Google Pixel 4 Loudspeaker Replacement Guide – DIY Repair Tutorial
Duration: 45 minutes
Steps: 24 Steps
A heads up: this repair guide was put together by the pros at Salvation Repair, but it’s not officially endorsed by Google.
Be careful:
The Salvation Repair team put together this guide to help you remove or replace the loudspeaker module on your Google Pixel 4. Keep in mind that the loudspeaker is sealed against the frame with an adhesive gasket, so removing it will affect your phone’s water resistance. Also, be aware that taking apart the front laser assembly can expose you to infrared laser emissions – check out Google’s safety warnings here. If you need help, you can always schedule a repair. Follow these steps to get your phone’s sound back on track.
Step 1


– Time to get started! Insert a SIM eject tool, a trusty paper clip, or a specialized bit into the tiny hole on the SIM card tray, located on the left edge of your phone.
– Give it a firm press to eject the tray – it’s like a little surprise inside!
– Now, carefully remove the SIM card tray. If you need help, you can always schedule a repair
Step 2

You can also use a hairdryer, heat gun, or hot plate to warm up the phone, but remember to watch out for overheating! Both the display and internal battery are kinda sensitive to heat, so be careful. If you need help, you can always schedule a repair.
– Alrighty, time to get warm and fuzzy with the iOpener! Lay it nice and gently on the bottom edge of that back panel for a whole minute. This’ll help us loosen things up and make our day easier! If you need help, you can always schedule a repair.
Tools Used

Step 3


If your back glass is super cracked, it might be a good idea to put some clear packing tape on it, so the suction cup can stick. If you can’t get the suction cup to stick, try some really strong tape instead. If you’re still having trouble, you can superglue the suction cup to the broken panel. Don’t worry, it happens! If you need help, you can always schedule a repair
– Ready to make your phone’s back panel budge? Get your suction cup close to the edge and give it a firm press. We’re going for maximum suction, folks!
Step 4


Depending on your phone’s age, this step might be a little tricky. Don’t sweat it! Just keep applying a little more heat around the edges and try again. If you’re still having trouble, you can always schedule a repair with us!
– Give that suction cup a good, steady pull to pop open a little gap between the back panel and the frame. You’ve got this!
– Now, take the tip of your trusty opening pick and slide it right into that gap. Easy peasy!
Step 5


– Alright, let’s get this party started! Slide that opening pick across the bottom towards the left corner, like you’re slicing a pizza. You got this!
– Now, with the pick still in, glide it from the bottom left corner to the bottom right corner. We’re cutting through that adhesive like butter.
– Leave the pick chillin’ in the bottom right corner to stop the adhesive from sealing itself back up. We don’t want that, right?
Step 6

– Ready, set, iOpener! Place your trusty iOpener on the left edge of the phone and let it work its magic for a solid minute. If you need help, you can always schedule a repair.
Tools Used
Step 7


– Slide a second opening pick right under the back panel, aiming it directly over the charge port.
– Gently glide the opening pick over to the bottom left corner of your phone.
Step 8


This adhesive can be a little sticky, so don’t be afraid to give it a little wiggle! Push the pick in and out like you’re sawing through it to help loosen things up.
– Now it’s time to get this phone open. Carefully slide the opening pick around the bottom left corner, working your way across the left side to break through the adhesive. Don’t worry, you got this!
– When you reach the top left corner, near the camera, stop and leave the pick in place. You’re making great progress. If you need help, you can always schedule a repair
Step 9

– Grab your iOpener and give the right edge of your phone a warm hug for a minute.
Tools Used
Step 10


– Alrighty, with those first two pickies still in action, time to rock ‘n’ roll a third pick down there on the bottom right. Let’s do this!
– Now, slide that pick up towards the top of the cell phone, like you’re slicing through layers of tasty cake. Keep it up, you’re the chef of the day!
– Hold up when you reach the top right corner, but don’t remove it yet. Keep it there on the dance floor, ready to groove.
Step 11


– Gently glide the third opening pick around the top right corner and along the top edge of the phone, cutting through that last stubborn strip of adhesive.
Step 12


– Alright, you’ve got the perimeter sliced up nicely. Now, gently lift the right edge of the back cover – think of it like opening a book!
– Hold on a sec, though! Don’t go pulling the whole thing off just yet. It’s still hanging out with the phone, so let’s keep it connected for now.
Step 13


– Keep swinging that back panel open until it’s resting comfortably on the left edge of your phone. Just be sure to give that ribbon cable some space – we don’t want to put any stress on it!
– Here’s a pro tip: Now’s the perfect time to power up your phone and test everything’s working before you put that back panel back on. Once you’re happy with everything, power it back down completely before moving on. If you run into any trouble, you can always schedule a repair.
Step 14

Hey, so, don’t lose track of those screws, okay? We’re going to put them back exactly where they belong, no mixing things up! You got this!
– Let’s tackle those five T3 Torx screws holding your battery connector shield in place:
– – Four shiny 4.0 mm screws just waiting to be removed.
– – And don’t forget the little guy, the 2.1 mm screw!


Step 16


Remember, batteries are delicate, so be extra gentle with your trusty spudger around that area! You wouldn’t want to give your device a little ‘zap’. If you need help, you can always schedule a repair.
– Using the pointed end of a spudger, gently lift the battery connector straight up from the motherboard to disconnect the battery. It’s like giving the battery a little high five!
– To reconnect the battery, carefully align the connector and press down on one side until it clicks into place. Then repeat on the other side. Don’t press in the middle! If the connector is misaligned, you might bend the pins, which could cause some serious problems. If you’re not sure about any of this, you can always schedule a repair with us!
Tools Used

Step 17


– Using the flat end of a spudger, gently fold the battery cable over so it doesn’t accidentally make contact while you’re busy working your magic on the rest of the repair. No need to worry, we’ve got your back! If you need help, you can always schedule a repair
Tools Used
Step 18

– Grab your trusty T3 Torx driver and let’s get those two 4 mm screws out! They’re holding the back panel connector cover tight, and we need to free it up. You’ve got this!

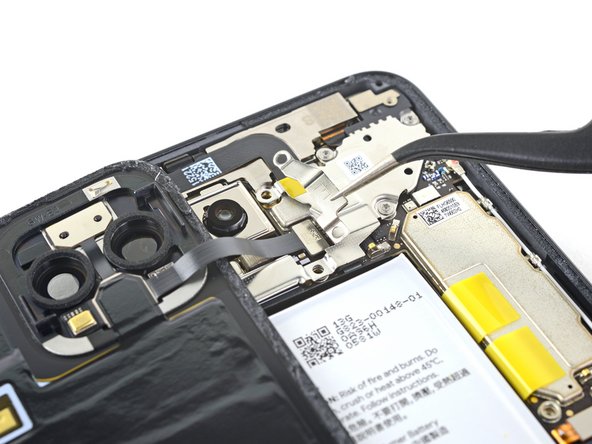


Step 22

– Let’s get started by unscrewing those two T3 Torx screws holding the loudspeaker in place:
– One 4.2 mm screw
– One 4.4 mm shouldered screw
Step 23
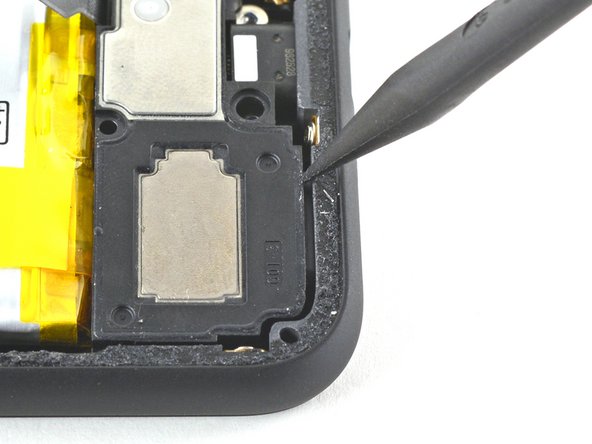

That loudspeaker is held in place by a little clip hiding under the left side of the frame. It’s like a tiny secret agent, keeping things in place!
– Grab your trusty spudger and gently nudge the loudspeaker towards the battery. This will create a little wiggle room between the loudspeaker and the phone’s frame. Easy peasy!
Tools Used
Step 24


If the loudspeaker’s being stubborn and not pivoting up, try nudging it closer to the battery. If you need help, you can always schedule a repair.
– Grab your trusty tweezers and gently lift the loudspeaker out by pivoting it upwards and away from the phone.
– Before you pop in the new loudspeaker, let’s give the adhesive gasket a quick once-over:
– If it looks like it’s in good shape, you’re good to go and can use the gasket again. Just double-check that it doesn’t block the exit hole.
– If the gasket has moved out of position, kindly remove it and swap in a pre-cut strip or some Tesa tape to keep things neat and tidy.
Tools Used

