Google Pixel 4a Back Cover Replacement Guide – DIY Tutorial
Duration: 45 minutes
Steps: 27 Steps
This repair guide has been put together by the awesome folks at iFixit, but it’s not officially backed by Google. Want to dive deeper into our repair guides? Just click here!
Heads up! The display panel on the Google Pixel 4a is a bit on the delicate side, so handle it with care.
Get ready to breathe new life into your Google Pixel 4a by replacing the back cover. Our step-by-step guide is here to walk you through it. Keep in mind that the display panel on this device is pretty fragile, so be sure to check out the warnings in the opening procedure – especially if you’re planning to reuse the screen. If you need help, you can always schedule a repair. The team at Salvation Repair has put together this guide to help you get the job done. Learn more about our repair guides and how we can help you fix your device at Salvation Repair.
Step 1
– Time to get started! Insert a SIM eject tool, a trusty paper clip, or a bit into the SIM tray hole – it’s like a little key to unlock your SIM card.
– Gently press straight into the hole until you feel the SIM card tray start to eject. Easy does it!
– Now, carefully remove the SIM card tray. You’re making great progress! If you need help, you can always schedule a repair
Step 2
Heads up! Keep an eye on that orange ribbon cable tucked away in the lower-right corner of the screen. It’s a delicate little thing and can easily fall victim to a rogue opening pick. Just insert your pick gently and only as far as needed to break the screen adhesive. You’ve got this!
It’s time to get a little hands-on – carefully pry the screen up to remove it from your phone. Before you start, take a minute to read through the following notes to make sure you’re prepared. If you need help, you can always schedule a repair
– Keep an eye on those two seams along the edge of your phone:
– Before diving in, take a moment to check out these areas on the screen:
– Screen seam: This is the magical line that divides the screen from the rest of the phone. It’s your go-to spot for prying.
– Frame seam: Here’s where the plastic frame and the back cover shake hands. It’s held snugly with screws, so let’s give it a break and avoid prying here.
– Screen flex cable: Be careful not to plunge your opening pick deeper than we suggest, or you might just give that cable a bad day.
– Adhesive perimeter: If you stray beyond this slim boundary without angling your pick just right, you could end up damaging the OLED panel. Let’s keep it safe!
Step 3
You can use a hair dryer, heat gun, or hot plate to help out, but remember to keep an eye on the heat—your phone’s display and internal battery can get a little too toasty!
– Let’s warm up that adhesive a bit! Apply a heated iOpener to the right edge of the display for one minute. This will help soften the adhesive and make the next step a breeze.
Tools Used
Step 4
If your display is really cracked up, tape can help a suction cup stick. Even strong tape can work! If you’re in a bind, glue can help with this too. We’re here for ya if you need a hand!
– Get started by placing a suction cup super close to the right edge of the screen – it’s the perfect spot to begin.
– Now, gently lift the suction cup with a steady force – you got this!
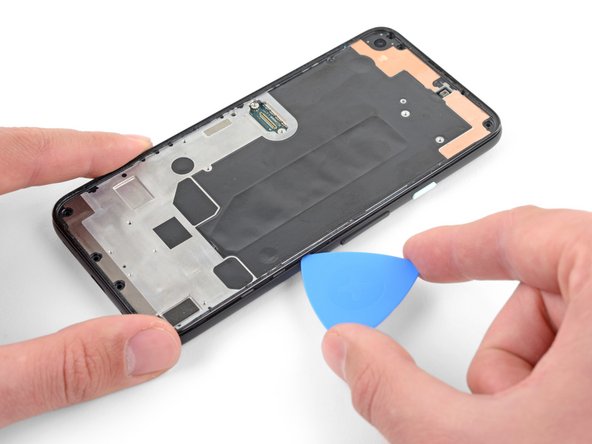
– Next, carefully insert the tip of an opening pick into the screen seam, about 1mm deep. Take your time and be precise.
Step 5
Hold up! If you notice your pick bumping against a ridge, it might be pushing into the edge of the OLED screen. Try tilting the pick and give it another go!
Here’s how to carefully slide in the pick without putting a dent in that OLED panel. Make sure to do this before you start slicing through the adhesive.
– Slide the pick about 1 mm into the gap, then give it a little twist upward to create a nice angle.
– At that angle, gently nudge the pick deeper into the gap, aiming for about 1/4 inch (6 mm). It should glide right under the OLED panel like a pro!
Step 6
Hey there, champ! Don’t go too crazy with that pick! Just a little tap, about 1/4 inch or 6mm, and you’ll be good to go. Go too far, and you might accidentally give that screen’s flex cable a little pinch. Not cool, right? If you need help, you can always schedule a repair.
Step 7
Hey there! There’s a super delicate cable hanging out under the bottom-right corner of the screen. If you feel your opening pick snag on anything, don’t force it. Pull it out and try again. Keep that pick angled downward and only go in as deep as you need to separate the adhesive (we’re talking about 2 millimeters max!).
You’re almost there! The screen adhesive is pretty weak, so you probably won’t need any extra heat. If it feels a little tough to cut, just warm up that stubborn spot for a minute and try again. You’ve got this! If you need help, you can always schedule a repair
– Let’s get this phone open! Insert another opening pick into the right edge of the phone, using that gap you made. It’s like a little dance, and you don’t want to step on the OLED panel’s toes. 😉
– Now, slide that opening pick around the bottom of the phone. You’re basically giving the adhesive a little massage, and it’s going to love it.
– Leave the pick in place on the bottom edge, making sure the adhesive doesn’t sneakily seal itself back up. We don’t want to start all over, do we? If you need help, you can always schedule a repair
Step 8
If your screen feels super stiff, give the left edge a little warm-up with a hairdryer for a minute, then try again. You got this!
– Slide another opening pick into the bottom edge of your phone at a fun angle where a gap has popped up, just to keep that OLED panel safe and sound.
– Now, use that pick to glide along the left edge of the phone like a pro.
– Keep the pick planted along the left edge to stop that pesky adhesive from making a comeback.
Step 9
Take a peek at the earpiece speaker on the top edge of the screen – there’s a mesh covering it. If you’re missing a replacement mesh, be gentle so you don’t damage or misplace this tiny part.
Having trouble slicing through the screen? Try heating the top edge for about a minute and then give it another shot. If you need help, you can always schedule a repair
– Gently slide another opening pick into the left edge of your phone at a cozy angle where a gap has already popped up. This will help keep that OLED panel safe and sound!
– Now, take that pick and glide it around the top edge of the phone to slice through the adhesive like a pro.
Step 10
Hold your horses! The screen isn’t ready to make its grand exit just yet.
– After you’ve made your way around the edge of the phone, gently lift the right side of the screen, just like flipping open a book.
– Grab an opening pick and carefully slice through any leftover adhesive. You’re almost there!
Step 11
Handle that ribbon cable with care—no need to give it a workout!
– Time to get this repair started! Lift the screen from the top edge and gently swing it over the bottom edge until you can safely rest it glass-side down. If you need help, you can always schedule a repair
Step 12
– Grab a trusty pair of tweezers and gently lift the black tape that’s keeping the screen connector bracket under wraps. It’s like unwrapping a present, but for your device!
– If the tape looks good as new, feel free to use it again during reassembly. If it’s seen better days, no worries! Just swap it out for a piece of electrical tape.
Tools Used
Step 13
As you dive into this repair adventure, keep a close eye on those screws! Treat them like your trusty sidekicks and make sure they find their way back to their original homes. Happy fixing!
– Let’s get started! Use a T3 Torx driver to remove the two 2.1 mm screws that hold the screen connector bracket in place. If you need help, you can always schedule a repair
Step 15
– Grab your spudger and gently pry up the screen flex cable. You got this! 😎
– Now, let’s reattach that connector! Line it up carefully and press down on one side until you hear a satisfying click. Repeat on the other side, but no pressure in the middle! Don’t worry, it’s like a little dance. 💃 If you’re not sure about any of this, you can always schedule a repair. We’ve got your back. 😉
Tools Used
Step 16
When you power up your device after putting it back together, the screen will embark on a calibration adventure. So, let it do its thing and resist the urge to poke the screen during this time! Touching it could throw off the calibration and lead to some pesky touch issues.
Check out the third photo to help place your adhesives just right.
– First things first, let’s get that screen off!
– Ready to put on a shiny new screen? Here’s how:
– Take a peek at your replacement screen—does it have the speaker mesh and top edge adhesive already on it? Awesome!
– If you need to, check out this guide to apply the custom-cut adhesive like a pro.
– If it does have the adhesive, you can skip the top edge adhesive step. Sweet!
– If it doesn’t, peel off the larger clear liner from the top edge adhesive and stick it onto the screen (not the frame). Just make sure that the larger cutout aligns perfectly with the speaker mesh.
Step 17
– Grab your T3 Torx driver and let’s get to work! You’ll want to unscrew those eight 4.3 mm screws that are keeping that back cover snug on the midframe. You’re doing great!
Step 18
– Start by inserting an opening pick into the seam between the midframe and the back cover – it’s the first step to freeing your phone’s back cover.
– Now, gently slide the opening pick along the bottom edge of the phone to release the plastic clips that are holding the back cover in place. If you need help, you can always schedule a repair
Step 19
– Let’s get this party started! Slide that opening pick around the left edge of your phone to free those plastic clips holding the back cover to the midframe. It’s like giving your phone a little high five, but with a tool. If you need help, you can always schedule a repair.
Step 20
– Now, let’s get those clips released! Gently slide the opening pick along the top and right edges of your phone. It’s like a little dance, just keep moving that pick around until all the clips let go.
Step 21
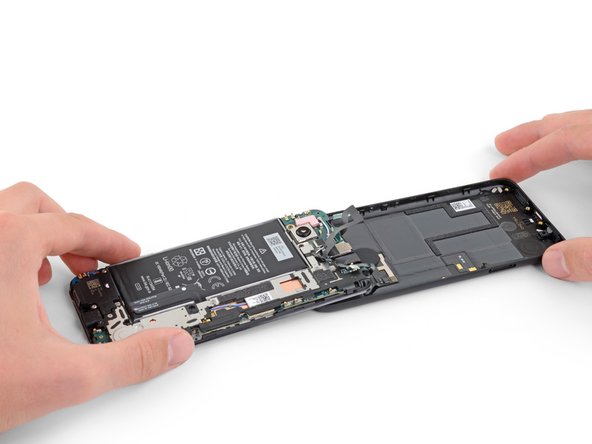
– Now, for some fun! Gently swing the back cover from the bottom of your phone, over the top and around the back. It’s like a dance move, but for tech!
– Time to give your back cover a little rest. Lay it down flat on your work surface and let the midframe take a nap on top of it. Just be sure to be gentle and not put any pressure on the ribbon cables—those guys are busy!
Step 22
– Let’s loosen those screws! Use a T3 Torx driver to remove the seven screws holding the motherboard bracket in place. You’ll see three of those 2.9 mm long black screws, three more of those 2 mm long screws, and then one long 4.1 mm screw. Super easy! If you need help, you can always schedule a repair.
Step 23
– Gently slide the tip of your spudger into the upper-right and lower-right corners of the motherboard to pop off the bracket. You’ve got this!
Tools Used
Step 24
– Grab your trusty tweezers and gently lift out the motherboard bracket. You’ve got this!
Tools Used
Step 26
– Gently use the tip of a spudger to unplug the two flex cables that link the fingerprint sensor and buttons to the motherboard. You’ve got this!
Tools Used
Step 27
– Let’s get started by removing the back cover. It’s the first step towards getting your device up and running again. If you need help, you can always schedule a repair


