Google Pixel 6 Pro Front Camera Replacement Fix Tutorial – Step-by-Step Guide
Duration: 45 minutes
Steps: 29 Steps
This repair guide was put together by the Salvation Repair crew and isn’t official Google stuff. Want to know more about our guides? Check this out! schedule a repair
Hey there, safety first! Before you tear into your phone, make sure the battery is chillin’ at 25% or less. Just sayin’, it’s a good idea!
Our step-by-step guide, crafted by the Salvation Repair team, is your go-to for swapping out the front or selfie camera on your Google Pixel 6 Pro. To play it safe, make sure your battery is under 25% before diving in—this helps avoid any fiery surprises if the battery gets a ding during the repair. If you’ve got a puffy battery, be extra careful. Heads up: The Pixel 6 Pro rocks some class 1 lasers, and taking it apart could expose you to some invisible infrared rays. After the repair, water resistance is all about how well you slap on the new adhesive, but keep in mind your device won’t have that official IP rating anymore. You’ll need some fresh adhesive to stick things back together. If you need help, you can always schedule a repair.
Step 1
Hey there! So, the tech fam says to let your battery go lower than a quarter full before beginning this fix, just in case things get spicy with a charged battery that’s been damaged. Don’t worry, you got this! And if you need a hand, you can always schedule a repair!
– First, let’s get started by completely powering down your phone and unplugging any cables – we want to make sure it’s safe to work on.
Step 2
Alright, let’s get this phone opened up! The next three steps show you how to use our handy-dandy Anti-Clamp tool to make things super easy. But if you don’t have it, no worries! Just skip down three steps for a different way to do it.
Hey, if your screen is cracked, put some clear packing tape over it to help the suction cup stick better.
Want to learn more about the Anti-Clamp? Check out this guide: .
If your phone is too slippery for the Anti-Clamp, just add some tape to give it a little more grip.
– First, let’s get started by pulling the blue handle backwards – this will unlock the Anti-Clamp’s arms and get you moving.
– Next, slide the arms over either the left or right edge of your phone, getting into position for the next step.
– Now, carefully place the suction cups near the bottom edge of the phone, one on the front and one on the back – this is where the magic happens.
– Finally, squeeze the cups together to apply suction – if you need help or feel unsure, you can always schedule a repair with Salvation Repair.
Step 3
– Pull the blue handle forward to lock the arms in place.
– Give the handle a full 360-degree spin or until you see the cups start to stretch out.
– Keep the suction cups aligned! If they get wonky, loosen them a bit and realign those arms.
Step 4
Take it easy! Only turn it half a twist at a time and give it a minute to chill before the next twist. Let the Anti-Clamp and a bit of time do their magic for you!
Feel free to grab a hair dryer or heat gun, but remember to keep the warm vibes gentle! Too much heat could lead to sad times for your display or internal battery, so take it easy.
If the Anti-Clamp isn’t doing its job and you don’t see a nice gap yet, add a little more heat to the area and give that handle a cheerful half turn clockwise!
– Get your iOpener nice and toasty and slide it into the Anti-Clamp arms.
– Fold that iOpener so it’s resting comfortably on the phone’s bottom edge.
– Give it a minute to loosen things up and create a little opening for us.
– When the Anti-Clamp gives you a nice gap, slip in that opening pick under the screen frame.
– We’re skipping the next two steps, no worries!
Step 5
A hair dryer, heat gun, or hot plate can do the trick too, but remember to keep it cool—no one likes a fried device!
– Time to get this repair started! Apply a heated iOpener to the screen for at least 3 minutes to loosen the adhesive underneath. If you need help, you can always schedule a repair
Step 6
Hey, don’t forget to pop that opening pick in the right spot! You don’t want to separate the screen from its frame instead of the phone itself. If you need help, you can always schedule a repair.
If your screen is badly cracked, don’t worry – we’ve got you covered. Try slapping a layer of clear packing tape over it to help the suction handle stick. If that doesn’t work, you can use some seriously strong tape as a substitute. And if all else fails, a little superglue can be your screen’s new best friend. Remember, if you need help, you can always schedule a repair
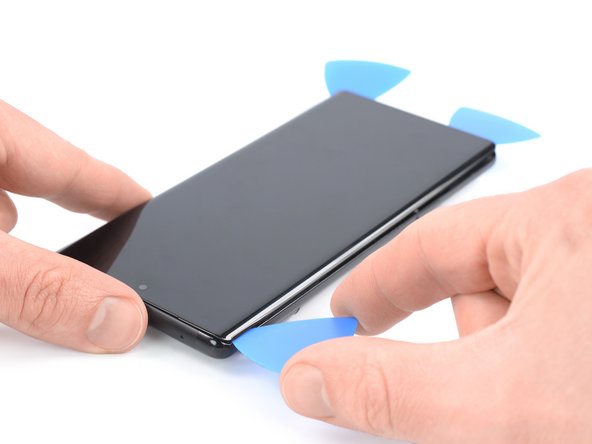
– Alright, let’s get this screen warm! Once it’s comfortably warm to the touch, go ahead and stick a suction handle to the bottom edge.
– Time to give that screen a little lift! Use the suction handle to gently pull the screen, including its safety frame, creating a tiny gap between the screen and the phone.
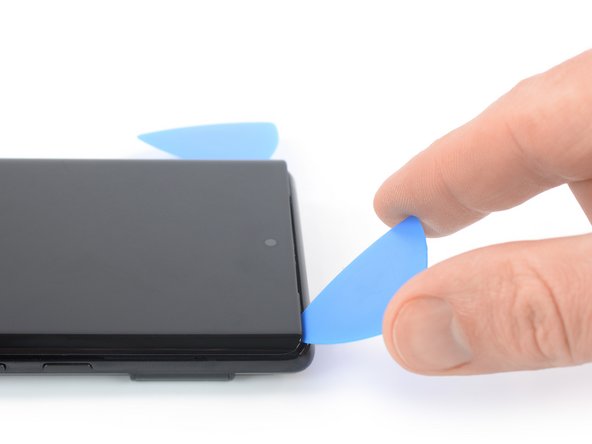
– Now for a little wiggle room! Insert an opening pick into the gap you just created, between the screen frame and the phone.
– Slide that pick all the way down to the bottom left corner of the screen, like you’re cutting through butter. This will help loosen the adhesive.
– Don’t let those sticky fingers reseal! Leave the opening pick in place to hold the adhesive at bay.
Tools Used
Step 7
– Slide a second opening pick into the bottom edge and smoothly glide it towards the bottom right corner of the screen to cut through that pesky adhesive.
– Keep the opening pick in place to ensure the adhesive doesn’t decide to resettle itself.
Step 8
The screen of the Google Pixel 6 Pro is held in place by some super strong glue and some tiny little plastic pins. If you feel your pick getting stuck while trying to lift the screen, you might have gone too deep. Just gently slide the tip of your pick (about 3-4 mm) under the display adhesive and go slow. You got this! If you need help, you can always schedule a repair.
– Slide a third opening pick under the bottom left corner of your screen – let’s get that started!
– Now, gently glide the pick along the left edge to cut through that adhesive. You’re doing great!
– Keep the pick in the top left corner – this will stop the adhesive from reattaching. Nice work!
Step 9
When slicing near the front-facing camera, be gentle and only insert the tip of the opening pick, about 2-3 mm, to avoid damaging or smudging the camera. If you’re not feeling confident, don’t worry – you can always schedule a repair and let the pros handle it.
If the adhesive gets stubborn and hard to cut, don’t worry – it’s probably just cooled down. Give it a little love with your iOpener or heat gun for 1-2 minutes to warm it back up. If you need help, you can always schedule a repair
– Now it’s time to add a fourth opening pick – slide it into the top left corner of the screen and get ready to loosen that adhesive.
– Gently slide the opening pick along the top edge of the phone, slicing through the adhesive as you go. You’re making great progress!
– Leave that opening pick right where it is, in the top right corner, to keep the adhesive from resealing. You’re doing a great job – if you need help, you can always schedule a repair
Step 10
Hey there, tech enthusiast! Before you attempt to remove the display completely, remember that the screen is still securely connected to the phone assembly. If you need a hand, you can always schedule a repair!
– Now it’s time to bring in the fifth opening pick – slide it along the right edge of your phone to carefully cut through the remaining adhesive. If you need help, you can always schedule a repair
Step 11
Be careful not to pull on the display cable during this step. If you need help, you can always schedule a repair.
– Gently swing the screen over to the left side of the phone assembly, just like you’re flipping open the cover of your favorite book!
Step 12
Whoa, the Pixel 6 Pro sports some fancy Torx Plus screws, but regular Torx bits do the trick! Just remember to put some gentle pressure down while taking them out, no need to be a wrecking ball. 😄
In this repair adventure, it’s super important to keep all those little friends, err, screws, in a safe place and put ’em back exactly where they were found. Be a great detective! 🕵️♂️
– Alright, let’s get this show on the road! Grab your trusty Torx T3 screwdriver and give those two little 2.0 mm 3IP Torx Plus screws holding the display cable metal bracket a friendly farewell. You got this!
Step 13
Keep this part handy in case you need it later! You never know when you might need some help, so don’t forget your trusty salvation repair toolbox.
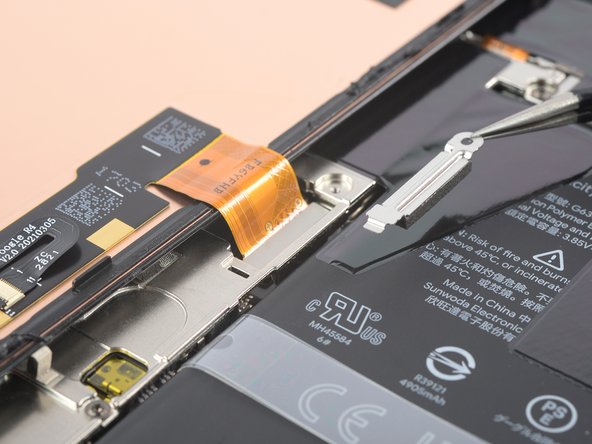
– Grab yourself a trusty pair of tweezers and gently lift off that metal bracket that’s resting on top of the display cable connector. You’ve got this!
Tools Used
Step 14
– Now, let’s disconnect that display flex cable. Grab your trusty spudger and gently pry that connector straight up from its socket. You’ve got this!
Tools Used
Step 15
Don’t forget to pop that display cable bracket back in place! You’ve got this!
– Time to get started! Remove the screen to begin your repair journey.
– Reassembly tip: take a moment to double-check your work.
– If you’ve got a brand new screen, make sure to remove any protective liners from the front-facing camera hole and sensor cutout before closing up your phone.
– Let’s test it out! Temporarily connect your screen, power on your phone, and give it a quick once-over to make sure everything is working as expected. Then, power off and disconnect the screen before moving on.
– Using custom-cut adhesives? No problem! Follow our guide for a seamless application process.
– Pre-cut adhesive card, coming right up! Check out our guide for easy installation.
– New screen, who dis? If you’re installing a fresh screen, be sure to calibrate that fingerprint sensor for a smooth user experience. Need help? You can always schedule a repair with Salvation Repair.
Step 16
Avoid putting heat directly on the battery. It’s like a sunbather with a bad sunburn – it just can’t handle it! Too much heat can lead to some serious thermal drama.
Step 17
Be careful when handling the battery – if it gets punctured or bent, it could leak chemicals or overheat. If you’re not comfortable with this step, don’t worry, you can always schedule a repair
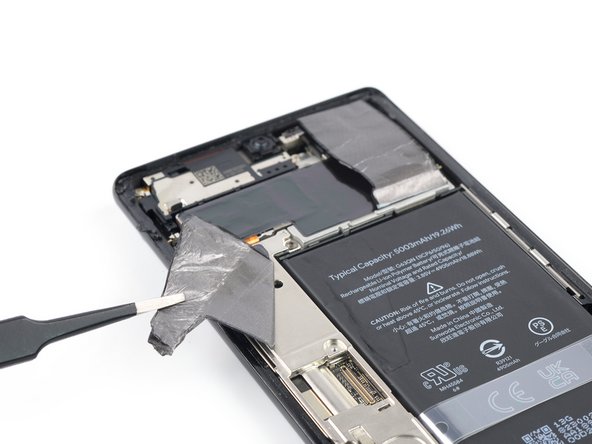
– Grab a pair of blunt nose tweezers or use your clean fingernail to gently peel back that pesky black graphite film from the bottom edge of the battery and the motherboard shield.
– Say goodbye to the graphite film!
Tools Used
Step 18
Ready for a battery swap? Just peel back the bottom part of the graphite film, and you’re good to go! Want to switch out that rear camera? You’ll need to take it out completely. But if you’re just looking to refresh the earpiece speaker or the front-facing camera, no need to remove anything! You’ve got this! If you need help, you can always schedule a repair.
– Let’s get started! Use a pair of blunt nose tweezers or a clean fingernail to gently pry the black graphite film off the top right corner of the battery.
– Now, carefully fold the graphite film towards the selfie camera to expose the battery. If you need help, you can always schedule a repair
Tools Used
Step 19
Don’t worry if that graphite film is being stubborn! It’s probably just a little chilly. Just give it a quick blast with your iOpener or heat gun for a minute or two, and it’ll be ready to go.
– Time to get up close and personal with your device’s internals. Use a pair of trusty blunt nose tweezers or a clean fingernail to gently pry the black graphite film off the left edge of the battery and the motherboard shield. Remember to take your time and be patient – we’ve got you covered. If you need help, you can always schedule a repair
Step 20
– Grab your trusty Torx T3 screwdriver and expertly twist out those two 5.1 mm-long 3IP Torx Plus screws holding down the charging port metal bracket. You’ve got this!
Step 21
Don’t forget to hang onto this part so you can pop it back in during the reassembly. You’ve got this!
– Grab those tweezers and gently lift off the charging port bracket like a pro!
Tools Used
Step 22
– Grab your trusty Torx T3 screwdriver and get ready for some fun! You’ll want to carefully remove the five 5.1 mm-long 3IP Torx Plus screws that are holding the motherboard cover tight.
Step 23
– This is going to be a fun challenge, but don’t worry – you got this! Carefully loosen the motherboard cover and give it a little dance as you remove it. If you’re stuck, remember that our team at Salvation Repair is always here to help! Feel free to schedule a repair if you need a hand.
Tools Used
Step 24
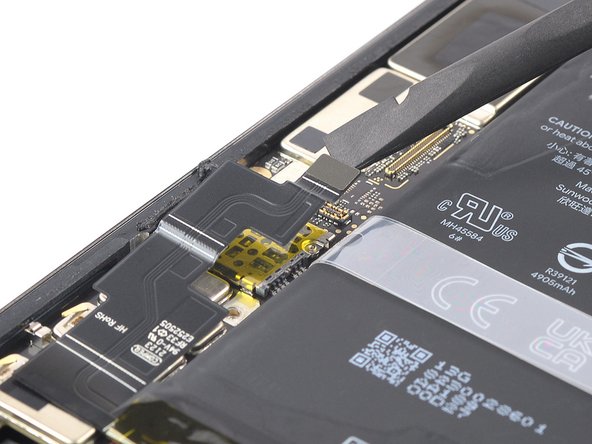
– Grab your trusty spudger and gently pry the battery cable connector straight up from its socket. Easy-peasy, right? If you need help, you can always schedule a repair.
Tools Used
Step 25
– Grab your trusty Torx T3 screwdriver and let’s get to work! Carefully take out those two 3.3 mm-long 3IP Torx Plus screws that are keeping the earpiece speaker in place. You’ve got this!
Step 26
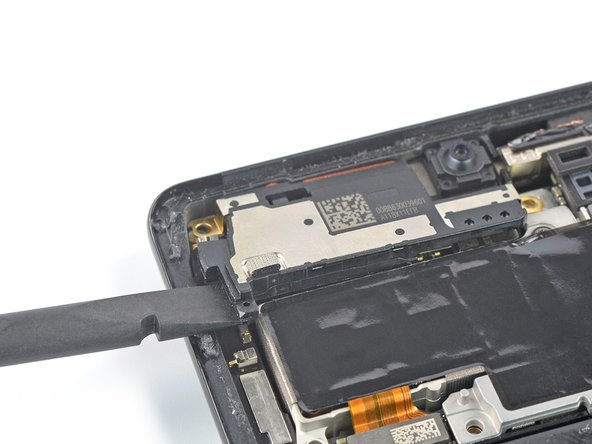
– Slide a spudger under the bottom left corner of the earpiece speaker.
– Gently use the spudger to lift the earpiece speaker by angling it downwards.
Tools Used
Step 27
– Grab a trusty pair of tweezers or just use your fingers to gently lift out that earpiece speaker. Be careful, you got this!
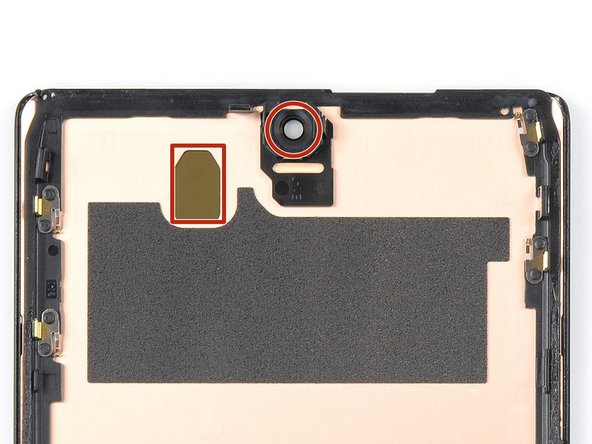
– Now, take a good look at your shiny new replacement part and compare it to the original. You might need to switch over some leftover bits or peel off any sticky backings from the new part before you pop it in.
Tools Used
Step 28
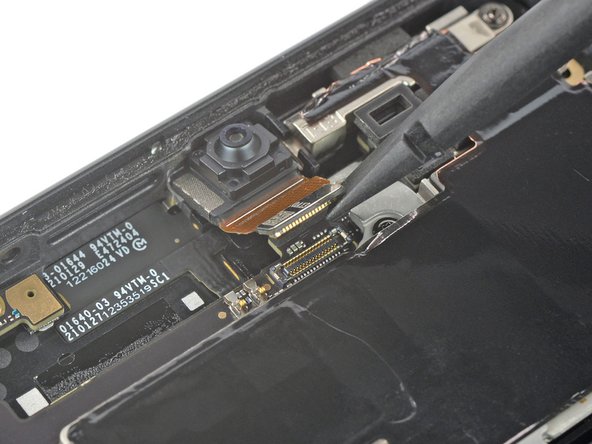
– Let’s free that front camera! Use your trusty spudger to gently pry the connector straight up, disconnecting it from its socket.
Tools Used
Step 29
– Gently pry the front camera out of its spot using your fingers or a trusty pair of tweezers – it’s easier than you think. If you need help, you can always schedule a repair
Tools Used


