
Google Pixel 7 Earpiece Speaker Replacement Guide
Duration: 45 minutes
Steps: 31 Steps
This repair guide is brought to you by the awesome folks at Salvation Repair, and while it hasn’t been given the thumbs-up from Google, we think it’s pretty cool. Check out more of our guides here!
For your safety, make sure to juice your battery down to below 25% before diving into your phone’s insides. Safety first, right?
Hey there, savvy fixer! This handy-dandy repair guide comes courtesy of the awesome folks at Salvation Repair and, just a heads up, it isn’t vetted by Google. If you want to dive deeper into our collection of repair guides, check it out here. Ready to tackle replacing the earpiece speaker in your Google Pixel 7? Before you get started, make sure your battery is below 25% charged—this little tip helps minimize any fire risks if things get a bit messy during the repair. If your battery happens to be swollen, please handle with care! A quick note: your Pixel 7 is equipped with class 1 lasers, so be cautious as you disassemble—it might expose you to some sneaky infrared laser emissions. Also, remember that keeping your device water-resistant after the repair hinges on how well you reapply that adhesive, and yes, your IP rating will be out the window. Grab some replacement adhesive, and let’s get to fixing!
Step 1


– First, let’s get started by completely powering down your phone and unplugging any cables, it’s time to get hands-on with your repair!
Step 2


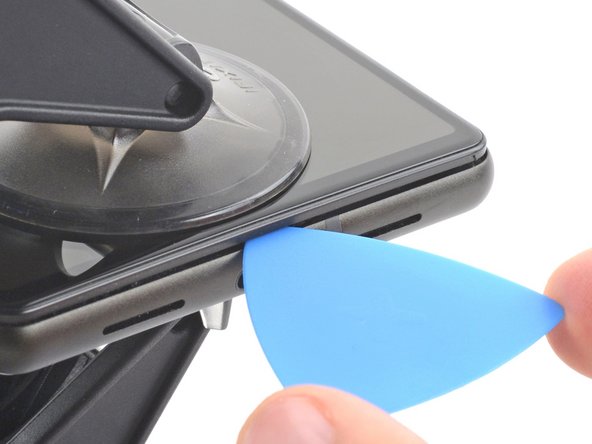
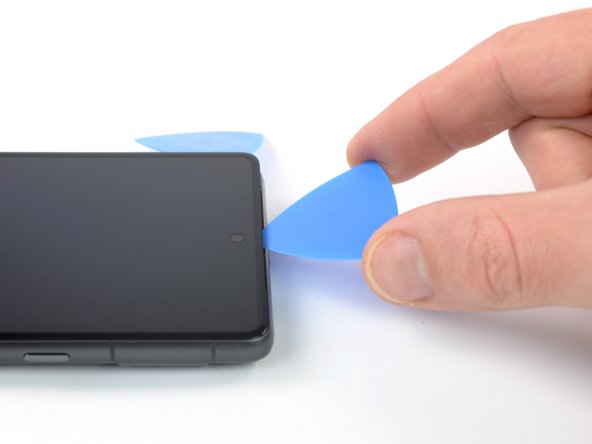
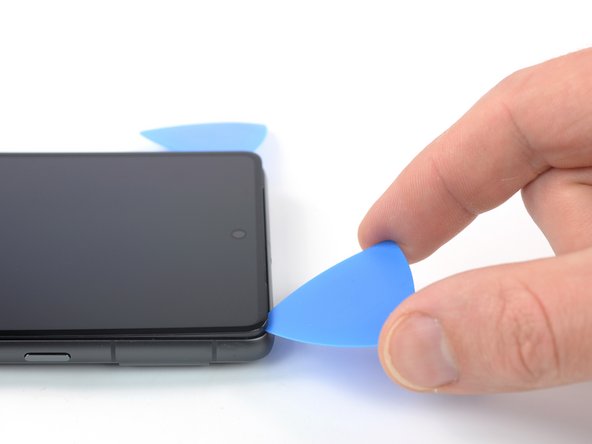
Be careful when inserting the pick – stop at about 3.5 mm to avoid damaging the internal components and interfering with the plastic clips. If you need help, you can always schedule a repair
– When you’re diving into the removal process, remember to slide those opening picks under the safety frame – it’s like giving your screen a little hug to keep it attached!
– Watch out for those sneaky plastic clips that are all around the screen. If your opening pick feels like it’s stuck, that’s a sign you might be too deep into the screen area. Just gently adjust and try again!
Step 3


Get ready to meet the Anti-Clamp! This nifty little tool is here to make opening your device a breeze. If you’re not using the Anti-Clamp, feel free to jump down three steps for a different approach.
If your screen’s sporting some cracks, slap on a layer of clear packing tape. It’ll help the suction cup stick like a pro!
Want to master the Anti-Clamp? Check out our detailed guide for all the tips and tricks.
If your phone’s surface is giving you the slip, a bit of tape can help create a grippier surface for the Anti-Clamp to grab on to.
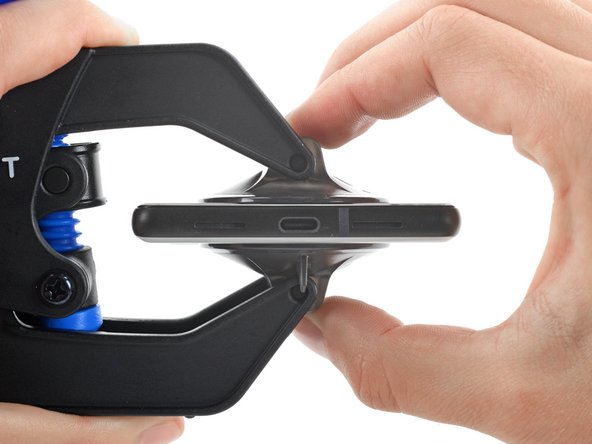
– Give that blue handle a little tug backwards to let the Anti-Clamp’s arms stretch out.
– Gently glide those arms over the left or right edge of your phone—whichever feels right!
– Place the suction cups close to the bottom edge of your phone—one on the front and the other on the back.
– Now, give those cups a good squeeze to create some suction magic.
Step 4

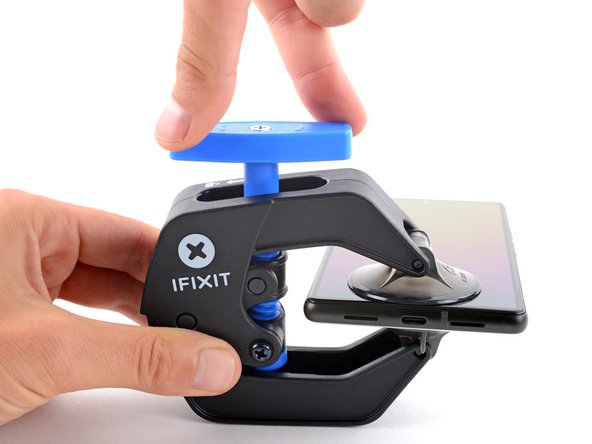

– Gently tug the blue handle forward to secure those arms like a pro.
– Give the handle a smooth clockwise spin of 360 degrees or until those cups start to stretch out.
– Keep an eye on those suction cups to ensure they’re staying in sync. If they start to wander off, just loosen them up a bit and nudge those arms back into alignment.
Step 5

Take it easy and turn slowly – no more than half a turn at a time. Pause for a minute between turns and let the Anti-Clamp do its thing. If you need help, you can always schedule a repair
For an extra boost, try using a hair dryer or heat gun – just be careful not to overheat, as this can harm your device’s display or battery. Take your time and proceed with caution.
If the Anti-Clamp isn’t creating enough space, don’t worry! Simply apply some more heat to the area and give the handle a gentle clockwise turn – about half a turn should do the trick. If you need help, you can always schedule a repair
– Warm up that iOpener and slide it through the arms of the Anti-Clamp.
– Bend the iOpener so it rests on the bottom edge of your phone.
– Give it a minute to let the adhesive loosen up and create a lovely little opening gap.
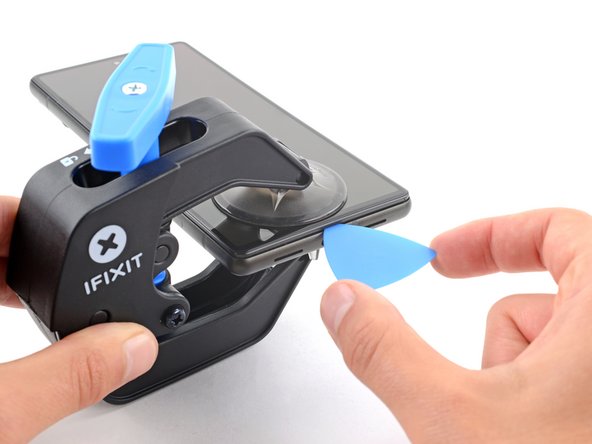
– Once the Anti-Clamp has made enough space, gently slide an opening pick under the screen frame.
– You can skip the next two steps.


Step 6

If you’re feeling a bit warm around the edges, it’s time to bring out the big guns, safely of course! Just make sure it’s not too hot to handle, like a Veggietales DVD after binge-watching. If you need help, you can always schedule a repair!
Step 7


Got a cracked display? A layer of clear packing tape might help the suction cup stick. If that doesn’t work, try some super strong tape instead. Still no luck? Superglue that suction cup to the screen!
Having trouble with an older phone? Apply more heat to the bottom edge and give it another go. If you need help, you can always schedule a repair.
– Once your screen is feeling a bit toasty, grab a suction handle and stick it on the bottom edge of the screen.
– Gently lift the screen along with its trusty safety frame using the suction handle to create a little gap between the screen and the phone assembly.
– Now, let’s slide an opening pick into that gap and keep moving forward!
Tools Used

Step 8


– Carefully locate the screen cable, which is situated just shy of the halfway point along the left edge of your phone. Take your time and watch out for that cable—it’s easy to accidentally snag it!
– You’ll notice a bunch of spring contacts hanging out around the perimeter of the phone. Handle these areas gently; we want to keep everything in tip-top shape without bending those contacts.
Step 9


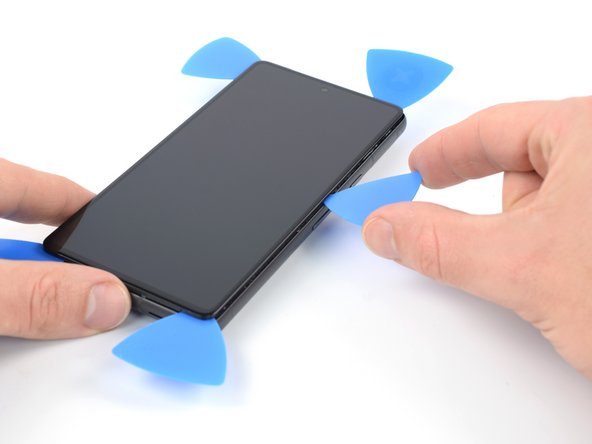
– Gently slide that opening pick down to the bottom right corner of the screen and let it work its magic on the adhesive.
– Keep the opening pick right where it is to stop the adhesive from getting all clingy again.
Step 10


– Alright, let’s get this party started! Grab your second opening pick and slide it along the bottom edge of the screen, like you’re trying to unlock a secret treasure chest.
– Once you reach the bottom left corner, leave that pick in place. That’ll keep the glue from sticking back together, so you can keep going.
Step 11


– Let’s get this screen popping! Insert a third opening pick underneath the bottom left corner of the screen.
– Now, slide the opening pick along the left edge of the screen. This will slice through the adhesive and release those pesky plastic clips.
– Hold on tight! Leave the opening pick in the top left corner to stop the adhesive from getting too cozy and sealing back up.
Step 12

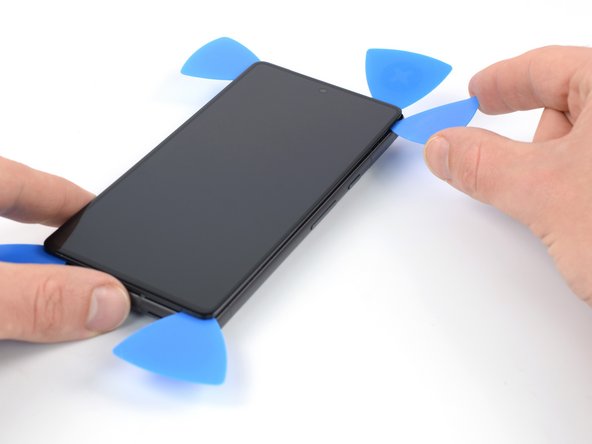
When you’re working near the front-facing camera, just slide the tip of that opening pick in gently (about 2.5 mm) to keep the camera safe and sound. No smudges, no worries!
If the adhesive gets stubborn and hard to cut, don’t worry – it’s probably just cooled down. Give it a little love with your iOpener or heat gun for 1-2 minutes to warm it back up. If you need help, you can always schedule a repair
– Slide a fourth opening pick into the top left corner of the screen. You’ve got this!
– Gently glide that opening pick along the top edge of the phone to cut through the adhesive.
– Keep the opening pick tucked in the top right corner—it’s the perfect spot to stop the adhesive from getting too clingy again.
Step 13

Be careful not to completely remove the display just yet – it’s still connected to the phone assembly by a flex cable, so let’s take it one step at a time. If you need help, you can always schedule a repair
– Grab that fifth opening pick and give it a nice slide along the right edge of your phone. This will help cut through the last bit of adhesive and free up those stubborn right plastic clips!
Step 14


Avoid twisting the screen or pulling it too far from the frame. We don’t want to stress out or damage that flex cable – it’s doing its best!
– Time to get this repair started – gently lift the right edge of the screen up and swing it towards the left side of your device, just like you’re opening a book.
– Now, carefully rest the screen upside down and parallel to the frame. Take a deep breath, you’re doing great! If you need help, you can always schedule a repair.
Step 15


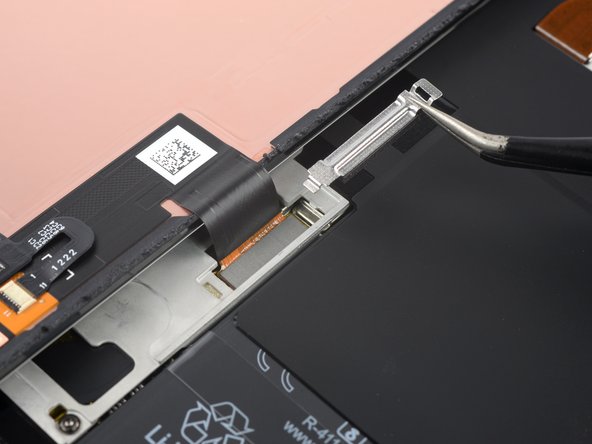
The display cable bracket can be a bit stubborn, so don’t be shy to give it a little extra push to pop it loose.
– Time to get a little handy! Insert one arm of your trusty tweezers into the opening at the top of the display cable bracket.
– Now, gently push the bracket inwards and pry it up to release it – you’re making great progress! If you need help, you can always schedule a repair
Tools Used


Step 17


– Grab your trusty spudger and gently lift that display flex cable out of its cozy socket. Just pry it straight up, and you’re good to go!
– When it’s time to reconnect, take a moment to line those connectors up just right. Press down on one side until you hear a satisfying click, then do the same on the other side—no need to push down in the middle. Keep it snug, because if it gets misaligned, those tiny pins might bend and that’s a no-go. If you need help, you can always schedule a repair.
Tools Used

Step 18

– Let’s get that screen off your phone, shall we?
– When you’re putting it all back together:
– Double-check that all screws are snug and that there’s nothing rattling around.
– Reconnect the screen and give your phone a quick test run. If all’s good, power it down and keep rocking the reassembly.
– Time to apply fresh adhesive where needed! Just make sure to clean those areas with isopropyl alcohol (>90%) first for a smooth stick.
– If you’re using custom-cut adhesives for your device, this guide is your go-to.
– And if you’re using a pre-cut adhesive card, well, you’ve got the right guide right here!
Step 19


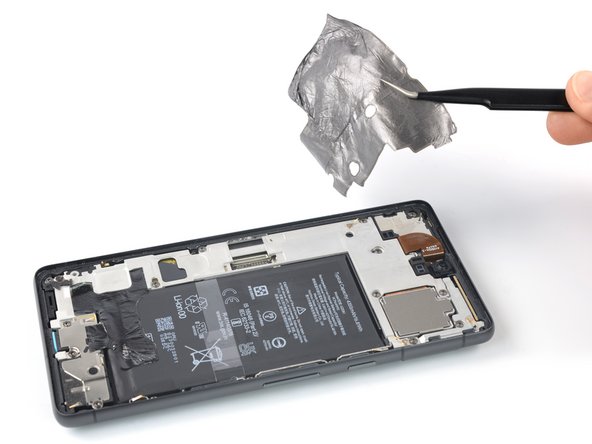
Hey, watch out! Be careful not to poke or bend the battery with your tool in the next few steps—it’s like a little power pack, and if you get too close, it might leak something yucky or even get hot! If you need help, you can always schedule a repair.
– Grab a trusty pair of tweezers and gently lift that black silicone pad right off the battery and midframe. You’ve got this!
Tools Used
Step 20

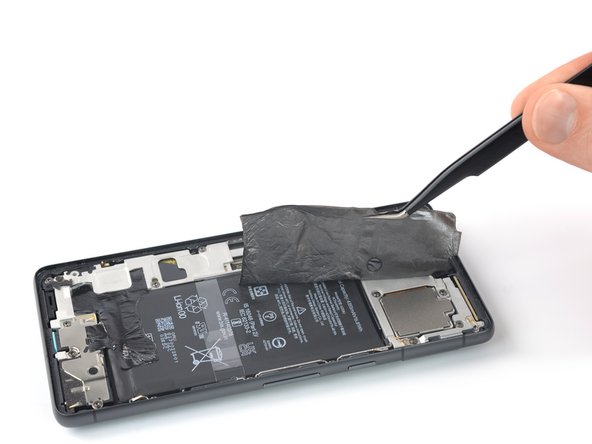
Feeling stuck on that pesky foil? No worries, buddy! Just heat up your iOpener for two minutes and watch how the glue lets go like magic. Still need a hand? No sweat! You can always schedule a repair.
Step 21


Having trouble removing that protective foil? No worries! Give it a little heat from our iOpener friend for two minutes, and it’ll be easy peasy to remove. Let us know if you need help, cuz we’re here to make your repair journey a breeze!
Step 22
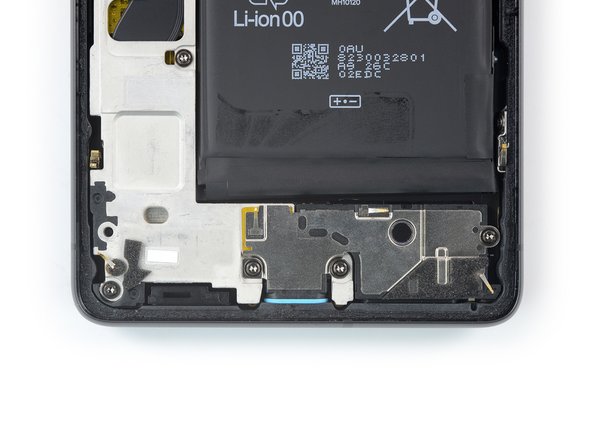

– Grab your trusty Torx T3 screwdriver and get ready to unscrew! Remove those three 5.1 mm-long screws holding the loudspeaker in place, and let the fun begin!

Step 24

– Grab your trusty Torx T3 screwdriver and get ready to tackle those nine 5.1 mm-long screws that are holding the midframe in place. Let’s make this phone repair a breeze!
Step 25

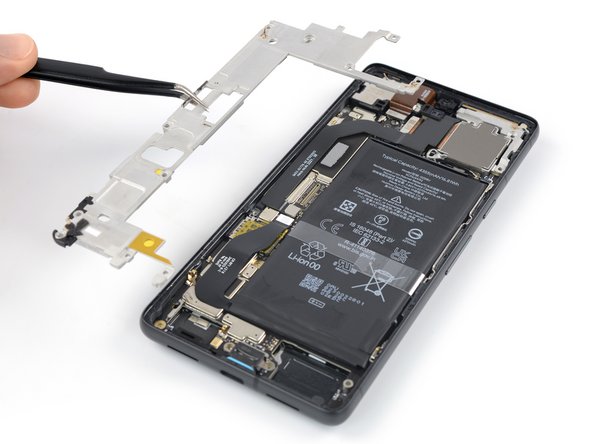

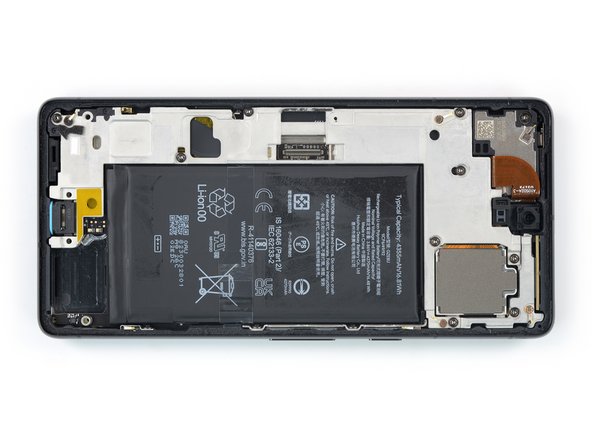
– Grab your trusty tweezers and gently coax the midframe out of its cozy spot.
– When you start to put it back together, be sure to give the thermal pad a little attention. If it looks worse for wear, peel it off, then clean the area with some high-concentration (90% or above) isopropyl alcohol and a soft microfiber or lint-free cloth. After that, it’s time to treat it right and apply a fresh thermal pad.
Tools Used
Step 26


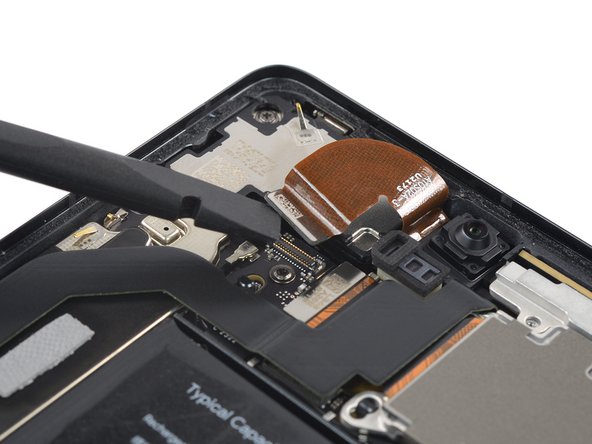
– Time to get started! Use a spudger to carefully disconnect the battery cable by gently prying the connector straight up from its socket. If you need help, you can always schedule a repair
Tools Used


Step 29


– Grab your trusty Torx T3 screwdriver and carefully unscrew the 5.1 mm-long screw that’s keeping the earpiece speaker in place. You’ve got this!
Step 30


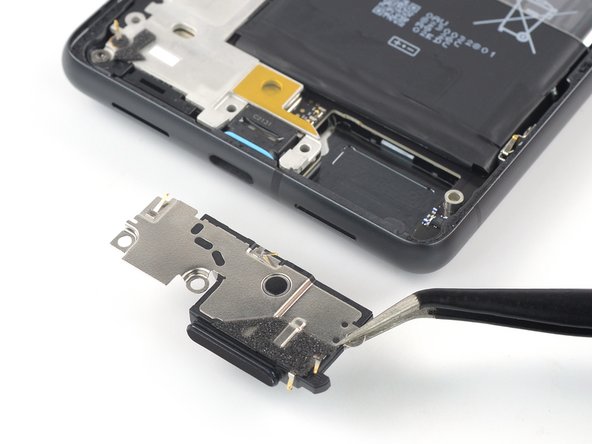
– Slide the pointed end of a spudger under the bottom edge of the earpiece speaker with finesse.
– Gently pry upwards to release the earpiece speaker. You’ve got this!
Tools Used
Step 31


– Grab your trusty tweezers and gently pluck out that earpiece speaker like a pro!
Tools Used

