Google Pixel 7 Loudspeaker Replacement Guide
Duration: 45 minutes
Steps: 21 Steps
Hey there, this guide was whipped up by the awesome folks at Salvation Repair and we’re all about giving you the power to fix your own stuff! If you need a hand, you can always schedule a repair.
For your safety, it’s best to chill out your phone’s battery below 25% before you get your hands dirty with the disassembly.
Hey there! This repair guide comes straight from the awesome folks at Salvation Repair, and while it’s not officially backed by Google, it’s packed with everything you need to know. Ready to swap out the loudspeaker on your Google Pixel 7? Before you dive in, make sure your battery is below 25% to keep things safe and sound—this helps prevent any fiery surprises if the battery gets a little too cozy during the repair. If your battery looks like it’s about to burst, please take the right precautions. Heads up: The Pixel 7 has class 1 lasers inside, so handle with care to avoid any sneaky infrared emissions. Remember, after your repair, the water resistance will depend on how well you apply the adhesive, but your device will lose its IP (Ingress Protection) rating. Don’t forget to grab some replacement adhesive to wrap things up nicely. If you need help, you can always schedule a repair.
Step 1


– First things first: completely power down your phone and disconnect any cables. If you need help, you can always schedule a repair.
Aha, your battery is getting low? That’s okay, we’ve all been there! Remember to let your battery drain down to 25% before you get started. Why? Well, it’s to make sure this hitchhiker’s guide to repair galactica travels smoothly, you know, scrutinizing all the quirks and dangerzones, like a battery that could go ‘poof!’ if you don’t watch out. Fear not, if you find yourself stumped or in a pickle, you can always to schedule a repair!
Step 2


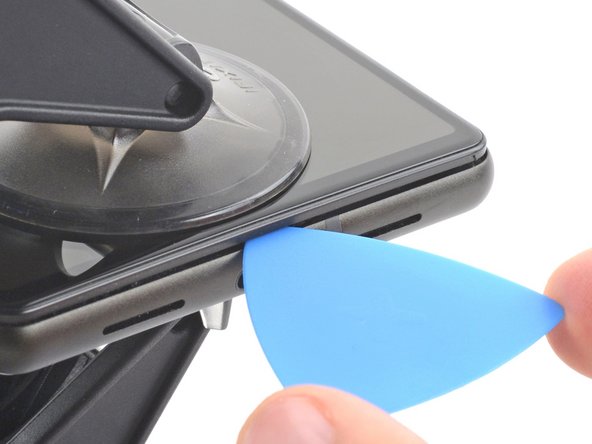
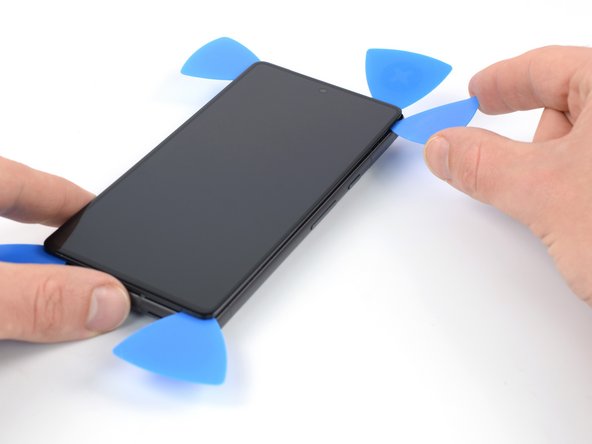
Hey there! Just a friendly reminder to gently slide that pick in only about ~3.5 mm during the removal process. We want to keep those internals safe and sound, plus avoid messing with those pesky plastic clips. Happy repairing!
– As you dive into the removal process, remember to slide your opening picks gently beneath the safety frame to keep it cozy and attached to the screen.
– Keep an eye out for the sneaky plastic clips surrounding the entire screen. If your opening pick seems to be having a tough time during the screen extraction, it might just be too deep under the screen. No worries, just adjust your approach!
Step 3


Alright, let’s talk about the Anti-Clamp, our little helper for opening up your device. It’s a handy tool that’ll make this job a breeze. If you’re not using the Anti-Clamp, just skip down three steps for a different approach.
If your screen is cracked, don’t worry, we’ve got you covered! Throw some clear packing tape on there to help the suction cup grip like a champ.
For all the nitty-gritty details on using the Anti-Clamp, check out this guide.
If your phone’s surface is feeling a bit slippery, no sweat! Just use some tape to give the Anti-Clamp a little extra grip.
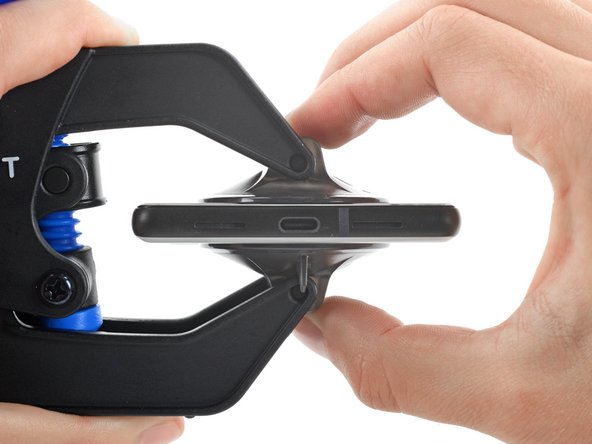
– First, let’s get started by pulling that blue handle backwards – this will unlock the Anti-Clamp’s arms and get you moving.
– Next, slide those arms over either the left or right edge of your phone, nice and easy.
– Now, position the suction cups near the bottom edge of your phone, one on the front and one on the back – this is where the magic happens.
– Finally, squeeze those cups together to apply some suction – if you need help, you can always schedule a repair
Step 4

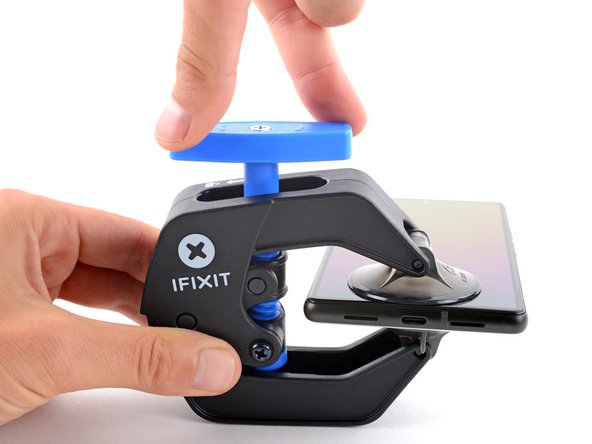

– Grab the blue handle and pull it forward – that’s right, you’re locking those arms in place.
– Now give that handle a spin! Turn it clockwise 360 degrees, or until those cups start to stretch.
– Keep those suction cups buddies! Make sure they’re sticking together and not going their separate ways. If they start to drift, just loosen them up a bit and nudge them back in line. You got this!
Step 5

Take it easy and turn slowly – no more than half a turn at a time. Pause for a minute between turns and let the Anti-Clamp do its thing. If you need help, you can always schedule a repair
For an extra boost, try using a hair dryer or heat gun – just be careful not to overheat, as this can harm your device’s display or battery. Take your time and proceed with caution.
If the Anti-Clamp isn’t creating enough space, don’t worry! Just apply some more heat to the area and give the handle a gentle clockwise turn – about half a turn should do the trick. If you need help, you can always schedule a repair
– Warm up your iOpener and slide it through the arms of the Anti-Clamp – it’s like giving it a little hug!
– Bend that iOpener so it rests snugly on the bottom edge of your phone.
– Take a breather for a minute to let that adhesive loosen up and create a little gap for us.
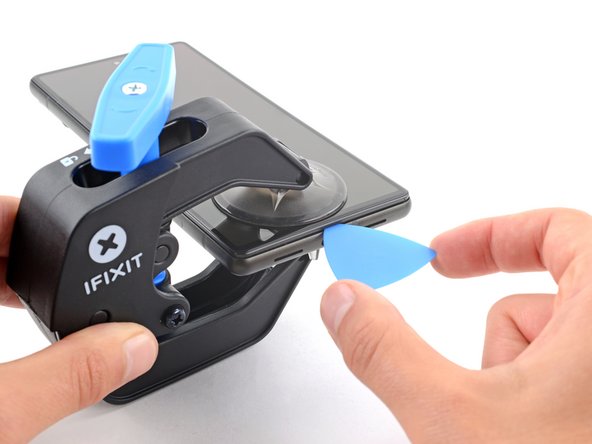
– Once the Anti-Clamp has made a nice enough opening, slide an opening pick underneath the screen frame.
– Feel free to skip the next two steps!


Step 6

You can also use a hairdryer, heat gun, or hot plate to warm up the edge, but don’t get carried away and make it too hot! Just until it’s slightly too hot to touch.
Step 7


Got a cracked screen? No worries, we’ve got you covered. Try slapping a layer of clear packing tape over it – this might just give your suction cup the grip it needs. If that doesn’t work, super strong tape or even a bit of superglue can save the day.
Having trouble getting started? Don’t sweat it – some phones can be a bit stubborn. If you’re struggling, just apply some extra heat to the bottom edge and give it another shot. If you need help, you can always schedule a repair
– First things first, let’s get that screen cozy! Warm it up until it’s pleasantly snug to the touch, then stick a suction handle right on the bottom edge.
– With a gentle lift, pull the screen along with its trusty safety frame using the suction handle, creating a little breathing room between the screen and the phone assembly.
– Now, it’s time to slide an opening pick into that gap you just made. You’ve got this!
Tools Used

Step 8


– The screen cable hangs out just a smidge below the midpoint on the left edge of the phone. Take it easy here so you don’t accidentally snag the cable!
– Scattered around the phone’s border are several spring contacts. Tread lightly in these spots to keep from bending the contacts!
Step 9


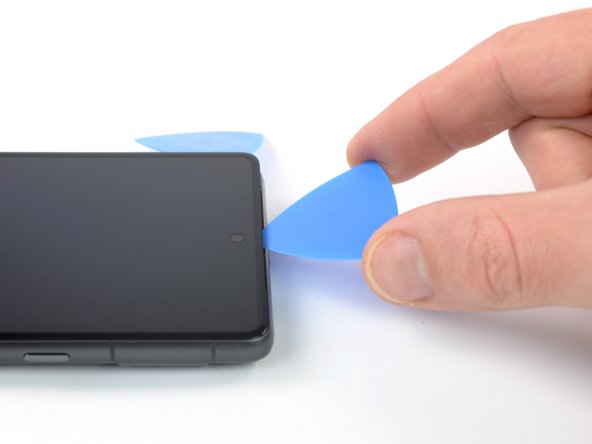
– Now it’s time to get that screen loose – gently slide the opening pick down to the bottom right corner to break the adhesive seal.
– Leave that pick right where it is, so the adhesive doesn’t try to sneak back into place. If you need help, you can always schedule a repair
Step 10


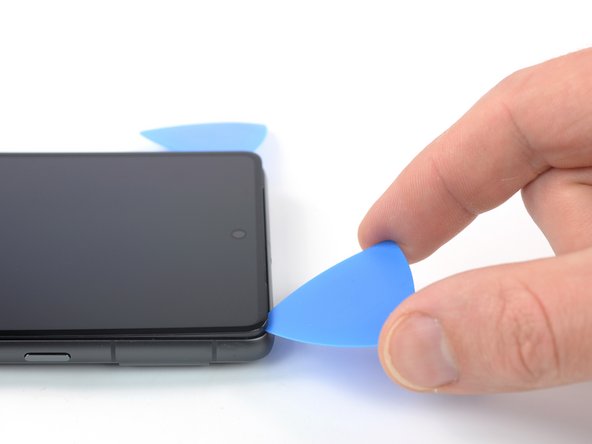
– Let’s get this party started by sliding a second opening pick along the bottom edge of the screen, towards the bottom left corner. It’s like a little dance for your phone! 😎
– Hold that opening pick in place to keep the adhesive from getting cozy again. We don’t want it to play hide and seek! 😉
Step 11


– Awesome! Now, scoot in an extra tool under the lower left corner of the screen, wouldn’t you love to see your screen adhesive slice and plastic clips pop open?
– Woo-hoo, glide that tool along the left edge, letting the adhesive and clips bid farewell to each other
– Hang tight, superhero! Keep that top-left tool in place and let those adhesive forces know who’s boss.
Step 12

When slicing near the front-facing camera, be careful to insert only the tip of the opening pick (~2.5 mm) to avoid damaging or smudging the camera. If you’re not feeling confident, don’t worry – you can always schedule a repair and let the pros handle it.
If the adhesive gets stubborn and hard to cut, don’t worry – it’s probably just cooled down. Give it a little love with your iOpener or heat gun for 1-2 minutes to warm it back up. If you need help, you can always schedule a repair
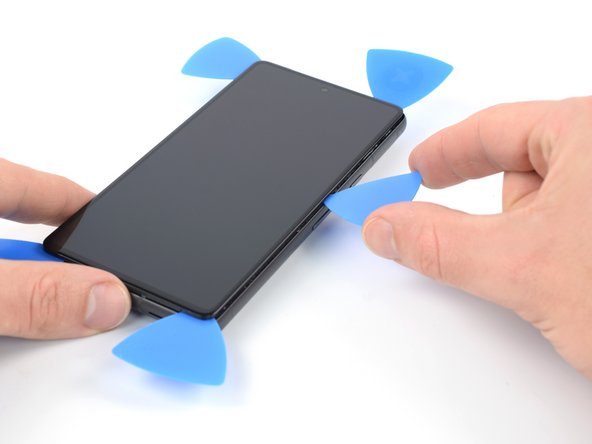
– Let’s get this party started! Insert a fourth opening pick at the top left corner of the screen.
– Slide the opening pick along the top edge of the phone to slice the adhesive. Think of it as a hot knife through butter!
– Leave the opening pick in the top right corner. We don’t want that sticky stuff trying to sneak back together, do we?
Step 13

Hold up! Don’t go ripping that display out just yet. That screen is still attached to the phone with a flex cable, so let’s be careful and take our time.
– Now it’s time to bring in the fifth opening pick – slide it along the right edge of your phone to carefully cut through the remaining adhesive and release those right plastic clips. If you need help, you can always schedule a repair
Step 14


Be gentle with the screen! Twisting or pulling it too far from the frame could put some strain on that delicate flex cable, so give it a little love and care.


Step 17


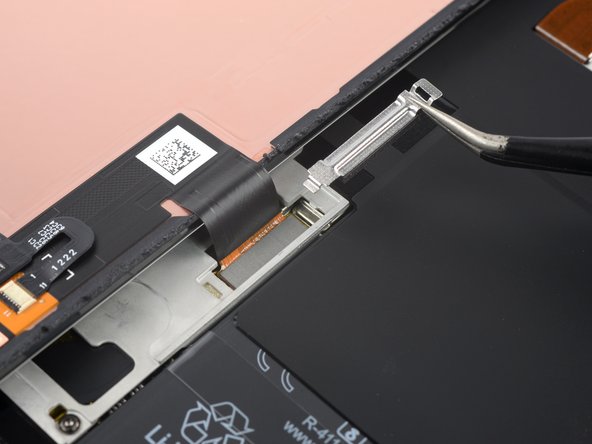
– To start, use a spudger to carefully release the display flex cable by gently prying the connector straight up from its socket – it’s like freeing a tiny captive!
– When it’s time to reattach, take your time and align the press connector with care. Press down on one side until you hear that satisfying click, then repeat on the other side. Remember, gentle does it – if the connector is misaligned, those pins can bend and cause permanent damage. If you need help, you can always schedule a repair
Tools Used

Step 18

– Time to gently part the screen from your phone!
– As you gear up for reassembly:
– Make sure all screws are snug and there are no loose bits to worry about.
– Reconnect the screen and give your phone a test run. Power it down once you confirm everything’s working, then continue putting it back together.
– Don’t forget to apply fresh adhesive where needed after giving those areas a good cleaning with isopropyl alcohol (>90%).
– If you’re working with custom-cut adhesives for your device, check out this guide.
– If you’re using a pre-cut adhesive card, this guide has got your back!
Step 19


If the foil’s being a little stubborn, don’t worry! Just give it a little heat with a heated iOpener for about two minutes and the adhesive will loosen right up. You’ll be peeling that foil like a pro in no time.
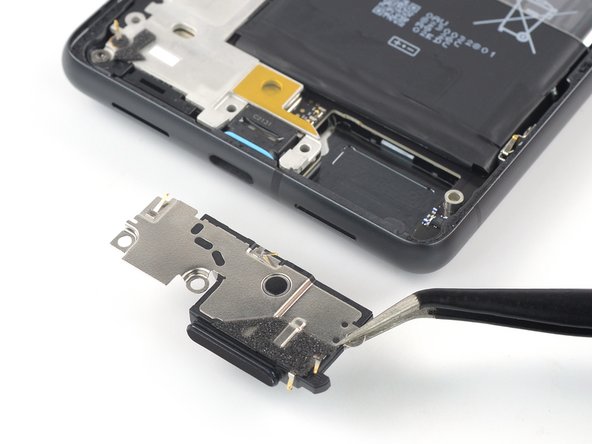
– Grab your trusty tweezers and gently peel the lower graphite foil off the battery and midframe. It’s like giving your device a little spa treatment, but for the insides! If you need help, you can always schedule a repair.
Step 20
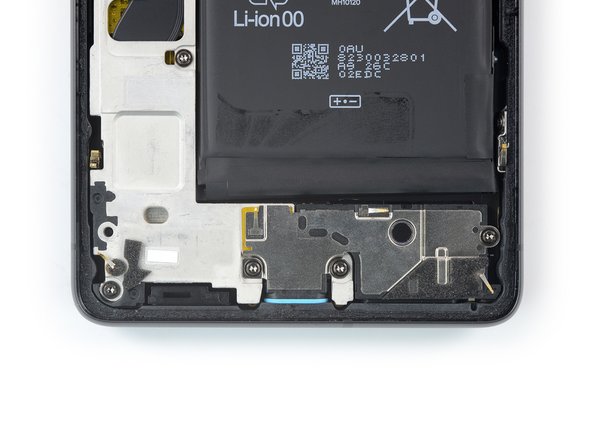

– Grab your trusty Torx T3 screwdriver and let’s get to work! Unscrew those three 5.1 mm-long screws holding the loudspeaker in place. You’ve got this!