Google Pixel 7 Screen Replacement Guide
Duration: 45 minutes
Steps: 18 Steps
Written by our trusty Salvation Repair team, this guide is not officially backed by Google. Dive into more of our repair guides here.
Safety first! Make sure your battery is below 25% before popping open your phone. If you need help, you can always schedule a repair.
Crafted by the talented folks at iFixit, this guide comes without any shiny Google stamp of approval. If you’re looking to breathe new life into your Google Pixel 7 by swapping out that screen, you’re in the right place! First things first: be sure to let your battery drop below 25% before diving in. It’s a smart move to minimize fire risks if the battery gets a bit too adventurous during the fix. And hey, if your battery looks like a balloon, take care when handling it! Just a heads up: your Pixel 7 has class 1 lasers lurking inside. Disassembling it might give you a peek at some invisible infrared laser goodness. Your shiny new screen should come with the fingerprint reader ready to roll. If it doesn’t, no worries—just pop the original one onto the new screen and recalibrate it so it remembers your awesome fingerprint. Remember, reapplying the adhesive properly is key to keeping that water resistance intact, but just so you know, your device’s IP (Ingress Protection) rating may take a little hit after you’re done. Don’t forget to snag some replacement adhesive—it’s essential for a job well done!
Step 1


– Hey there, tech fans! Time to take a quick little power nap. Make sure your phone hangs up its keyboard and closes out the night by turning it off completely. And don’t forget to break free from any wired connections. If you need help, you can always schedule a repair with us!
Step 2


Be careful to insert the pick only about 3.5 mm during the removal process. This way, you’ll keep those delicate internals safe and steer clear of any trouble with the plastic clips.
– During the removal procedure, make sure to slide your opening picks under the safety frame to keep it intact, avoiding separation from the screen. There are various plastic clips surrounding the screen. If your opening pick gets stuck, it means you inserted it too deep beneath the screen.
Step 3


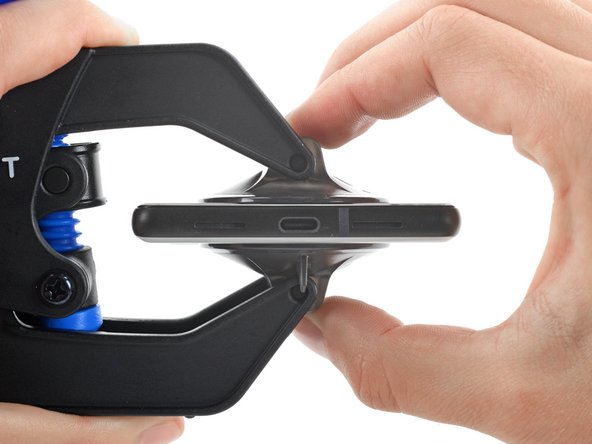
In the next three steps, we’ll introduce you to the Anti-Clamp, a nifty little gadget we’ve whipped up to simplify the opening process. If you’re not using the Anti-Clamp, just hop down three steps for a different approach.
Got a cracked screen? No worries! Just slap a layer of clear packing tape on it to help that suction cup stick like a champ.
Want to master the Anti-Clamp? Dive into our complete guide for all the details!
If your phone’s surface feels a bit too slippery for the Anti-Clamp, try using tape to create a more secure grip.
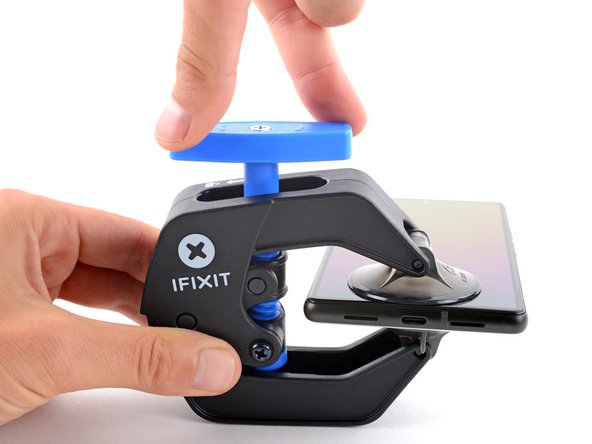
– Unlock the Anti-Clamp’s arms by pulling the blue handle backwards.
– Slide the arms over either the left or right edge of your phone.
– Position the suction cups near the bottom edge of the phone—one on the front, and one on the back.
– Give those cups a squeeze to create suction.
Step 4


– Get started by pulling that blue handle forward – this will lock the arms in place.
– Next, turn the handle clockwise until it’s made a full rotation or the cups start to stretch. Easy does it!
– Now, keep an eye on those suction cups and make sure they stay aligned. If they start to slip out of place, just loosen them a bit and realign the arms. You got this! If you need help, you can always schedule a repair.
Step 5

Take it easy and don’t twist more than half a turn at once. Give it a minute to breathe between turns. Let the Anti-Clamp and a little patience do their magic for you.
Feel free to use a hair dryer or heat gun to warm things up a bit — just be careful, as too much heat might harm the display or the internal battery.
If the Anti-Clamp isn’t giving you the gap you need, don’t hesitate to add a bit more heat to the area and give that handle a gentle clockwise twist for half a turn.
– Warm up an iOpener and slide it through the arms of the Anti-Clamp like a pro.
– Bend the iOpener so it rests comfortably on the bottom edge of your phone.
– Hang tight for a minute—this gives the adhesive some time to loosen up and create that sweet opening gap.
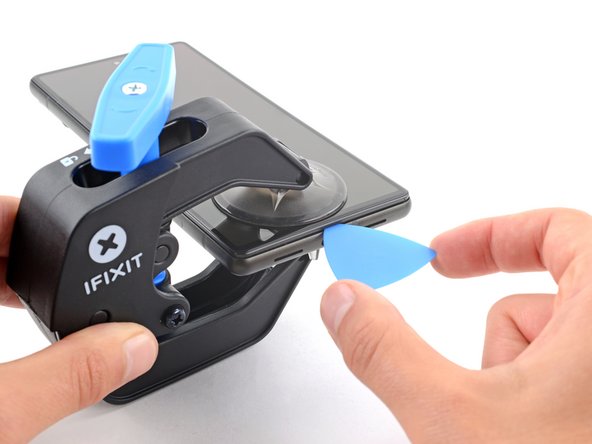
– Once the Anti-Clamp has worked its magic and made a nice gap, gently slide an opening pick under the screen frame.
– Feel free to skip the next two steps.


Step 6

You can also use a hair dryer, heat gun, or hot plate, but remember to treat your device with care. The edges should feel just a tad too warm for comfort – that’s your cue to stop!
Step 7


If your screen is looking a bit worse for wear with some serious cracks, don’t panic! Slapping a layer of clear packing tape on it might just do the trick for your suction cup to stick. And hey, if you have some super strong tape lying around, that could work wonders too! In a pinch, you could even superglue the suction cup right onto that broken screen. Talk about a creative fix!
Now, if your phone is getting up there in age, this might be a bit tricky. If you’re hitting a wall, try giving the bottom edge a little more heat and give it another go. You’ve got this!
– First, get that screen warm to the touch – it’s time to get started. Now, grab a suction handle and attach it to the bottom edge of the screen.
– Next, use the suction handle to carefully lift the screen and its safety frame, creating a small gap between the screen and the phone assembly. You’re making great progress!
– Now it’s time to insert an opening pick into the gap you just created. If you need help, you can always schedule a repair
Tools Used

Step 8


– The screen cable is located just shy of halfway up the left edge of your phone. Tread lightly here to keep that cable intact and avoid any mishaps.
– Keep an eye out for the spring contacts that line the edges of your phone. Handle these areas with care to prevent any bending or damage to those little guys.
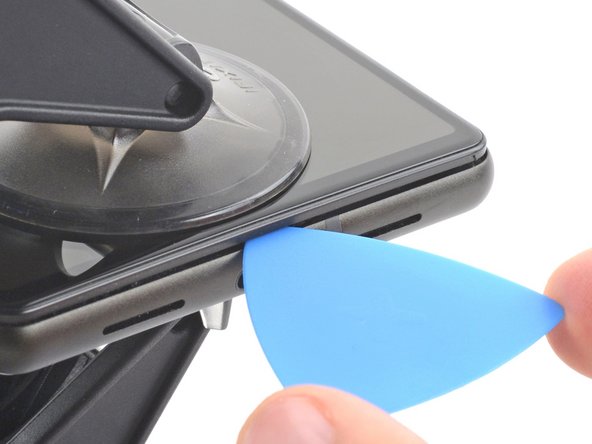
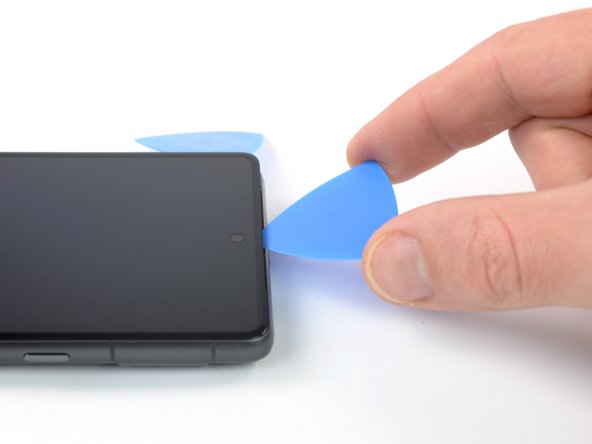
Step 9


– Gently slide the opening pick down to the bottom right corner of your screen to cut through that pesky adhesive.
– Keep that opening pick right where it is to stop the adhesive from sticking back together.
Step 10


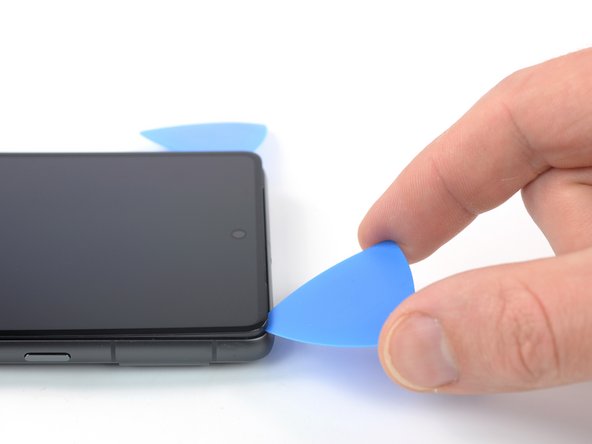
– Slide a second opening pick into the bottom edge and gently glide it to the bottom left corner of the screen to cut through that pesky adhesive.
– Keep that opening pick snugly in place to stop the adhesive from making a comeback.
Step 11


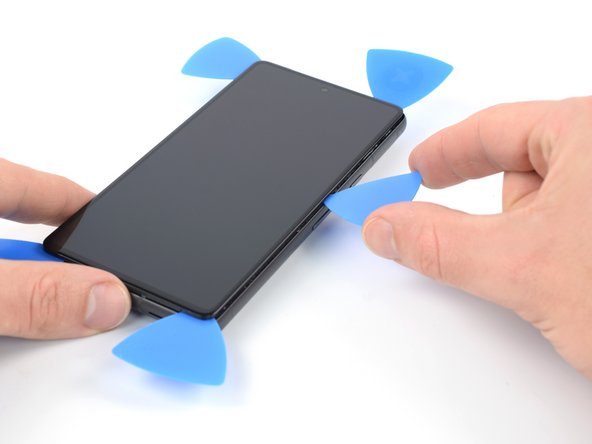
– Slide a third opening pick snugly under the bottom left corner of the screen.
– Gently glide the opening pick along the left edge to cut through the adhesive and pop those plastic clips open.
– Keep the pick in the top left corner to make sure the adhesive doesn’t make a comeback.
Step 12

When you’re getting close to the front-facing camera, just slip in the very tip of your opening pick (about 2.5 mm) to keep that camera safe and sound from any bumps or smudges.
– Now it’s time to add a fourth opening pick – slide it into the top left corner of the screen and get ready to loosen that adhesive.
– Gently slide the opening pick along the top edge of the phone, slicing through the adhesive as you go. You’re making great progress!
– Leave that opening pick right where it is, in the top right corner, to keep the adhesive from resealing. You’re doing a great job, and if you need help, you can always schedule a repair
Step 13

Hold your horses! Don’t yank that display out just yet—it’s still tethered to the phone by a flex cable. Let’s take it slow and steady.
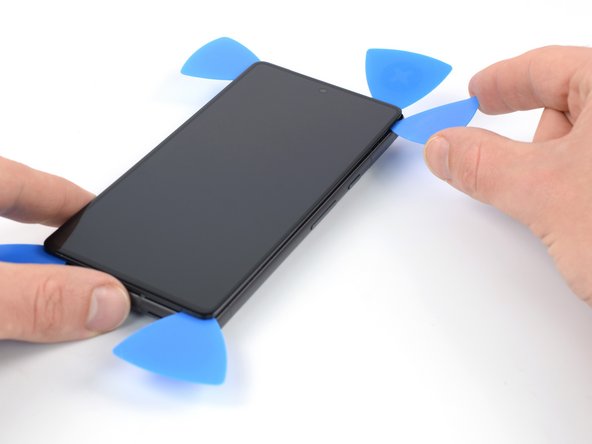
– Slide in a fifth opening pick and gently glide it along the right edge of your phone. This will help you slice through the remaining adhesive and pop those right plastic clips free!
Step 14


Be gentle with that screen! Don’t twist it or pull it too far from the frame, or you might put some unnecessary strain on that flex cable. Keep it happy and intact!
Step 15


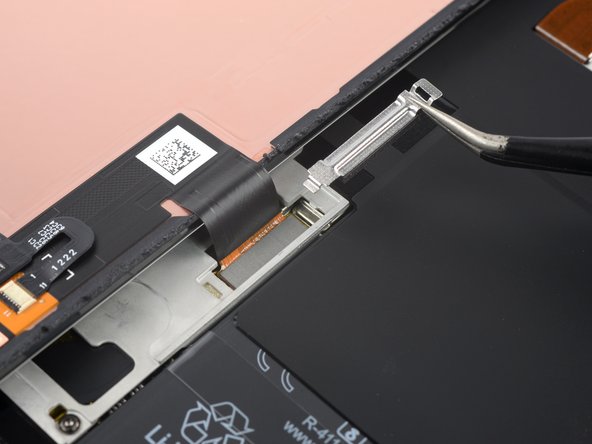
The display cable bracket is snug as a bug, so you might need to give it a little nudge to pop it loose.
– Gently slide one arm of your trusty tweezers into the top opening of the display cable bracket. We’re just getting started!
– Now, give that bracket a little nudge inward and easily pry it up to let it go free. You’re doing great!
Tools Used


Step 17


– Grab a spudger and gently lift the display flex cable connector straight up from its socket. It’s like giving it a little hug to say goodbye!
– When it’s time to re-attach, line up those connectors just right. Press down on one side until you hear that satisfying click, then do the same for the other side. Remember, no need to press down on the middle—let’s keep those pins safe and sound. If it feels a bit off, it might be misaligned, and we definitely don’t want any bent pins causing trouble.
Tools Used

Step 18


Don’t forget to pop that display cable bracket back into place!
– Time to say goodbye to that screen! Let’s get it off.
– Now, as we put everything back together:
– If you’ve swapped out your screen, take a moment to check the front-facing camera hole and the sensor cutout on your new screen, and get rid of any pesky liners that might be hanging around.
– Here’s a handy tip: it’s a great idea to test your phone before you seal it up. Just connect your screen for a quick check, power it up, and make sure it’s running smoothly. Don’t forget to power it off and disconnect the screen before you dive back into reassembly!
– If you’re rocking some custom-cut adhesives for your device, this guide has got your back.
– Using a pre-cut adhesive card? No worries, just follow this guide.
– And if you’re putting in a new screen, make sure to follow this guide to calibrate that fingerprint sensor just right.


