Google Pixel 8 Wide Rear Camera Replacement Guide: DIY Tutorial
Duration: 45 minutes
Steps: 39 Steps
This repair guide was put together by our awesome team and hasn’t received a thumbs up from the big G. Want to dive deeper into our repair guides? Check them out here.
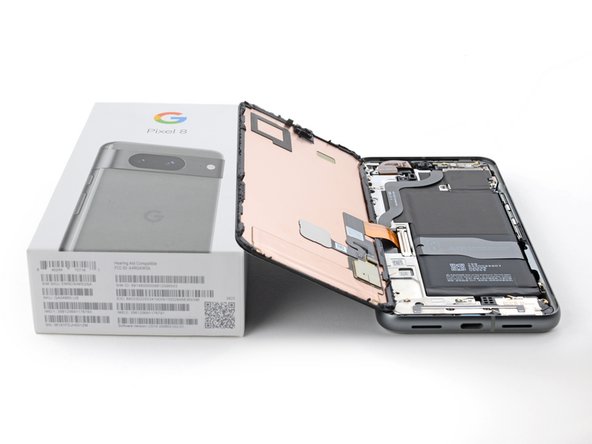
Whoa, it looks like your Pixel 8’s wide rear camera isn’t snapping photos quite the way you’re accustomed to. No worries, though! If you’re all about getting back to taking those Instagram-worthy shots—no filters required—then it’s time to replace that camera. You’ll also want to grab some screen adhesive to really seal the deal. If you’ve got the Pixel 8 sporting that fancy mmWave antenna, this guide’s got you covered. But hey, even if you’ve got a non-mmWave version, this guide’s still totally tasty. Just skip those steps about the 5G antenna, and you’ll be good to go! If you’re having a hard time with any of the steps, just remember you can always schedule a repair and have a professional bring your Pixel to life again.
Step 1


Before diving into this repair adventure, let your Pixel’s battery chill out and drop below 25%. A fully charged lithium-ion battery can be a bit dramatic if it gets damaged, so let’s keep things safe and sound.
Hold down the power button and the volume up button at the same time to open that handy shutdown menu. You’ve got this!
– Time to get started! First, carefully unplug all cables from your phone to avoid any accidental power-ons or short circuits.
– Next, completely power off your phone – this will help you avoid any unexpected surprises during the repair process.
Step 2


Get ready to boldly go where no phone has gone before! If you slip and wiggle that pick a bit too much, no need to worry – it’s just exploring new territory. Stay on course by taping a coin to your pick 3 millimeters from the tip, like a trusty sidekick on a cosmic journey.
– Grab your trusty permanent marker and mark a spot on the opening pick exactly 3mm from the tip. That’s it! Easy peasy.
Step 3

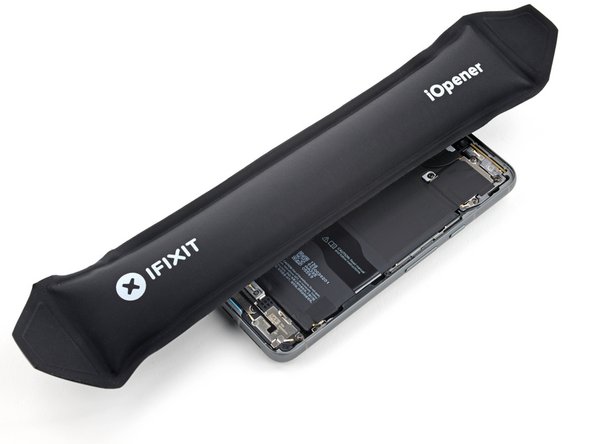
The screen is held tight to the frame by adhesive and clips. A little heat can work wonders, softening that adhesive and making it a breeze to pop the screen off.
You could also grab a hair dryer, heat gun, or hot plate for this job—but a word of caution: too much heat can be a screen and battery’s worst nightmare!
– Warm up your trusty iOpener and place it gently on the bottom edge of the screen for a cozy two minutes. This will help loosen up that stubborn adhesive, making your repair journey smoother!
Tools Used


Step 4


Get ready for the next three steps where we showcase the Anti-Clamp! This nifty tool is designed to make opening your device a breeze. If you decide to go without the Anti-Clamp, feel free to jump down three steps for a different approach.
For a detailed walkthrough on using the Anti-Clamp, take a peek at this guide.
– Give that blue handle a gentle pull backwards to set the Anti-Clamp’s arms free and ready for action!
– Now, place your phone screen-side up on a flat surface so it sits nicely between the arms of the Anti-Clamp—just let that bottom edge hang off a bit!
– Slide those arms right over the left edge of your phone; this will give you easy access to the bottom edge for the next steps.
– Position those suction cups as close to the center of the phone’s bottom edge as you can; we want the perfect grip!
– Give the cups a nice squeeze to create some powerful suction—they’ll hold on tight!
Step 5


– Give that handle a gentle tug forward to secure those arms like a pro!
– Now, twist the handle to the right for a complete turn (that’s 360 degrees!), or until you see those suction cups start to stretch out. You’ve got this!
– As those cups stretch, keep an eye on their alignment. If they start to slide around, just pop off the Anti-Clamp and slap on some tape for a little extra stickiness.
Step 6


Keep your opening pick under 3 mm to steer clear of any spring contact mishaps. You’ve got this!
If the adhesive doesn’t want to let go, just give the handle a little twist to the right – a quarter turn will do the trick. Then, hang tight for another minute. If things start to cool down, just add a little more heat.
– Hang tight for about a minute to let a little gap appear between the screen and the frame.
– Slide an opening pick into that welcoming gap.
– Gently pull the blue handle back to release the arms and carefully take out the Anti-Clamp using the pull tabs on those handy suction cups.
– Feel free to skip the next two steps!
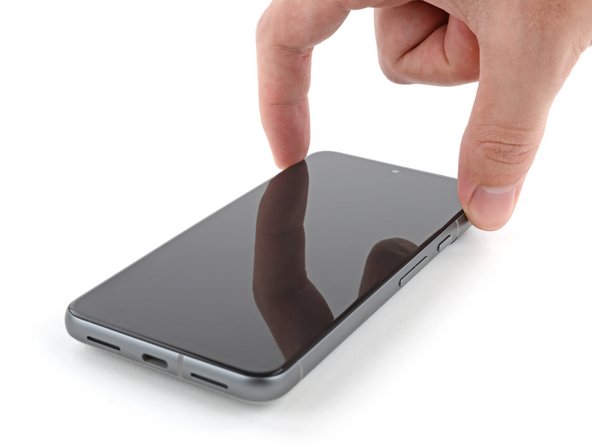
Step 7


– Grab a suction cup and place it right in the middle of the bottom edge of the screen. Let’s get that screen moving!
Tools Used

Step 8


If you’re struggling to make that gap, just give it a little more heat and take another shot at it!
– Give that suction handle a good pull, you’ve got this! Keep pulling until you see a little gap open up between the screen and the frame.
– Now, slide that opening pick into that gap – you’re almost there!
Tools Used
Step 9


– The screen cable hangs out just shy of the halfway mark on the left edge of your phone. Tread lightly here to keep that cable intact!
– You’ll find a bunch of spring contacts dancing around the edge of the phone. Be gentle in these spots to prevent bending any of them.
Step 10


– Gently glide that opening pick along the bottom edge to break free the adhesive that’s holding it down.
– Keep the pick snugly in the bottom right corner to make sure the adhesive doesn’t decide to play hide-and-seek again.
Step 11

If you’re feeling a bit adventurous, grab a hair dryer, a heat gun, or even a hot plate! Just a friendly heads-up: keep the heat in check, as too much can put your screen or battery in a hot mess. Stay cool while you work!
– Let’s heat things up! Apply a heated iOpener to the right edge of the screen for two minutes. This will help loosen the adhesive and make the next step a breeze.
Tools Used
Step 12


– Slide a second opening pick beneath the lower right corner of the screen.
– Gently glide the new pick up to the top right corner to break free the adhesive holding the right edge of the screen.
– Keep that pick in place at the top right corner so the adhesive doesn’t decide to play hide and seek again!
Step 13


– Gently slide a third opening pick under the bottom edge of that screen.
– Carefully glide the new pick over to the bottom left corner.
– Keep the pick in the bottom left corner to ensure the adhesive stays put.
Step 14

Alternatively, feel free to grab a hair dryer, heat gun, or hot plate—but remember, too much heat can be a grumpy guest for your screen and battery. So, keep things cozy, not scorching!
– Warm up your trusty iOpener and gently place it on the left edge of the screen for a cozy two minutes.
Tools Used
Step 15


– Slide a new opening pick into the bottom left corner of the screen, just like tucking a cozy blanket in.
– Gently glide that pick all the way to the top left corner to break free the adhesive keeping the left edge snug as a bug.
– Keep the pick in that top corner to make sure the adhesive doesn’t play tricks and reseal itself while you work your magic.
Step 16

If you’re feeling adventurous, you might try using a hair dryer, heat gun, or hot plate. Just remember, a little heat goes a long way—too much can turn your screen or battery into a melted mess! So take it easy and keep it manageable.
– Warm up your iOpener and gently press it against the top edge of the screen for a cozy two minutes.
Tools Used
Step 17


– Wedge a fifth opening pick right under the top edge of your screen, just by that left corner. You got this!
– Now, glide that opening pick over to the top right corner, gently separating the adhesive that’s holding the screen in place. You’re one step closer!
Step 18

Hey, keep it cool! Don’t put any strain on the screen cable.
If your screen is feeling a bit clingy, just make another round along the edges with your trusty opening pick to break free any leftover adhesive that’s holding it tight.
– Grab a little box or a stack of books and set it to the left of your phone. This will give your screen a nice lift while you disconnect its cable.
– Now, gently lift the right edge of the screen as if you’re flipping open the front cover of a book.
– With the screen propped up, you can easily get to the screen cable. Time to work your magic!
Step 19


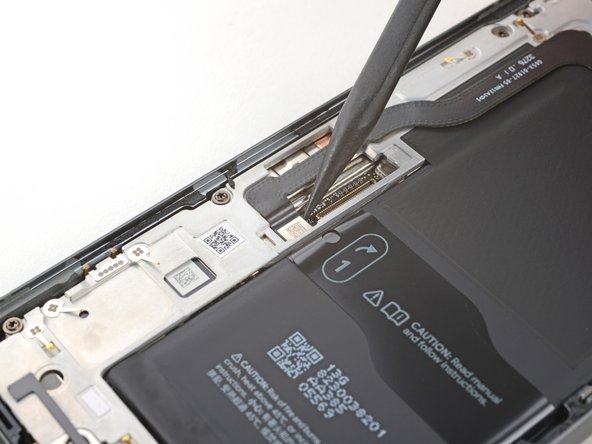
– Grab your trusty opening pick and gently slide it under the top edge of that screen cable cover. Give it a little wiggle to pry it up, and voilà!
– Now, simply lift off the cover and set it aside. You’re doing great!
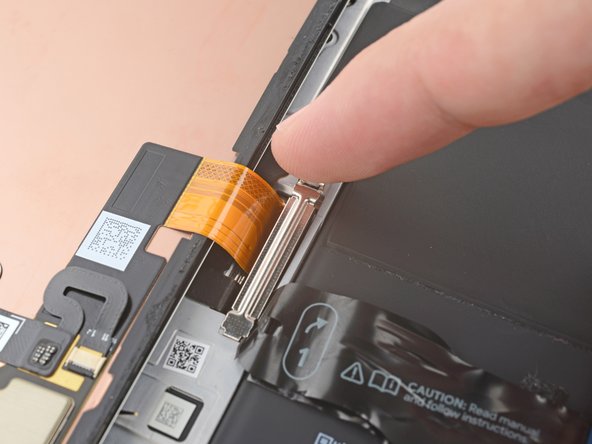
Step 20


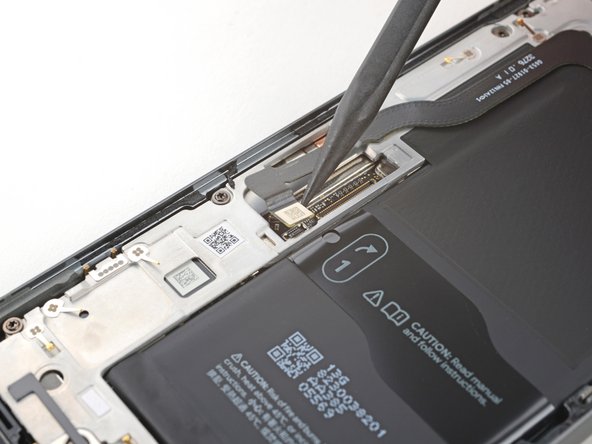
– Slide the tip of a spudger under the top left corner of the screen’s press connector like you’re slipping a secret note to a friend.
– Gently lift and disconnect that cable—like removing a sticker from your favorite notebook.
– Time to say goodbye to the screen! Carefully take it off.
– When you’re ready to reconnect the press connector, line it up over its socket and give one side a gentle press until you hear a satisfying click. Then, do the same for the other side. Remember, no pressing in the middle! If it’s not lined up just right, those little pins can bend, and we definitely don’t want that. If you need help, you can always schedule a repair.
Tools Used

Step 21

Got a shiny new screen with adhesive all set to go? Awesome! Just follow this step when putting things back together. If you’re working with your old screen, no worries—check out this guide on how to apply adhesive like a pro.
For a little extra love, feel free to apply even pressure to the phone to really strengthen that adhesive bond. You’re doing great!
– Gently peel back those pull tabs to free the liners hiding the front camera cutout, the rear camera pad, the back of the screen, and the perimeter adhesive. You’ve got this!
– Reconnect the screen cable and pop the cover back on like a pro.
– Now’s the perfect moment to give your phone a quick test drive! Power it up temporarily and make sure everything’s running smoothly. Don’t forget to turn it off before you dive back in.
– Press the screen firmly into its frame; you should feel those clips snap into place like a satisfying hug.
– Give a solid press around the edges of the screen to secure it with that fresh adhesive. It’s all in the details!
– Need to calibrate the fingerprint sensor? Just follow this guide for a seamless setup.
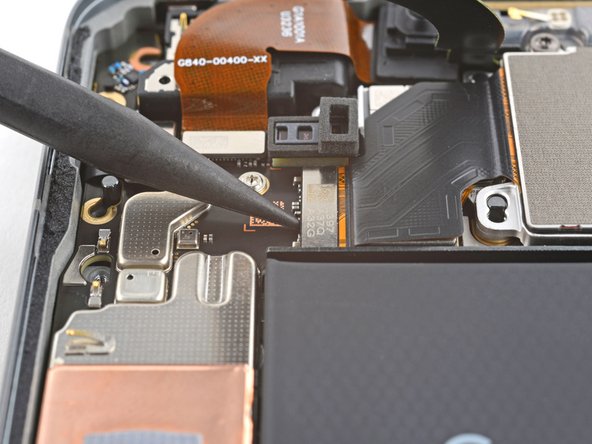
Step 22

– Gently use the spudger’s pointy end to pop up and unplug the 5G mmWave antenna cable from the logic board. You’re doing great!
Tools Used
Step 23

Alternatively, feel free to grab a hair dryer, heat gun, or even a hot plate—but proceed with caution! Remember, too much heat can be a battery’s worst enemy.
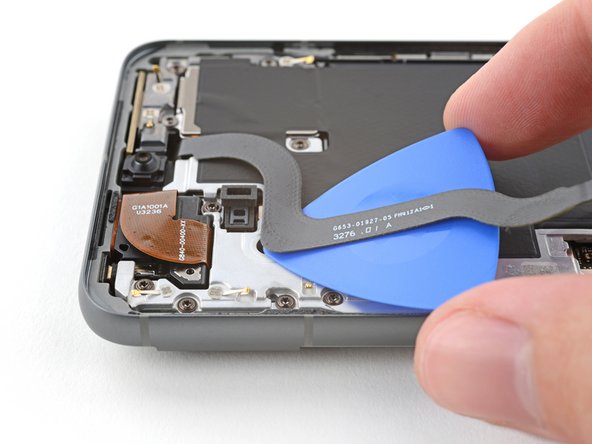
– The 5G mmWave antenna cable is snugly stuck to the midframe with adhesive in two spots.
– Warm up your trusty iOpener and rest it on the left edge of the phone for a couple of minutes to help loosen that pesky cable adhesive.
Tools Used
Step 24


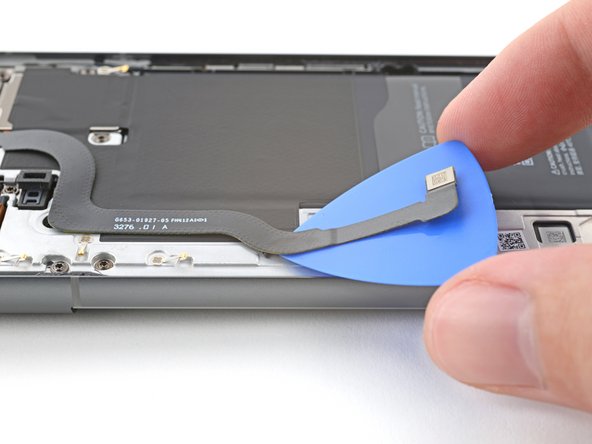
– Slide that trusty opening pick under the adhesive at the bottom of the 5G mmWave antenna cable. You’ve got this!
– Now, glide that pick gently toward the top edge of the phone to loosen up that sticky stuff. Separation is key!
Step 25

– Now, get ready to rock and roll as you repeat the previous step for the upper section of adhesive. You can do it, champ!
Step 26

Don’t worry about folding or creasing the cable – just gently move it out of the way so you can keep taking things apart without any snags.
– Gently guide the 5G mmWave antenna cable over the top of the phone to keep it nice and tidy. You’ve got this!
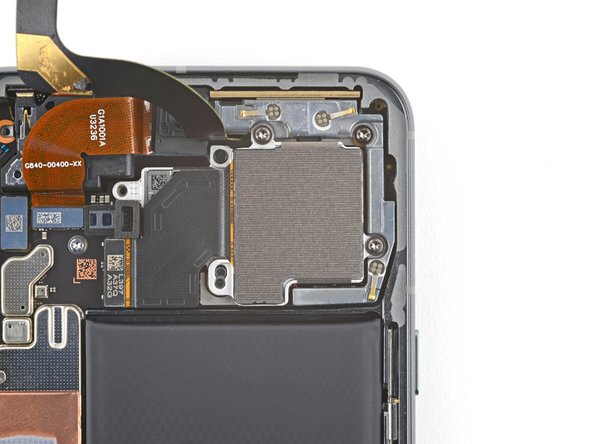
Step 27
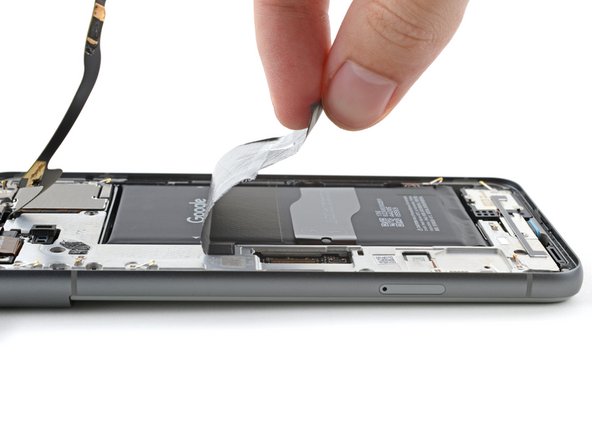

To wrap up this repair, you’ll need to carefully take out and swap in a big ol’ graphite sheet. This little hero connects the upper part of the battery, the midframe, and those rear cameras.
If your sheet decides to tear, no biggie! Just grab those torn bits and peel the sheet off in sections like a pro.
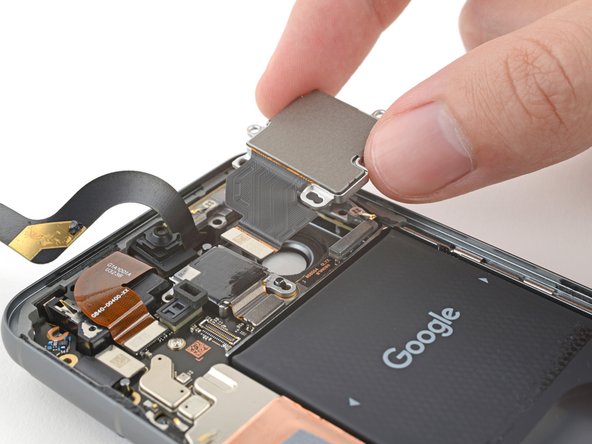
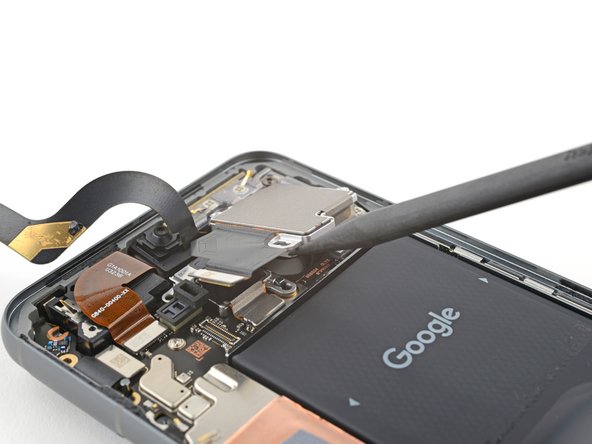
– Slide the tip of your trusty spudger under the top right corner of that graphite sheet and gently lift it until you can grab it with your fingers.
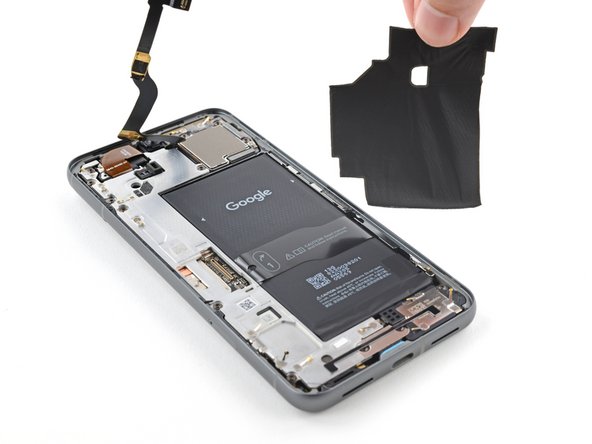
– Carefully peel off the entire graphite sheet like it’s a sticker you just can’t resist.
– When it’s time to put everything back together, remember: the old graphite sheet is a no-go. Check out this guide to get that shiny new sheet in place!
Tools Used
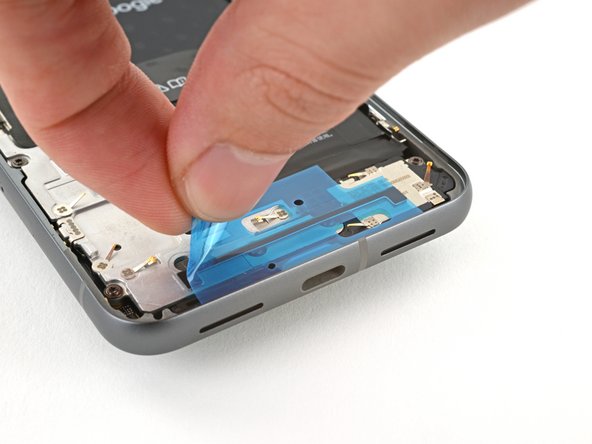
Step 28


A plastic buffer is gently sticking to the midframe and bottom speaker.
– Gently slide the tip of your trusty opening pick beneath that plastic buffer until you can grab it with your tweezers or fingers. You’ve got this!


Step 30


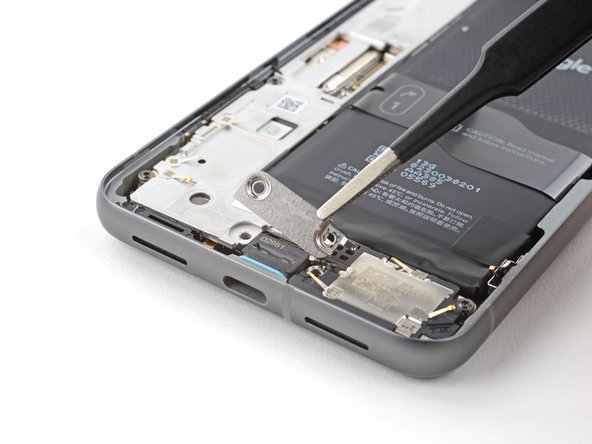
As you dive into this repair adventure, remember to keep an eye on every little screw. They all have their special place, so be sure to return them exactly where they belong!
The Pixel 8 is a fan of Torx Plus screws, but no worries—regular Torx bits will do the trick too. Just remember to press straight down with a steady hand to keep things smooth and avoid stripping those screws!
– Grab your trusty T3 Torx driver and let’s tackle those two 5 mm-long 3IP Torx Plus screws holding down the USB-C port bracket. You’ve got this!
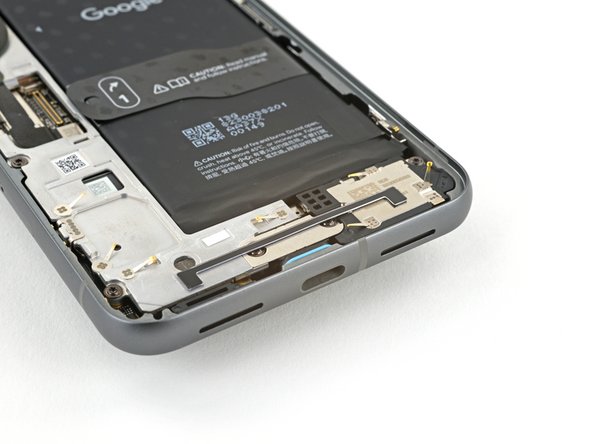
Step 31

– Grab those tweezers or just use your fingers to carefully take off the USB-C port bracket. You’ve got this!
Step 32

– Time to give that plastic shim a little TLC. You’re gonna slide it back in across the bottom of the midframe and loudspeaker. If you don’t have a new one, just give the old shim a good press.
– Let’s get that clear liner off the shim. It’s outta here!
– Alright, let’s get the shim lined up. Use the markings on the midframe to get the left side in place, and press it down gently.
– Now, use the flat end of your spudger to press down along the whole shim. Make sure it’s secure, just like a good friend.
– And finally, ditch the blue liner. We’re almost there!
Tools Used
Step 33

– Grab your T3 Torx screwdriver and remove those eight 5.1mm-long 3IP Torx Plus screws holding down the midframe. Let’s get to it!
Tools Used

Step 34

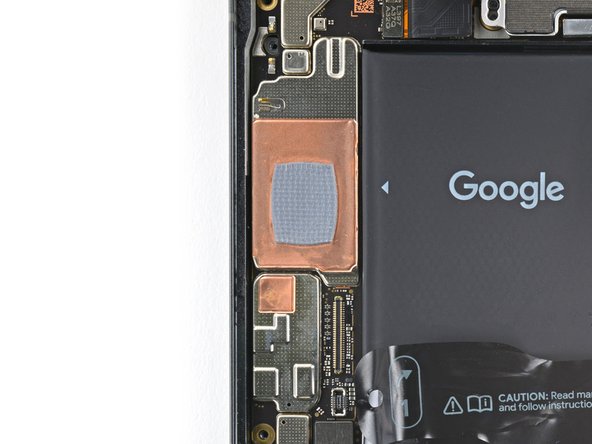
The center of the midframe is hanging out with a thermal pad.
You’ll know when the midframe is ready to party because it will feel like it’s saying “bye bye”!
– Gently slide the flat end of a spudger under the bottom right corner of the midframe to effortlessly pop it away from the thermal pad. You’re doing great!
Tools Used
Step 35
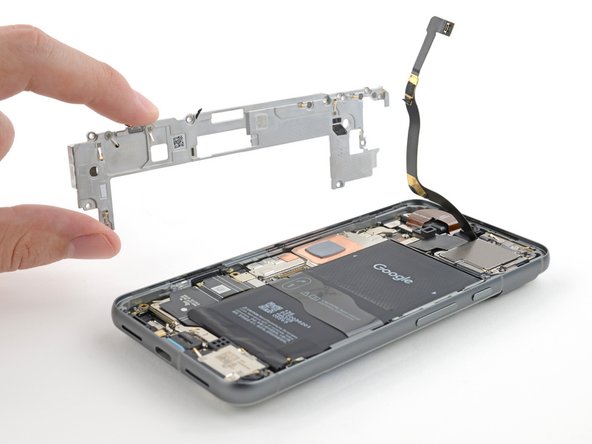

– Carefully lift the midframe off the main frame and set it aside with a smile!
– As you’re getting ready to put everything back together, take a moment to check the thermal pad. If it’s looking a little worse for wear, gently peel it off, clean the area with some high-concentration isopropyl alcohol (90% or more) and a soft microfiber or lint-free cloth, and then pop on a fresh thermal pad. You’re doing great!

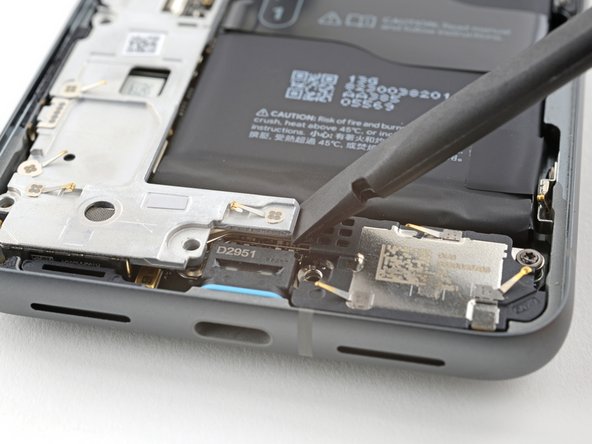
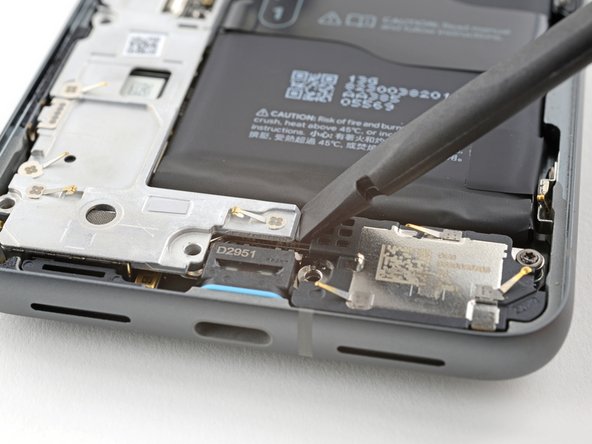
Step 37

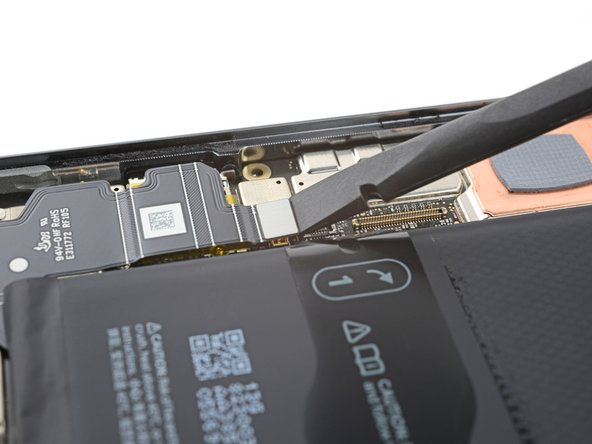
Keep that pick in its lane! Stray moves might mess up the logic board.
– Alright, pals! Time to be a hero for your wide rear camera. First, find a trusty spudger and get it under the bottom half of that camera’s press connector. Be a bit gentle and slip it between those surface-mounted components. Once you’ve got it, give it a little lift to disconnect that camera! You’re a natural at this!
Tools Used
Step 38

– Grab your trusty T3 Torx screwdriver and let’s tackle those two 5.1 mm-long 3IP Torx Plus screws holding down the wide rear camera. You’ve got this!
Tools Used
Step 39

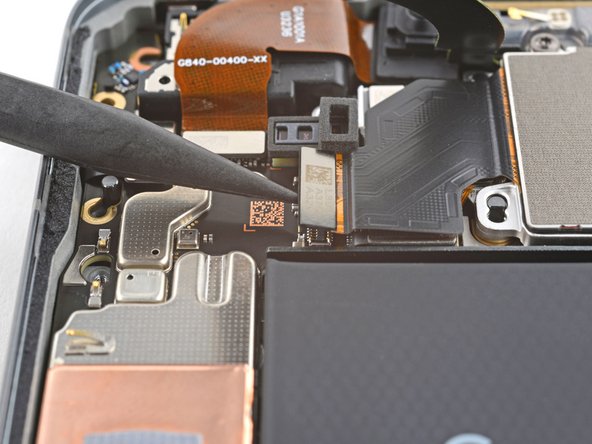
– Slide the spudger tip into one of those spacious cutouts around the rear camera screw holes.
– Gently pry the camera up and out of its cozy spot using the spudger.
– Go ahead and take that camera out!
Tools Used
Success!