Google Pixel 9 Pro Fold Camera Replacement Guide: Step-by-Step DIY
Duration: 45 minutes
Steps: 44 Steps
Hey there! Remember, this repair guide was put together by the awesome folks at iFixit, but if you need a hand, don’t hesitate to schedule a repair with us at Salvation Repair! We’re here to help, and we can’t wait to show you just how easy fixing your device can be!
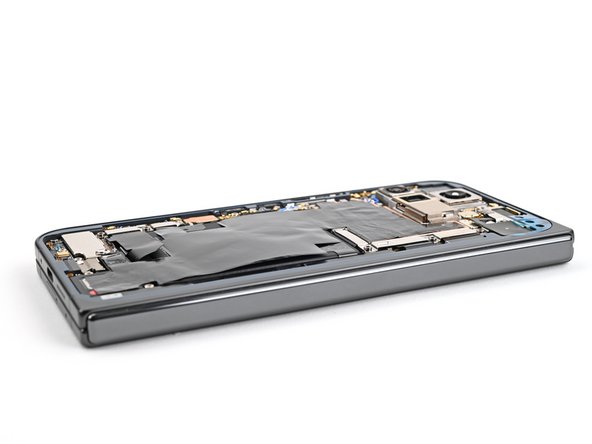
Ready to give your Google Pixel 9 Pro Fold’s front camera a fresh start? This guide will walk you through the process of replacing the inner front camera. We’ve got you covered, step by step. If you need a little help, you can always schedule a repair. Let’s get started!
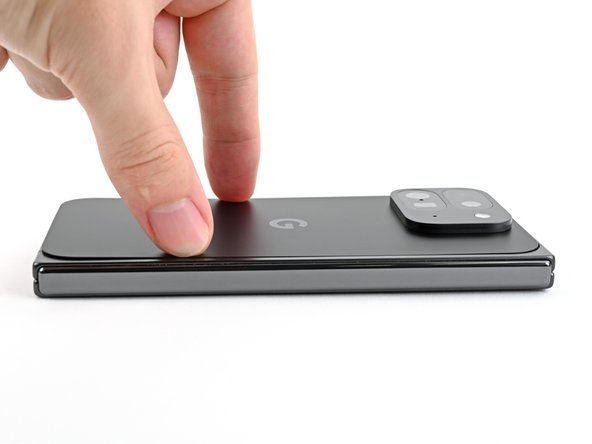
Step 1

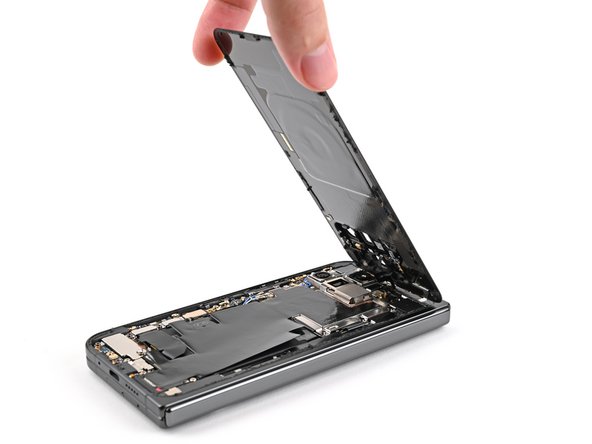
– Alright, let’s get this party started! First things first, unplug all the cables from your phone and give it a complete power down. You got this!
Step 2


If your back cover is super cracked, don’t worry! You can try covering it with clear packing tape to give the suction cup a better grip. If that doesn’t work, you can use strong tape instead of the suction cup. As a last resort, you can always superglue the suction cup to the back cover. No biggie, we’ve all been there!
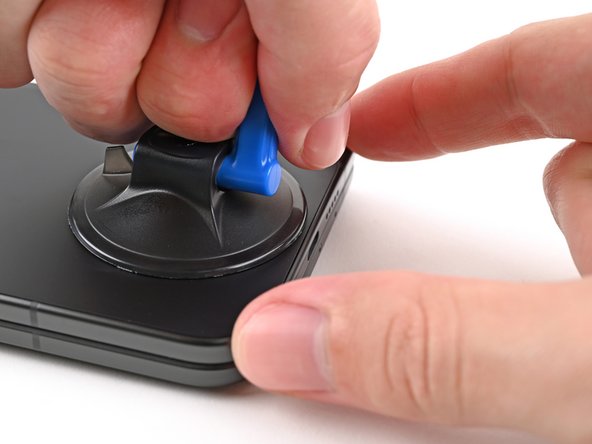
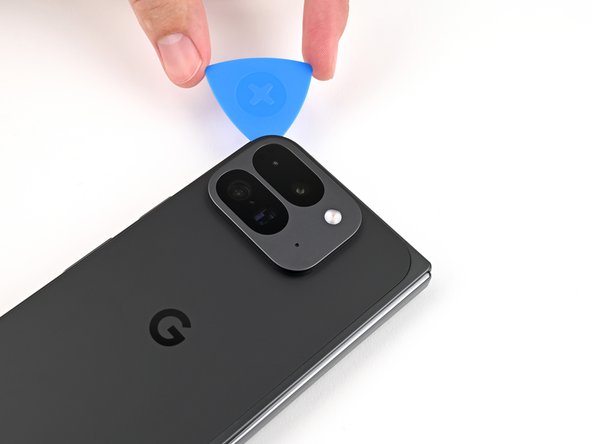
– First things first, grab a suction cup and stick it on the back cover, aiming for that sweet spot near the center of the bottom edge.
– Now, with one hand holding the phone steady, pull up on the suction cup with a firm, steady tug to create a little gap between that back cover and the frame.
– Once you’ve got that gap, slide in an opening pick to keep it nice and open.
Step 3

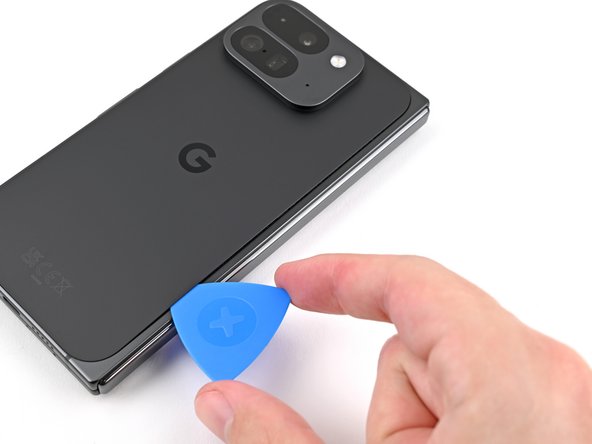
Alright, let’s keep those opening picks chill and not go too deep! You want to avoid messing with those metal springs around the frame. Just keep it to 3mm, and you’ll be good to go.
Want to get a visual on how long that opening pick needs to be? No problem! Just measure and mark it at 3mm. It’ll make things a lot easier to see.
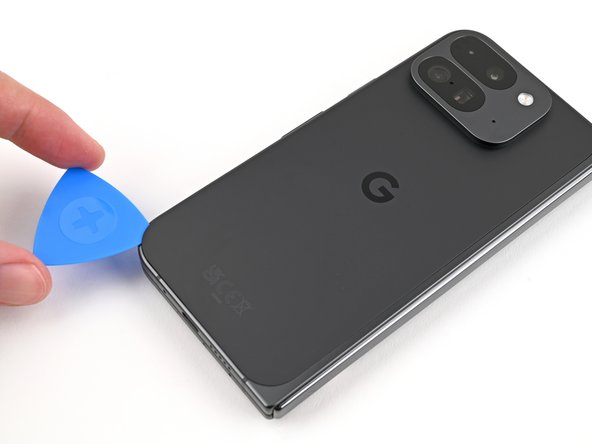
– Take off the suction handle from the back cover.
– Glide the opening pick around the bottom left corner and up the left side of the back cover to loosen the adhesive.
Tools Used

Step 4

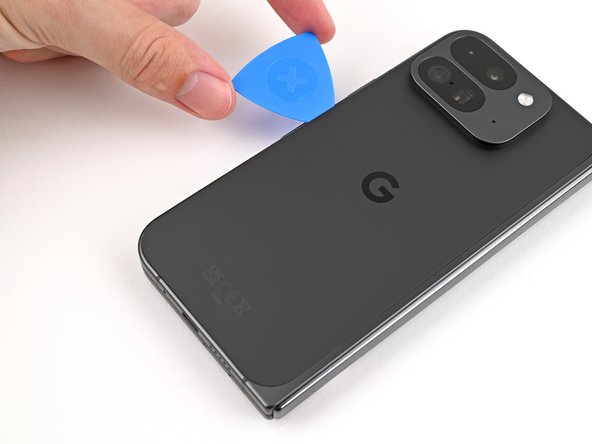
– Keep on sliding that pick around that top left corner and across the top edge of the back cover. You’re doing great!
Step 5
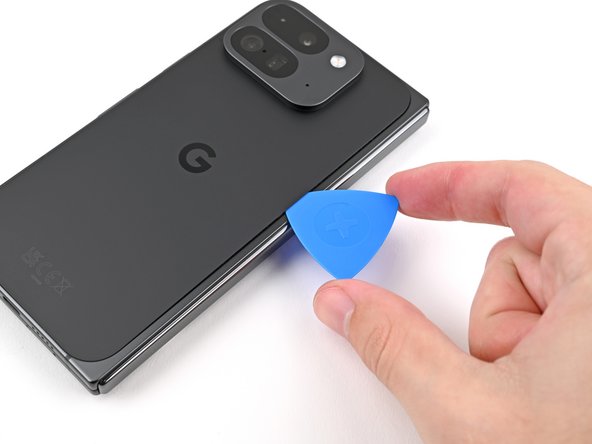

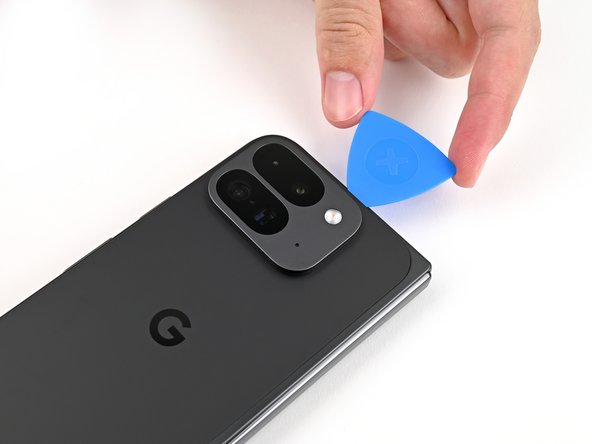
The adhesive on the right edge of the back cover is a bit more stubborn than the rest. Make sure to slide your opening pick in at least 4 mm to break that adhesive free.
– Gently glide your pick down the right edge and around that bottom right corner, freeing up the last bit of adhesive like a pro!
Step 6
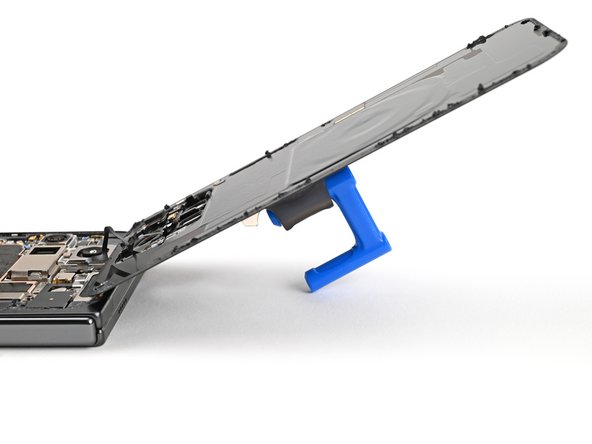

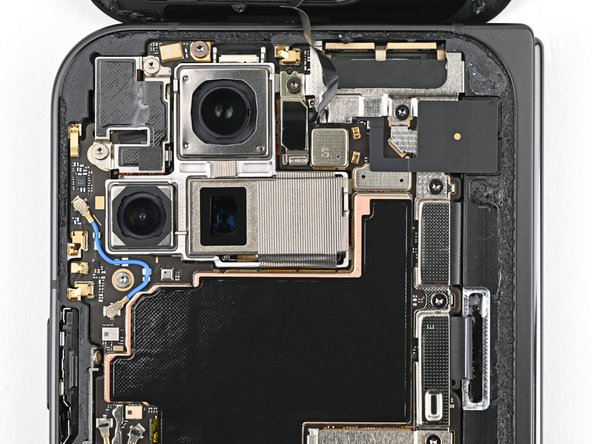
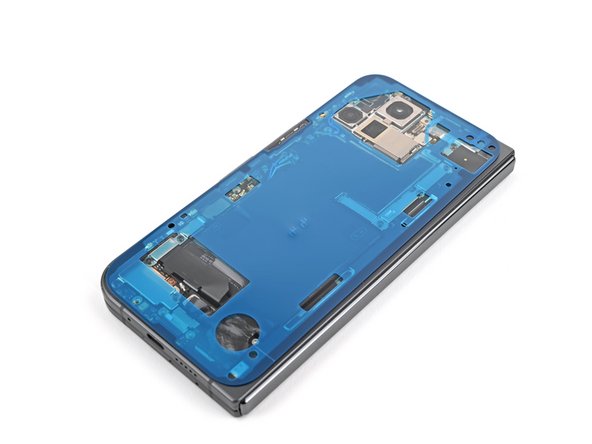
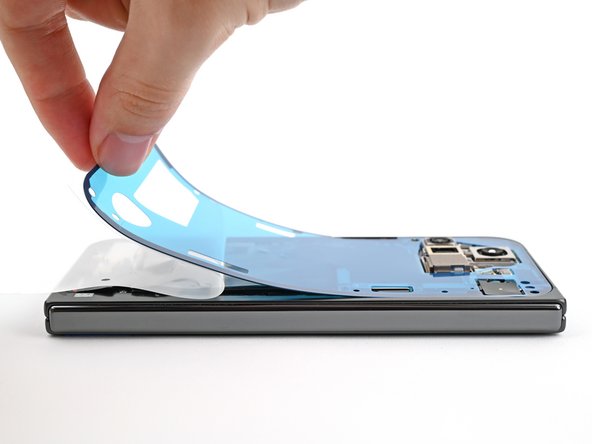
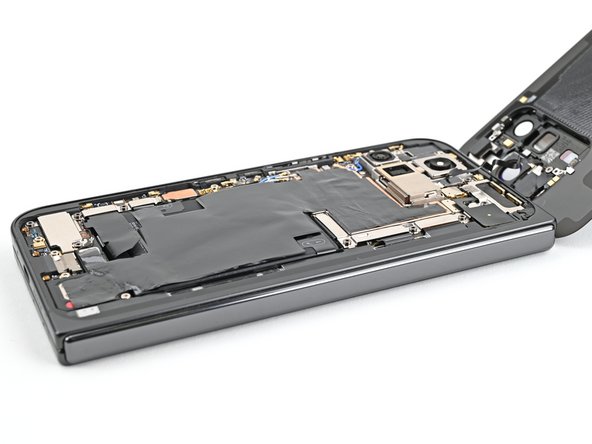
Hold your horses on removing the back cover just yet! It’s still hanging on by a cable.
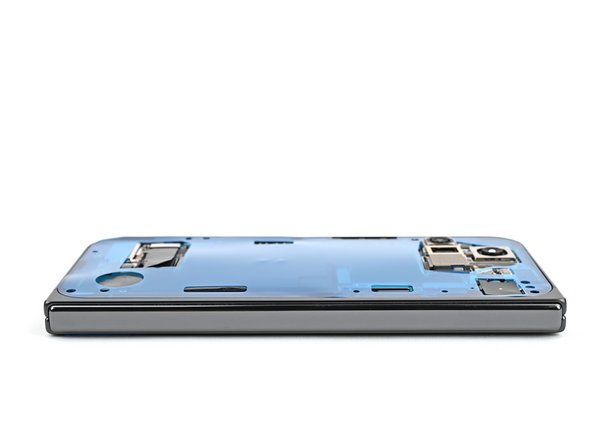
Now that you’ve tackled this part, the back cover should be free as a bird from the frame! If it’s still holding on a bit too tightly around the edges, no worries—grab an opening pick and gently work through any stubborn adhesive still lingering.
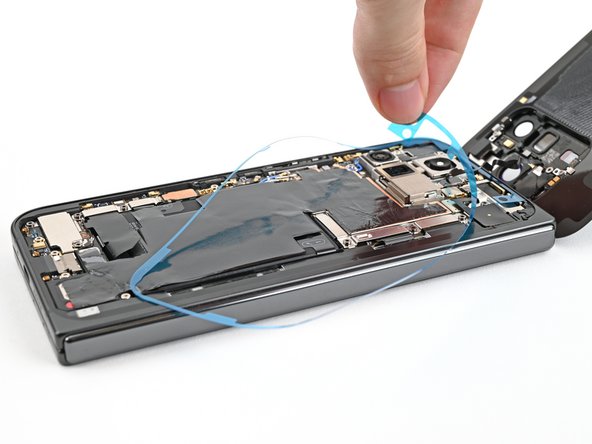
– Gently lift the bottom edge of the back cover and swing it over the top—like you’re flipping the pages of your favorite book.
– Use your suction handle or a clean, sturdy object to hold the back cover up, making sure that little cable stays relaxed and drama-free.
Tools Used
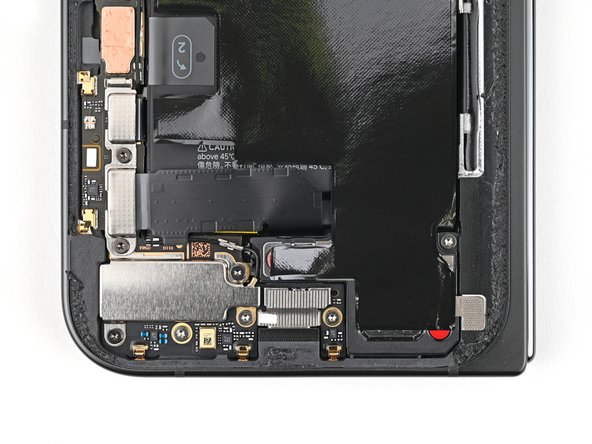
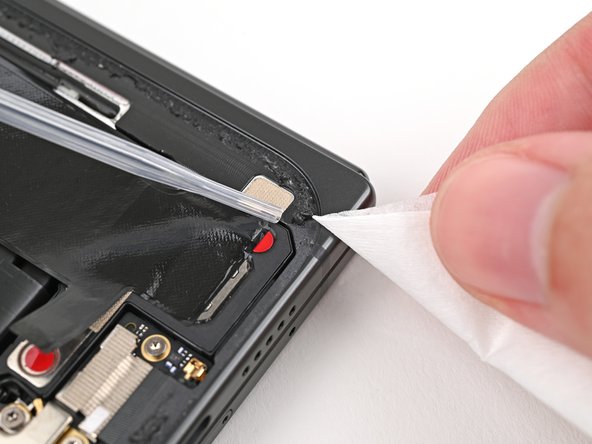
Step 7

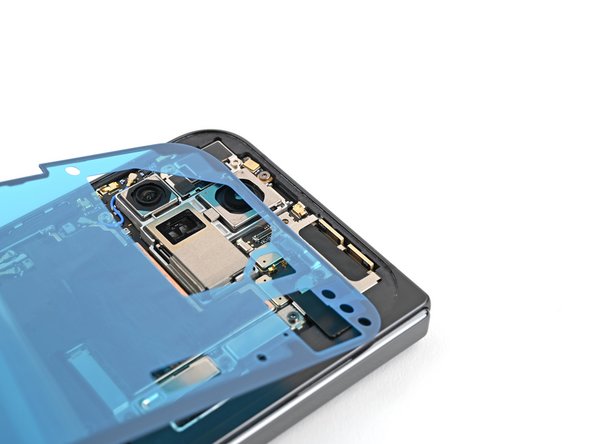
Hey, keep an eye on those screws, make sure they go back where they came from! We don’t want any rogue screws causing trouble.
The Pixel 9 Pro Fold is a bit fancy with its screws, but don’t sweat it. Standard Torx bits work just fine. Pick a size that’s the same or just a tad bigger than the screw. Don’t be shy, apply some pressure to avoid stripping those little guys.
– Grab your trusty Torx Plus 3IP driver and let’s get to work! Carefully unscrew that 3.0 mm-long screw holding the top bracket in place. You’re doing great!


Step 9

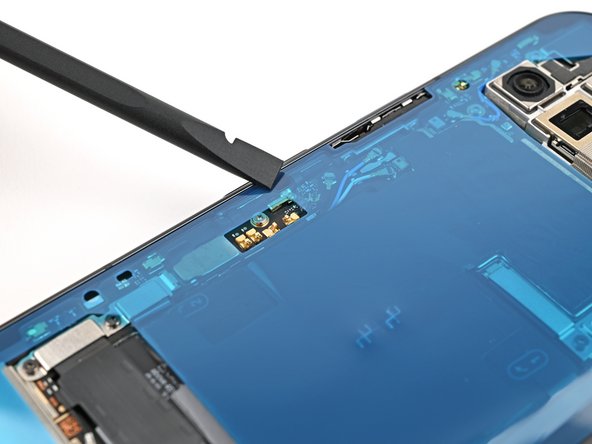
Hey there! No poking and prodding around willy nilly – you might accidentally shimmy the surface-bound gizmos right out of place!
– Gently slide the tip of your spudger beneath the lower edge of the back cover cable connector, like you’re revealing a hidden treasure.
– Carefully lift and disconnect the back cover cable with a bit of finesse.
Tools Used


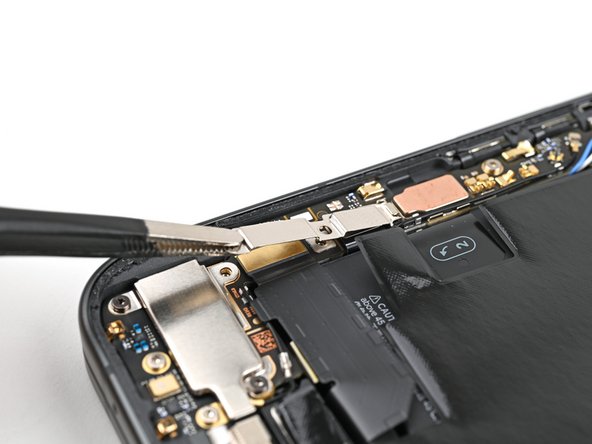
Step 11

– Grab your Torx Plus 3IP driver and unscrew the two 3.0 mm-long screws holding the base battery bracket in place. Easy peasy!

Step 13


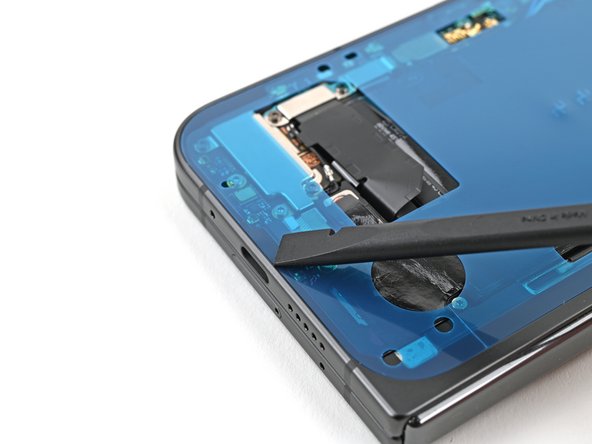
Stick to the script with your spudger—wandering off could knock loose some tiny but crucial parts. If you need help, you can always schedule a repair.
– Let’s loosen that battery! Slide your spudger under the bottom left corner of the battery connector, right near that shiny gold marker.
– Now, gently pry upwards to disconnect that battery. You’re doing great!
Tools Used
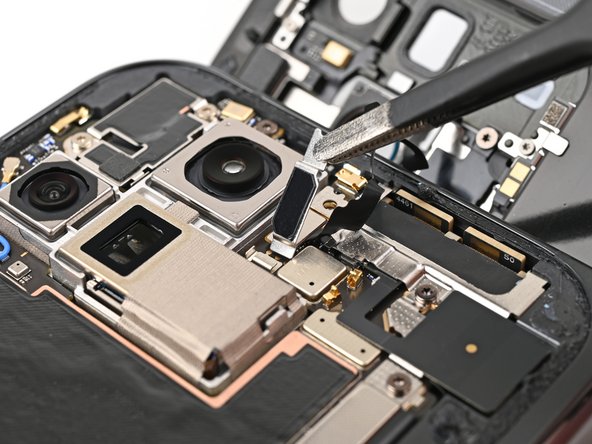
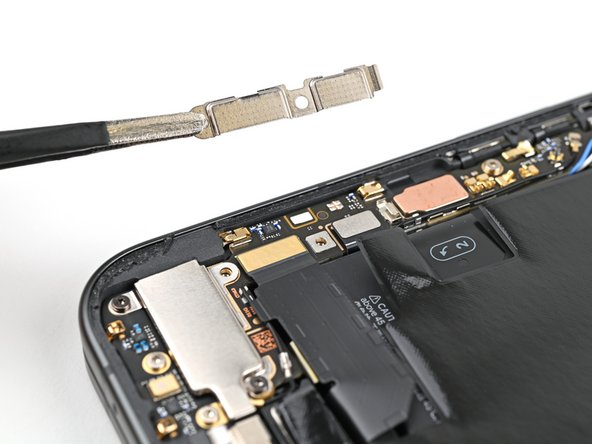
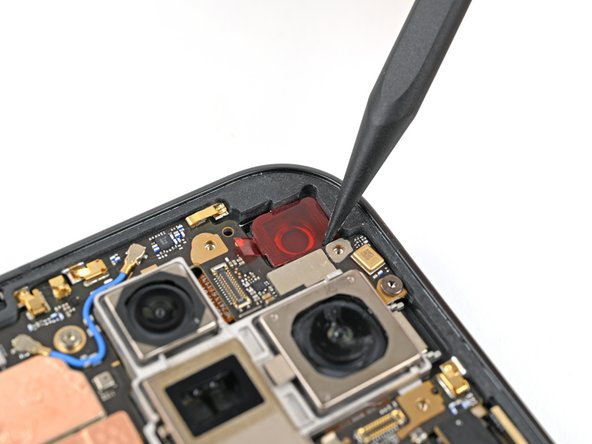
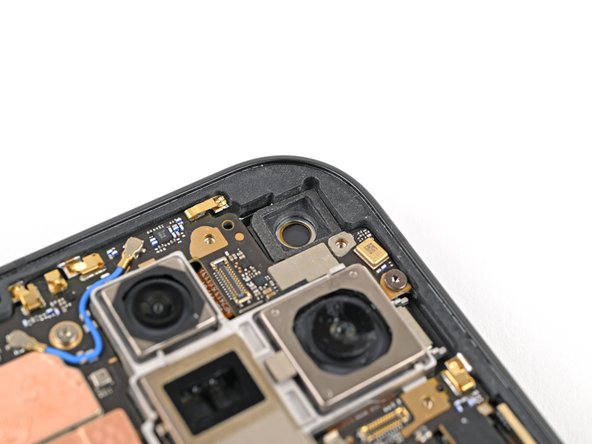
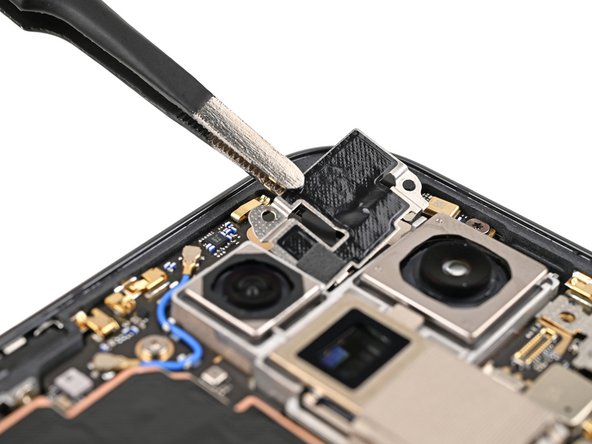
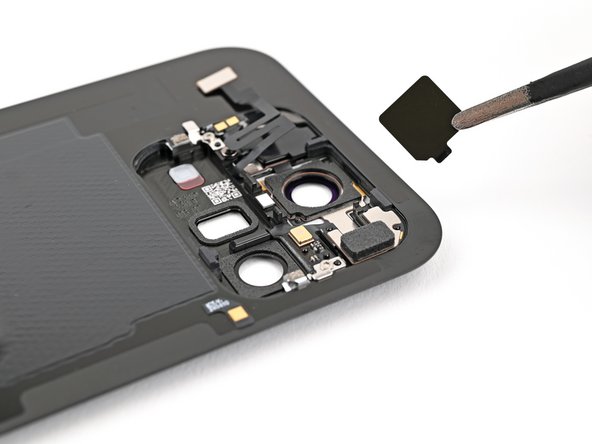
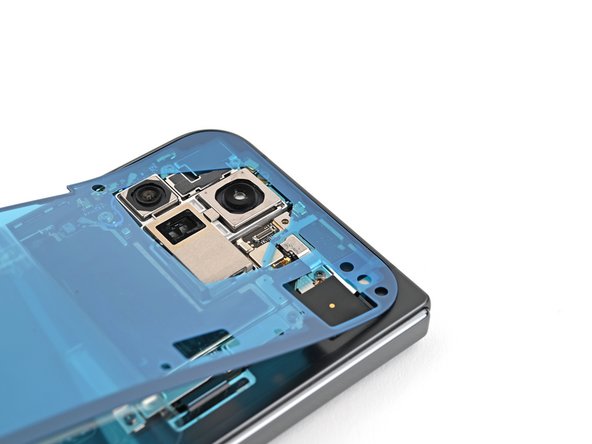
Step 14


– Grab your Torx Plus 3IP driver and remove those two 2.6mm screws holding down the inner front camera bracket. Easy peasy!
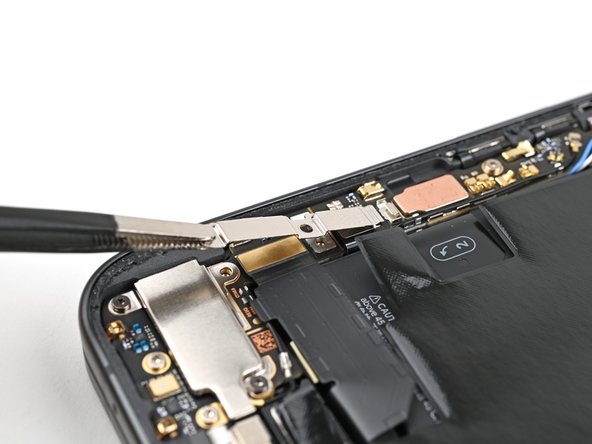
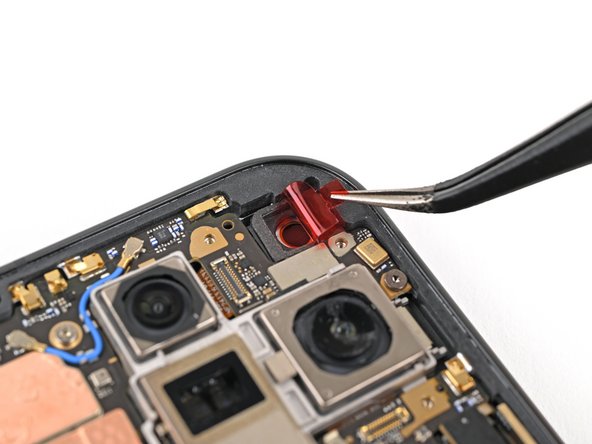
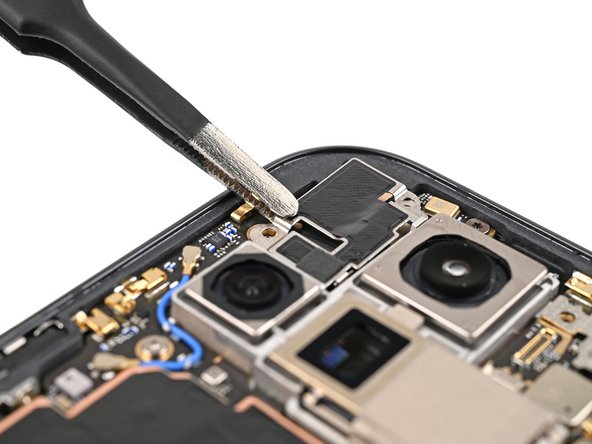
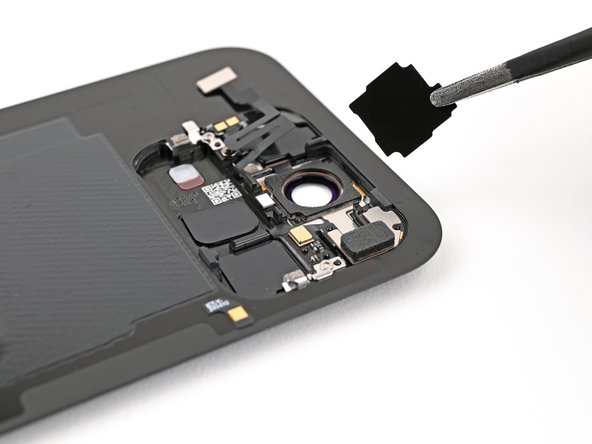
Step 15


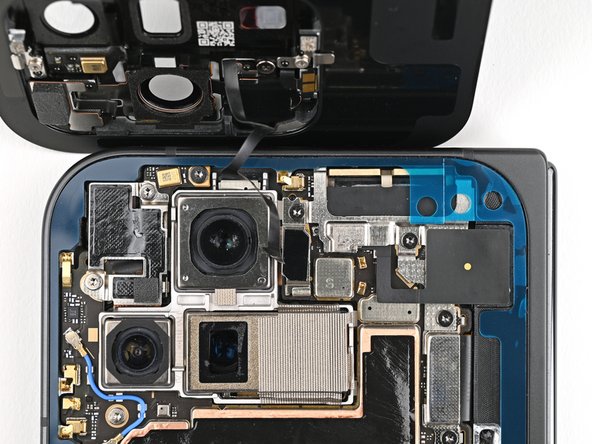
– Grab your trusty tweezers or just use your fingers to gently lift the inner front camera bracket upward and shimmy it over toward the left edge of the phone to pop those clips free.
– Once you’ve got it loose, go ahead and remove the inner front camera bracket.
Tools Used
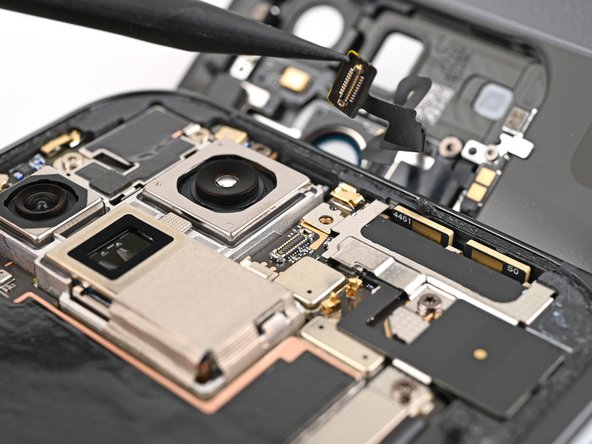
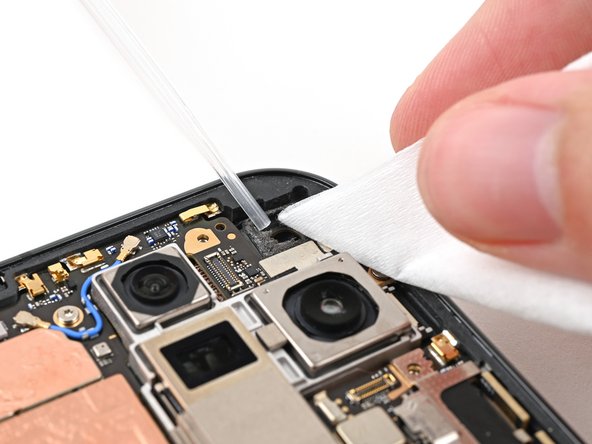
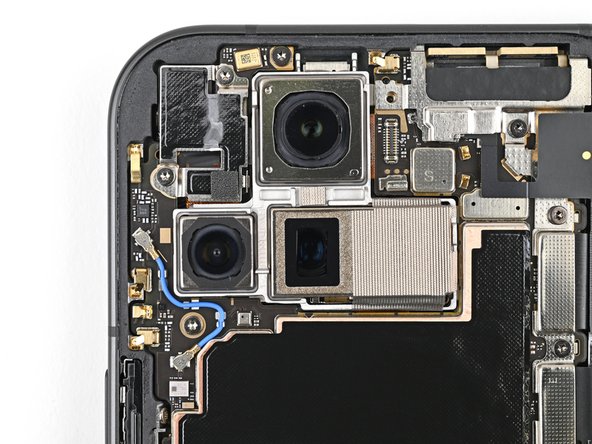
Step 16
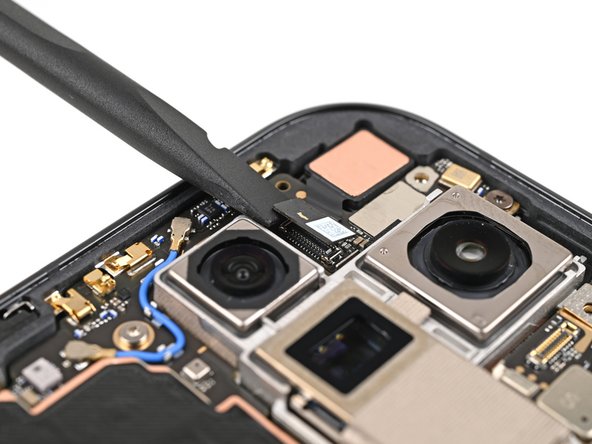

– Grab your trusty spudger and gently pop off that inner front camera press connector.
Tools Used
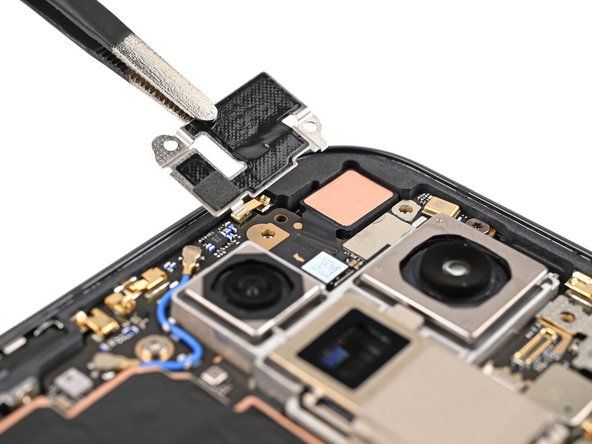
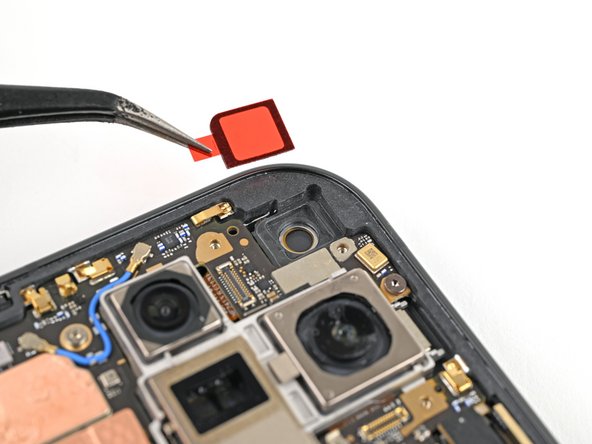
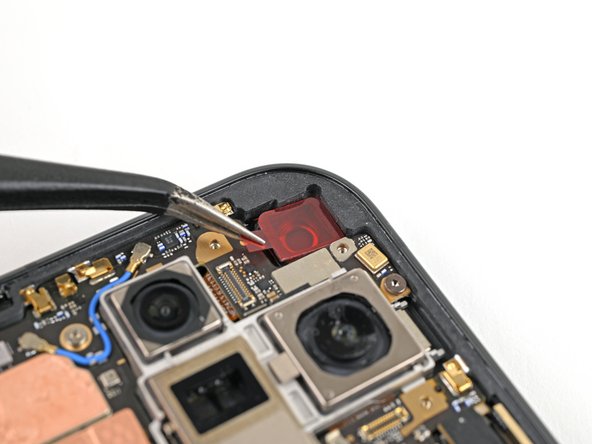
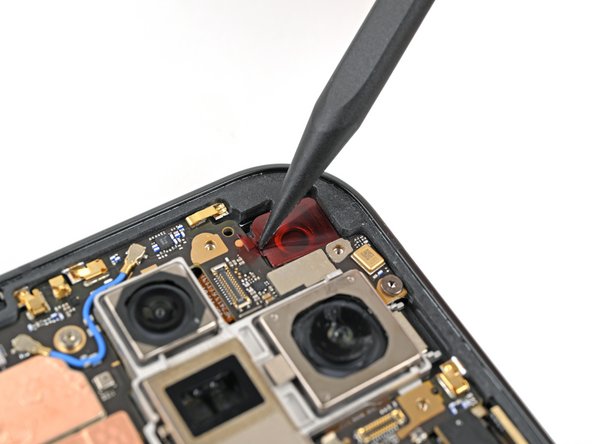
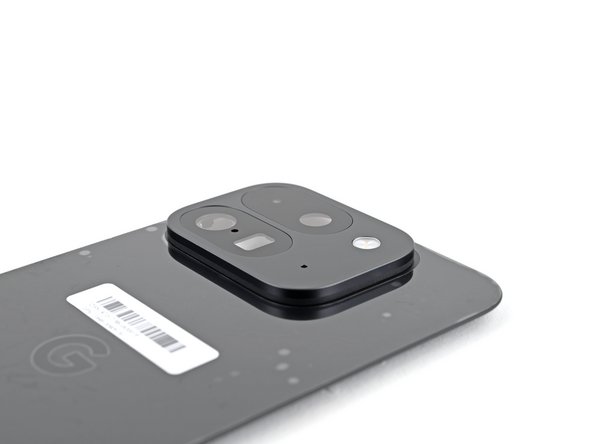
Step 17
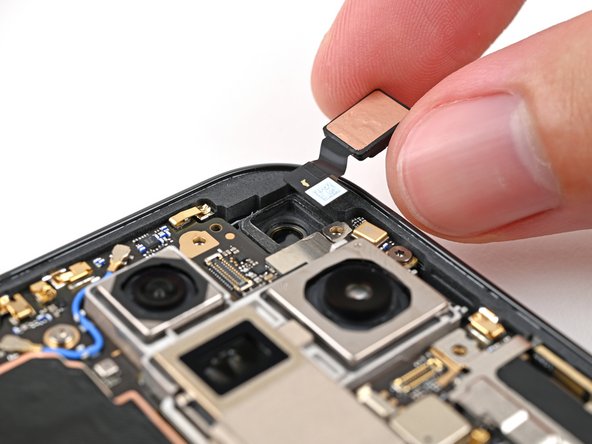

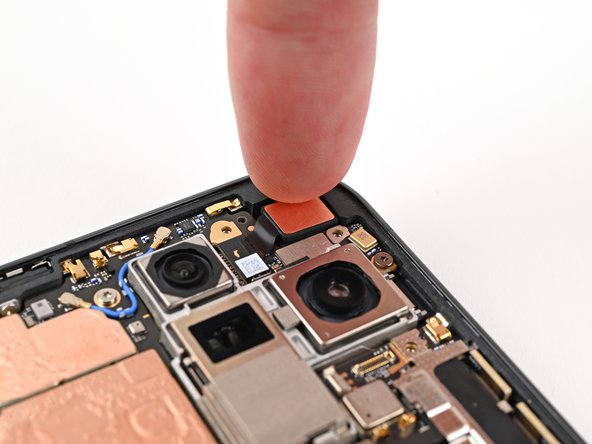
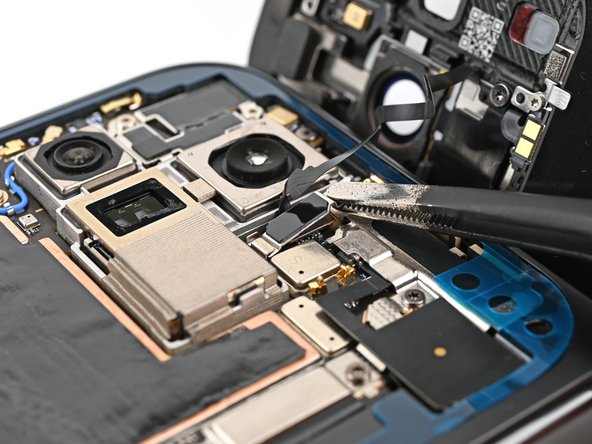
– Let’s get this camera out! Use the tip of a spudger to gently lift the inner front camera and free it from the sticky adhesive holding it to the frame.
– Time to remove that camera! Gently pull the inner front camera out of its spot.
Tools Used
Step 18

– Alright, champ! You’ve conquered the disassembly. Now we’re going to put it all back together. Let’s rock this!
Step 19

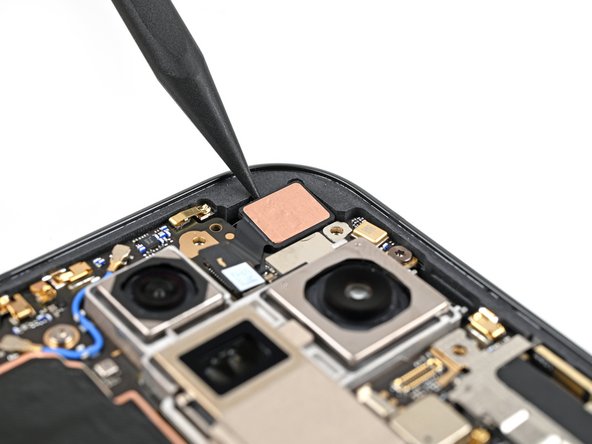
If your inner front camera adhesive has lost its stickiness or isn’t intact anymore, follow these next four steps to replace it. Otherwise, skip ahead. You’re doing great!
– Grab those tweezers or use your fingers to gently pull away the old adhesive foam from the inner front camera cutout. You’ve got this!
– Next up, take some isopropyl alcohol (make sure it’s over 90%) and a coffee filter or a lint-free cloth to wipe away any stubborn adhesive residue. You’re almost there!
Tools Used
Step 20

– Carefully peel off that replacement adhesive foam from its clear liner to unveil the sticky goodness underneath!
– Next, line up the adhesive foam with the cutout in the frame, making sure the handy pull tab is hanging out at the bottom of the phone.
– Now, gently place that adhesive right into the cutout and give it a snug fit!


Step 23

– Hold the inner front camera right above its cozy little cutout and reconnect that press connector like a pro.
– Gently lay the inner front camera into its snug cutout and press it down firmly to make sure it sticks to the adhesive like it belongs there.
Step 24

– Carefully slide the inner front camera bracket clip back into its cozy spot on the logic board, making sure to line up those screw holes just right.
Step 25

– Alright, let’s get this inner front camera bracket secured. Grab your Torx Plus 3IP driver, and carefully install the two screws that are 2.6 mm long. You got this! 💪

Step 27

– Slide the base battery bracket clip back into its slot on the logic board and make sure the screw holes are lined up perfectly.
Step 28


– Grab your Torx Plus 3IP driver and secure those two 3.0 mm-long screws to lock down the base battery bracket like a pro!
Step 29

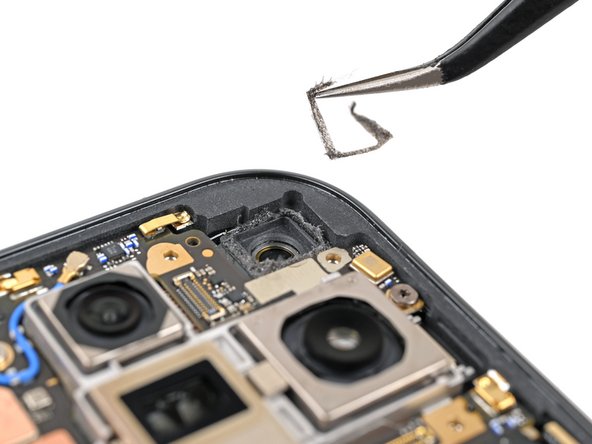
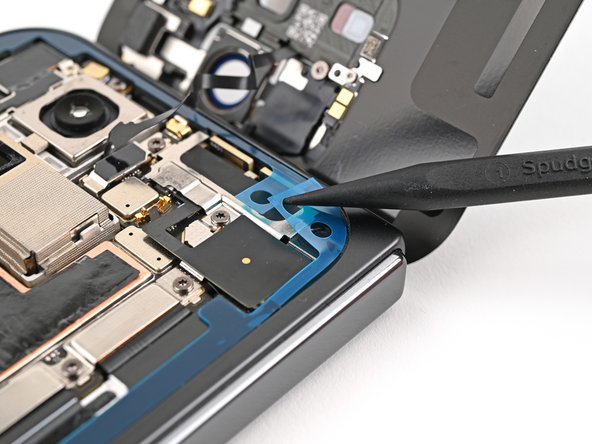
– Grab a spudger or your trusty fingers to peel away that old back cover adhesive like a pro.
– Next up, take some isopropyl alcohol (make sure it’s over 90%!) and a coffee filter or microfiber cloth to wipe away any leftover sticky bits. You’re doing great!
Tools Used
Step 30

Feeling excited to continue? If you’re swapping out your back cover for a shiny new one, let’s rock the next two steps. If not, no worries, we’ll skip ’em!
– Grab some tweezers or just your trusty fingers and gently lift out the three rear camera liners from the cozy spot inside your brand new back cover. You’re almost there!
Tools Used
Step 31

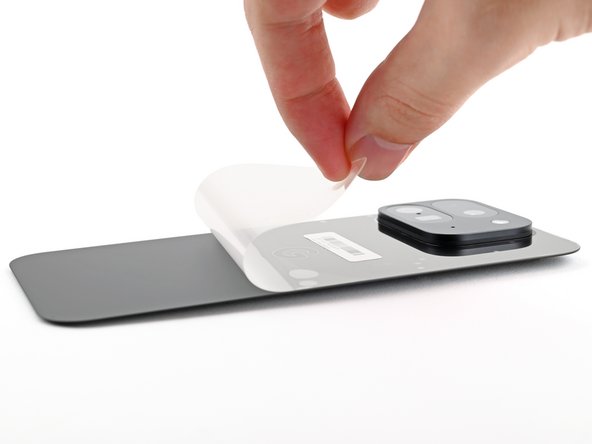
– Gently peel away those last pesky clear liners from the outside of the back cover. You’re almost there!

Step 33

No sweat! This step can be a bit tricky, but just take it slow and steady. You’ll be a pro in no time!
– Let’s get that new adhesive strip lookin’ good! Peel away the top half of the adhesive strip from its clear liner. Keep it folded, we’re just getting started.
– Now for some sweet alignment! Line up the top half of the adhesive over the frame, making sure those corners are lookin’ sharp.
– Time to stick it down! Place the adhesive on the frame. You’re doing great!


Step 35

– As you peel off the remaining clear liner, take your time to gently press the adhesive around the edge of the phone. You’ve got this!

Step 37


– Grab your trusty spudger and gently pry up that segmented tab hanging out at the bottom right corner of the big blue liner. It’s like unwrapping a surprise!
– Once the tab is lifted, peel off the large blue liner with care to reveal the secondary liner below. It’s like peeling back the layers of a delightful mystery!
Tools Used
Step 38

Hey there! Instead of trying to shove that connector into place like it’s a stubborn puzzle piece, take a breather. If it’s giving you a hard time, just reposition it and give it another go. You’ve got this!
– Now, with the back cover held up, carefully reconnect the back cover cable. You’re doing great!
Step 39

– Slide the top bracket clip back into its cozy spot on the logic board and make sure its screw hole is lined up just right.
Step 40

– Grab your trusty Torx Plus 3IP driver and get ready to rock! It’s time to secure that top bracket with a 3.0 mm-long screw. You’ve got this!


Step 43

– Now, line up the top edge of the back cover with the frame, and press down to make it stick. You’ve got this!
Step 44

If you’re feeling adventurous, grab a hair dryer or heat gun and gently warm up the edges of the back cover. This little trick can help strengthen the bond and keep everything snugged up nicely.
– Way to go! You’ve nailed that repair!
– Don’t forget to recycle your e-waste responsibly with an R2 or e-Stewards certified recycler.
– Things didn’t go as smoothly as planned? Give some basic troubleshooting a shot, or if you’re stuck, feel free to reach out for a little extra guidance!
– Cancel: I didn’t finish this guide.
–
Success!
