Google Pixel C Teardown
Duration: 45 minutes
Steps: 22 Steps
A few months after its debut and a bit of a tepid reception, the Pixel C is back in the spotlight, offering a fantastic discount for developers eager to explore the new Android N operating system. It looks like it’s time to dive into the teardown! For the latest and greatest updates, don’t forget to catch us on Facebook, Instagram, or Twitter for all your teardown news.
Step 1


– What makes a Pixel C tick? Let’s find out!
– 10.2″ LTPS LCD with a crisp resolution of 2560 x 1800 (308 ppi) – your screen is going to look sharp!
– Nvidia Tegra X1 64-bit quad-core processor paired with a 256-core Maxwell GPU – power and speed, all in one!
– 3 GB of LPDDR4 memory – multitasking just got a whole lot easier.
– 32 or 64 GB of storage options – plenty of space for all your apps and files.
– USB Type-C – because who doesn’t love reversible connections?
– 8 MP rear camera and a 2 MP front camera – capture memories and selfies with style.
– Android 6.0 Marshmallow – a smooth, easy-to-use interface to power everything.
Step 2


Having four microphones is a big upgrade from the usual two – it’s like a superpower for noise cancellation. By comparing signals from multiple locations, it can better eliminate ambient noise, making your audio sound clearer and more crisp.
– The Pixel C showcases a sleek unibody aluminum body, complete with stereo speakers, USB C, and the go-to power and volume buttons that we all know and love.
– At the top, you’ll find openings for those “quad noise-cancelling microphones.” A cool touch for a device still waiting for its moment to shine with always-on voice activation.
– But enough admiring the exterior—let’s bring on the heat and dive into this gadget!
– (By the way, this feature is “coming soon.”)
Step 3


A little finesse with the spudger goes a long way.
And just take a peek at that adhesive—it’s thick, gooey, and all over the place. No wonder this one was tough to tackle!
– After a bit of heat and some serious suction power, we’re ready for takeoff!
– Hold up! We’re still attached to the launchpad: a sneaky little cable for the front-facing camera is keeping us from opening up right away.
– With that camera cable taken care of, we can finally pop open the Pixel C, although the wide display data ribbon cable is still hanging on.
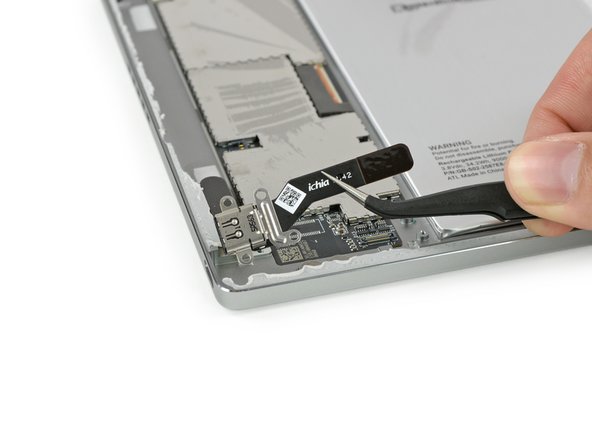
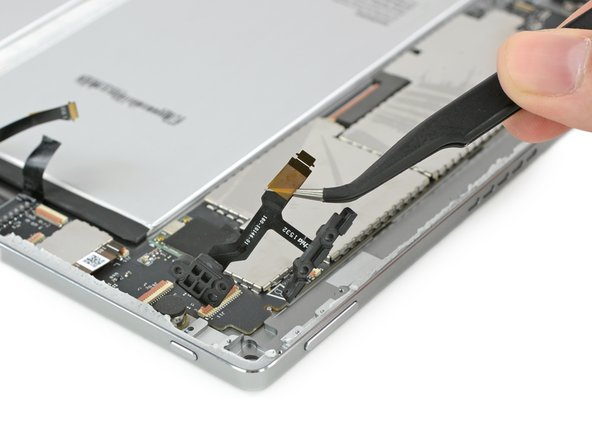
Step 4


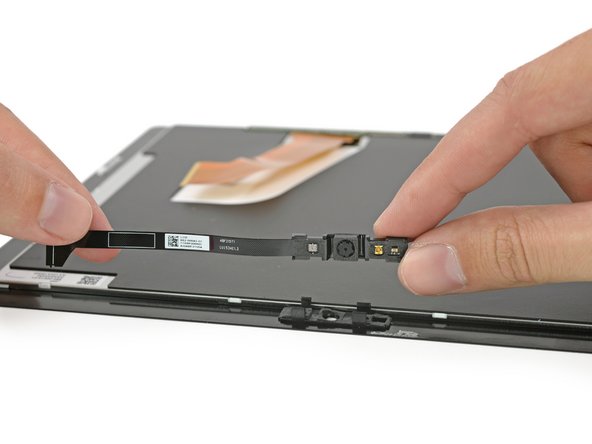
The front-facing camera assembly is equipped with a 2 MP selfie camera, an ambient light sensor, and a little LED that indicates when the camera is active.
– Unlike most tablets, with the Pixel C, the front-facing camera assembly is part of the display itself, rather than snugly tucked into the device’s unibody chassis. Fun fact, right?
– There’s a small daughterboard connecting the display data cable, and it’s where the Synaptics touchscreen controller (S3370B) calls home.
– This setup is a bit of a hassle, creating an extra cable to unplug when you’re diving into the device. But hey, adventure awaits!
Step 5


The case has a total of 17 magnets cleverly placed throughout, making it super easy to connect to the keyboard like a pro!
– First up, let’s check out the display—it’s time to see what we’re working with!
– Safety first! We’re going to disconnect the battery before diving in—this one’s a bit of a workout.
– The connector is playing hide and seek under a couple of ribbon cables and a piece of tape.
– A little poke at the battery reveals it’s stuck on there like it’s auditioning for a role in a horror movie… We’ll tackle that later!
Step 6
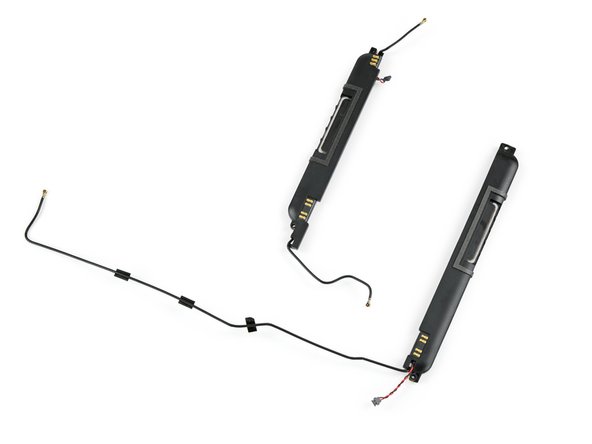

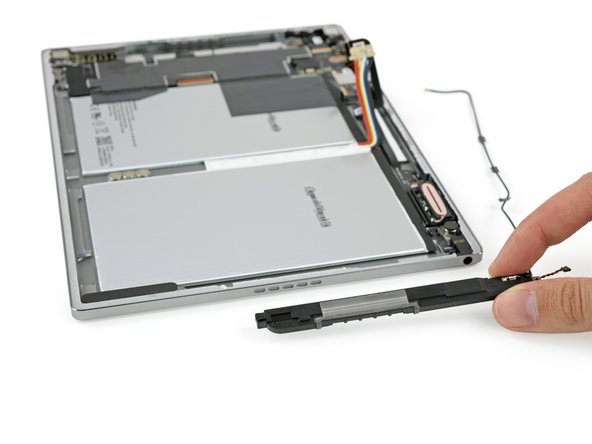
– What’s on the agenda? Maybe it’s time to tackle those snazzy stereo speakers!
– Just a heads up, the speakers come with some antennas stuck on, so swapping them out might require a little extra effort—think peeling and re-sticking. No biggie!
– The backs of the speakers are equipped with spring contacts that connect to the back of the case. This setup is likely for grounding or helping to transmit that sweet WiFi signal to the antennas.
Step 7
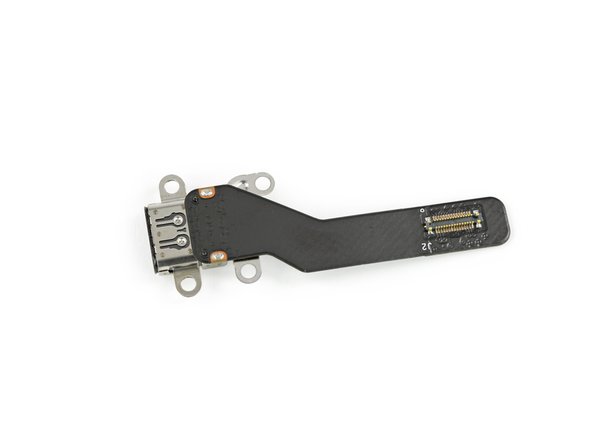

– The USB-C port bracket is held in place by just a couple of standard Phillips screws—after that, removing it is a breeze and super user-friendly!
– We’re all for seeing ports as their own little heroes! This port is probably going to go through its fair share of wear and tear over time, so having it as a modular component means you can swap it out easily and affordably (just make sure you get into the device without cracking the display…)
Step 8


– Get ready for some fun with modular parts ahead!
– Pop off the metal bracket and watch the rear-facing camera make its grand entrance from its cozy spot.
– The power button and volume rocker are held in place by just two screws each. With short cables and easy button covers, swapping them out will be a piece of cake!
– Tablet cameras can be a bit of a mystery, but with 8 MP, you’ll be snapping decent pics of your furry friends in no time—no need to reach for your phone!
Step 9

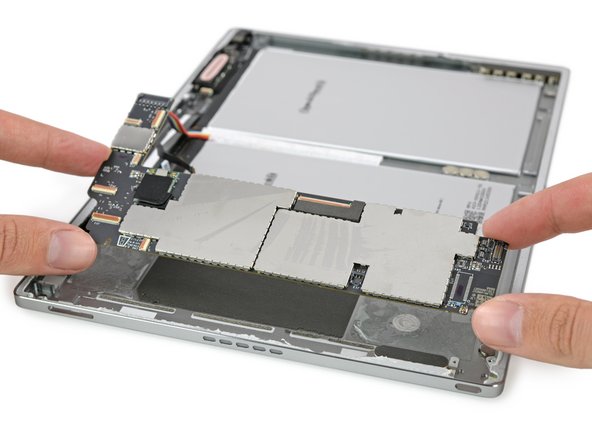
– After enjoying the ease of modular parts, we hit a snag: a stubbornly stuck motherboard.
– With no screws in sight, we decide to bring on the heat.
– At last, we free the tablet’s heart, pulling it away from two adhesive pads, some (nonstick) foam padding, and a couple strips of conductive foam.
– And it’s black too! Talk about a blast from the Apple past. Thank goodness the USB port is modular!
Step 10

– Let’s meet the stars of the show:
– Nvidia Tegra X1: A snazzy 64-bit quad-core powerhouse.
– Samsung KLMBG4GEND: Your trusty 32 GB eMMC flash storage buddy.
– Samsung K4F2E304HMMGCH: Rocking 6 Gb (1.5 GB) of LPDDR4 RAM—two of these give you a delightful 3 GB total.
– Broadcom BCM43540LKUBG: The cool cat of 5G Wi-Fi 802.11ac.
– Nuvoton NAU88L25: Your audio sidekick, making sounds sweeter.
– STMicroelectronics STM32F3x8: A 32-bit ARM Cortex-M4 microcontroller with charm.
– Infineon SLB 9645: The trusted platform module keeping things secure.
Step 11


– Let’s get into the nitty-gritty of IC identification, part two! Here we go:
– Check out the Realtek ALCxxxx card reader controller – it’s the one keeping your card reader in check.
– Next up, we’ve got the Analog Devices audio amplifier (likely) – it’s responsible for that sweet sound.
– Don’t forget about the Maxim Integrated MAX77620A power management – helping your device flaunt its power skills.
– And of course, the Maxim Integrated MAX77621A power management, keeping things running smoothly.
– Say hello to the Diodes Incorporated PI3USB30532 USB 3.2 Type-C analog switch – facilitating all those connections like a champ.
– Then, there’s the Diodes Incorporated PI3USB9281C, protecting the USB port with charger detection like a trusty guardian.
– Last but not least, we have the Winbond W25Q128FW 128 Mb Serial NOR flash memory – your data’s safe haven.
Step 12


– IC Identification, pt. 3 (sensors):
– Next up, sensor squad! Meet the Bosch Sensortec BMI160—your device’s go-to for smooth motion tracking. This 3-axis accelerometer/gyroscope keeps things stable whether you’re flipping screens or gaming like a pro.
– Joining the party is the Bosch Sensortec BMM150, a 3-axis magnetometer that helps your device know which way is up (or north). It’s all about precise positioning!
– Last but definitely not least, the Texas Instruments TMP451 temperature sensor keeps an eye on your device’s heat levels, making sure everything runs cool and efficient.
Step 13

This keyboard doesn’t have ports of its own—it’s all about that inductive charging from the tablet! We’ll be hunting for a matching coil in the peripheral to make the magic happen.
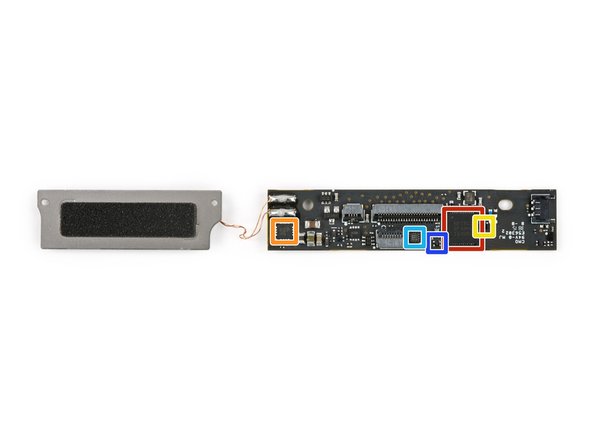
On this PCB, you’ll spot some cool chips: an STMicroelectronics STM8S003F3 8-bit microcontroller, a Semtech TS32101 DC-DC boost converter, and a Semtech TS51231 wireless power system transmitter.
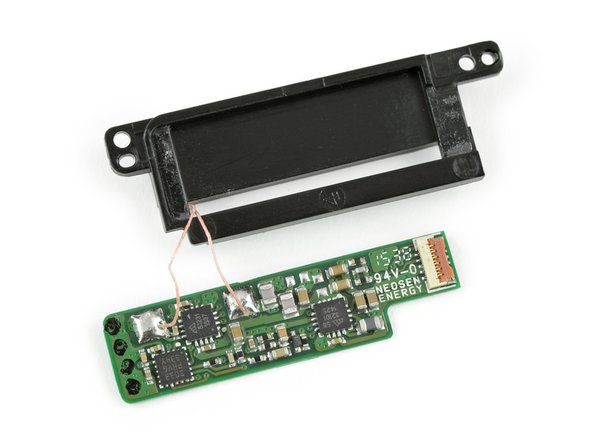
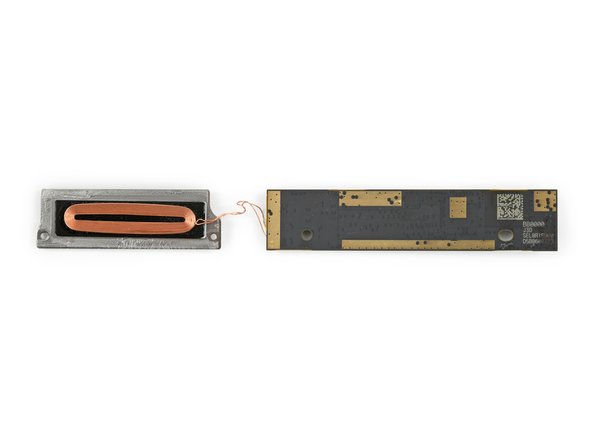
– Now, let’s take a look at the clever coil that powers the keyboard when it’s attached in the correct position.
– Underneath the coil, we’ve got a control board that likely converts the battery’s DC power into AC power to energize the coil.
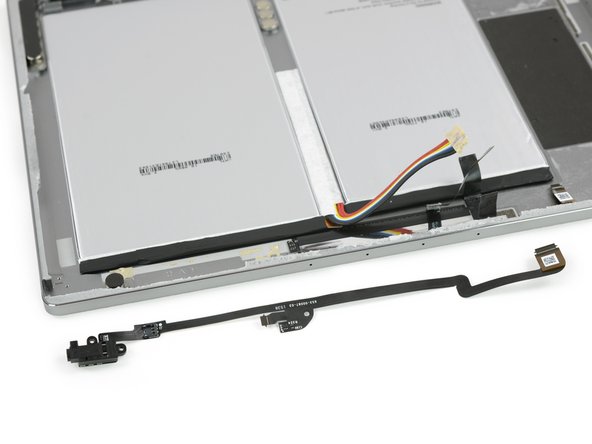
– Next, we get to carefully remove the remarkably long headphone jack port – it’s quite the record-breaker!
– It’s worth noting that this port does double duty, serving as both an interconnect cable for the inductive coil and the right speaker.
Step 14


This slick foil layer acts like a secret agent for light, catching those sneaky beams from the board and redirecting them through a light guide—so they shine right where they should, out through the case.
– This section of the case is quite intriguing; just beneath the headphone jack layer, there’s a shiny backing hiding an LED board.
– Interestingly, the LEDs here point upward toward the display rather than toward the indicator bar in the case. That’s a bit unexpected.
– At the very bottom layer, you’ll find an array of four noise-canceling microphones.
– Whether doubling up on microphones actually translates to a performance boost over the usual dual-microphone setup remains to be seen.
Step 15


We think giving our Li-Ion battery a little more time to chill until tomorrow sounds like a great plan, so we’re pausing here.
– Alright, folks, it’s time to roll up our sleeves and take on that hefty battery! But first, let’s take a moment to check out those dazzling specs.
– After a bit of a warm-up, we’ll start gliding that plastic card along the edges. Time to get serious!
– Even at the gentlest angles, let’s curl that battery like a pro at the art of pencil shaving. This adhesive is sticking around for a reason!
– With a robust 34.2 Wh, the Pixel C is definitely flexing its muscles, surpassing the 27.9 Wh of the 9.7″ iPad Pro, but still trailing behind the powerhouse Surface Pro 4 at 38.2 Wh.
Step 16


– Let’s dive into the Pixel C’s keyboard. It’s not part of the basic package, but it definitely deserves a look.
– Since there’s no obvious place to start, we’re getting creative—poking, heating, and prying our way in.
– First up, the plastic bezel gives way. And hey, looks like we made the right move. We’ve uncovered an inductive charging coil and a few magnets already. Not bad!
Step 17
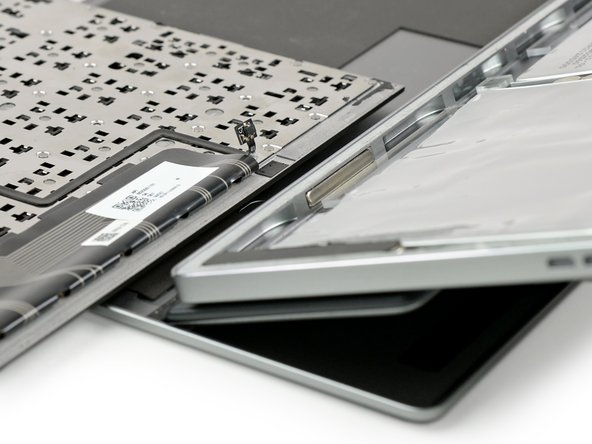


– Let’s start by loosening a few screws and cranking up the heat a bit to gain access to the main body.
– Once we do that, the keyboard pops right off—no annoying cables connecting it to the bottom case, and none lurking near the edges. How great is that?
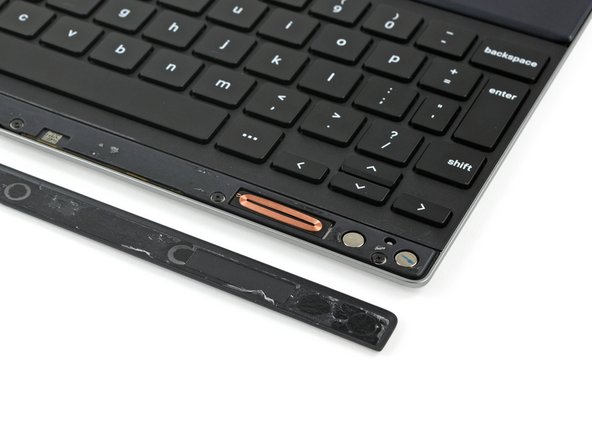
– Now, we’ve got a big cable for the keyboard, but what’s the deal with that skinny one?
– That slim cable lines up perfectly with a magnet in the Pixel C’s casing—so, we’re guessing it’s a Hall effect sensor. This clever setup means the keyboard immediately knows it’s attached to the tablet, allowing you to jump right into typing!
Step 18


– Grab an opening pick and easily pop off those single keys—no sweat.
– Underneath, you’ll spot the classic scissor mechanism. For larger keys, there’s an extra little metal bar keeping things sturdy.
– The keys snap back on like a charm! But watch out—those tiny plastic clips can be fragile, so double-check the orientation before you click them back into place.
Step 19


– The base seems to be just a heavy chunk with a hinge, while all the important parts are riding along with the keyboard assembly.
– Let’s put the cables on hold for now and carefully extract the adorably tiny battery.
– Without any markings or specs, there’s not much to say about this battery—except that it’s small and charges inductively via the tablet.
Step 20

– First up, gently detach the keyboard and sensor cable, then it’s time to lift the main board—along with that nifty inductive charging coil—right out of the keyboard.
– Now let’s meet the tiny powerhouse: the Nordic Semiconductor nRF51822, our 2.4 GHz Bluetooth buddy, paired with a 32-bit ARM Cortex-M0 microcontroller.
– Next in line is the Semtech TS51221, our trusty wireless power receiver voltage regulator, making sure everything runs smoothly.
– Don’t forget the STMicroelectronics BAL-NRF01D3, a 50 Ω Bluetooth balun that keeps our signals strong and clear.
– We’ve also got the Dialog Semiconductor (formerly Silego) SLG46110, a programmable mixed signal array that likely lends a helping hand.
– Last but not least, the Texas Instruments LP5907SNX-3.3, a 250 mA / 3.3 V LDO regulator keeping the voltage just right.
Step 21


– Welcome to the last step of the journey: tackling the tablet mount hinge! This part is as glued together as your favorite childhood memories, but after a little heat magic, we get the hinge components to break free.
– Once we lift the cover, surprise! More magnets! Looks like this tablet is really committed to staying put…
– This neat layout shows off the straightforward, yet sturdy design of this essential component.
Step 22


– The Pixel C Repairability Score: 4 out of 10 (10 being the easiest):
– Several parts, including the USB-C port, are modular and can be replaced individually, which is a win.
– The motherboard is locked down with some seriously stubborn glue to the rear case—prepare for a challenge.
– Super strong adhesive anchors the battery to the rear case, making replacement a sticky situation.
– The display is fused, meaning you’ll have to pry it off to access any internal parts—thanks to some relentless adhesive, this step is no walk in the park. If you need help, you can always schedule a repair.
Success!
