Google Pixel Display Adhesive Replacement Guide
Duration: 45 minutes
Steps: 8 Steps
This repair guide comes straight from the talented folks at Salvation Repair and hasn’t received a thumbs up from Google. But don’t worry, we’ve got your back!
Authored by the folks at iFixit, this guide hasn’t been endorsed by Google. Apply replacement adhesive to your Pixel or Pixel XL display after a repair with confidence. Note: Some replacement screens don’t come with an earpiece speaker grille. If yours doesn’t, transfer the grille from your old display to the new one before installing. Or, if you need help, you can always schedule a repair. Before you dive in, ensure you’ve already removed your Pixel’s display assembly and set it aside. For detailed instructions, check out the specific model guides here: Google Pixel Google Pixel XL
Step 1


While high-concentration isopropyl alcohol is usually a-okay for your gadgets, it might just nibble away at the foam padding on the midframe. So, take it easy while you’re scrubbing those tight corners of the frame!
When putting your display back together, don’t forget to clear off all that old sticky stuff! It’s like giving your device a fresh start.
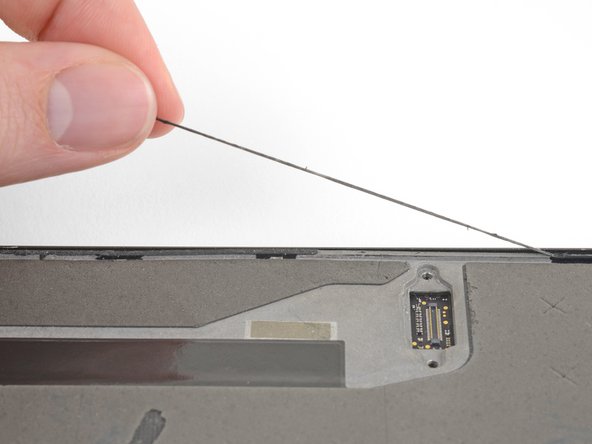
– Gently peel off all that old display adhesive from your phone’s body. It’s like peeling a sticker – satisfying, right?
– Grab your trusty spudger and use its point to scrub away any stubborn bits of adhesive that just don’t want to leave.
– For the best results, give the area a good clean with some 90% or stronger isopropyl alcohol. This helps prep the surface for the new adhesive – think of it as giving your phone a little spa treatment!
– Remember, using metal tools can scratch that beautiful glass! So, handle with care!
Tools Used


Step 2


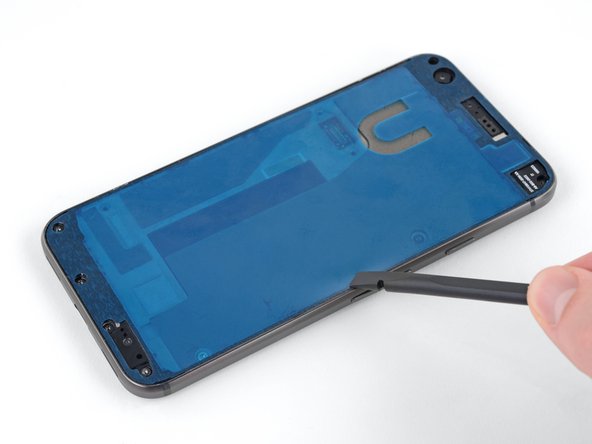
– Stick the new adhesive along the edges of the frame, but heads up, the center might be pre-filled.
– Get rid of that extra center piece by peeling away both the white paper layer and the black adhesive layer, starting from the U-shaped cutout. If you need help, you can always schedule a repair.
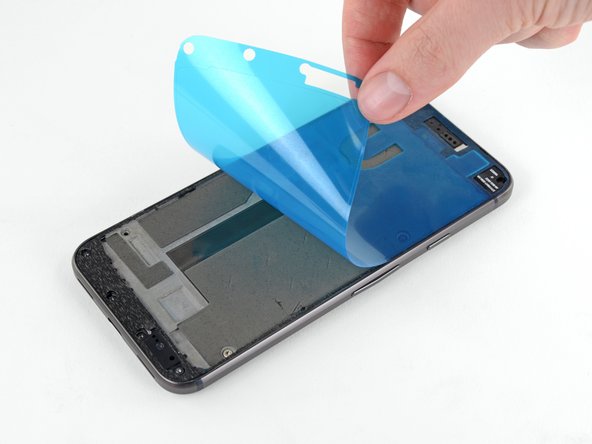
Step 3


– Time to say goodbye to that pesky paper liner! Gently peel it off and toss it away to reveal the sticky goodness waiting underneath.
Step 4


Ensure the adhesive sheet’s positioned just right, with the rectangular cutout for the earpiece speaker up top.
Step 5


Grab that spudger and use its flat end to gently press along those tricky edges and hard-to-reach spots. You’ve got this! If you need help, you can always schedule a repair.

Step 7


Hold up! Don’t touch that display cable while your phone’s powered on. Trust us, it’s not a good idea.
– Pop that display cable connector back on.
– Screw the connector bracket snugly in place.
– Power up your phone to check if the repair did the trick. If you need help, you can always schedule a repair
Step 8

– Once you’re confident that your display is working like a champ, gently line it up with the chassis and give it a nice, firm push into place.
– To really get that display adhesive to stick like it means it, warm up the edges of the display and then pop your phone face-up under a hefty stack of books for 30 minutes. It’s like a spa day for your device!