Google Pixel Slate Front-Facing Camera Replacement
Duration: 45 minutes
Steps: 6 Steps
Ready to give your Pixel Slate a brand new front-facing camera? This step-by-step guide from Salvation Repair will walk you through the process of removing and replacing the old one. Follow along and you’ll be taking stunning selfies in no time. If you need help along the way, don’t worry – you can always schedule a repair.
Step 1


– Place your device with the screen facing up—let’s get that screen ready for action.
– Grab your trusty opening tool and carefully separate the screen from the main body of the device.
– Now, use the suction cup to gently lift the screen off the body. Just a little pull, and you’re almost there!
Tools Used

Step 2


– Carefully unhook the three flat wires from the screen – treat them like delicate spaghetti!
– Gently pry the screen away from the device’s body, like you’re unveiling a surprise gift.
Step 3
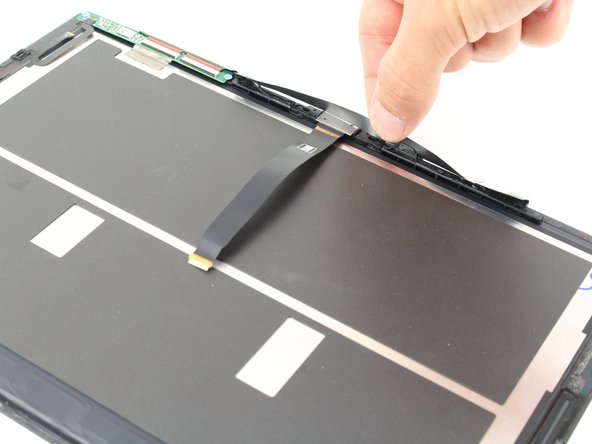


– Once you’ve got the screen off, flip it over so the display is facing down.
– Carefully peel back the black adhesive strip that’s hiding the front camera, revealing that shiny silver plate underneath!
Step 4


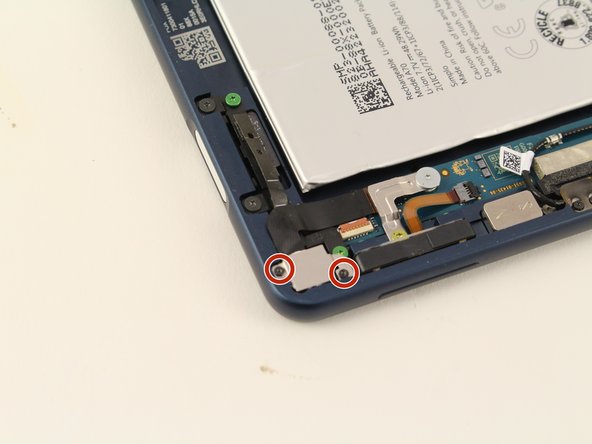
– Give that adhesive tape a gentle tug to reveal the two sneaky black 2mm screws holding down the cover plate. They’re just hiding, waiting to be discovered!
– Grab your T2 Torx screwdriver and unscrew our little friends—those two 2mm screws. You’re almost there!
Tools Used

Step 5


– After taking out the two 2mm screws, gently lift and pop off the cover plate—easy peasy!
Step 6
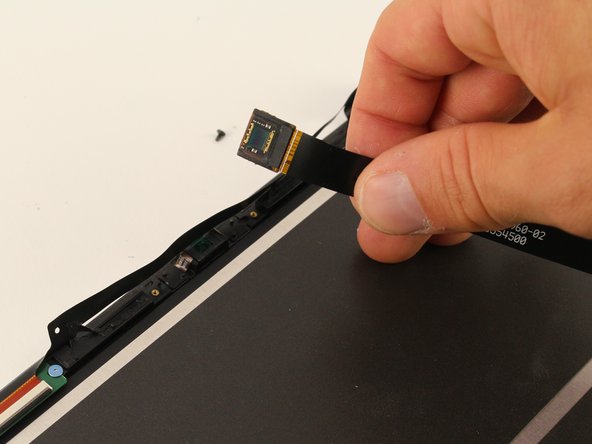

The camera might be stuck to the screen with some sneaky adhesive tape. Just give it a gentle tug to peel it away and free your camera!
– Gently tug upwards on the flat wire to free the front-facing camera from your device. You’ve got this!
Success!