Google Pixelbook Go Back Panel Replacement
Duration: 45 minutes
Steps: 4 Steps
Step 1


– Flip your device over so the back is facing up. You got this!
– Gently peel off the rubber stoppers from both the top and bottom of your device. Take your time, no rush!
Step 2


– Grab your T5 Torx screwdriver and carefully unscrew the ten 3 mm screws around the edge of the back panel. Take your time, no rush!
Tools Used

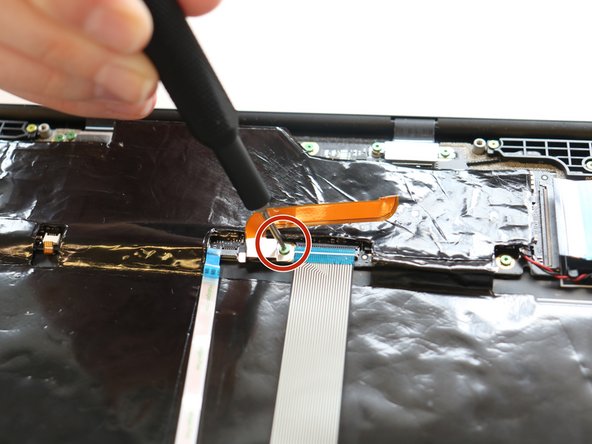
Step 3

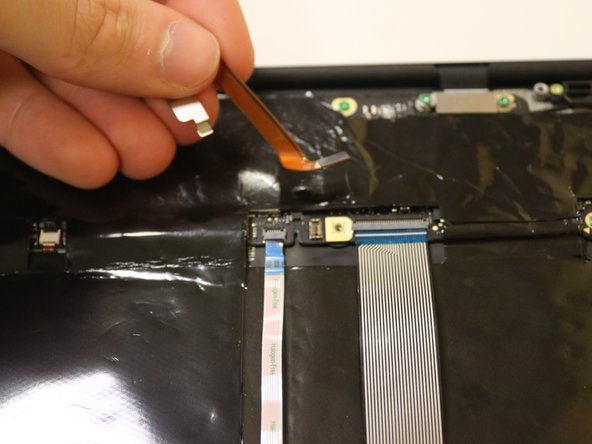
Watch out for that orange ribbon cable connecting the cover to the base—it’s a bit delicate, so avoid pulling the two pieces apart completely to keep everything intact.
– Grab your trusty opening tool and pop off that back panel—nice and easy does it.
– Take out the 2 mm screw with your Torx T3 screwdriver. Don’t drop it in the carpet!
– Gently unplug the orange cable from the bottom of your device—no yanking necessary.
Tools Used

Step 4

– Start by powering down the device and removing any external accessories. Carefully open the device casing using appropriate tools, taking care not to damage any internal components. Detach the faulty part gently, noting how it was connected. If you need help, you can always schedule a repair. Install the new component in reverse order, ensuring all connections are secure. Once everything is reassembled, power on the device to confirm the repair was successful. If issues persist, don’t hesitate to reach out for professional assistance.
Success!