Google Pixelbook Go Battery Replacement
Duration: 45 minutes
Steps: 5 Steps
Got a Pixelbook Go that’s not charging? The culprit could be the battery, which powers the whole device. Before jumping into a replacement, check out our troubleshooting page to make sure it’s the battery and not something else causing the issue. If it’s the battery that’s giving up, it’s time for a new one. Pro tip: grab a battery that comes with the back cover already attached—it’s a whole lot easier than trying to peel the battery off the old cover without causing damage. Oh, and make sure your Pixelbook is fully powered off before you get started. If you run into any trouble, don’t hesitate to schedule a repair.
Step 1


– Turn your device over so the back side is facing up—like it’s ready for a spa day.
– Gently peel off the rubber stoppers from both the top and bottom. They might resist, but you’ve got this!
Step 2


– Grab your T5 Torx screwdriver and take out the ten 3 mm screws lining the edge of the back panel.
Tools Used

Step 3

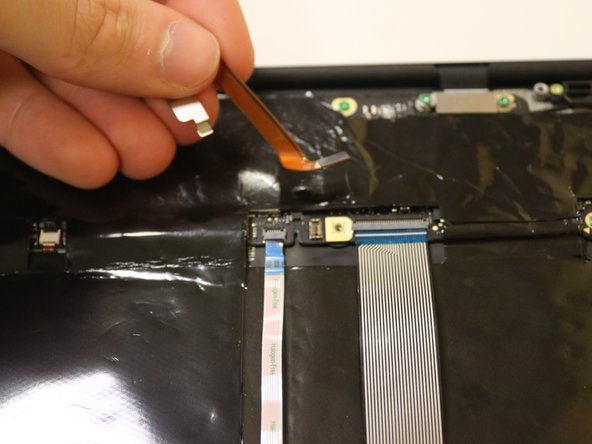
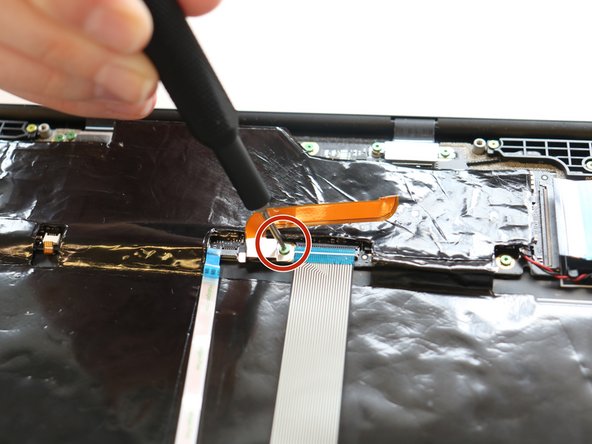
There’s an orange ribbon cable keeping the cover and base connected, so don’t pull them apart completely. Keep them together for now.
– Grab your trusty opening tool and gently pop off the back panel cover. A little wiggle goes a long way!
– Next, take a Torx T3 screwdriver and remove that single 2 mm screw—don’t let it roll away.
– Carefully unplug the orange cable from the base. Easy does it—no need to rush!
Tools Used

Step 4

– Ready to get started? Let’s dive in and make that gadget of yours good as new. Take it slow, follow the steps, and remember: you’ve got this. If things get tricky, don’t hesitate to schedule a repair. We’re always here to help when you need that extra hand.
Step 5

If your replacement battery already comes with a new cover attached, you can skip this step—no need to fuss with the old one.
– Grab an opening tool and gently lift the adhesive off the entire battery area. Be patient, it should peel right back.
– Carefully pop that old battery out of its base. Take it slow and steady—no rush!
– Now, align the new battery with the cover and secure it with adhesive or double-sided tape. It’s like a perfect puzzle piece, just click it into place!
Tools Used
Success!