Headphone Plug Replacement
Duration: 45 minutes
Steps: 7 Steps
It’s not uncommon for one side of your earphones to go silent on you. Typically, the culprit is the connection where the wires meet the 3.5mm plug. This guide will walk you through the process of replacing that plug and getting your earphones back in action!
Step 1


– Let’s get started by removing the screws from the casing of your replacement plug. Take your time and make sure they’re all out before moving on to the next step.
Step 2


Turns out, the terminal with the bigger hole lines up with the right speaker, and the one with the smaller hole matches the left speaker. Your results might vary, but hey, that’s part of the adventure!
– Grab your multimeter (set it to ohms for resistance testing), and get ready to play detective! Test each terminal on the base of the plug to figure out which terminal hooks up to which speaker—left or right. When you see a number pop up on the multimeter that isn’t 1, congrats! You’ve got a match.
– Check out Image 3 to see which part of the plug lines up with each cable:
– Left
– Right
– Common (aka ground)
Step 3


– Grab your wire cutter and snip off that broken 3.5mm plug from the wire. It’s a simple cut, no sweat!
Step 4

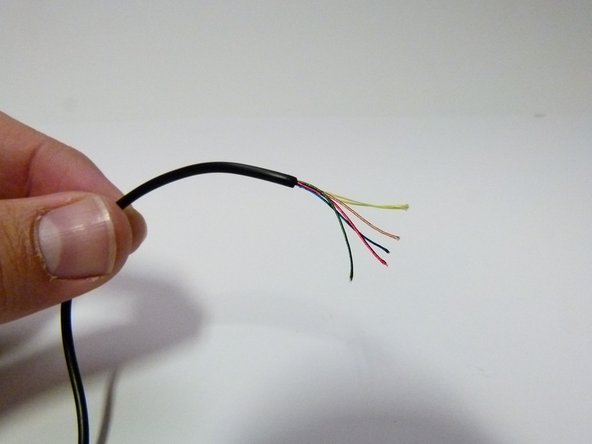

Make sure to strip the coating off the wires before soldering, or else the connection is likely to be a no-go.
– Grab your trusty wire stripper and carefully strip away about 2cm of the wire like peeling a banana—smooth and steady.
– Gently remove the coating from each of the tiny wires inside. You can use a wire stripper, a bit of fine sandpaper, or something similar—whatever works for you!
Tools Used

Step 5


– Slide that casing (remember Step 1?) onto the wire—easy peasy.
– You’ll need to twist this back onto the plug at the end, so double-check it’s facing the right way!
Step 6


The pictures show a blue wire alongside a bunch of yellow wires. The blue wire was teamed up with the ground wire through soldering, while the yellow wires turned out to be just nylon (not real wires).
– A little extra help can go a long way when you’re soldering. If you’re new to soldering, feel free to check out a helpful guide on soldering techniques to get you started.
– Next, slide the red wire through the hole on the terminal for the right speaker. Give it a couple of wraps around the terminal and then solder it into place.
– Do the same for the terminal for the left speaker. Pro tip: The left audio wire is usually white or green, just to keep things easy.
– Lastly, solder the common/ground wire (it’s usually copper-colored) and any multicolored wires through the last remaining hole.
Step 7

Make sure the two terminals (or connecting wires) stay apart—if they touch, things won’t work out the way we want!
– Wrap it up by twisting the casing back onto the plug—you’re almost there!
Success!