How to Clean and Tin a Soldering Iron Tip Guide
Duration: 45 minutes
Steps: 9 Steps
Hey there! Just a friendly reminder to take your time and be careful while working on your device. If you run into any bumps along the way, don’t hesitate to reach out for help. You can always schedule a repair if you need a hand!
As Benjamin Franklin wisely said, “an ounce of prevention is worth a pound of cure,” and that definitely applies to keeping your soldering iron tip in prime condition. The working surface of soldering iron tips is actually iron-plated, which helps with conductivity and keeps the molten solder at bay. Once that iron layer gets damaged, it’s a one-way ticket to tip town! The secret to extending the life of your iron tips is to maintain that protective coating and keep them free of buildup. A well-cared-for soldering iron tip can serve you well for years to come, and the key to longevity and effective soldering is all about keeping it clean and tinned. So, let’s dive into this guide and make sure your soldering iron tip stays in tip-top shape!
Step 1


Reviving oxidized soldering tips is totally doable and can keep them working for years! First things first, take a good look at your tip’s condition to see if it just needs a little TLC or if it’s time for a replacement.
– Once the iron has cooled down, take a moment to check out your workspace.
Step 2


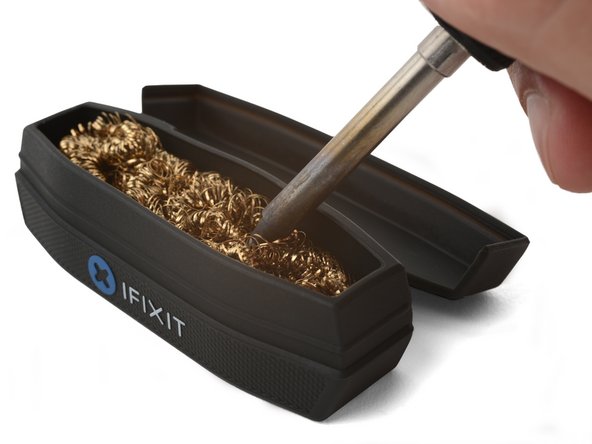
– While you’re busy soldering away, remember to keep that hot iron tip in tip-top shape! A quick wipe with a brass or damp cellulose sponge every now and then is your best buddy for ensuring it stays functional and ready to roll.
Step 3
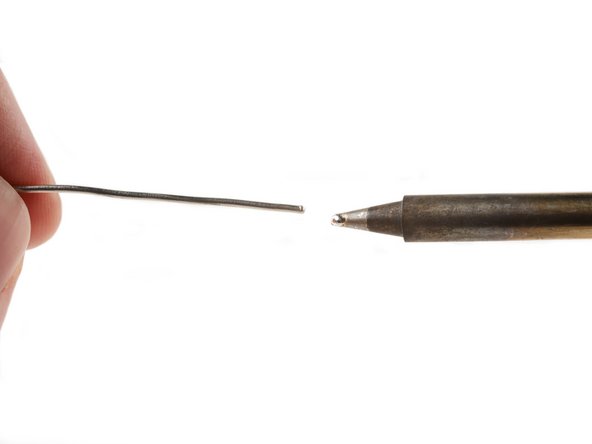

– Once you’ve banished the buildup with your trusty brass or slightly damp cellulose sponge, it’s time to show that tip some love! Slap on a generous amount of fresh rosin-core solder across the entire working surface.
– This delightful process of adding a layer of solder to the tip is known as ‘tinning.’ It’s like giving your tools a cozy blanket!
Step 4

– Once you’ve given that iron tip a nice, even coat of solder, take a moment to wipe away any extra solder with your brass or damp cellulose sponge. Keep it neat!
– Whether you’re in the middle of a soldering spree or just about to tuck your iron away, remember to keep that tip tinned. It’s a smart move for two solid reasons:
Step 5


Remember, just like with soldering, it’s super important to tin your tip in a spot with good airflow. Keep it breezy!
But hey, don’t go overboard with the tip tinner! Using too much can shorten the lifespan of your tip. That strong flux in the tinner can wear down the iron plating over time. If you keep your tip nice and clean and well-tinned, you shouldn’t have to reach for the tinner more than every 20-30 sessions.
If your tip is still looking a bit tired after trying to tin it, it’s time to bring in the big guns: tip tinner! Also known as cleaning paste, reactivation paste, or chemical paste, this magic mix combines aggressive flux and solder to tackle oxidation while giving your tip a fresh coat of tin. Let’s get that tip shining again!
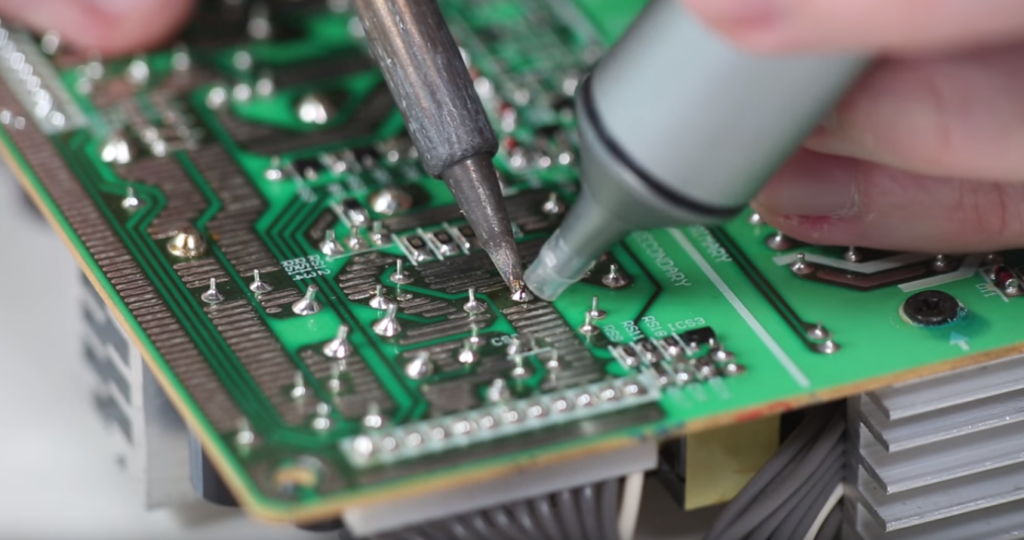
– Get that soldering iron nice and toasty! Dip the tip into the pot of tip tinner and give it a little spin for about 3-4 seconds. Make sure every part of the tip gets a good coating of that shiny stuff.
– Once you’re done, wipe off any extra tinner using your trusty brass or cellulose sponge. Keep it clean and ready for action!
Step 6

Using abrasives like sandpaper, wire brushes, or polishing bars should really be your last option. We get it, sometimes finishing the job feels more important than keeping that tip pristine! But remember, these tools can quickly wear away the iron plating, which means your tip won’t last as long. So, let’s keep it cool and save those tough methods for when you absolutely have to!
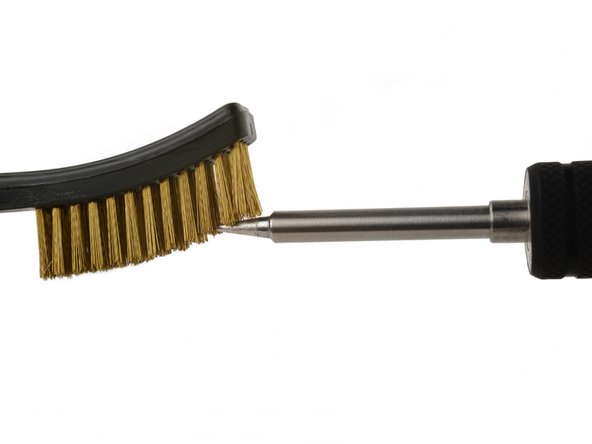
– If you’re still seeing some oxidation or buildup after working with the tip tinner, no worries! Just grab a brass wire brush and give that pesky residue a gentle sweep away.
– Once you’ve tackled the bigger chunks of oxidation and buildup, it’s time for another round of tip tinning. Go ahead and repeat Steps 2-4 to get everything shining again!
Tools Used

Step 7

Pause right there once you’ve tackled that pesky oxidation!
Make sure to give that working surface a nice, even scrub!
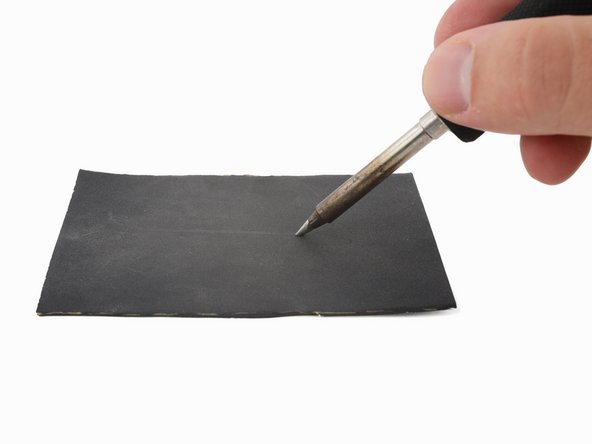
– If your tip tinner and a little wire brushing haven’t worked their magic yet, and you’re on a mission to complete those last connections, grab some fine-grit sandpaper (600 grit or higher) and let’s get to work!
– Gently glide the tip across a polishing bar or that fine-grit sandpaper, keeping the tip’s shape in mind as you go.
– Now, it’s time for another round of tip tinning (Steps 2-4). Let’s keep that momentum going!
Tools Used
Step 8

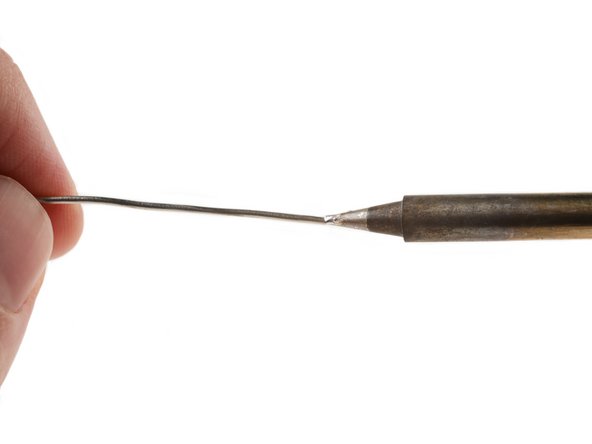
Just to give you a little inspiration, here’s our goal: a gleaming tip, nicely dressed in solder, and completely free from any pesky oxidation or gunk.
Step 9

Make sure to spread a generous amount of solder across the entire work area, not just the tip, as shown in the photo attached. It’s all about that coverage!
– Once you’re done soldering or putting away the iron, make sure to leave a little blob of solder on the tip. This nifty trick creates a protective layer that keeps oxidation at bay by shielding the tip from air and moisture.
– When you’re ready to dive back into soldering, just heat up the iron, wipe off the extra solder using a brass or damp cellulose sponge, and give the tip a fresh coat of solder.