How to Clean Up Solder Pads – Soldering Skills Guide
Duration: 45 minutes
Steps: 5 Steps
Hey there! Just a friendly reminder to handle your device with care while you’re on this repair journey. If you run into any bumps along the way, no worries! You can always schedule a repair and let the pros take over. Happy fixing!
Hey there! In this guide, I’ll walk you through the process of sprucing up the solder pads on a logic board. Today, I’m working on a Chinese A13 Allwinner tablet, specifically getting those battery solder pads in tip-top shape so I can attach a shiny new battery to the logic board. Let’s get started on this little adventure together!
Step 1

To get started, you’ll want to gather a few essential tools: a trusty soldering iron, some soldering paste, and desoldering wire, often referred to as a wick. Let’s make this repair happen!
Tools Used

Step 2

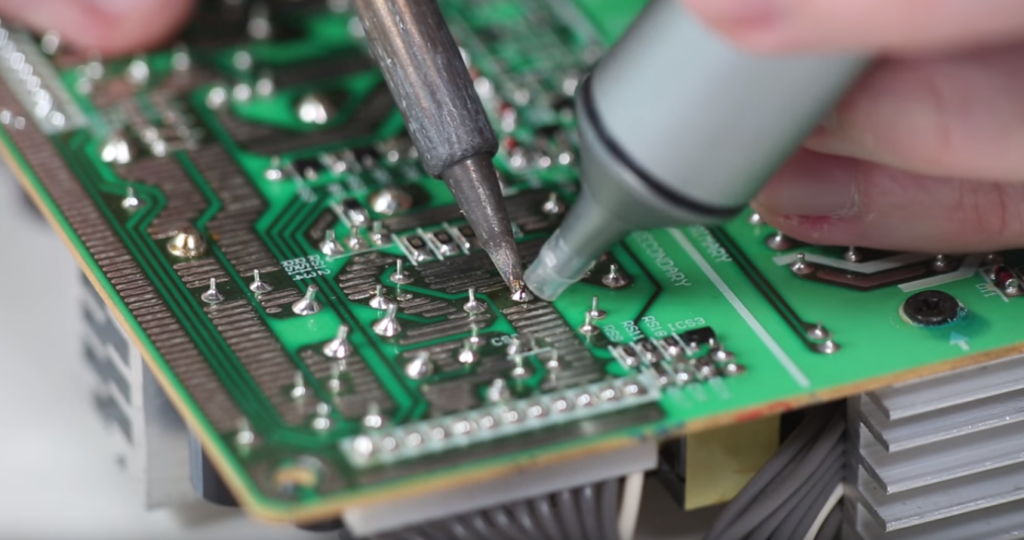
Soldering paste comes in a variety of types, and many of them are conveniently packaged in a syringe-like tube. This makes it super easy to apply the paste exactly where it needs to go—no mess, no fuss!
Step 3

– The spot where I’m going to work my magic with the de-soldering tool is just above the SPK spot shown in the picture.
Tools Used
Step 4
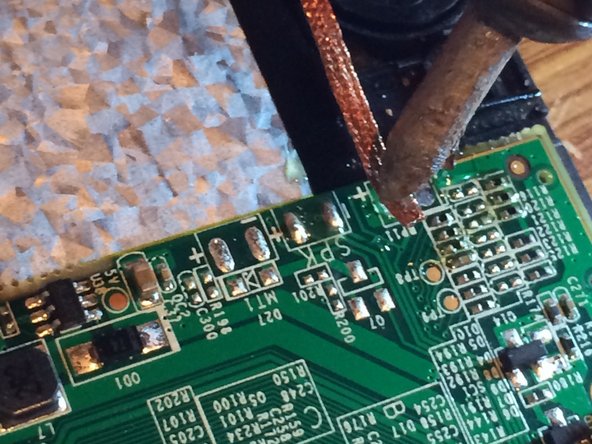

– Position the de-soldering wick right on that solder joint and then rest the tip of your soldering iron on top. This way, the wick gets nice and toasty, soaking up all that old solder like a champ!
– Now, gently lift the wick and the soldering iron away from the logic board simultaneously. If you don’t, you might end up with hardened solder that sticks the wick to the board, which could pull off a logic board pad. And nobody wants that!
Tools Used
Step 5

– What remains are pristine spots on the solder board, all set for some fresh solder action!