How to install Windows 11 on unsupported devices
Duration: 45 minutes
Steps: 7 Steps
With Windows 11 shaking things up, Microsoft has rolled out some hardware requirements, like needing TPM 2.0, specific CPU types, and a certain chunk of RAM. But hey, not everyone has the latest and greatest hardware, and some folks just want to skip these checks. That’s where Rufus steps in! Rufus is a nifty tool that lets you create bootable USB drives from ISO images, with some cool customization options, including the ability to bypass those pesky installation checks for Windows 11. In this guide, we’re going to show you how to use Rufus to whip up a bootable USB drive that will let you install Windows 11 without worrying about TPM, CPU, or RAM checks, or even signing up online. Just a heads up: while you can bypass those hardware requirements, it doesn’t mean your old hardware will run Windows 11 smoothly. It’s built for modern tech, and using it on older machines might lead to sluggish performance, crashes, or other hiccups. Now, let’s check out the changes Rufus will make to the registry of your installation media: Windows Registry Editor Version 5.00 “BypassTPMCheck”=dword:00000001 “BypassSecureBootCheck”=dword:00000001 “BypassRAMCheck”=dword:00000001 “BypassStorageCheck”=dword:00000001 “BypassCPUCheck”=dword:00000001
Step 1


If your Windows version is older than 10 1709 (build 16299), or if things just aren’t going your way, it’s time to grab Rufus manually from GitHub.
– Kick off the Windows command line interface like a pro!
– Type in winget install Rufus.Rufus to get Rufus rolling.
– Give your terminal a quick restart, then launch Rufus by typing rufus.
Tools Used

Step 2


Head over to the official Windows 11 download page and grab the ISO file. It’s all there, just waiting for you!
– Grab the Windows 11 ISO file and get ready to install. You’re almost there—just a few more steps to get your device up and running smoothly. If you need a hand along the way, you can always schedule a repair.
Step 3

– Grab a USB flash drive that’s got at least 8GB of space to spare.
– Just a heads up, all the goodies on that flash drive will be wiped clean.
Tools Used

Step 4

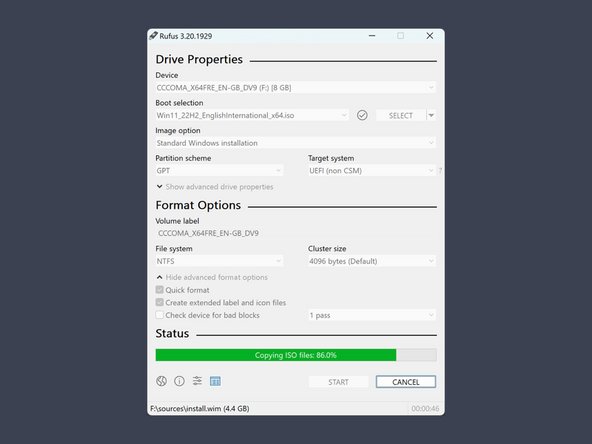
– Pick the flash drive that tickles your fancy.
– Choose the ISO image you just snagged.
– Hit that START button.
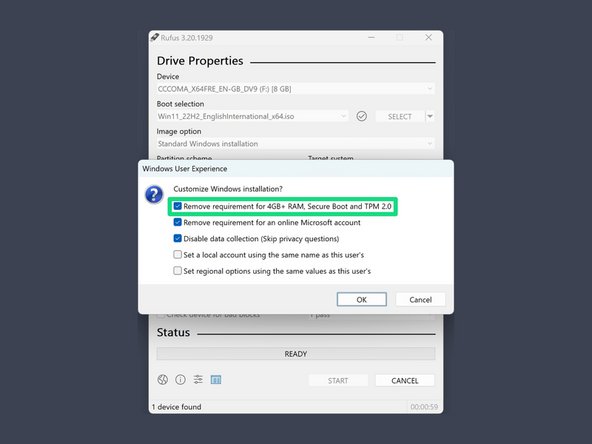
– Opt for the option to ditch the requirement for 4GB+ RAM, Secure Boot, and TPM 2.0, then give it a thumbs up with OK.
Feeling adventurous? Here’s your chance to customize your setup even further—like opting out of data collection or skipping the need for a Microsoft account during setup. Just a heads up: some options might require a bit more digging, but don’t worry, you’re in control. If you need help at any point, you can always schedule a repair.
Step 5

– Kickstart your PC by rebooting it while holding down the key that brings up the boot-device selection menu.
– Choose the option that gets your PC fired up from the USB flash drive.
Some devices, like Microsoft Surface tablets, skip the menu and boot straight into USB mode when you press the Volume-Down button while powering on. Others might require pressing keys like Enter, Esc, F10, or F12 to access the boot menu. Usually, you’ll see an option labeled something like USB: Mass Storage—select that to start the process. If you need help, you can always schedule a repair.
Tools Used
Step 6

– Now, let’s walk through the steps to get Windows installed. Follow the prompts, and before you know it, you’ll be all set up. If anything trips you up, don’t hesitate to schedule a repair—we’ve got your back!
Step 7

– Time to say goodbye to that USB flash drive! Give it a gentle pull and let it go.
– Oh, and don’t forget to adjust your boot priority back to where it should be if you made any changes in step 5!
Tools Used
Success!