How to Open Google Pixel Watch: Step-by-Step Guide
Duration: 45 minutes
Steps: 6 Steps
Hey there, safety first! Make sure to drain your battery to below 25% before diving into your device. Trust us, it’s better this way.
Follow this guide to get inside your Pixel Watch for repairs. Safety first: make sure the battery’s below 25% before you start, to avoid any fire risks if it’s accidentally damaged. Swollen battery? Take the right precautions. You’ll need new adhesive to stick the screen back on. Water resistance may not be the same after, depending on how well the adhesive is applied, and your device will lose its IP rating. Note: This guide uses the GBZ4S LTE model, but if you have the non-LTE version, you might notice slight visual differences.
Step 1


Before diving into the repair, make sure your watch is powered off and unplugged from the charger. We don’t want any surprises while working!
– To kick off, gently press the band release button and slide the band off while pulling it away from the watch. Easy peasy!
– Now, just repeat the same process for the other watch band. You’ve got this!


Step 5
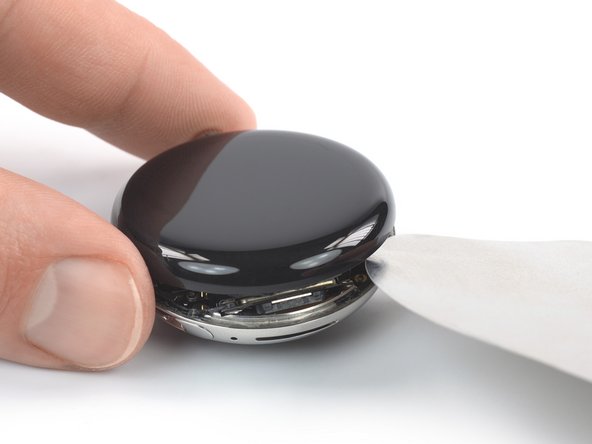

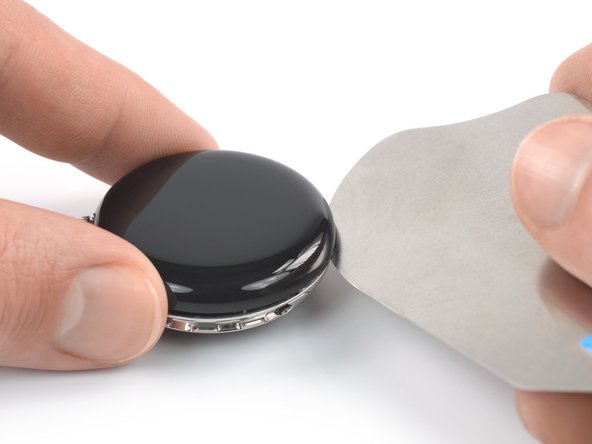
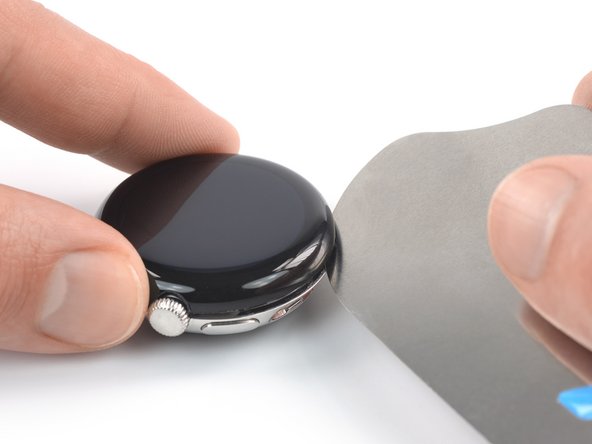
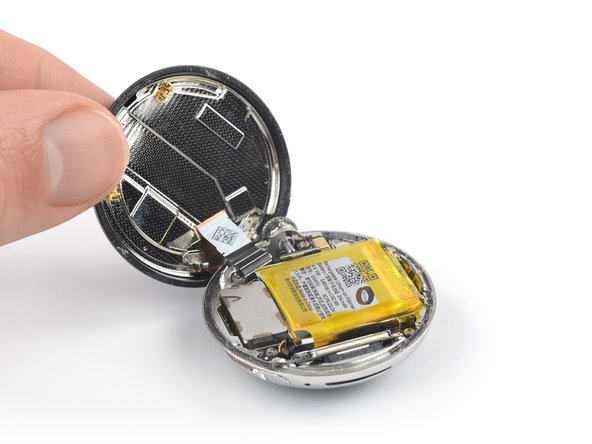
Hold up, don’t yank off the screen just yet – it’s still clinging on to the watch assembly with a super delicate cable.
– Let’s get that screen back in action! First, carefully remove the iFlex and reinsert it under the screen, just to the right of the speaker grille – easy does it!
– Now, gently twist the iFlex to pry the screen up. Take your time, you’ve got this!
Step 6


– Now, just retrace your steps in reverse to put everything back together.
– When reassembling, make sure to add fresh adhesive where needed after wiping down surfaces with some isopropyl alcohol (>90%) to keep things nice and clean.
– Got e-waste? Take it to an R2 or e-Stewards certified recycler for responsible disposal.
– Did the repair not go quite as planned? No worries, try a little troubleshooting, or reach out to our Answers community for some extra support.
– Need to cancel? It’s okay, just let us know you didn’t finish this guide.
– And hey, you’re not alone—others have also completed this guide!
Success!

