How to Remove the Interconnect Cables in the Samsung Galaxy S21 Plus
Duration: 45 minutes
Steps: 20 Steps
Get ready to tackle the task of replacing the interconnect cables on your Samsung Galaxy S21 Plus! This guide focuses on the SM-G996B/DS (international) model, but don't fret if you've got a different one; just keep in mind that other models may have an extra antenna cable tucked away in the midframe. When you're putting everything back together, remember that skipping the adhesive seals might let your device work just fine, but it could lose that all-important water protection. Make sure you've got some replacement adhesive handy to securely reattach those components during reassembly. And if you need help, you can always schedule a repair.
Step 1

You can use a hair dryer, heat gun, or hot plate, but let's keep it cool! Don't overheat your phone, or you might give the display and battery a heat-induced headache.


Step 2


If the back cover is a bit cracked, your suction handle might not stick as well as it should. No worries! You can try lifting it with some strong tape, or if you’re feeling crafty, superglue that handle in place and let it cure before moving on.
Having a hard time making a gap? Just apply a little more heat to soften that adhesive further. Remember to check the iOpener instructions to keep things from getting too hot!
- Stick a suction cup near the bottom edge of the back cover, as close to the edge as possible. Gently lift the back cover with the suction cup to create a small gap between it and the frame. Slip an opening pick into that gap. Carefully slide the pick toward the bottom left corner to cut through the adhesive. Leave the pick in place to keep the adhesive from sticking back together. If you need help, you can always schedule a repair.
Tools Used

Step 3


- Slip a second pick under the bottom edge of your phone—like you're picking a lock, but way less suspicious.
- Glide that pick over to the bottom right corner to slice through the sticky stuff holding things together.
- Let your picks hang out right where they are, so the adhesive doesn't sneakily stick everything back together.
Step 4


If the glue starts playing hard to get, it's probably cooled off. Give your iOpener another two or three minutes to warm things up.
- Pop in a third opening pick at the bottom right corner of your phone—it’s like giving your device a little love tap!
- Gently slide that pick right along the edge to slice through the adhesive. You're basically making a sweet little opening here.
- Now, keep that opening pick snug in the top right corner to make sure the adhesive doesn’t decide to make a comeback!
Tools Used
Step 5


When working near the camera, just dip in the tip of your opening pick—about 4-5 mm—so the camera stays safe and smudge-free.
- Pop a fourth opening pick under the top right corner of your phone—just like adding sprinkles to a cupcake.
- Slide that pick along the top edge to loosen up the sticky stuff holding things together.
- For a pro move, leave the pick chilling in the top left corner so the adhesive doesn’t get any ideas about sticking again.
Step 6


When working around the power button, just gently insert the tip of your opening pick (~3-4 mm) to avoid messing with the flex cable for power and volume. Take it slow and steady—your device will thank you.
- Slip a fifth pick under the bottom left corner—just like sliding into the DMs.
- Glide the pick up the left edge to break up the last bits of sticky stuff holding the back cover on.
Step 7


- First things first, let's pop off that back cover. It's like opening a surprise gift!
- Now, during the reassembly phase, give yourself a moment to showcase your handiwork. Power up your phone and make sure everything's working like a charm before putting the final seal on this tech treasure. Just remember to power it down completely before you dive back in.
- Got any sticky adhesive remnants hanging around? Grab a pair of tweezers or your fingers and show them who's boss. A little splash of high concentration (over 90%) isopropyl alcohol will help wipe away that pesky residue.
- If you're using Samsung custom-cut adhesives, follow this awesome guide.
- And if double-sided tape is more your style, check out this helpful guide.
Step 8


Watch out for that battery—no poking or bending allowed, unless you want a surprise chemistry experiment or a mini fireworks show.
There’s a sneaky cable hiding under the charging coil. Take it slow, and if your pick hits a snag, pause and reassess so you don’t play tug-of-war with your device’s insides.
- Gently slide an opening pick underneath the lower left corner of the NFC antenna and charging coil assembly. You're on the right track!
- Carefully glide the opening pick along the bottom left edge of the assembly to separate it from the battery. Keep it smooth and steady!
Step 9


- Slide an opening pick underneath the lower edge of the NFC antenna and charging coil assembly with care.
- Gently glide the opening pick along the bottom of the assembly to detach it from the loudspeaker.
Step 10


- Grab a spudger and gently lift the charging coil connector straight up from its socket to disconnect it. Keep it smooth and steady—no force needed. If you need a hand, you can always schedule a repair.
Tools Used

Step 11


- Grab your trusty spudger and pop the NFC antenna connector straight up from its socket. Just a gentle lift—no wrestling required!
Tools Used
Step 12

- Grab your Phillips screwdriver and take out the five 3.9 mm screws holding down the NFC antenna and charging coil assembly. Easy does it!
Step 13


- Gently grab your trusty tweezers or just use your fingers to carefully pop out the NFC antenna and the charging coil assembly. You've got this!
Step 14

- Grab your trusty spudger and gently pry the battery cable connector upward from its socket. It's like giving it a little lift-off!
Tools Used
Step 15

- Grab your Phillips screwdriver and unscrew the six 3.9 mm screws holding the loudspeaker assembly in place. It's like unlocking the secret level—just keep track of those tiny screws!
Step 16


- Slide an opening pick into the little gap between the loudspeaker assembly's top edge and the midframe. You're on the right track!
- Now, use that trusty pick to gently pry up the loudspeaker assembly by tilting it downwards. You've got this!
Step 17


- First up, let's liberate that loudspeaker assembly! It's time to get it out of there.
- When you're putting things back together, make sure to use some fresh adhesive where it's needed. Don't forget to give the surfaces a good clean with isopropyl alcohol (>90%) first—it's like a spa day for your device!
Step 18

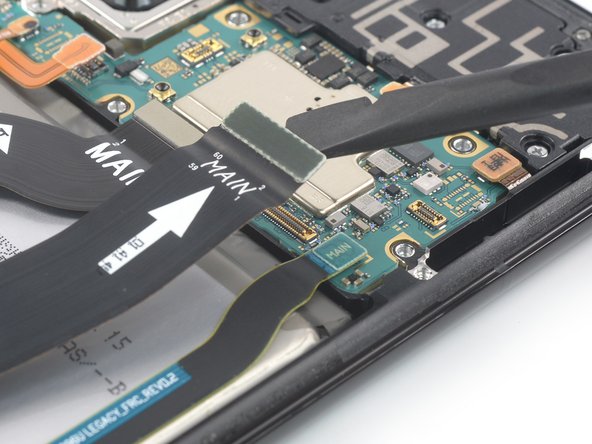
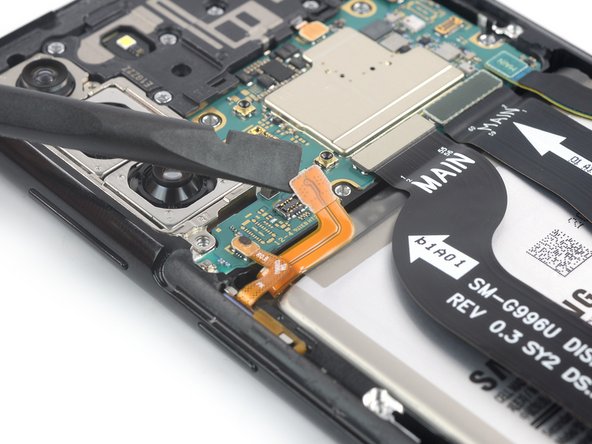
- Grab your trusty spudger and gently pry the upper connectors of the main and interconnect flex cables straight up from their sockets to disconnect them from the motherboard. You've got this!
Tools Used
Step 19

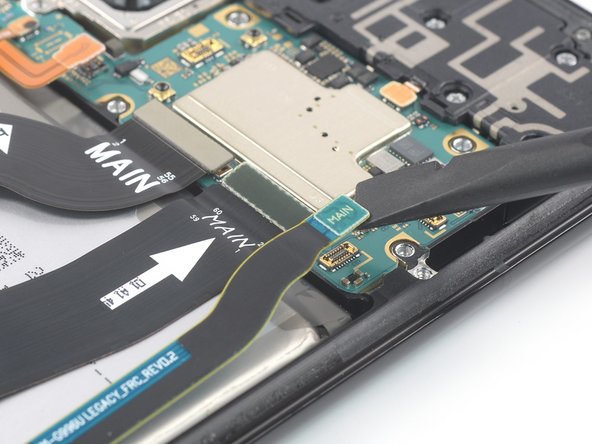
- Grab your trusty spudger and gently pop the main flex cable’s bottom connector up from the daughterboard socket. Easy does it—think of it like unplugging a stubborn headphone jack.
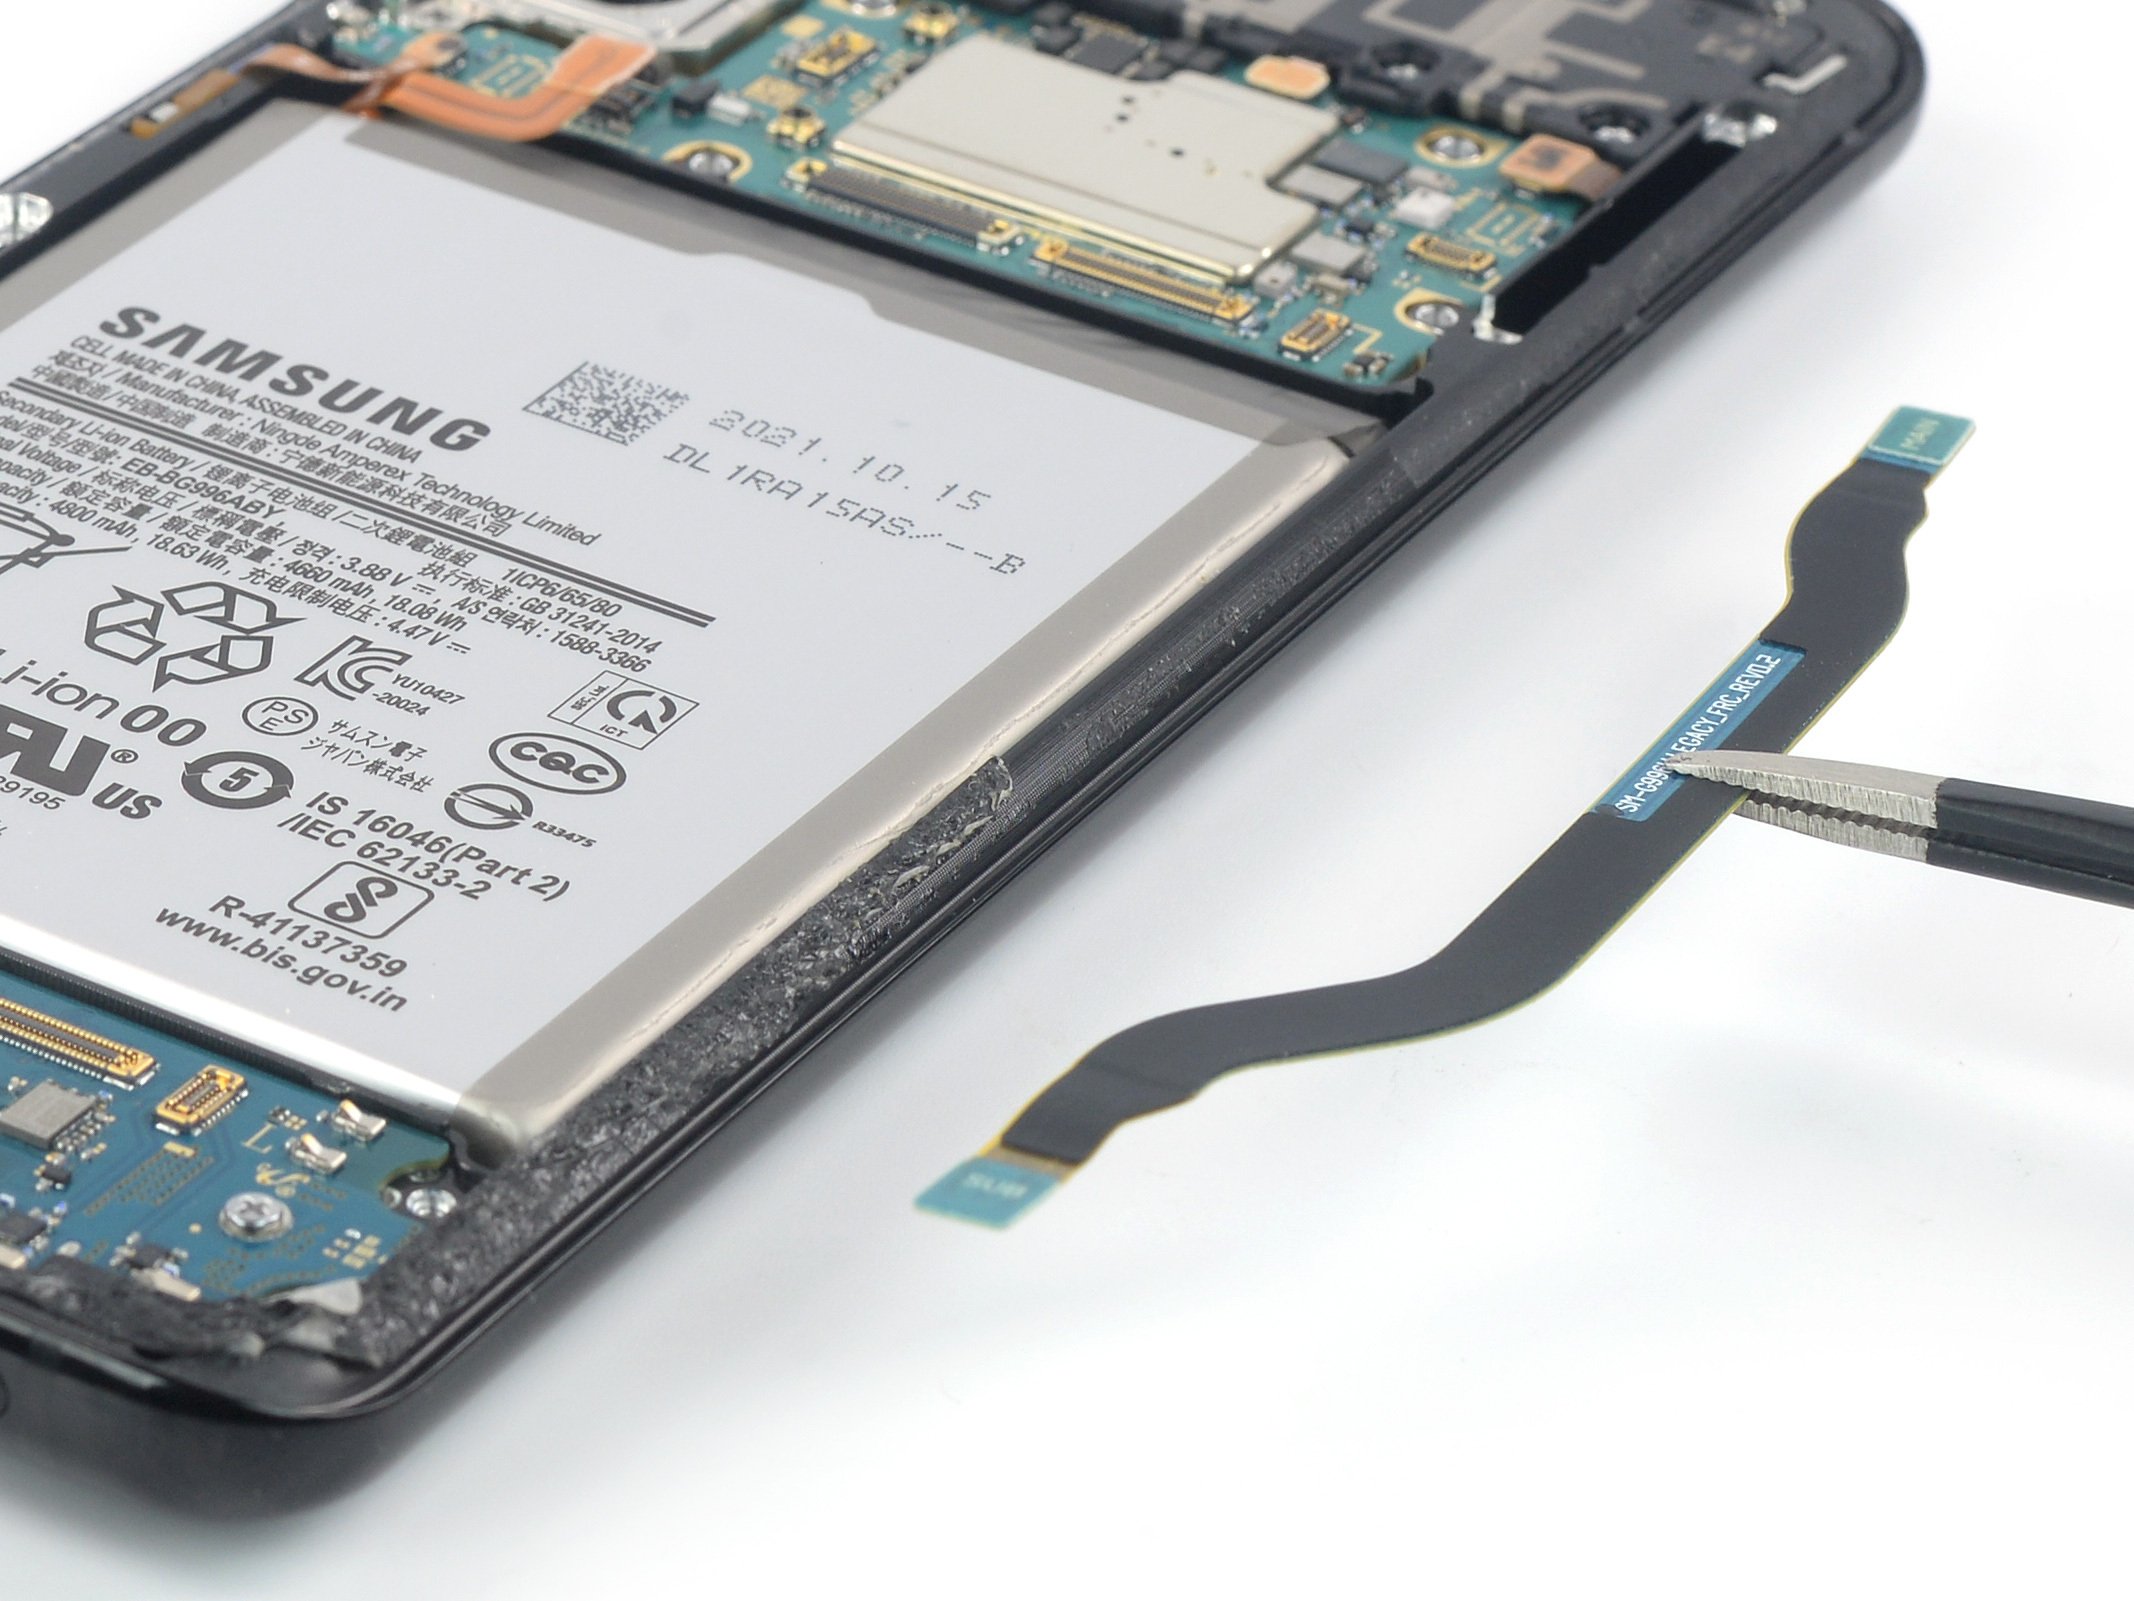
- With your fingers or tweezers, lift out the main flex cable with care. No tug-of-war here—just a smooth removal!
Tools Used
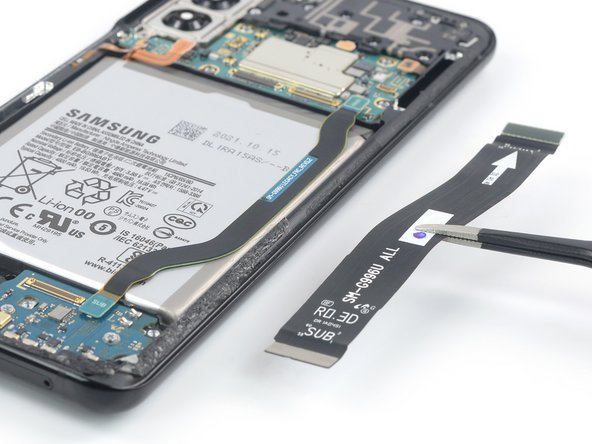
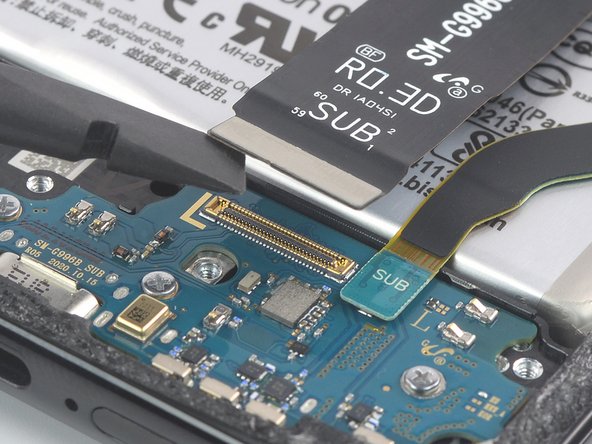
Step 20
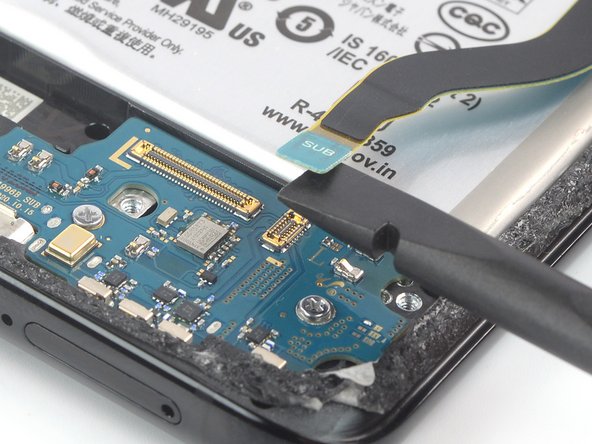


- Grab your trusty spudger and gently nudge the interconnect flex cable off the daughterboard. Just pry that bottom connector straight up from its cozy socket, and it should pop right out!
- Now, with a delicate touch—either with your fingers or a pair of tweezers—carefully lift out the interconnect flex cable. You're doing great!


