
How to repair a broken flex cable (Sony Xperia Z1 microphone flex)
Duration: 45 minutes
Steps: 14 Steps
So, you've stumbled upon a pretty common hiccup with the Sony Xperia Z1's microphone not working. No worries! We're here to break down the different types of microphone issues you might encounter. Before diving in, it's a good idea to have some experience with surface-mount soldering and the basics of disassembling and reassembling your device. In this guide, we'll walk you through the steps to create a jumper, tackle advanced techniques for flex cable repair (yes, we know fixing flex cables can seem a bit wild), and gather all those scattered tidbits of information about the Z1's microphone troubles. Just a heads-up: while this guide is packed with useful insights, remember it draws from various forum posts and my personal experiences, rather than official sources. If you need help, you can always schedule a repair.
Step 1

- Let's get started! To figure out what's going on with your device, head to settings -> about phone -> diagnostics -> tests and run a microphone test. Alternatively, you can dial *#*#7378423#*#* to access the service menu and test your mic from there.
- The test results will give you a better understanding of the issue. You might encounter muffled sound, no sound at all, or just a weird buzzing noise. Whatever the result, it'll help you determine the best course of action to get your device back in working order.
- While you're at it, go ahead and test the secondary microphone (the one used for recording sound in videos). Knowing whether it's working or not might come in handy later on in the repair process.
Step 2

Hey there! Just a friendly reminder: diving into repairs without the right skills, precision, and a sprinkle of patience can lead to more trouble than triumph for your gadget. Before you leap into part replacements, take a moment to rule out the simple issues and software glitches. If you find yourself stuck, don’t hesitate to schedule a repair and let the pros handle it!
When tackling your device, keep an eye out for those sneaky washers, grounding pieces, or even plastic covers that might be hanging out above or between the parts. It's a good idea to double-check these if you've done any work inside before. And if you haven't replaced any parts yet, swapping out something like the microphone could just do the trick!
- Sometimes the solution is simpler than you'd expect, so make sure to rule out the obvious culprits first, like pocket lint stuck in the bottom holes of your phone. These are where the microphone picks up air pressure changes and mistakenly interprets them as sound.
- Give those holes a quick check – it might save you a lot of time and effort. It’s helped in the past, but if it doesn't work for you, don’t sweat it. Keep going, you’ve got this!
Step 3

- Feeling a bit stuck? Try giving your device a hard reset or updating its operating system. If things are still wonky, you might want to roll back to a previous version that was working just fine. I'm not diving into the software nitty-gritty here because, let's be real, that's not my strong suit! But if you're in need of some serious help, don't hesitate to schedule a repair.
- Usually, problems that crop up from tinkering with the software can only be resolved by sorting out the software itself. So, keep that in mind as you troubleshoot!
Step 4

- If you're hearing muffled sound, don't panic! It probably means your flex cables are just fine. Instead, it could be a little dirt causing the trouble or maybe your mic settings need a bit of tweaking.
- No sound at all? That could point to a broken mic or damaged flex cables. But if you've never opened up your device, chances are the flex cables are still in good shape. They don't just break for fun!
- A buzzing noise might suggest your mic has been through some water or moisture, or it could just be some funky mic settings. Some folks have found that turning off mic noise suppression and equalizer can do the trick!
Step 5

Other options to consider are
- If your microphone was working just fine before cracking open your device, but suddenly starts acting up, it's likely that something went a bit haywire during the process.
- For the Xperia Z series, it's not uncommon for the microphone to go silent after a screen replacement. The usual suspect? The flex cable! Even the pros can have a slip-up now and then, and flex damage is a frequent mishap during these repairs. That's why we're here with this guide!
- It’s possible that a tiny surface-mount component got dislodged from the board or flex.
- Also, don’t forget to check for any dirt or loose connections between the flex and the motherboard, or between the part and the flex. A little grime can cause a lot of trouble!
Step 6


Keep an eye on where the tear is hiding beneath that black rubber you peeled back. It can be a bit sneaky sometimes, making it tricky to find those pesky defective points!
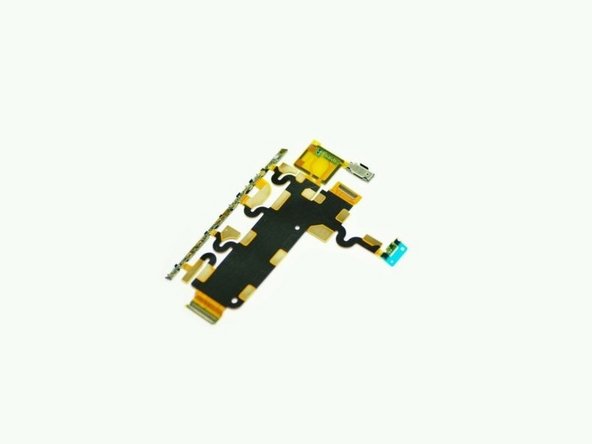
- To track down that sneaky broken flex, you’ll want to keep your eyes peeled on those flex cables and any areas that got a little love during the last repair. For our buddy Xperia Z1, the troublemaker is that hefty flex cable connecting the motherboard to all those buttons and the screen.
- Spotting a damaged flex cable takes a sharp eye, so don’t hesitate to grab some magnification to help you out.
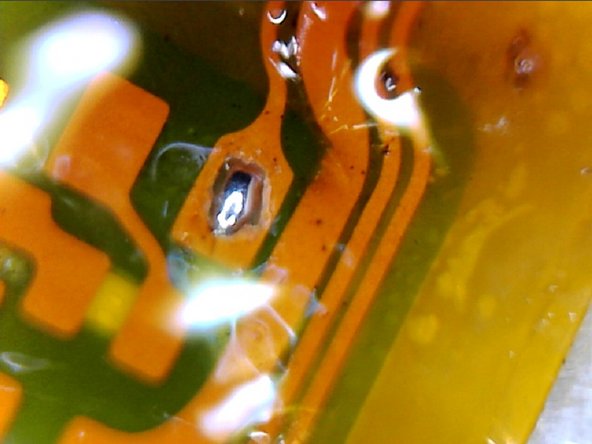
- Flex cables often like to tear around bends or in tighter spots. Check out the pictures of two broken mic flexes for the Z1. The first is the original flex that I, whoops, accidentally tore, and the second? Well, it arrived broken too. Not wanting to gamble on the second replacement, I decided to work my magic on the original...
Step 7
Before you hit that order button for a new part, give those model numbers and pictures a good once-over to make sure they're a perfect match!
- Locating the broken flex is often the final step in your diagnostic adventure, and thankfully, replacement parts are usually pretty affordable.
- For those tackling the iPhone 6 home button flex cable repair (Error 53) or anyone who can't wait for a new part, I'm including these parts more out of curiosity than as a common practice. Unless you have a compelling reason (or just really enjoy this kind of thing like I do), fixing a broken flex cable might not be the best use of your time!
Step 8

Steer clear of that hot air! It can burn and warp the flex, and we definitely don't want that. You'll want to do most of this with a soldering iron in hand, so having some SMT experience and a microscope is key to success. You're going to do great!
Scout out as much free space as you can around those jumper points—it's like a dance floor for your soldering iron! Give those SMD components plenty of room to avoid any accidental bumps. We definitely want to keep the burn marks to a minimum, so aim for those open pads when placing your jumpers.
Keep an eye on the flex cable's path inside the device. It's all about making sure you've got room to work, so avoid piling solder and jumpers where they just don’t fit. No one likes a cluttered workspace!
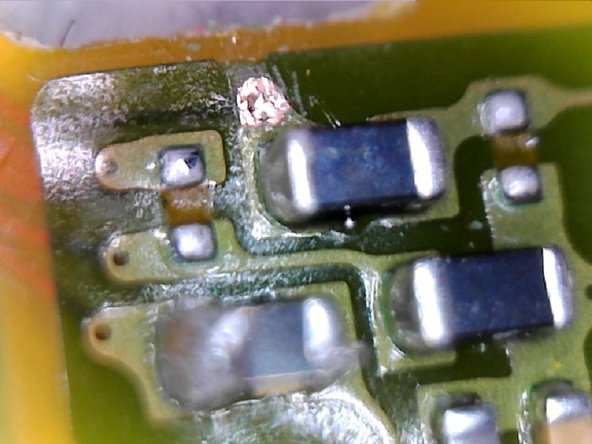
- Alright, if you're gearing up to tackle a flex cable repair, it’s all about having a solid game plan for your jumpers. Think of jumper points like those sweet spots on a pizza—great spots are the edges of SMD components or wider sections of the trace. I’ve highlighted some ideal jumper locations in the picture to give you a good visual cue.
- To nail this jumper thing, you need to get the basics down. The wire you use has to be insulated, or else you'll end up with a chaotic mess of connections that could cause some serious damage. I usually roll with enameled copper wire, but if you’re feeling adventurous, scrap flex cable can work too (just a bit trickier!).
- Before you dive in and snip that jumper, make sure to check out the upcoming steps in the guide to get a clearer picture of what kind of jumper you’re aiming to create.
Tools Used

Step 9

Handle that knife with care—no need to go all Hulk on it! You might need to lightly scratch the surface for a bit before the copper decides to make an appearance. It's a good idea to practice this, along with the rest of the repair steps, on some scrap flex cables first. You've got this!
- Find a pad that looks like it could use some TLC, and give it a gentle scratch with the tip of your exacto knife until the copper shines through.
- Next up, grab some alcohol (the cleaning kind, please!) and a Q-tip to give that pad a good scrub.
- Repeat the same process for the second jumper point and you're on your way!
Step 10
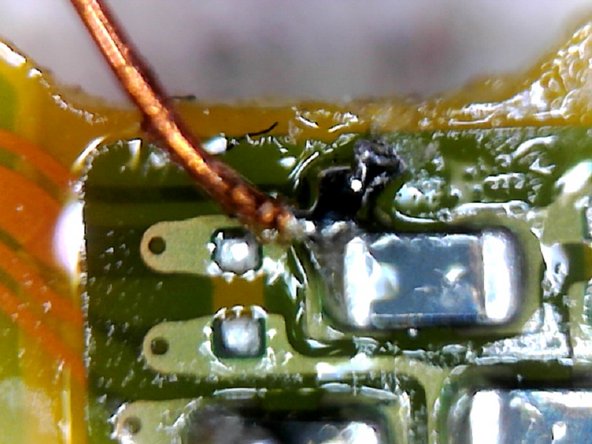
- First, spread some flux onto the pads. Then, grab your soldering iron and gently touch the pad tips with the iron’s end, adding a little solder to tin them. Check out the pictures and maybe practice first. In the second picture, the pad got a smaller tinning because it wasn't cleaned well enough, so aim for bigger pads if you've got the space.
- Next up, give the ends of your jumper some tinning too. To get rid of the enamel, use a file or knife, then add a tiny bit of solder (not too much!) with plenty of flux. You just need the end of the jumper to look silvery – no big solder blobs here!
Tools Used
Step 11
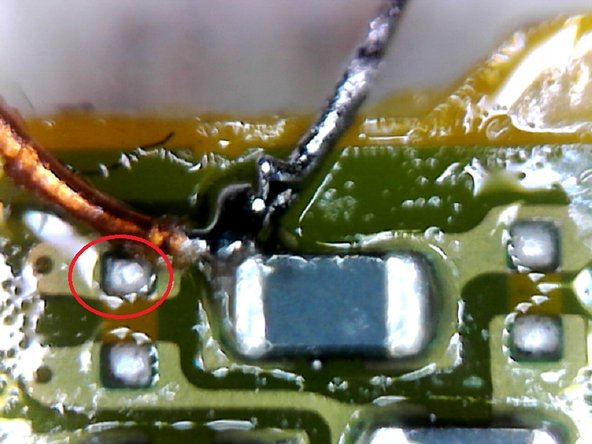
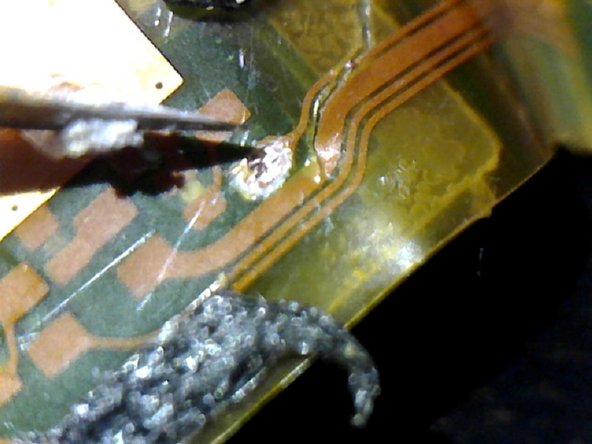
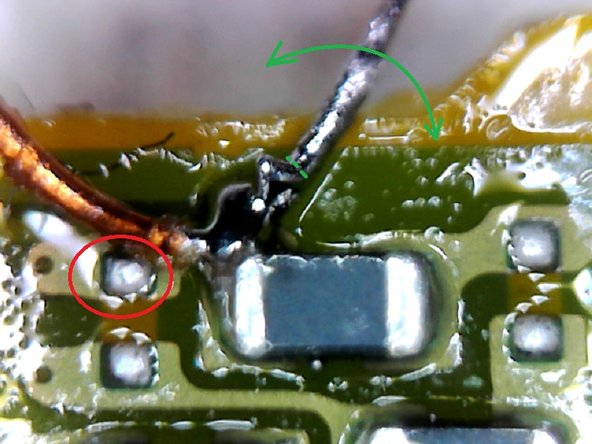
Keep those wires tidy! Leaving any exposed wire after soldering isn't just a bad idea; it could lead to a shocking surprise when they touch other components. Take a peek at the first picture: I'm leaving a little extra tinned wire for a snip later. And just a heads up, there's a pad that's a bit too close for comfort (circled in red).
- Time to add a little more flux (just a friendly nudge from Jessa)!
- Gently solder that jumper into place, and use tweezers to hold it steady. No need to fret about the length of the jumper just yet!
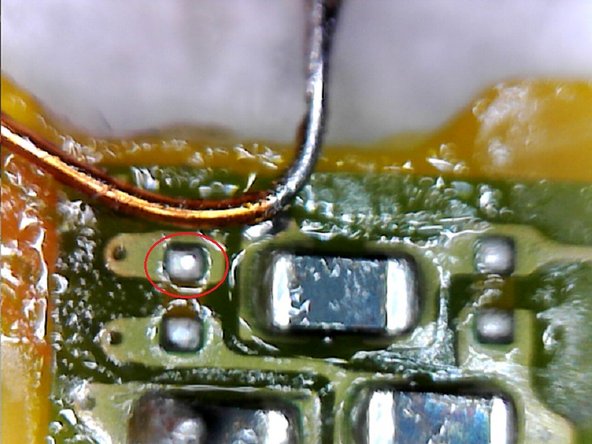
- Now, take a look at the second picture. Oops! A solder bridge formed because we got a bit too enthusiastic with the solder. This is a classic example of what can happen if you’re not careful. But don’t sweat it this time; the bridging didn’t cause any issues (check the first pic to see why), so I just let it slide.
- The pad was already a tad too snug, and now it's super cozy! I ended up using a piece of tape as insulation between the jumper wire and the pad after giving the area a nice clean to remove that flux.

Step 12

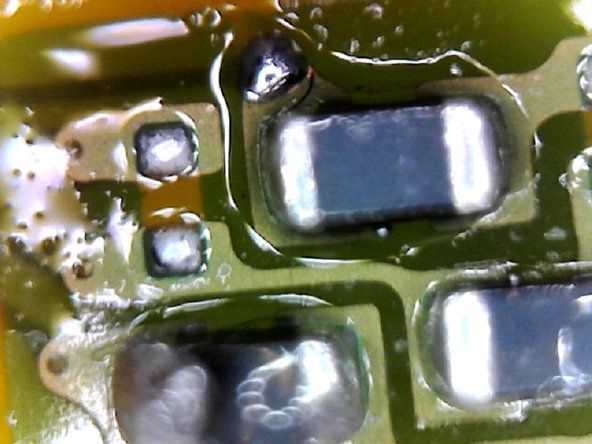
- First things first, measure that jumper so it can easily reach the pad you're aiming for! Make sure to lay the jumper flat across the flex. If the flex needs to take a little bend along the way, just make sure your jumper wire is long enough to accommodate that twist. And a quick tip: avoid using copper wire for flex repairs that need to move—trust me, it’ll just break on you.
- If your earlier tinning didn’t quite do the trick, give the wire a couple of pokes with a file to expose some copper—just enough for soldering. Then, give it another round of tinning to prep it!
- Time to get a little more flux on there.
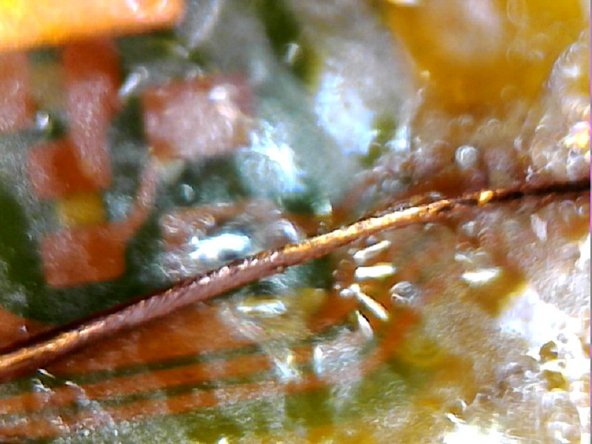
- Now it’s soldering time! Sorry about the not-so-great picture quality. By the way, in the second shot, I’ve already snipped off the extra wire.
Tools Used
Step 13

- Using your trusty tweezers, grab that pesky excess wire and give it a little dance—bend it back and forth gently until it snaps off. Don’t forget to do the same for the other end!
- If your solder joint decides to break while you're giving that leftover wire a little wiggle, it might just be a sign that the joint wasn't as strong as it should have been in the first place.
Tools Used
Step 14

- Just follow the same steps for any other torn flex traces, and you'll be all set—easy peasy! If you decide to dive into this adventure, we'd love to see your results, so feel free to share your photos with us! And hey, if you're a pro and spot any mistakes, don’t hesitate to give us a shout! Remember, if you need help, you can always schedule a repair.
- You're now equipped with the knowledge to tackle this repair!
