
How to Replace a Corroded One Terminal – DIY Guide
Duration: 45 minutes
Steps: 12 Steps
Caution: Working on a vehicle battery can be a bit risky. Please take extra care as you follow this guide.
Having a tough time getting your car to start? Is there some pesky corrosion on your terminals that’s messing with the connection? No worries! This guide will walk you through the steps to remove that troublesome terminal and swap it out for a shiny new one. Just a heads up: working on a vehicle battery can be a bit risky, so make sure to take extra care while following along!
Step 1

Don’t forget to pop that car key out of the ignition and turn off the engine before diving into this guide!
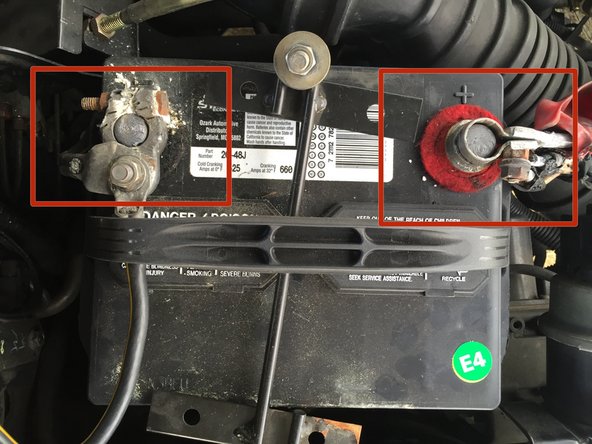
– First things first, find those terminals on the top of your car battery. You’ll see a positive (+) and a negative (-) sign next to each one, showing you which is which.
– The positive terminal is looking good and ready to go, but the negative side? It’s got some serious corrosion going on. Time to swap that out for a fresh one!
Step 2


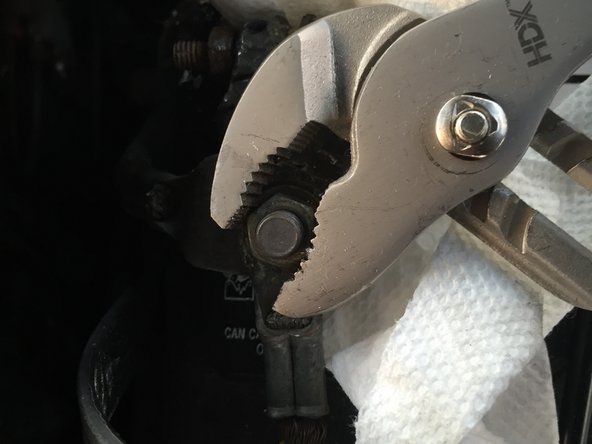
– Locate that little nut on the side of the terminal. It’s just hanging out, waiting for you!
– Grab your adjustable wrench and give that nut a twist to the left—counterclockwise is the way to go to loosen it up.
Tools Used

Step 3


Hey there! Just a quick reminder: always take off the negative terminal before the positive one. This little tip helps you avoid any shocking surprises or potential fires. Stay safe and happy repairing!
– Set the terminal down on a cozy rag or towel, and keep it away from that pesky battery node. Let’s keep things safe and sound!
Step 4


– First, find the nut nestled on the side of the positive terminal. It’s playing hide and seek!
– Next, grab your trusty wrench and give that nut a twist to the left. Let’s loosen it up!


Step 6


– First up, find the nut on the upward-facing side of the negative terminal. It’s just hanging out, waiting for you!
– Now, grab your trusty wrench and give that nut a counterclockwise twist to loosen it up. Once it’s free, you can easily take it off the bolt. You’re doing great!
Step 7


– Gently lift off the top wire plate from the bolt, treating it with care like a precious gem.
– Now, let’s tackle the bottom wire plate! Carefully remove it from the bolt and set it aside like it’s on a little vacation.
Step 8
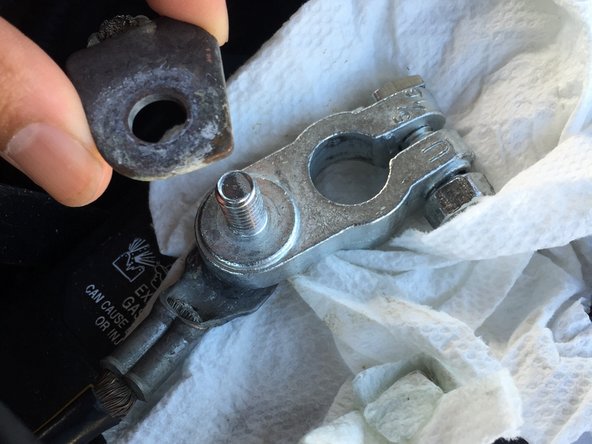

– Put the old battery terminal to the side and swap it out for the shiny new one.
– Reattach the wire plates in the same order you removed them. You’ve got this!
Step 9


– Grab that flat washer and the screw-on head that came with your battery terminal and place them onto the vertical bolt. You’ve got this!
– Now, twist that head clockwise to tighten it up, and make sure those wire plates are nice and secure. You’re doing great!
Step 10

– Grab a rag and gently place the positive terminal back onto its happy little positive node.
Step 11

– Reattach the negative terminal to its corresponding negative node. Let’s get that connection back in action!
Step 12


– First up, grab your trusty wrench and give that side nut on the negative terminal a clockwise twist to snug it up nice and tight.
– Now, show some love to the positive terminal by giving its side nut the same clockwise twist. You’ve got this!