How To Replace Acer Chromebook CB3-111-C8UB Touchpad Guide
Duration: 45 minutes
Steps: 9 Steps
Heads up! Before you dive into this repair adventure, make sure your device is powered down and unplugged. Safety first, friends! If you run into any bumps along the way, just remember, you can always schedule a repair for a helping hand. Let’s get to work!
Ready to tackle that pesky unresponsive touchpad? No worries, we’ve got your back! First things first, you’ll need to take off the laptop’s back cover and the battery to get to the touchpad. Once you’ve done that, you’ll encounter another batch of screws waiting for you. Just remember to keep track of which screws go where, so reassembly goes as smoothly as a fresh touchpad. If you need help, you can always schedule a repair.
Step 1


– Flip that laptop over so the hinges are facing away from you, just like a turtle on its back!
– Let’s tackle those eight 8mm screws with your trusty phillips #1 screwdriver. You’ve got this!
– Now, grab that same screwdriver and take out the four 4.5mm screws. Easy peasy!
Tools Used

Step 2


Hey there! Just a heads up, inside the left side of your device, there’s a sneaky wire connecting things together. Be gentle and watch out for it to avoid any mishaps!
– Grab your trusty plastic opening tool and gently nudge the plastic base away from the laptop. Start on the right side and glide your way to the left – you got this!
– Once you’ve freed the plastic base, lay it beside the laptop, opening it like a book that’s just begging to be read.
Step 3


Just a heads up – the ribbon cable is stuck to the plastic, so be prepared to show it who’s boss when you’re prying it off!
– Gently lift the tiny white ZIF connector using your fingernail or a trusty metal spudger.
– Give the blue tab a little tug to free the ribbon cable.
Tools Used


Step 4

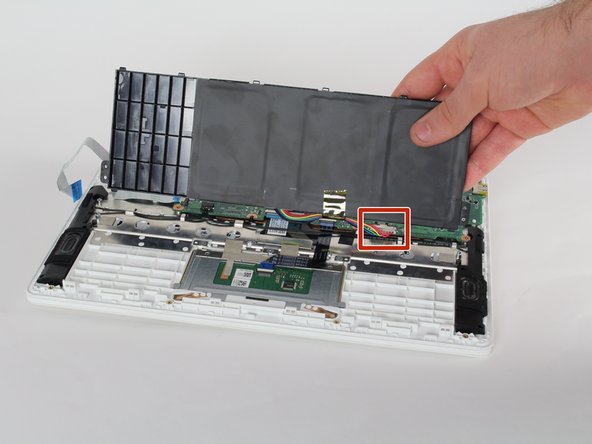
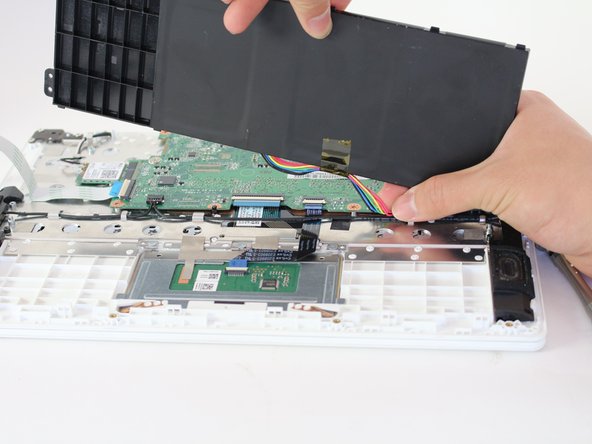
– Find those two 6mm screws that are keeping the battery snug as a bug in a rug, and give them a gentle twist with your trusty Phillips #1 screwdriver to set the battery free!
Tools Used

Step 6

– Grab your trusty metal spudger and gently lift the white ZIF connector to release the ribbon cable. Easy peasy!
– Next up, unplug the black ribbon cable from the track pad assembly. You’re doing great!
Tools Used
Step 7


– Grab your trusty Phillips #000 screwdriver and tackle those three 2.4mm screws hanging out at the top of the track pad assembly.
Step 8

– Gently lift the assembly with your finger and slide a metal spudger beneath each of the two strips of tape, peeling them away from the main metal plate like a pro.
Tools Used
Step 9

– Gently nudge the track pad assembly upwards toward the motherboard until it’s free to lift out. You’ve got this!