How to Replace Acer TravelMate Touchpad: Step-by-Step Guide
Duration: 45 minutes
Steps: 16 Steps
Hey there! If you need a hand with this step, you can always schedule a repair for expert assistance. Don’t hesitate to reach out for help!
If your laptop’s touchpad has decided to take a vacation due to some external boo-boos, don’t worry! This guide will help you through the process of removing and replacing that touchpad with ease. Let’s get it back in action!
Step 1

Hey there! Make sure to power down your laptop before we get this party started!
– Turn the laptop upside down so that the model stickers are looking up at you.
Step 2


– Grab your trusty #0 screwdriver and take out those thirteen 6mm Phillips screws like a pro.
– Time to unveil the magic inside! Carefully remove the back of the laptop.
Step 3

– Take out those two 7mm Phillips screws from the battery with your trusty #0 screwdriver. You’ve got this!


Step 5


– Gently unplug the hard drive from the motherboard, like you’re giving it a little hug goodbye!
Step 6

– Unplug the two wires from the Wi-Fi interface.
Step 7


– Using your trusty #0 screwdriver, gently take out one 6mm Phillips screw from the Wi-Fi interface. You’ve got this!

Step 9

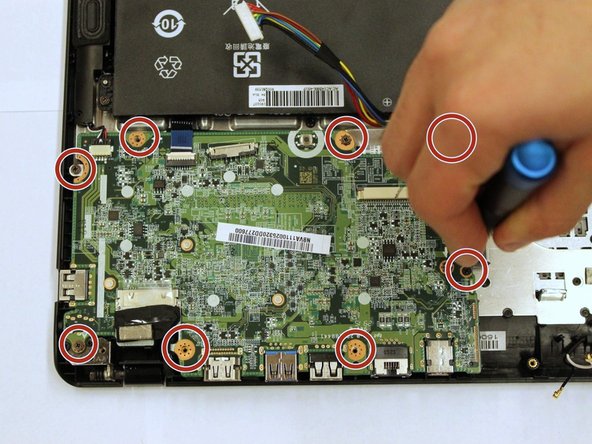
– Get ready to rock n’ roll by removing the eight 7mm Phillips screws from the motherboard with the #0 screwdriver.


Step 11

– Gently unscrew the single 6mm Phillips screw located at the center of the touchpad using the #0 screwdriver.
Step 12
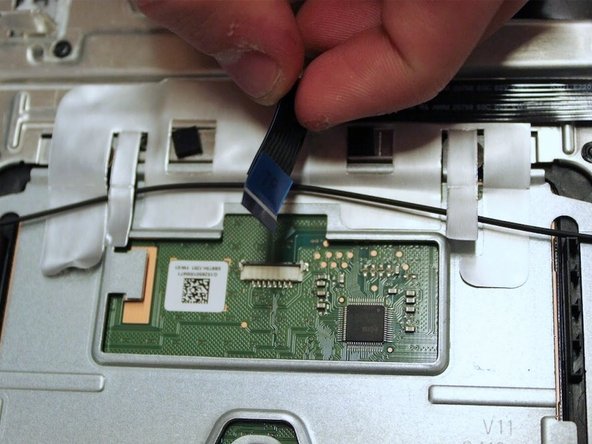

– Give that wire a little love and gently remove it from its cozy slot.

Step 14

– Grab your trusty #0 screwdriver and loosen up the 6mm screw hanging out in the corner of the touchpad frame. It’s time to let that screw go on its own little adventure!
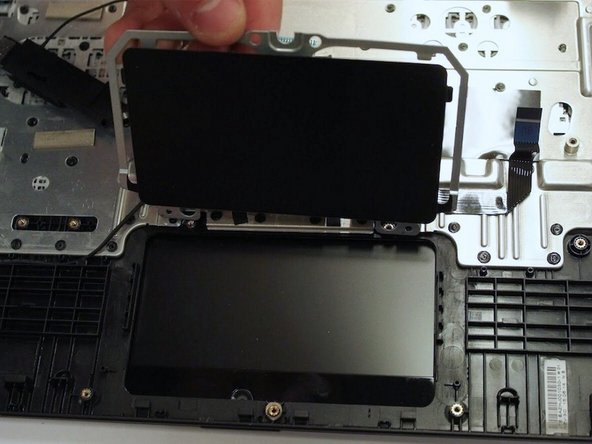

Step 16

– Time to say goodbye to the touchpad! Go ahead and remove it with care.