How to Replace Asus F6A-X2 Front Bezel: Step-by-Step Guide
Duration: 45 minutes
Steps: 5 Steps
Hey there! Just a friendly reminder to be extra careful while tinkering with your device. A little caution goes a long way! If you find yourself stuck or need a helping hand, don’t hesitate to schedule a repair. We’ve got your back!
The front bezel is that nifty plastic or metal frame that keeps all the important bits like your webcam and WiFi tucked away safely. Plus, it holds your screen in place like a champ! Just make sure you’ve got the right bezel for your laptop when it’s time for a swap. If you need help, you can always schedule a repair.
Step 1


– Place your laptop right side up, just like it’s lounging in the sun.
– Now, give that laptop a little twist—rotate it 90 degrees towards you so you can peek right into the empty battery compartment!
Step 2


– Slide a fingernail or the flat edge of your trusty spudger into the gap between the laptop base and the hinge guard on the right side. With a gentle tug, pull the guard towards you until it pops off like a champ.
– Now, just rinse and repeat for the other guard. You’ve got this!
Step 3

– First things first! Once you’ve taken off those hinge guards, lay your laptop down flat on its bottom. Now, gently lift the screen like you’re ready to dive into some serious work!
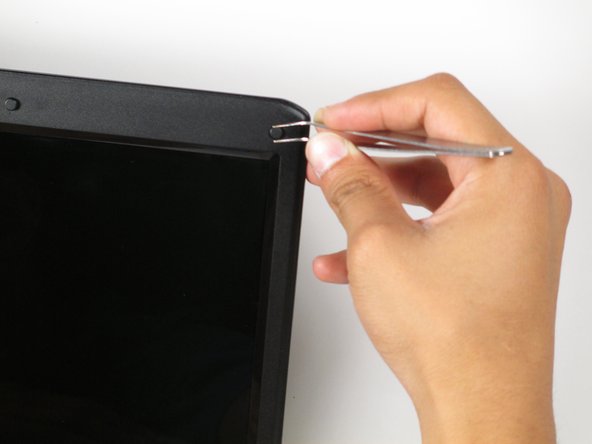
– Next up, grab a pair of tweezers and carefully peel off the six rubber cushions that are hanging out around the edge of the screen bezel. You’ve got this!
Tools Used

Step 4


– Let’s kick things off by unscrewing those six 2.0 mm Phillips #1 screws that are hanging out around the bezel. You’ve got this!
Step 5

It’s totally normal to hear a little crackle here and there! No worries, your bezel is just fine through all this.
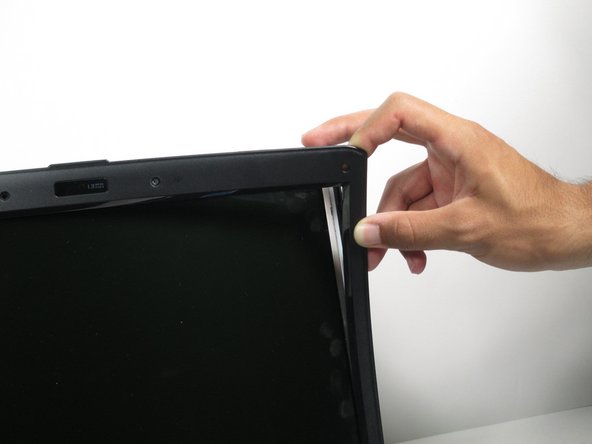
– Slide your finger or the flat edge of a spudger into the gap between the bezel and the back cover of the laptop.
– Carefully pry the bezel toward you to detach it from the laptop’s back panel.
– Keep prying around the edges of the laptop until you’ve completely freed the bezel.
