How to Replace Asus K200MA-DS01T Motherboard Guide
Duration: 45 minutes
Steps: 29 Steps
Hey there! Just a friendly reminder to take your time and double-check everything as you go. If you hit a snag or need a hand, don’t hesitate to schedule a repair. You’ve got this!
Ready to roll up your sleeves? This guide will help you swap out the motherboard in your Asus K200MA laptop like a pro. Let’s get started and make that laptop as good as new! If you need help, you can always schedule a repair.
Step 1


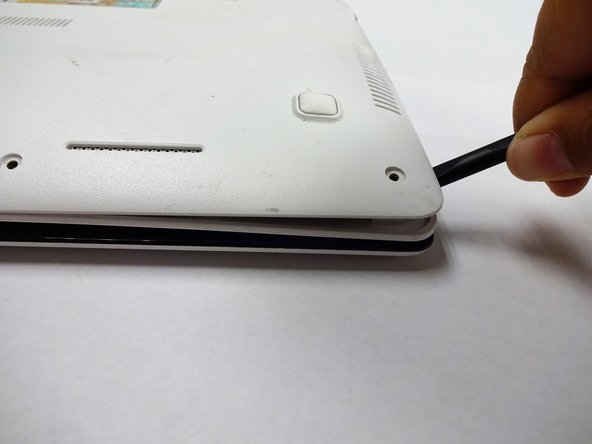
– With the back side up and ready to go, let’s flip that laptop over and tackle those screws on the back panel:
– Six 4mm Phillips screws are waiting for you—grab your trusty Phillips #0 screwdriver and let’s get to work!
– And don’t forget about the one special 12mm Phillips screw right in the center—same Phillips #0 screwdriver will do the trick.
Tools Used

Step 2


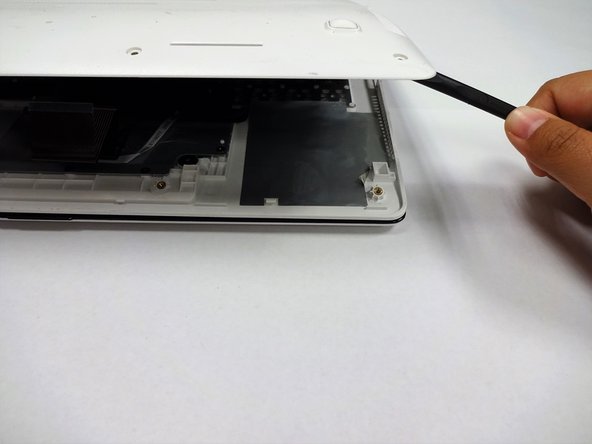
– Grab your trusty plastic spudger and gently pry off the two rubber stoppers near the hinge to uncover the hidden screws waiting for you underneath.
Tools Used

Step 3

– Let’s get started by taking out some screws:
– You’ll need to remove two 4mm Phillips screws with a trusty Phillips #0 screwdriver.
Tools Used
Step 4

You might find it handy to have one spudger snugly wedged between the back panel and keyboard while using another to gently nudge it open in a different area. Don’t worry, you’ve got this!
– Grab a trusty plastic spudger and muster up a bit of elbow grease! Carefully wedge it between the back panel and the keyboard, and give it a gentle nudge to pop it free. You’ve got this!
Tools Used
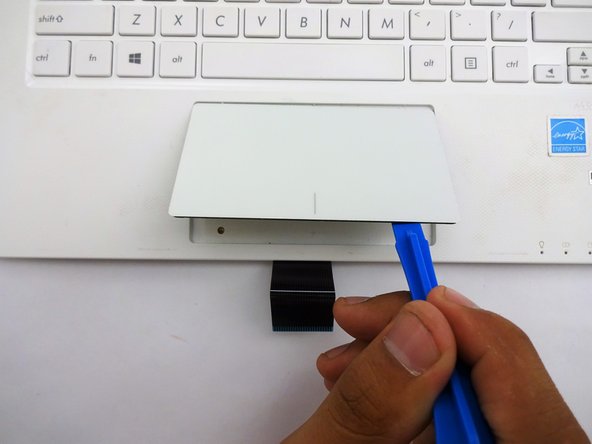
Step 5

– To gracefully detach the keyboard connectors from the keyboard and back panel, simply pull the wide keyboard connector out with a gentle tug.
– Next, with a light touch, pull the narrow connector away from the keyboard. You’ve got this!
Step 6

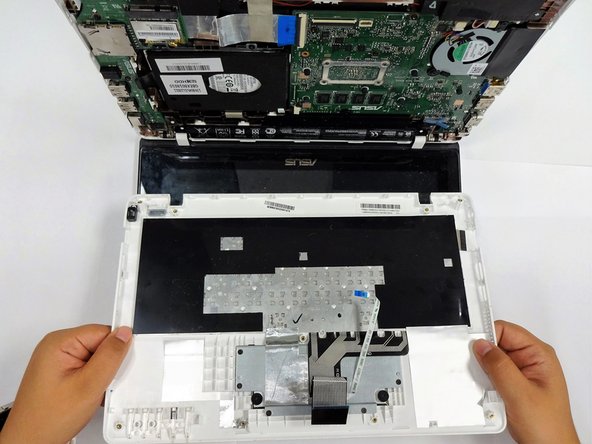
– With the keyboard connectors now unplugged, gently lift the keyboard away from the back panel hinges. You’ve got this!
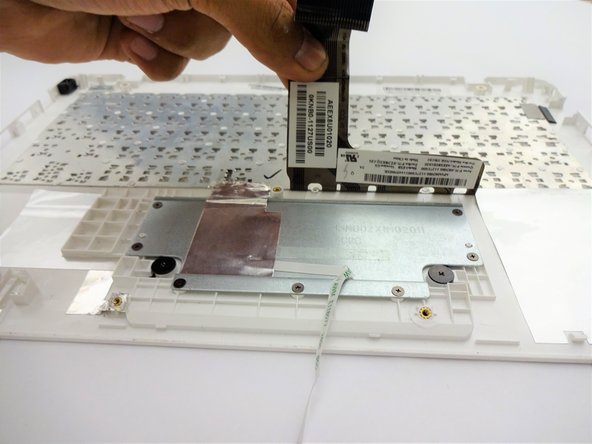

Step 8

– Gently lift the foil sheet up and away.
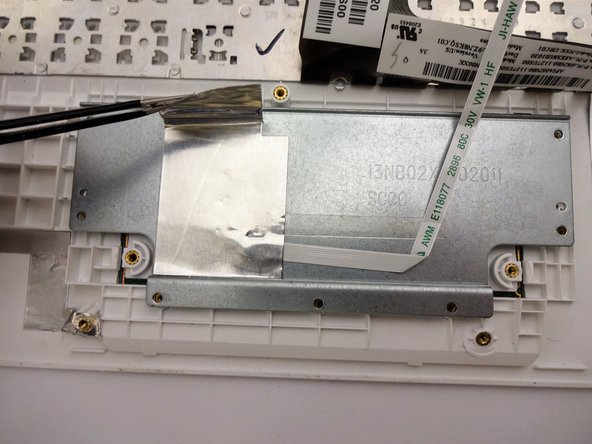
Step 9

Don’t forget to take out the screw hiding under the keyboard connector!
– Time to get your screwdriver ready! Start by taking out these screws:
– Eight 3 mm screws with a trusty Phillips screwdriver.
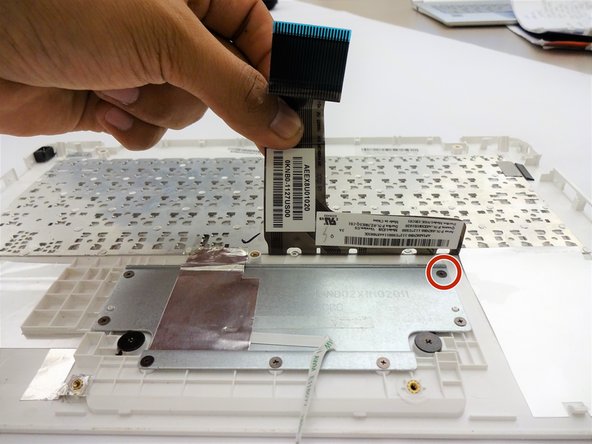
Step 10

– Let’s get started by taking off those pesky screws!
– You’ll need to grab your trusty Phillips #00 screwdriver for this part. Unscrew two 2 mm screws and you’re on your way!
Step 11

– Grab your trusty plastic spudger and gently pry off that pesky metal plate. You’ve got this!
Tools Used
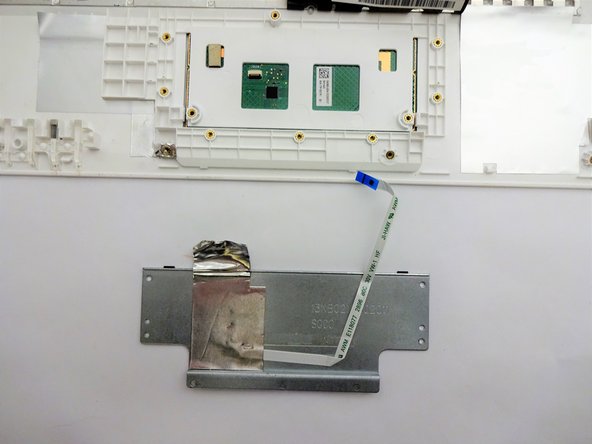
Step 12


Feel free to apply a bit of muscle here! The track pad and that plastic part are best buddies, glued together like they’re in a sticky situation.
– Turn that keyboard upside down, it’s time for some action!
– Grab a plastic spudger and gently work your magic to pop the track pad off the plastic base below.
Tools Used
Step 13

– Let’s get that computer flipped over! Make sure the side with the motherboard (that big green thing) is facing up and ready for action.
– Now, it’s time to tackle those screws holding the battery in place. Grab your tools!
– You’ll need to remove three 4mm Phillips screws using a Phillips #0 screwdriver. Easy peasy!
Tools Used
Step 14


– With a firm grip on the broader left section, gently lift the battery away from the computer like you’re unveiling a surprise gift!
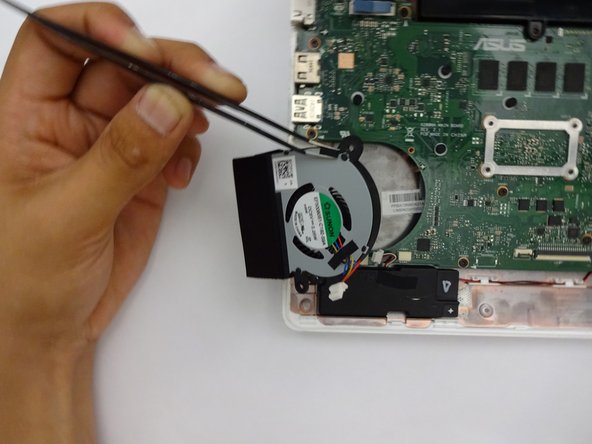
Step 15
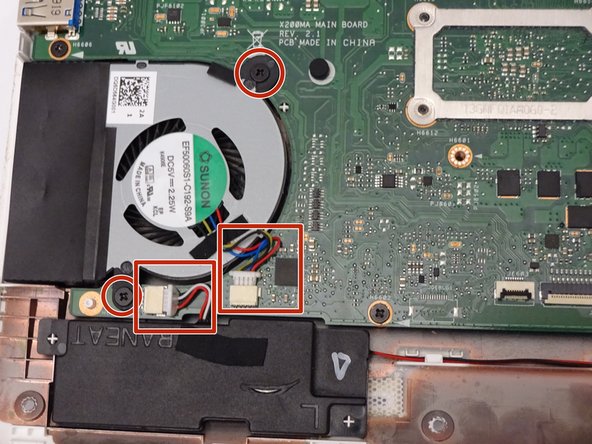

– Find the fan, along with two screws and two color-coded wires hanging out in the bottom left corner of your computer. You’ve got this!
Step 16

– Let’s get that fan ready for some action! First up, you’ll want to unscrew these little guys:
– Two 4mm screws using a trusty Phillips #0 screwdriver.
Tools Used
Step 17

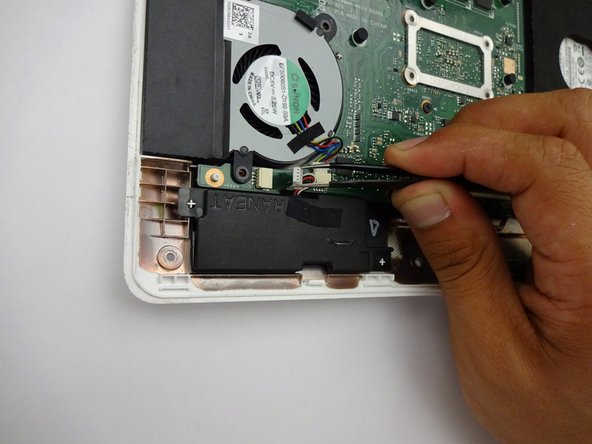
– Gently tug those colorful wires out of their snug little home in the wire slot. You’ve got this!


Step 19
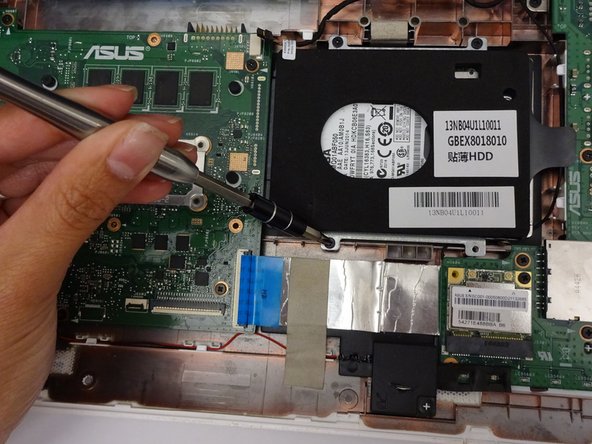

– Let’s get down to business! First up, it’s time to unscrew some screws:
– You’ll need to remove four 4mm Phillips screws using your trusty Phillips #0 screwdriver. You’ve got this!
Tools Used
Step 20

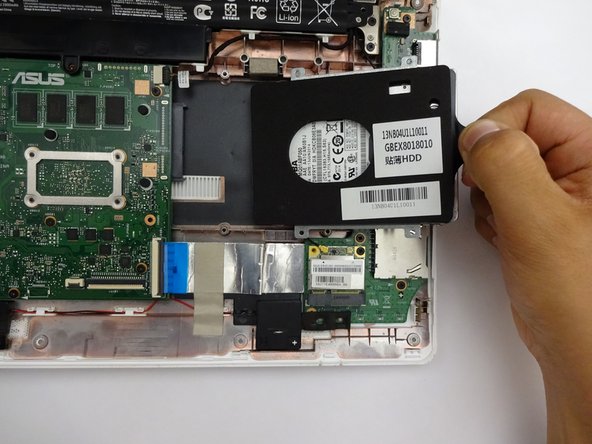
– Gently slide the hard drive to the right and away from the computer, using the handy tag on the right side to help you out.
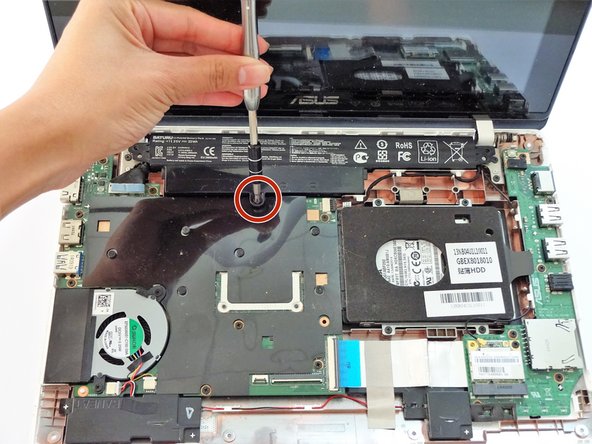
Step 21
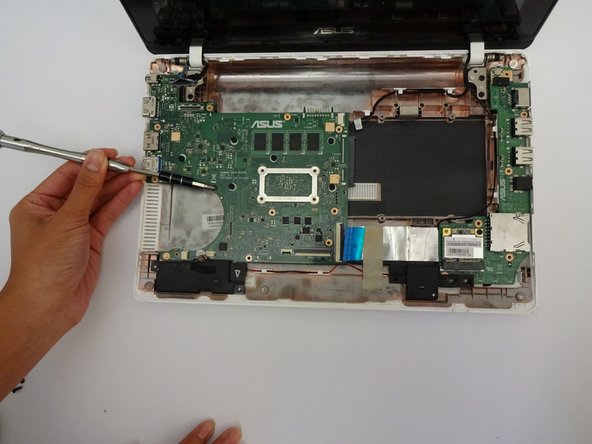

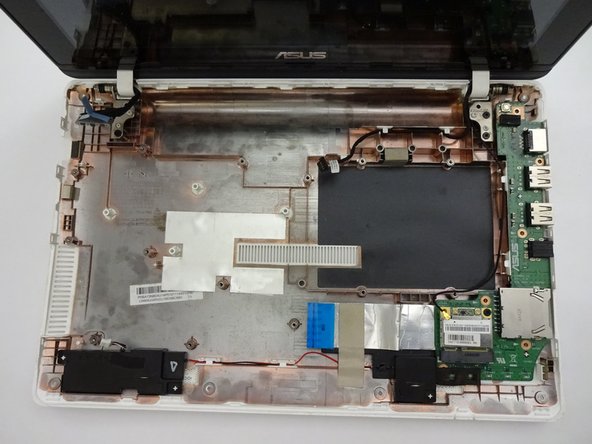
– Time to get your toolkit ready! First up, let’s track down and unscrew these little guys on the motherboard:
– You’ll need to tackle eighteen 4mm Phillips screws, so grab your trusty Phillips #0 screwdriver and get to work!
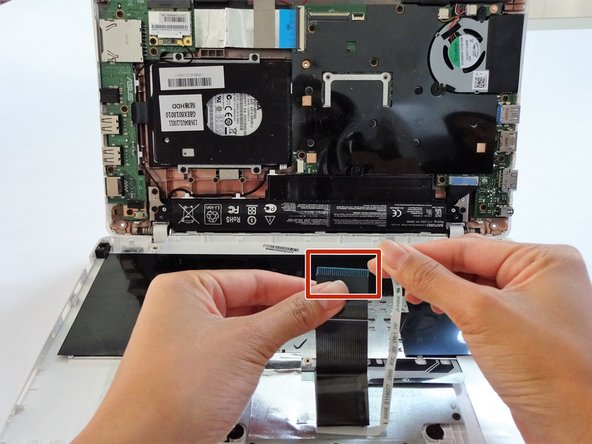
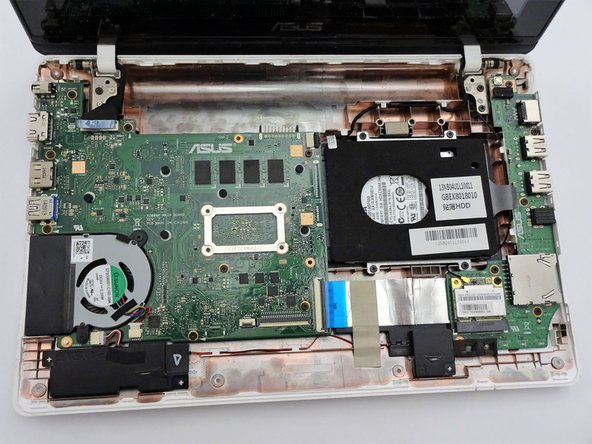
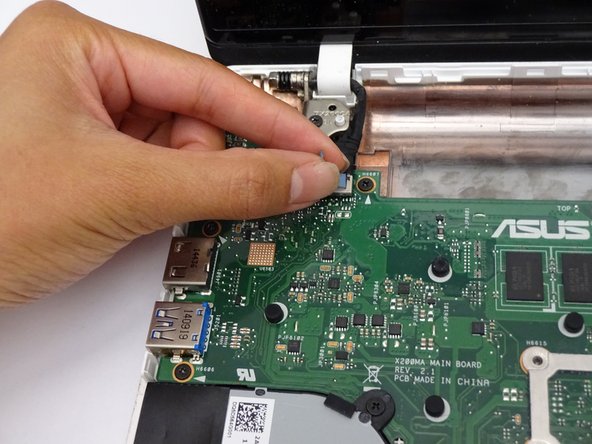
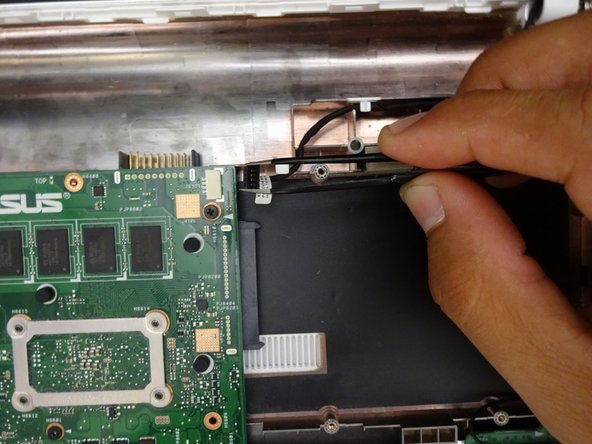
Step 22

One connector will be a sleek ribbon, the second will be sporting some snazzy color coding, the third will flaunt a shiny gold cable, and the fourth will be a robust wide connector positioned vertically.
– Find all 4 connectors hanging out and ready for action.
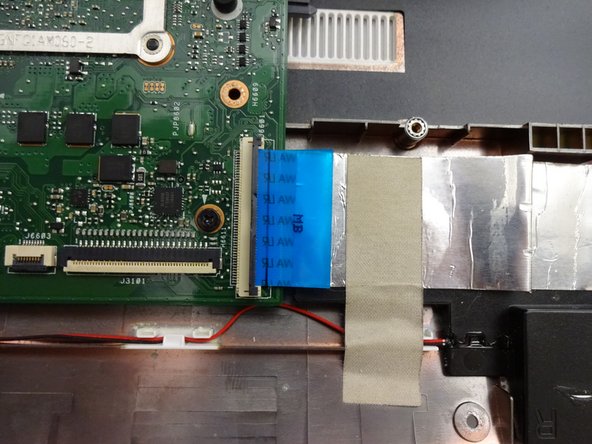
Step 23

You’ll need to apply a good amount of pressure to get things moving.
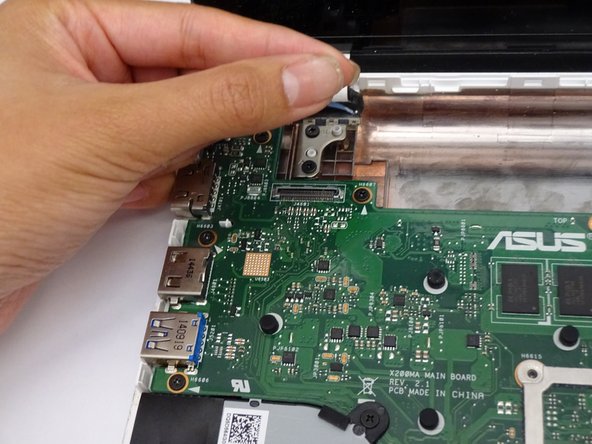
– Gently grab that blue ribbon and give it a little tug to lift the connector away from the motherboard with style.
Step 24

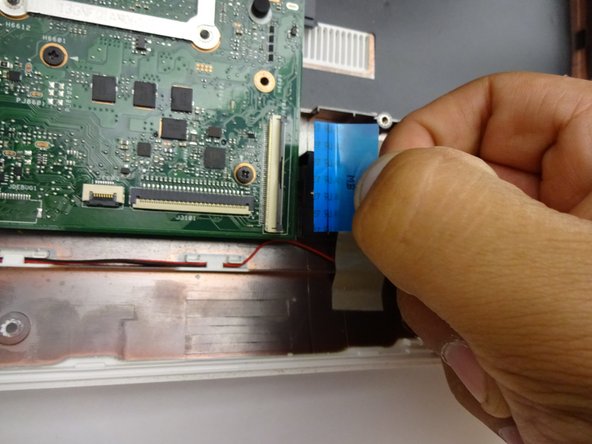
– Gently slide the connector out from the socket, keeping it parallel to the surface. You’ve got this!
Step 25

– Gently lift the latch upward to free that computer ribbon connector like a pro.
Step 26

– Gently slide the computer ribbon cable away from the latch, just like you’re giving it a little nudge to say, ‘You’re free to go!’
Step 27
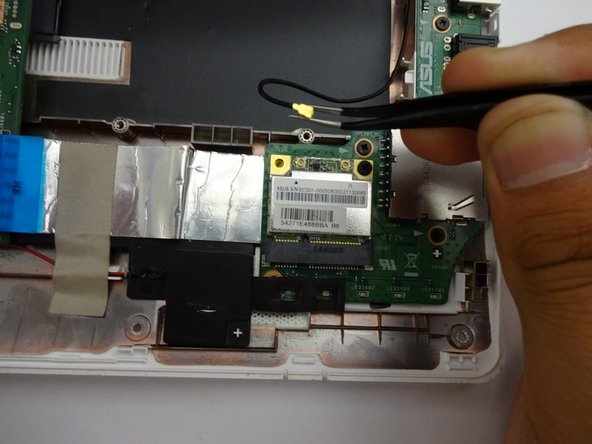

– Gently tug the cable straight out from the head, moving it away from the placement like you’re giving it a little stretch.
Step 28

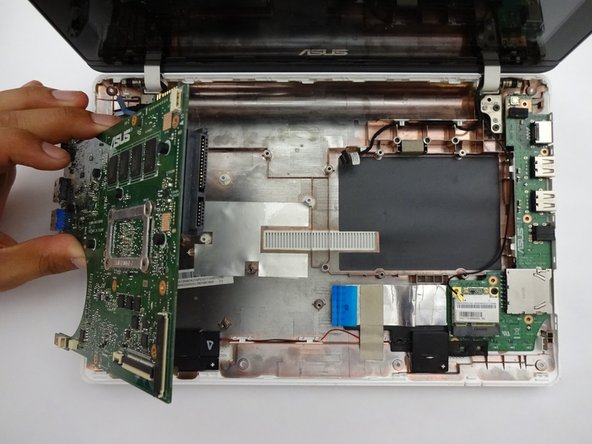
To keep everything safe and sound, please avoid using tools to pry off the motherboard.
Gently coaxing the motherboard out is the way to go—no need to muscle it out!
– After you’ve carefully taken out all the screws and connectors, it’s time to gently lift the motherboard out of your computer. You’ve got this!
Step 29

– Time to say goodbye to the last piece of the motherboard hanging out on the right side of the keyboard shell. You’ve got this!
