How to Replace Asus Transformer Pad TF103C Headphone Jack
Duration: 45 minutes
Steps: 8 Steps
Ready to fix up your ASUS Transformer Pad TF103C? This guide walks you through replacing the headphone jack step by step with helpful pictures and easy-to-follow instructions. It’s a simple process that doesn’t require much technical know-how—just a few basic tools and some patience. Follow the steps, and you’ll have that headphone jack swapped out in no time. And hey, if you hit a snag, don’t worry! You can always schedule a repair.
Step 1

If you don’t have an opening tool on hand, grab a thin screwdriver and get ready to work your magic!
– First things first, let’s power down that device! Safety first, right?
– Grab your trusty plastic opening tool and wedge it between the top and bottom covers of the laptop. They’re snuggly attached all along the edges, so a little finesse goes a long way.
– Now for the fun part! Gently pull upwards and coax those covers apart. Take your time—there’s no rush!
Step 2

– Gently glide that handy tool around all four edges of your laptop, giving it a little upwards tug as you go. Before you know it, the bottom case will be ready to pop right off!
Step 3

– Once you’ve popped off the back cover, stash it in a safe spot—you’ll need it later!
– Flip your laptop around to match the orientation in the picture—this will make the guide a total breeze to follow.
Step 4

– Let’s get started by carefully removing the tape and unplugging the wire that connects both speakers to the soundboard.
Step 5

– Grab your trusty +J000 screwdriver and let’s tackle that M2 screw! Unscrew it and gently take off the plastic bracket like a pro.
Tools Used
Step 6

– Peel off that black tape from the ribbon cable and gently detach the cable from the soundboard. You’ve got this!
Step 7

– Let’s get started by using the +J000 to remove the three mounting screws from the soundboard. This is a straightforward step, but be sure to keep track of those tiny screws!
– Keep those screws organized and together – you can even label them if you’re feeling extra meticulous. This will make reassembly a breeze.
Step 8
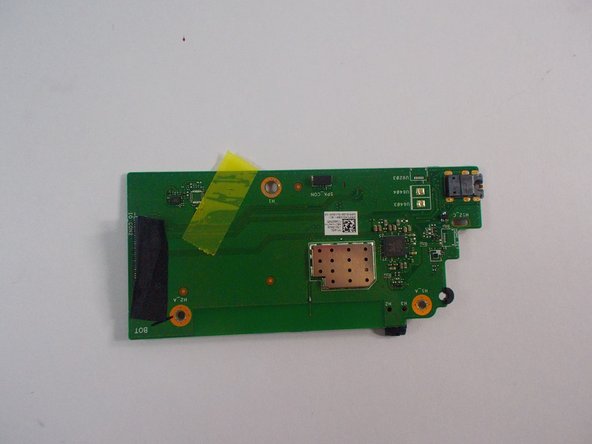

– Say goodbye to your old soundboard! Carefully detach the soundboard that’s holding onto the headphone jack and swap it for the shiny new one you have. You’re doing great!
– Once you’ve made the switch, it’s time to put everything back together. Just retrace your steps and reverse the order of these instructions. Easy peasy!
Success!