How to Replace Flash Unit Adhesive in Google Pixel 8a
Duration: 45 minutes
Steps: 6 Steps
Hey there! This guide has been put together by the awesome folks at Salvation Repair. Just a heads up, it’s not officially backed by anyone else. For more fun and useful repair tips, feel free to check out our other guides!
Get ready to tackle your repair journey! This guide is your trusty companion for applying fresh flash unit adhesives in your Pixel 8a. Remember, while we’re here to help you out, this guide isn’t officially backed by anyone. If you find yourself needing a little extra assistance, don’t hesitate to schedule a repair!
Step 1


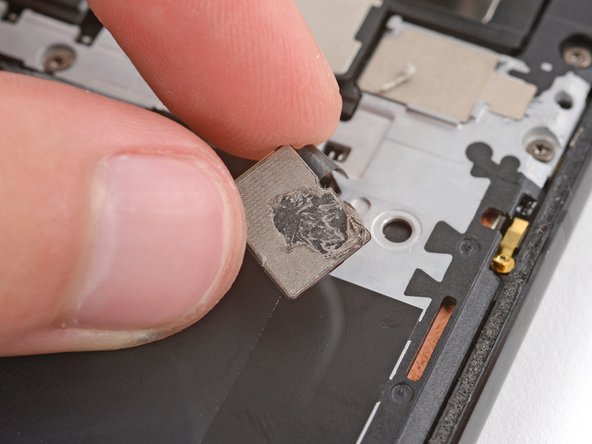
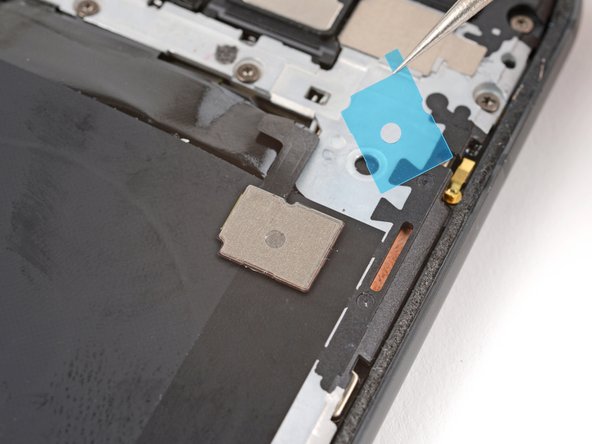
– Grab those tweezers and gently peel away the pesky conductive tape adhesive nestled in the top right corner of the motherboard cover. You’re on the right track!
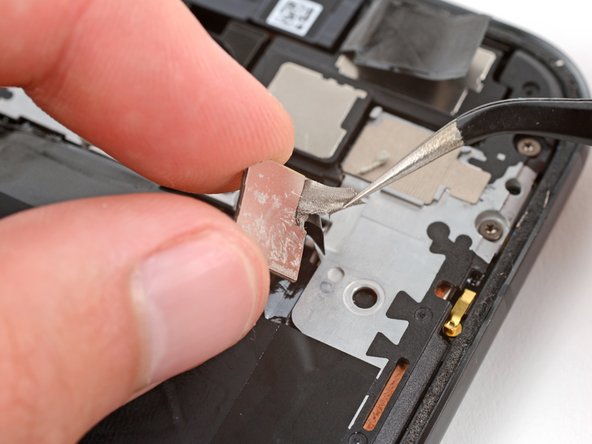
– Next up, take the flat end of your spudger and give that remaining adhesive a little love tap—scrape away any stubborn bits that are still hanging on.
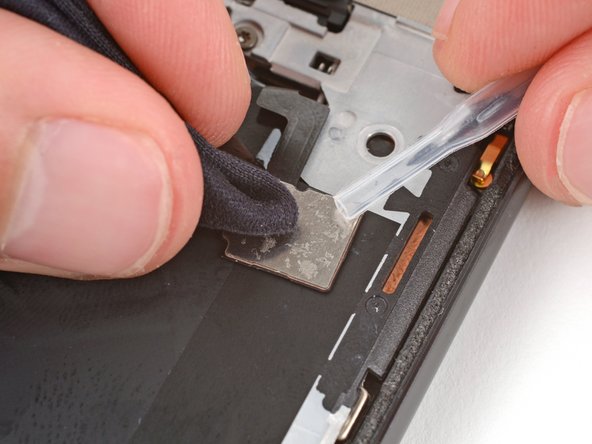
– Now it’s time to get a little scientific! Use a pipette or syringe to drop a few splashes of highly-concentrated isopropyl alcohol (over 90%) right on that residue, and then wipe it clean with a cozy microfiber cloth. Look at you go!
Tools Used


Step 3

– Take a moment to inspect the adhesive sticking to the bottom of the flash unit. Is it looking good?
– If that adhesive is still holding strong and feeling sticky, you can happily skip ahead and dive back into your original repair guide.
– But if the adhesive seems a bit worse for wear or has lost its sticky charm, don’t worry! Just follow the next three steps to give it a fresh new start.
Step 4

As you tackle the remaining steps, just remember to treat that delicate flash unit cable like it’s a precious little flower – handle it gently to avoid any strains or tears!
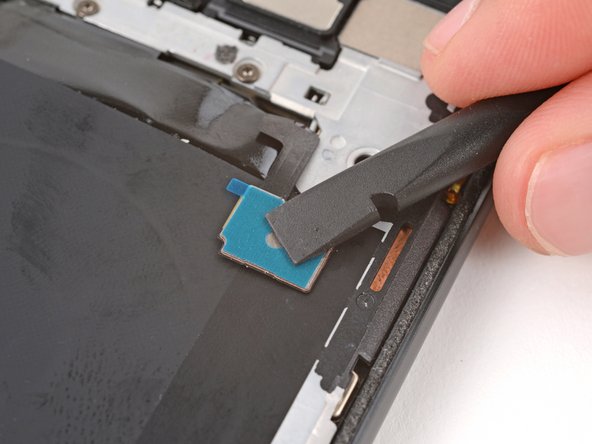
– Grab your trusty spudger and a pair of tweezers, and gently scrape away that old adhesive from the bottom of the flash unit. Let’s clear out the old to make way for the new!
– Now, take a pipette or syringe and sprinkle a few drops of high-octane isopropyl alcohol (90% or more!) onto the leftover adhesive goo. Wipe it off with a cozy microfiber cloth and watch that residue disappear like magic!
Tools Used

Step 6

– Things not going your way? No worries! Give some basic troubleshooting a shot, or feel free to reach out to our awesome Answers community for a helping hand.
– Oops! It looks like I didn’t finish this guide.
–
Success!


