How to Replace Google Pixel 3 Display Assembly – Step-by-Step Guide
Duration: 45 minutes
Steps: 47 Steps
A heads up: this repair guide was put together by the team at Salvation Repair, and it’s not officially endorsed by Google. Want to learn more about how we create our guides? Check it out here.
Important to note: this procedure is for screens that aren’t already attached to a frame. If you’re not sure what you’re doing, don’t worry – we’ve got you covered. Just follow along and take your time.
Warning: this process will completely remove the Pixel 3’s screen, so make sure you’re ready for that. If you need help or want some extra guidance, you can always schedule a repair.
Hey there! This repair guide comes straight from the awesome folks at Salvation Repair, and while Google hasn’t given it the thumbs up, we promise it’s packed with useful info! Ready to dive in? This guide will help you safely remove and swap out the display assembly on your Pixel 3. Just a heads up, this is for replacement screens that aren’t pre-mounted on a frame, so you’ll need to take a little detour to remove the motherboard to get to those screen connectors. Keep in mind, this process will involve safely taking out the Pixel 3’s screen. OLEDs are sensitive little things that don’t like being around oxygen or moisture, which is why they’re sealed tight (and why a cracked screen can look all black and sad). Replacing just the front glass? Tough gig! The Pixel’s OLED layers are bonded to the glass, making it tricky. If you ever feel stuck, you can always schedule a repair with us!
Step 1

– Warm up an iOpener and place it on the bottom of your phone for a minute to get things nice and toasty.
Tools Used

Step 2


Double-check that you’re working on the correct side – we don’t want you to accidentally mix up the screen and back cover.
Remember to use plastic tools to pry, as metal can damage or shatter the glass back cover. If it’s being stubborn, try applying a bit more heat with a hair dryer or heat gun. And if you’re still having trouble, don’t worry – you can always schedule a repair
If your back cover is looking a little worse for wear with some serious cracks, a layer of clear packing tape might just do the trick to help that suction cup stick around.
Depending on your phone’s age, you might need to channel your inner superhero for this. If you’re struggling a bit, just add some more heat and give it another shot!
– Place a suction cup on the warmed-up bottom edge of the back cover.
– Give the suction cup a firm, steady pull to open up a gap.
– Slip an opening pick into the gap to keep it open.
Step 3

When you’re slipping an opening pick above the power button, just be gentle and don’t push it in too far – you don’t want to accidentally damage that fingerprint sensor cable. If you need help, you can always schedule a repair
Step 4


– Carefully slice through the adhesive along the bottom edge of your phone and around the right corner – you’re making great progress!
– Leave a pick in the bottom edge to keep the adhesive from re-sealing, and take a moment to breathe – you’re doing awesome! If you need help, you can always schedule a repair
Step 5


The adhesive can be quite sticky! Give the pick a little wiggle in and out like you’re sawing away to make slicing a breeze.
– Now it’s time to get this repair started – heat up the right edge with an iOpener and keep slicing through that adhesive with your trusty opening pick. If you need help, you can always schedule a repair
Tools Used
Step 6


Be careful when slicing above the power button – don’t insert the pick more than halfway to avoid damaging that fingerprint sensor cable. If you need help, you can always schedule a repair
– Keep the heat flowing and glide your tool along the phone’s edge, slicing through the adhesive like a pro. Slip in a pick at each corner to keep that sticky stuff from sealing up again. You’ve got this!
Step 7


Hold up! Don’t even think about taking off the back cover just yet. It’s still hanging out with the phone, thanks to the fingerprint sensor cable.
– After you’ve made a careful slice around the edges of the phone, gently lift the left side of the back cover like you’re revealing a surprise.
– Now, flip that back cover over along its long side and lay it down with care to ensure the fingerprint sensor cable stays happy and unstrained.
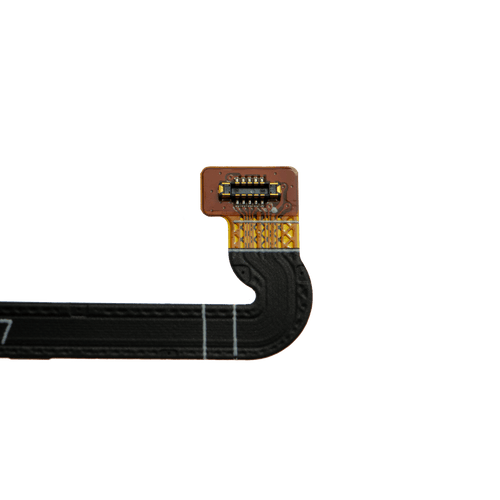
Step 8

– First things first, let’s tackle those two 4.1 mm-long Phillips screws holding down the fingerprint connector bracket. You’ve got this!
– As you go through this repair adventure, keep an eye on each screw and remember where it belongs. It’s like a little treasure hunt!
– When it’s time to put everything back together, just a friendly reminder: don’t over-tighten those screws. We wouldn’t want to accidentally give your display a workout it didn’t sign up for!


Step 10


These connectors are pretty delicate, so be careful not to bump those tiny parts around the socket. You got this!
– Use the point of a spudger to gently pry up and disconnect the fingerprint connector from its socket.
– To re-attach connectors like this one, carefully align and press down on one side until it clicks into place, then repeat on the other side. Don’t press down on the middle – that can bend the pins! If you need help, you can always schedule a repair
Tools Used
Step 11


– Let’s kick things off by taking off that back cover!
– Before you pop on a shiny new back cover, make sure to scrub away all that sticky adhesive residue from the phone frame. Grab an opening tool to gently scrape it off, and give the surface a good clean with some high concentration isopropyl alcohol.
– If you’re reusing that trusty back cover, don’t forget to wipe off any leftover adhesive and slap on some fresh back cover adhesive for a snug fit.
– When it comes to installing a replacement back cover, take a moment to hold it up against the original part for a quick comparison. Make sure to transfer any leftover bits (like the flash diffuser) onto your new piece.
– Check out this guide for the best way to apply that new back cover adhesive like a pro.
Tools Used

Step 12

– Let’s tackle that wireless charging coil! Begin by unscrewing those five Phillips screws holding it in place:
– Two little 1.9 mm screws — easy peasy!
– Next, you’ll find two slightly longer, 4.2 mm screws waiting for you.
– And finally, there’s that unique 4.3 mm screw that ties it all together!
Step 13

– Gently lift and detach the wireless charging coil from its spot. It’s just hanging out there, waiting for you to give it a little nudge.


Step 15


When it’s time to remove those standoff screws, a standoff bit is your best bet. If you don’t have one handy, a small flathead screwdriver can get the job done – just be super careful not to slip and damage the surrounding components. If you need help, you can always schedule a repair
– First up, grab your trusty screwdriver and remove those two screws holding the camera bracket in place.
– Now, gently lift off the camera bracket and set it aside.
– You’ll need one 4.1 mm Phillips screw for this step.
– Don’t forget about that one 4 mm standoff screw too!
Step 16

Ready to swap out that front-facing camera? First, figure out which one needs a replacement:
Heads up: if you’re tackling the motherboard removal process, you’ll need to take out both cameras. If you need help, you can always schedule a repair
– Let’s get started with the Normal view camera
– Next up, we’ve got the Wide-angle camera


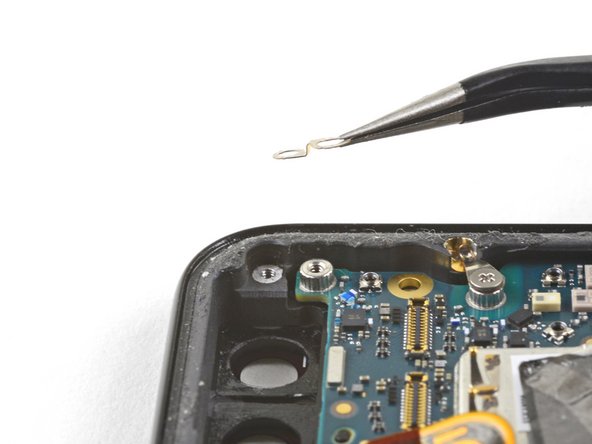
Step 19

– Grab a pair of blunt nose tweezers and gently remove the camera(s).
– If the adhesive holding the camera module is still in good shape, feel free to reuse it. If not, swap it out for some fresh double-sided Tesa tape.
– When putting in the new camera module, make sure the phone frame’s lens is clean and free of any leftover adhesive or gunk. A clean surface is key to a solid install.
Tools Used

Step 20

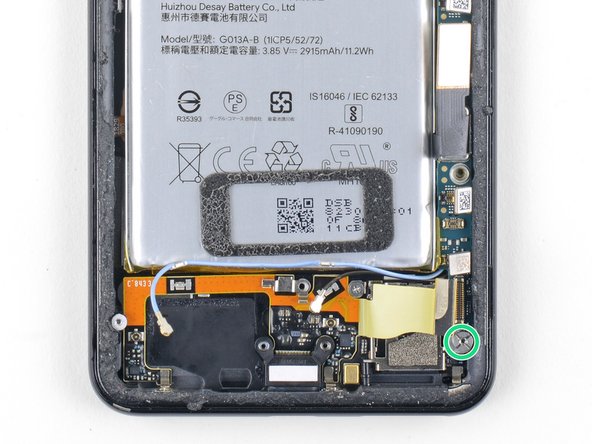
– Gently use the tip of a spudger to lift and unplug the loudspeaker connector from its cozy little spot on the motherboard, which is nestled near the right edge of the phone. Remember, take your time and be gentle with it! If you need help, you can always schedule a repair.
Tools Used
Step 21


Don’t forget to pop this insert back in place before securing the daughterboard.
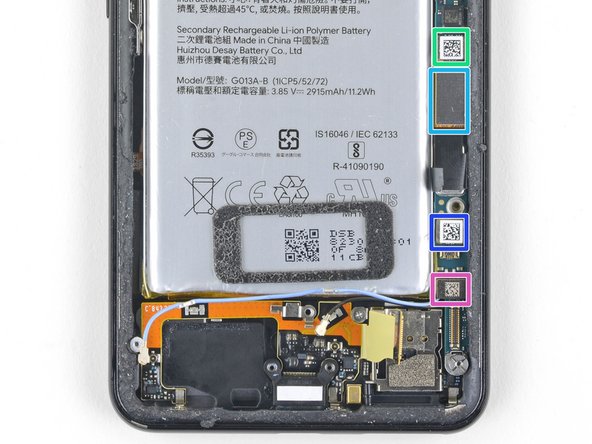
– Start by removing the four Phillips screws – easy peasy.
– Take out the tiny grounding clip from the left screw hole. Be extra careful not to misplace it; it’s small but mighty!
– Next, remove the small plastic insert from the right side of the USB-C port. It’s a little thing but needs to go.
– Unscrew the 1.9 mm screw. Just one, but it’s important.
– Now, grab that 4.3 mm screw and remove it. It’s a bit longer, but you got this.
– There are also two 4.3 mm screws with thinner shanks – make sure you get both.
– The grounding clip should go back in with the contoured edge facing the left side of the phone. Simple, right?
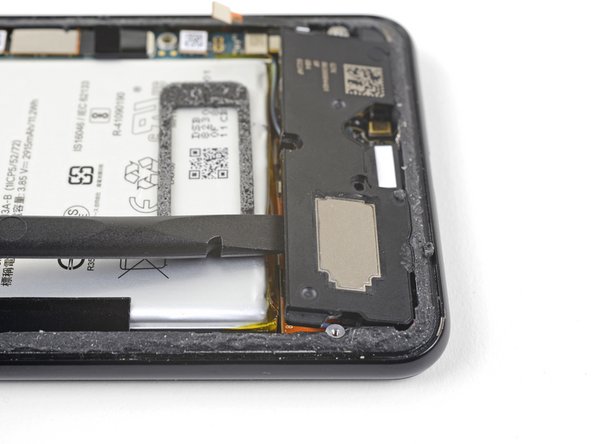
Step 22


The loudspeaker is snugly secured with a tough adhesive gasket. Before you dive in to remove it, give it a gentle pry in a few spots to break that sticky seal. Let’s get that sound back in action!
– Gently slide the tip of a spudger under the bottom right corner of the loudspeaker.
– Carefully pry it up to detach the loudspeaker from the phone.
Tools Used


Step 25


– First up, let’s get that loudspeaker out of there!
– Before you pop in a shiny new loudspeaker, take a moment to check the adhesive gasket. It’s important!
– If the gasket looks good, feel free to reuse it. Just make sure it doesn’t block the exit hole – we don’t want any sound issues!
– In case the gasket has gone rogue, carefully remove it and replace the adhesive with a pre-cut strip or some trusty Tesa tape.


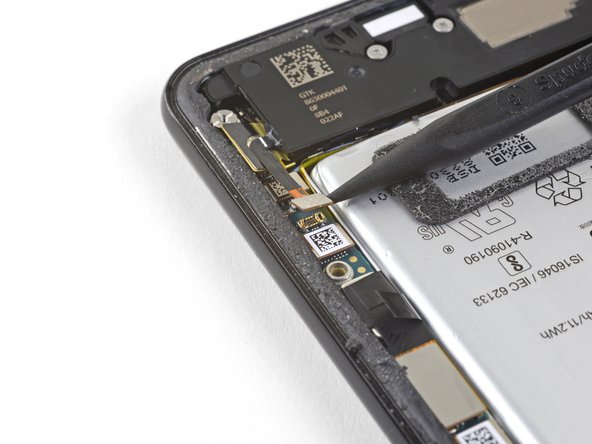
Step 27


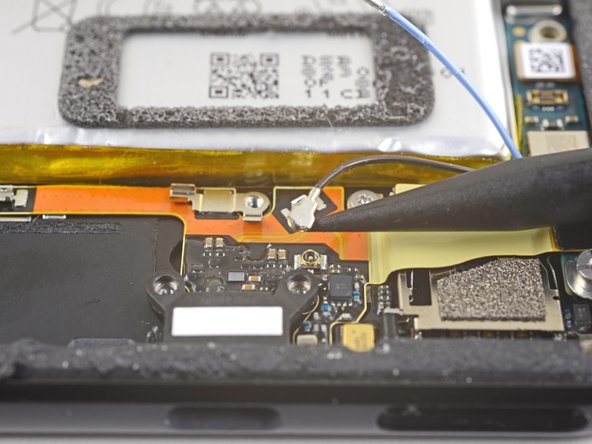
Be gentle with that cable – it’s a bit delicate and can break easily. If it feels like the wire is locked in tight, grab your trusty spudger and carefully nudge the clip open just a tad, then give it another go. You’ve got this!
– Gently use the tip of a spudger to lift and free the blue antenna cable from its grounding clips, taking care to do it with a little finesse.
Tools Used
Step 28

– Grab your trusty spudger and gently wiggle its point under the black antenna cable. Give it a little lift to disconnect it from the socket near the USB-C port. Easy peasy!
Tools Used
Step 29

– Gently move both antenna cables out of the way and steer them clear of the charging assembly. Take your time—patience is key!
Step 30


– Gently use the tip of a spudger to nudge up and detach the charging assembly’s connector from its cozy spot on the motherboard, which is hanging out near the right edge of the phone.
– Carefully peel away the flex cable from the top of the SIM card reader like it’s a sticker that’s seen better days.
Tools Used
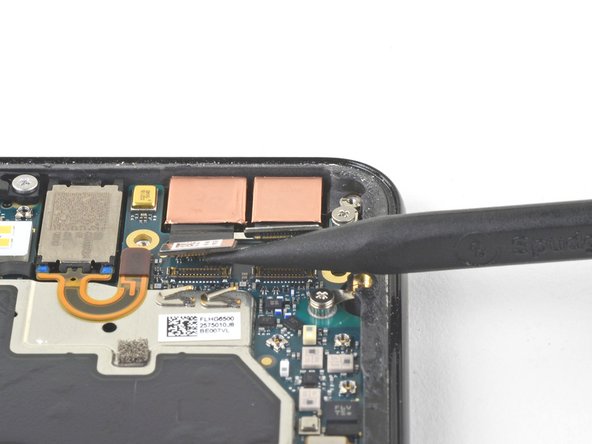
Step 31


Avoid using metal tools to pry things open; you might mess up the flex cable. If you need help, you can always schedule a repair
– Grab your trusty spudger and gently nudge up that black tape securing the display flex cable, right by the phone’s right edge. You’ve got this!
– Next up, use the flat end of that spudger to pop off and disconnect the display connector from the motherboard. It’s all part of the adventure!
Tools Used
Step 32


Hey, be super careful with that spudger around the battery, you don’t want to poke a hole in it! If you need help, you can always schedule a repair.
– Start by slipping the point of a spudger into the gap underneath the black tape that connects the battery and the motherboard – it’s like a little doorway to getting your device fixed.
– Now, gently slide the spudger along the gap to loosen the tape from the battery side. You’re making great progress!
– Carefully lift the tape away from the battery and fold it back out of the way. If you need help, you can always schedule a repair with the experts at Salvation Repair.
Tools Used
Step 33

– Time to get your spudger in action! Gently pry up and disconnect the following seven press-fit connectors from their motherboard sockets:
– External buttons connector
– Top microphone connector
– Earpiece connector
– Left squeeze sensor connector
– Screen connector
– Right squeeze sensor connector
– SIM tray connector
Tools Used
Step 34

– Gently use the flat edge of a spudger to lift and nudge the earpiece speaker’s flex cable upward, getting it out of the way of the motherboard. You’re doing great!
Tools Used
Step 35

Watch out! Some of these screws are responsible for holding tiny grounding clips. Keep an eye on those little guys so they don’t go missing while you’re working your magic!
When it comes to standoff screws, it’s ideally a job for a standoff bit. But if you’re in a bind, a small flathead screwdriver can swoop in to help—just be careful not to slip and cause any collateral damage to nearby components.
– Let’s get started by removing the six screws that hold the motherboard in place – it’s time to set it free!
– Next, carefully remove and set aside the three small metal grounding clips – we’ll get back to them later.
– Now we’re talking – remove the One 4.2 mm Phillips screw, you’re making great progress!
– Keep going, remove the Three 1.9 mm Phillips screws, you’re almost there!
– Don’t stop now, remove the One 4.3 mm Phillips screw and keep moving forward.
– Finally, remove the One 3.83 mm standoff screw – you’re doing awesome! If you need help, you can always schedule a repair
Step 36
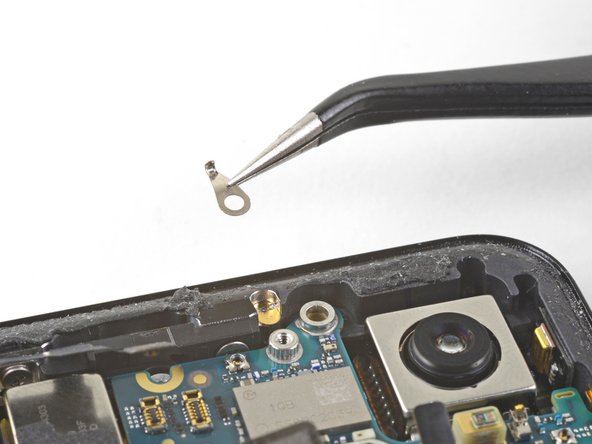

– Let’s get started by carefully removing the antenna bracket from the top left edge of your phone – take your time and be gentle.
– To put those small metal grounding clips back in place, follow these easy steps:
– First, make sure the silver side of the clips is facing upwards – it’s an easy step, but an important one.
– Next, position the teardrop shaped clips so their points are facing towards the edge of your phone – you’re doing great!
– Finally, the double-holed clip should be dipped downwards towards the top-right screw hole of the frame – almost there! If you need help, you can always schedule a repair
Step 37


– Let’s get started by inserting the point of a spudger near the top left corner of the motherboard, just below the rear-facing camera. Take your time and be gentle.
– Now, pry up carefully to loosen the motherboard. As you do this, make sure to bend all the flex cables away to give everything some breathing room.
– If the motherboard feels stuck, don’t worry. Just double-check that you haven’t missed any flex cables or screws that might still be connected. If you need help, you can always schedule a repair
Tools Used
Step 38


Gently nudge the motherboard around the earpiece speaker’s flex cable, making sure it fits snugly. Take your sweet time, and remember, patience is key!
– Now, let’s gently lift that motherboard! Slide your spudger underneath the top edge and carefully pry it up. You got this! If you need help, you can always schedule a repair
Tools Used
Step 39


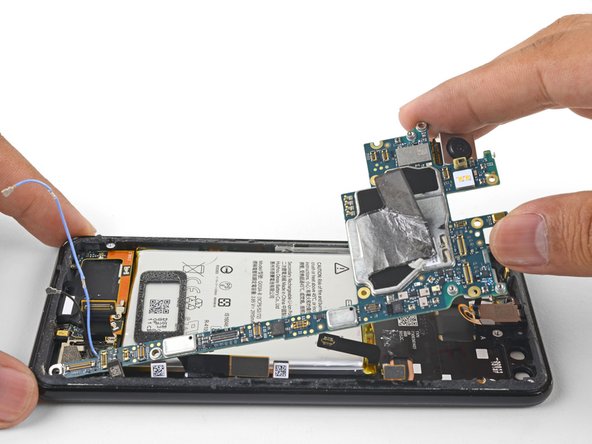
– Gently lift the left edge of the motherboard and swing it up towards the right, taking care not to catch any press connectors – if they get in the way, just nudge them gently to the side. If you need help, you can always schedule a repair
Step 40
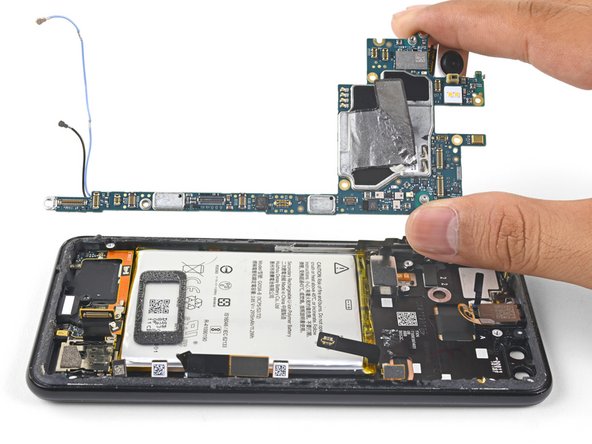

– Gently lift the top end of the motherboard away from the frame like you’re unveiling a surprise.
– Carefully take out the motherboard, it’s time for a little break!
– When you’re putting the motherboard back in, just make sure those flex cable connectors aren’t getting squished underneath. They like their space!
– Repositioning the motherboard around the earpiece flex cable can be a bit tricky. If you need to, gently pop up the earpiece speaker, slide in the motherboard, and then put the earpiece speaker back in place. You’ve got this!
Step 41

Depending on how old your phone is, it might take a little extra oomph to get it going. If you’re having trouble, just give it a bit more heat and try again. Don’t worry, we’ve all been there! If you need help, you can always schedule a repair
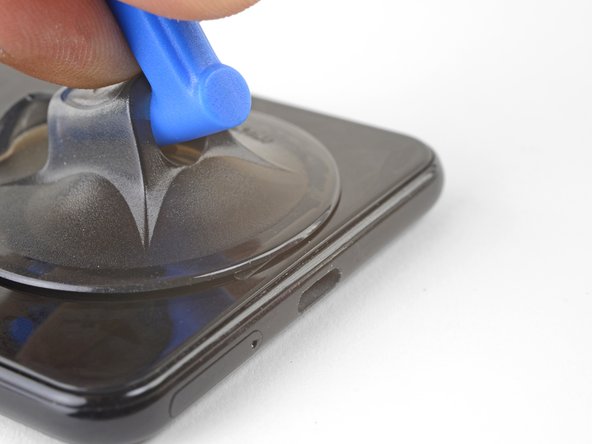
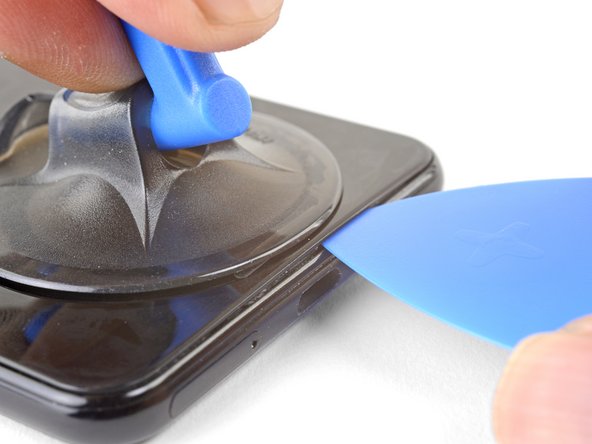
– First, warm things up by applying a heated iOpener to the bottom edge of the screen for about a minute.
– Next, place a suction cup near the bottom edge of the screen, right by the USB-C port – it’s the perfect spot to get a grip.
– Now, use some steady force to lift the suction cup and create a gap – you got this!
– Take an opening pick and carefully insert it into the gap you just made.
– If you’re having trouble, don’t worry – you can also try heating and pulling up a long edge of the phone to gain access. And if you need help, you can always schedule a repair
Tools Used

Step 43

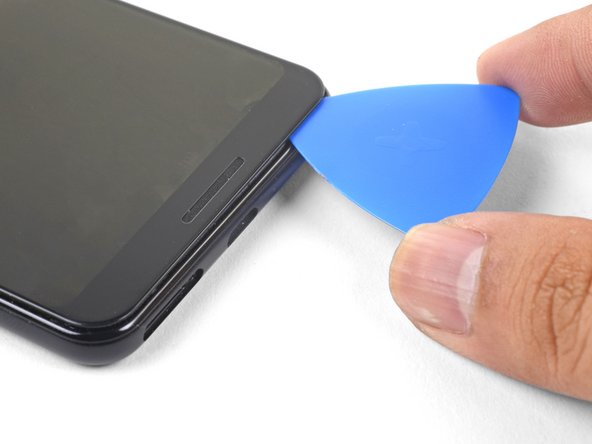
– Keep warming those edges with the iOpener and cutting through the adhesive with the opening pick. You’ve got this! Keep going until you’ve cut through all the adhesive. If you need help, you can always schedule a repair
Tools Used
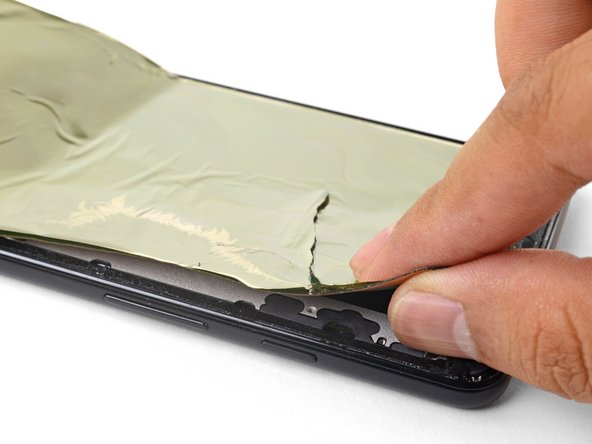
Step 44
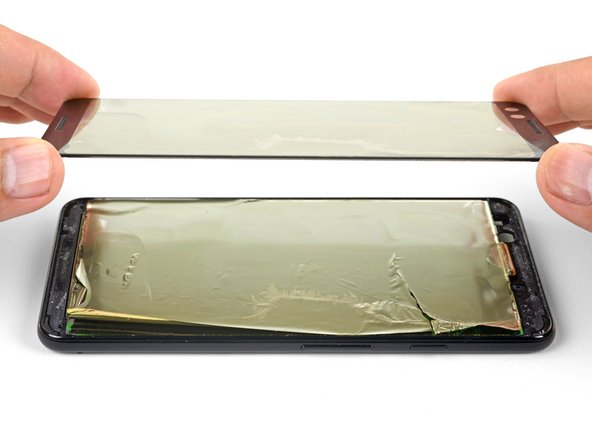

– Gently lift and detach the front glass from your phone, like peeling the perfect orange slice.
Step 45

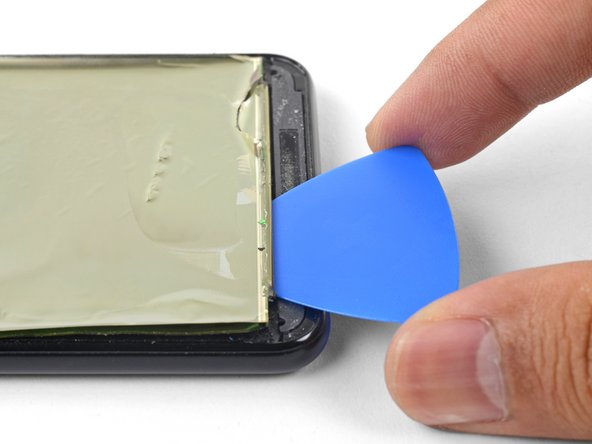
Okay, so that last bit of screen is stuck on with some super-strong adhesive. No worries, we’ve got this!
If you’re having trouble, just give the screen a little heat with a heated iOpener. That’ll help loosen things up.
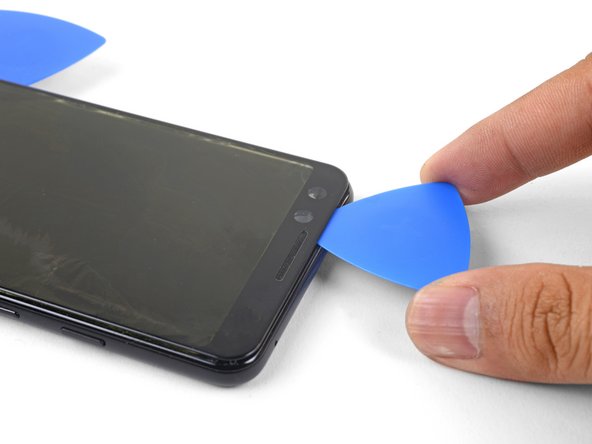
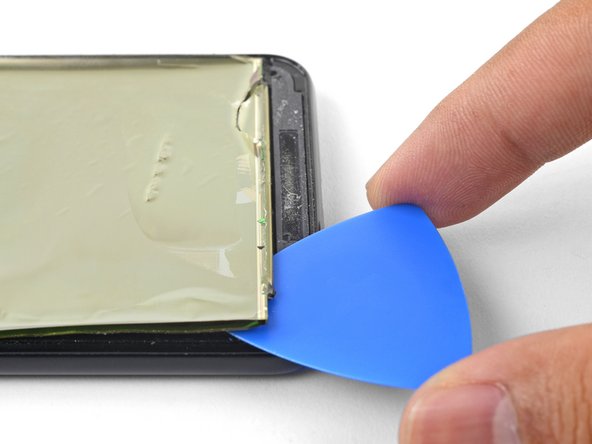
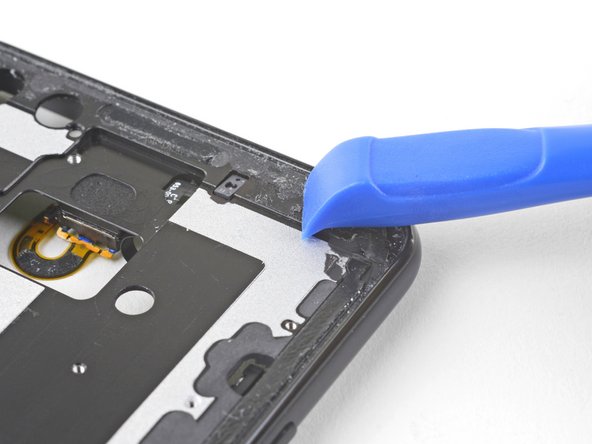
– Slide an opening pick into the tiny gap between the phone frame and the bottom edge of the screen. It’s like finding a secret door!
– Gently pry along the edge to free the screen from the frame. You’re doing great—just a little more pressure!
Tools Used
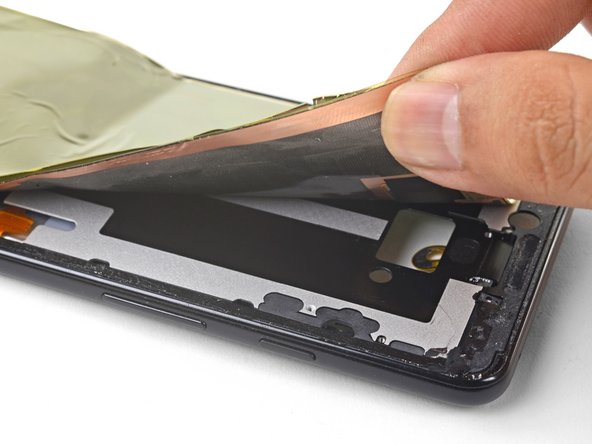

Step 47

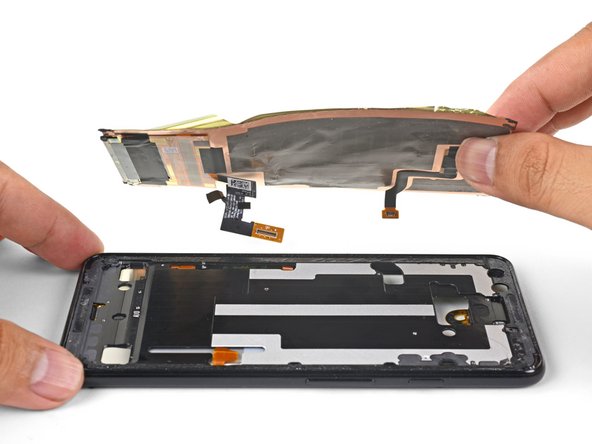
– Let’s get started by threading the screen cable and digitizer cable out of their cutouts, then carefully remove the display.
– To install a new display assembly, follow these steps:
– After reassembling your device, it will go through a calibration sequence during the boot-up process. Just let it do its thing – don’t touch the screen until it’s finished, or you might end up with some wonky touch calibration.
– Give your phone frame a good cleaning to get rid of any leftover adhesive residue. This will help ensure your new screen fits perfectly and doesn’t get damaged.
– Now it’s time to add some new adhesive to the phone frame’s perimeter. You can use a pre-cut adhesive or some double-sided tape – whatever you prefer.
– Next, peel off the plastic liners from the back of your replacement screen to expose the adhesive. Easy does it!
– Carefully thread the screen cable and digitizer cable through the phone frame’s cutouts. Take your time and make sure everything is lined up nicely.
– Finally, lay the screen onto the frame and let it sit for a bit – you can even weigh it down with some books for an hour to help the adhesive bond. If you need help or have any questions, you can always schedule a repair with the experts at Salvation Repair.