
How to Replace Google Pixel 7 5G mmWave Antenna: DIY Guide
Duration: 45 minutes
Steps: 33 Steps
A heads up from the team at Salvation Repair: we created this guide to help you fix your device, but it’s not officially endorsed by Google. Want to know more about our repair guides? Click here to learn more.
Safety first! Before you start taking your phone apart, make sure the battery is at 25% or less. If you need help or have questions, you can always schedule a repair.
Alright, let’s get this 5G mmWave antenna swap party started! This guide will help you replace that bad boy in your Google Pixel 7. First things first: battery safety! Always discharge your phone’s battery below 25% before you start taking things apart. This helps prevent any fiery mishaps if the battery accidentally gets a little bruised during the repair. If your battery is looking a little puffy, take extra care. Oh, and heads up, the Pixel 7 has some class 1 lasers. We don’t want any accidental exposure to invisible infrared rays, so handle with care! Remember, after the repair, how well your phone holds onto its water resistance depends on how well you reapply the adhesive. You’ll lose its official IP rating, but don’t sweat it, we’re all about that DIY spirit! To finish things off, you’ll need some fresh adhesive. If you need a little help, you can always schedule a repair with us. Happy fixing!
Step 1


Hey, before we get started, give your battery a little break and let it drain below 25%. A charged battery can get a little grumpy if we’re messing around inside, so we want to make sure it’s chillin’ before we go in. No worries, if you’re not sure, you can always schedule a repair.
– Alright, first things first! Power down your phone completely and make sure to unplug any cables hanging around. You’re on the right track!
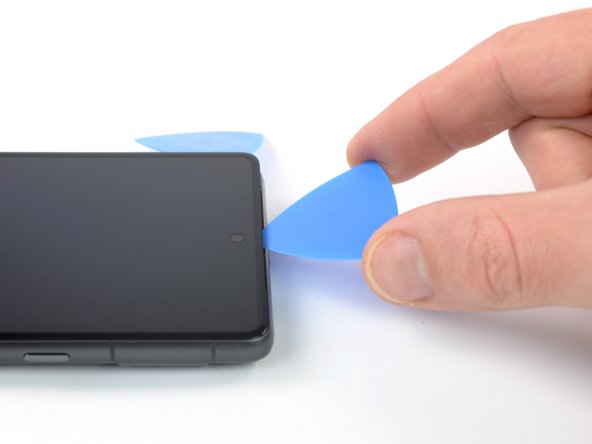
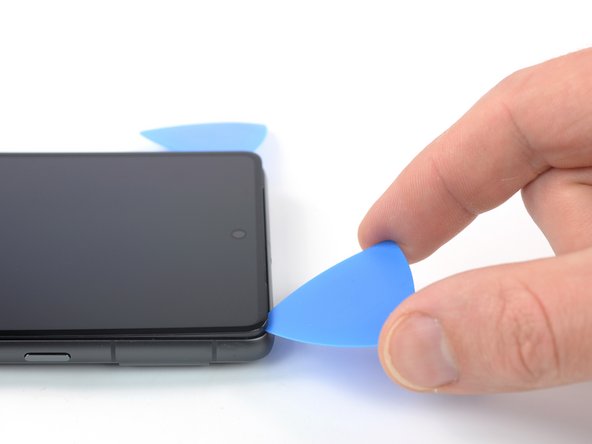
Step 2


Don’t go crazy with that pick! Just a gentle nudge, about 3.5mm deep, is all it takes to avoid any drama with the inner workings. Those plastic clips are delicate, you know! If things get tricky, you can always schedule a repair.
Alright, let’s get this screen party started! The Google Pixel 7 screen is held in place by some friendly plastic clips and a little bit of adhesive. It’s like a mini-hug, keeping everything snug. We’ll be carefully releasing that hug in just a bit. Don’t worry, we’ve got this! If you need help, you can always schedule a repair.
– When you’re removing the screen, remember to slide your opening picks under the safety frame – it’s like a protective shield for your device. This will help you avoid separating it from the screen, which can be a real hassle.
– You’ll notice there are several plastic clips around the screen. If your opening pick gets stuck during the removal process, don’t worry! It just means you might have inserted it a bit too deep. Take a deep breath, and try again. If you need help, you can always schedule a repair with the experts at Salvation Repair.
Step 3


Check it out! The next three steps will show you how to use the Anti-Clamp, a nifty tool we whipped up to make opening your device a breeze. If you don’t have an Anti-Clamp handy, no worries! Just skip down three steps for another way to tackle it.
Got a cracked screen? Give it a quick protective hug with some clear packing tape to help that suction cup stick like it’s best friends with your device.
Want to master the Anti-Clamp? You can find all the juicy details you need in this guide.
If your phone’s surface is feeling a bit too slippery for the Anti-Clamp to grip, don’t stress! Just a bit of tape will give it the extra traction it needs.
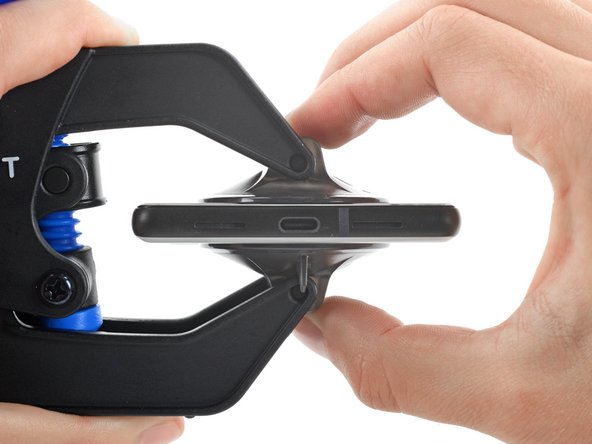
– Give that blue handle a gentle pull back to set those Anti-Clamp arms free!
– Slide those arms right over the left or right edge of your phone like you own the place.
– Place the suction cups at the bottom edge of your phone—one on the front and one on the back, nice and cozy.
– Squeeze those cups together to create some solid suction magic!
Step 4

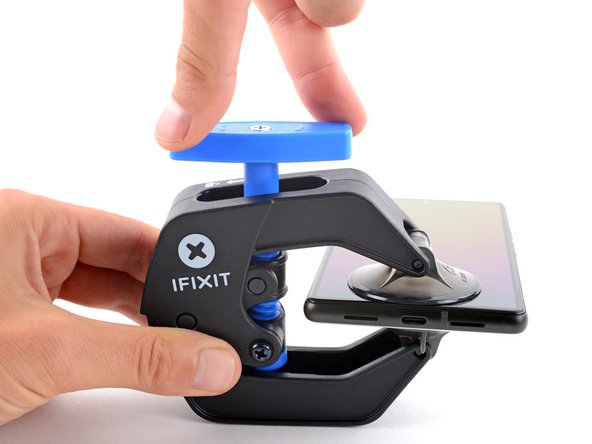

– Give that blue handle a little nudge forward to lock those arms in place.
– Twist the handle clockwise a full 360 degrees or until those suction cups start stretching out.
– Keep an eye on those suction cups to make sure they’re lined up just right. If they start to get a little wobbly, loosen them up a bit and give those arms a gentle realignment.
Step 5

Take it easy! Just a half turn at a time is all you need. Chill for a minute between those turns and let the Anti-Clamp and a bit of patience do their magic.
Feeling a bit crafty? A hair dryer or heat gun can lend a hand, but remember — too much heat can be a showstopper for your display or internal battery, so take it easy!
If the Anti-Clamp isn’t quite doing its job, turn up the heat a bit more in that area and give the handle a gentle clockwise twist for just half a turn.
– Warm up your iOpener and thread it through the arms of the Anti-Clamp, like a dance partner mingling at a party.
– Fold the iOpener and let it lay on the bottom edge of the phone – it’s like giving it a little sunbath!
– Wait a minute for the adhesive to loosen up and create a gap. Just like waiting for your coffee to cool down.
– Time to insert your opening pick under the screen frame when the Anti-Clamp has made enough room – it’s like unwrapping a birthday present!
– Skip the next two steps, because sometimes less is more, like that barefoot yoga class you’ve been meaning to try.


Step 6

Grab your trusty hair dryer, heat gun, or hot plate—but remember, we want to keep things cool, not fry your device! The edge should feel a tad warm to the touch, just enough to get the job done without any meltdowns.
Step 7


Got a cracked screen? No worries, we’ve got you covered. Try slapping a layer of clear packing tape over it – this might just give your suction cup the grip it needs. If that doesn’t work, super strong tape or even a bit of superglue can save the day.
Having trouble getting started? Don’t sweat it – some phones can be a bit stubborn. If you’re struggling, just apply some extra heat to the bottom edge and give it another shot. If you need help, you can always schedule a repair
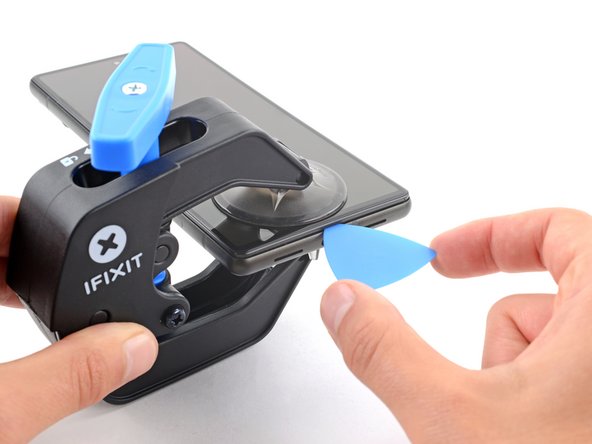
– First, get that screen warm to the touch – it’s time to get started. Now, grab a suction handle and attach it to the bottom edge of the screen.
– Next, use that suction handle to carefully lift the screen and its safety frame, creating a small gap between the screen and the phone assembly. You’re making great progress!
– Now it’s time to insert an opening pick into the gap you just created. If you need help, you can always schedule a repair
Tools Used

Step 8


– The screen cable sits just a tad less than halfway up the left edge of the phone. Handle this part with care to keep the cable safe and sound.
– You’ll find a bunch of spring contacts hugging the perimeter of the phone. Tread carefully in these zones to avoid bending them—let’s keep everything nice and straight!
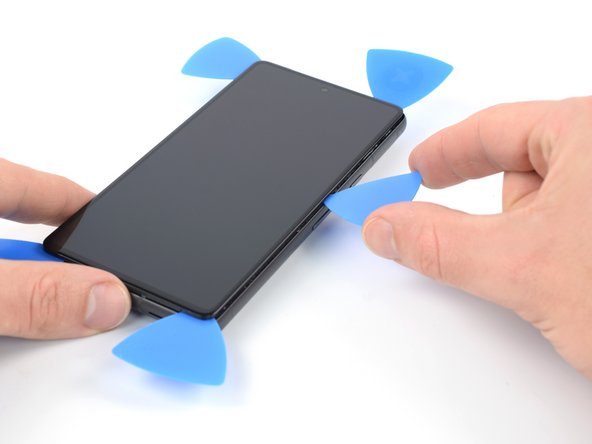
Step 9


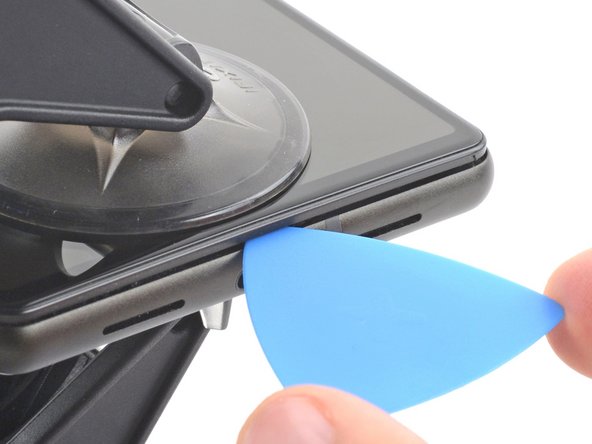
– Let’s get this screen loose! Slide the opening pick to the bottom right corner of the screen to separate the adhesive.
– Hold that pick in place so the adhesive doesn’t get too cozy and stick back together.
Step 10


– Now, let’s slip another opening pick in at the bottom edge and slide it over to the bottom left corner of the screen. We’re gonna carefully slice that adhesive, like we’re cutting a birthday cake!
– Leave that opening pick right there to keep the adhesive from sticking back together. We wouldn’t want to start all over again, would we?
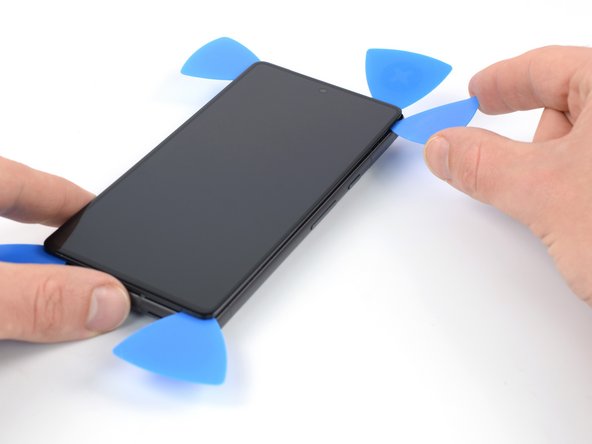
Step 11


– Gently slide a third opening pick under the bottom left corner of the screen – it’s like giving it a little nudge.
– Carefully glide that pick along the left edge of the screen to cut through the adhesive and free those pesky plastic clips.
– Now, keep that opening pick stuck in the top left corner to make sure the adhesive doesn’t try to seal itself up again.
Step 12

As you make your way around the front-facing camera, just slide in the tip of the opening pick (about 2.5 mm) to keep that camera safe and sound—no smudges or damage on our watch!
Don’t worry, it happens! If that gooey stuff starts to feel stiff, just give it a little heat. Pop your iOpener or heat gun on for a minute or two to warm it up and it’ll be nice and flexible again.
– Let’s get this screen open! Insert a fourth opening pick in the top left corner of the screen.
– Now, slide that opening pick along the top edge of the phone – think of it as slicing through the adhesive!
– Leave that opening pick in the top right corner to keep the adhesive from getting cozy again. You got this!
Step 13

Be careful not to completely remove the display just yet – it’s still connected to the phone assembly by a flex cable, so let’s take it one step at a time. If you need help, you can always schedule a repair
– Alright, let’s get this party started! Grab your fifth opening pick and slide it along the right edge of the phone. We’re gonna slice through that remaining adhesive like butter and release those right plastic clips. It’s like a little dance, except you’re the star and your phone is the partner! If you need help, you can always schedule a repair.
Step 14


Be gentle with that screen – avoid twisting or pulling it too far from the frame, or you might end up damaging the flex cable. If you need help, you can always schedule a repair
– Time to get this repair started – gently lift the right edge of the screen up and swing it towards the left side of your device, just like you’re opening a book.
– Now, carefully rest the screen upside down and parallel to the frame. Take a moment to double-check everything before moving on. If you need help, you can always schedule a repair
Step 15


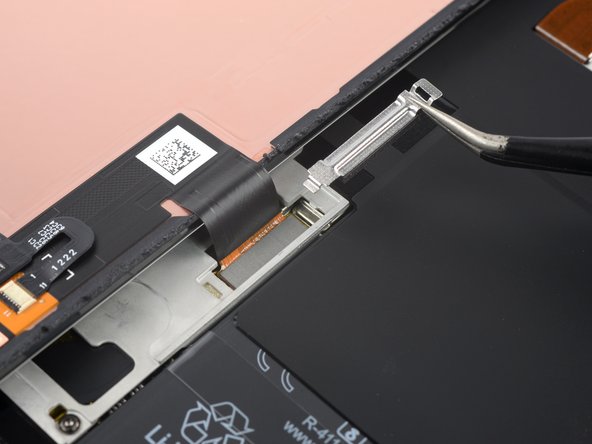
Hey, buddy, if you need to liberate that display cable bracket, just know that it’s a bit of a tight squeeze! So don’t worry if you’ve got to put in your A-game to get it out.
– Gently slide one arm of your trusty tweezers into the opening at the top of the display cable bracket.
– Now, give that bracket a little nudge inwards and pry it up to pop it loose!
Tools Used


Step 17


– Time to give that flex cable a little nudge! Use your trusty spudger to gently pry the connector straight up from its socket. Just like popping a bubble, easy peasy!
– Ready to reconnect? Line up those connectors like you’re playing a game of connect the dots. Press down on one side until it clicks, then repeat on the other. Don’t get too excited and press in the middle! We don’t want to bend any pins. If you need help, you can always schedule a repair.
Tools Used

Step 18

– Alrighty, let’s keep this repair extravaganza going! First up, gently disembark the screen from your sweet little device. In the next leg of this journey, you’ll want to ensure that everything’s buttoned up nicely during reassembly – make sure all those tiny screw buddies are tucked away and not pow-wowing anywhere. Now, give your screen a warm welcome back by reconnecting it, and do a little test dance to make sure your device is feeling spry – boot it back down and proceed with the reunion. Next, we’re gonna give that bad boy a fresh adhesive makeout session. Dampen some areas with the magical marriage of alcohol and isopropyl for that, and never fear if you’ve got some custom-cut adhesives or a pre-cut adhesive card – we’ve got guides for that, too! Once you’ve completed your craftsmanship alchemy, you’ll have yourself one dashing device – well done, you tech wizard, you! But, if you’re thinking, ‘Heck, this is all too much for me!’ panic not! Needing help is like, so common. So go ahead and cop that humble brag by scheduling a repair and let the pros handle it with their nerdy finesse.
Step 19


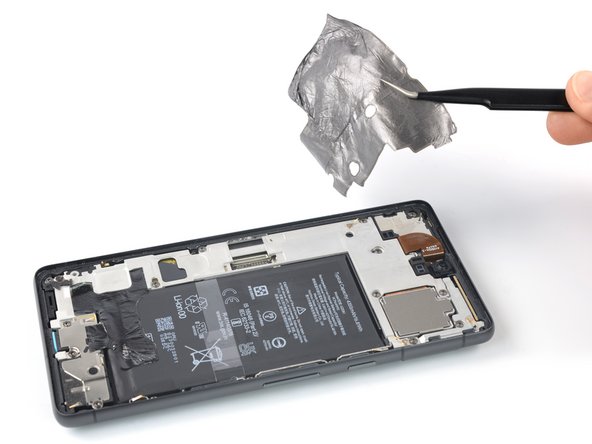
Be careful not to poke or twist that battery with your tool as you move forward—doing so could lead to a mess of leaked chemicals or even a fire. Let’s keep things safe and sound!
– Grab a trusty pair of tweezers and gently lift that black silicone pad off the battery and midframe. You’re doing great!
Tools Used
Step 20

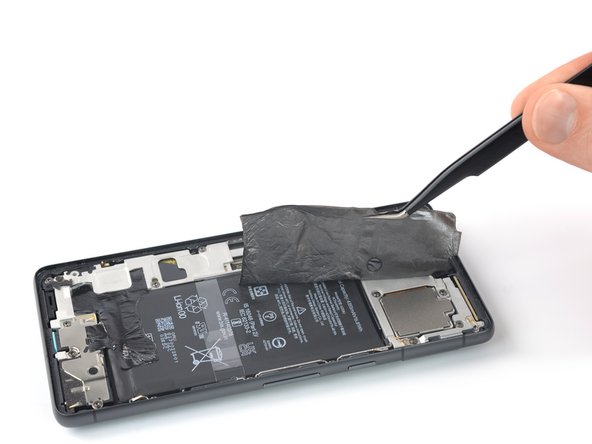
If you’re struggling to remove the foil, give it a little warmth with a heated iOpener for about two minutes to help loosen that sticky adhesive. You’ve got this!
Step 21


Struggling to peel off that pesky foil? No worries! Just grab your trusty heated iOpener and give it a go on the foil for two minutes. That should help loosen things up nicely!
– Time to get up close and personal with your device’s internals. Use a trusty pair of tweezers to carefully pry the lower graphite foil away from the battery and midframe. If you need help, you can always schedule a repair
Step 22

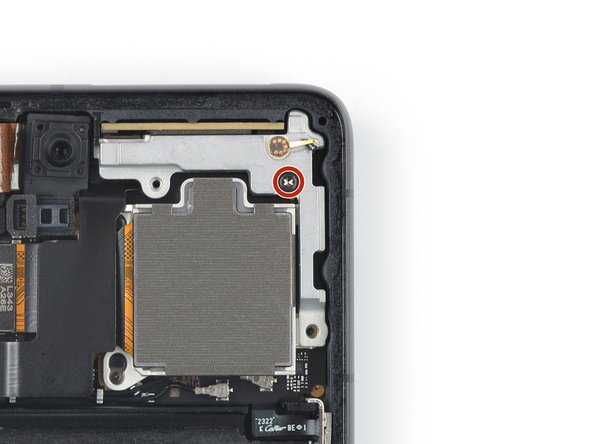
– Grab your trusty Torx T3 screwdriver and carefully take out the three 5.1 mm-long screws that are holding the loudspeaker in place. You’ve got this!
Step 23

– Grab those tweezers and gently lift out the loudspeaker from its spot. If you need help, you can always schedule a repair.
Tools Used
Step 24

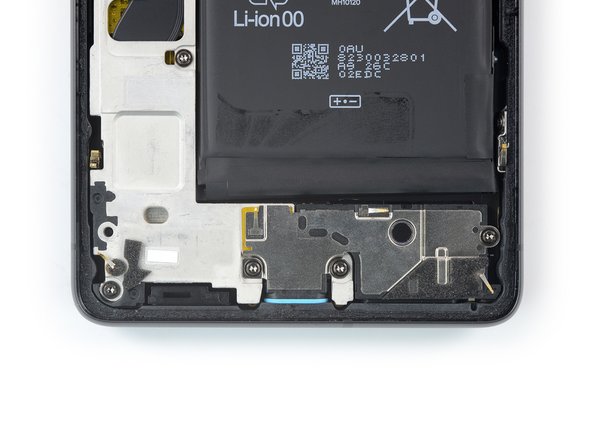
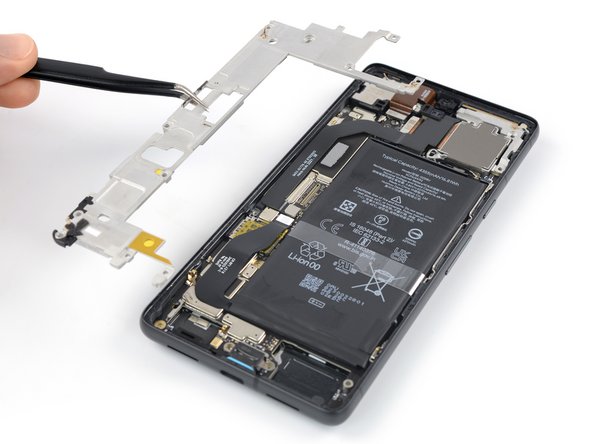
– Grab your trusty Torx T3 screwdriver and let’s do some unscrewing magic! Carefully take out those nine 5.1 mm-long screws that are holding the midframe in place. You got this!
Step 25


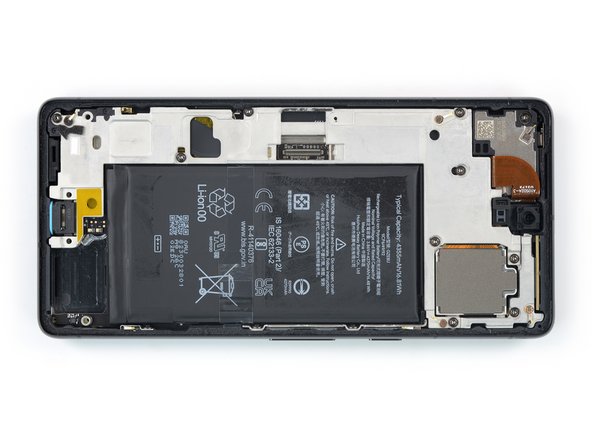
– Alright, buddy! Time for some surgery on that midframe. Grab those tweezers and let’s get digging. Don’t forget, once you’re all cleaned up, it’s time to check out the thermal pad situation. If it’s tired and worn out, let’s replace it with a brand new thermal pad. If you need any help, you can always schedule a repair! Let’s do this!
Tools Used


Step 27

Get ready for some fun! The next six steps will walk you through the process of safely removing that pesky mmWave antenna.
– Grab your trusty Torx T3 screwdriver and carefully remove the 5.1 mm-long screw that’s holding the mmWave antenna bracket in place. If you need help, you can always schedule a repair

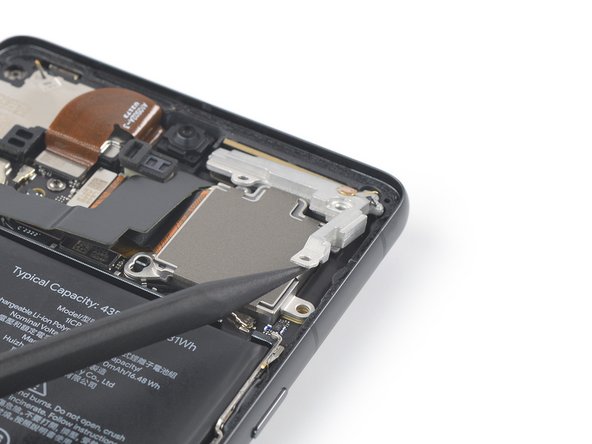
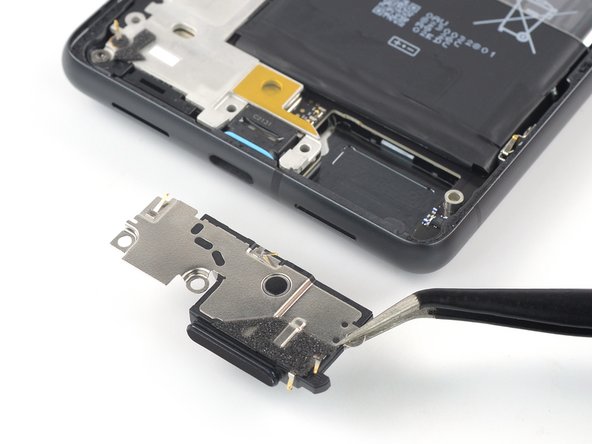
Step 29

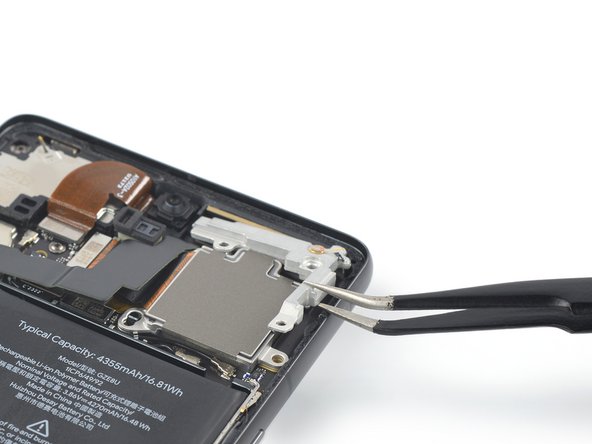
– Time to get a little handy! Use a pair of tweezers to carefully remove the mmWave antenna bracket. If you need help, you can always schedule a repair
Tools Used
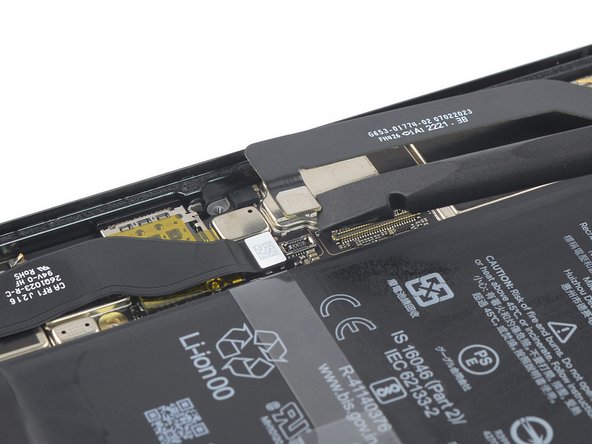

Step 31
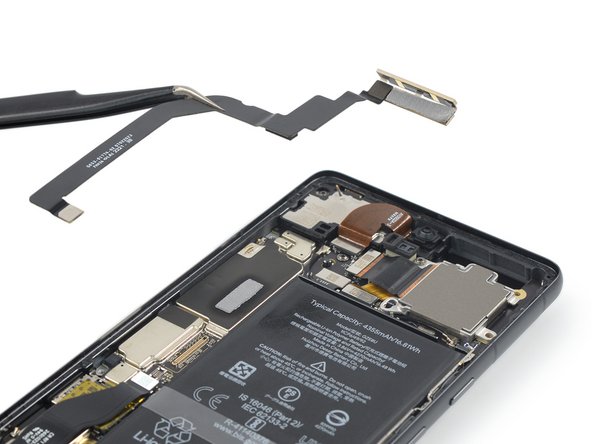

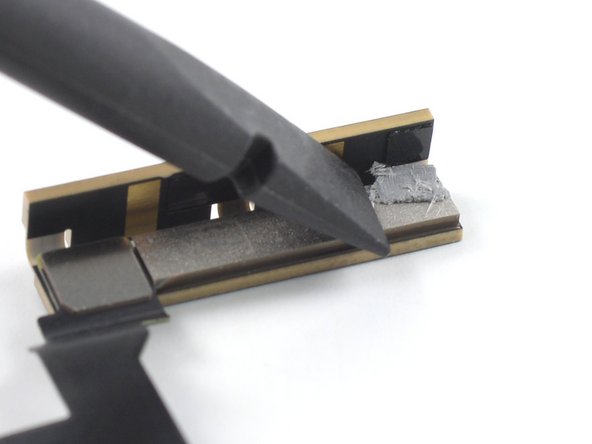
– Time to get a little delicate – use a pair of tweezers to carefully lift the mmWave antenna (cable and all) out of its cozy recess.
– Next, remove the entire mmWave antenna assembly. You’re making great progress!
– When you’re putting everything back together, take a moment to check the thermal pad’s condition. If it’s looking a bit worse for wear, gently remove it, clean the area with some high-concentration (greater than 90%) isopropyl alcohol and a microfiber or lint-free cloth, and then apply a brand new thermal pad. If you need help, you can always schedule a repair with the pros at Salvation Repair.
Tools Used
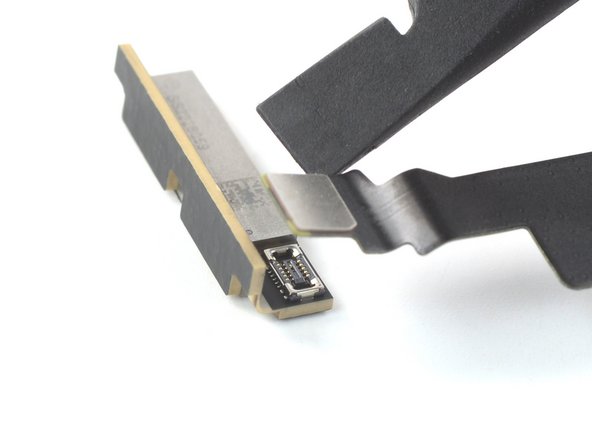

Step 33

– You’ve successfully removed the necessary components and are now left with the mmWave antenna. Great job! If you need help, you can always schedule a repair

