How to Replace Google Pixel 9 Pro Fold 5G mmWave Antenna
Duration: 45 minutes
Steps: 100 Steps
Heads up! This guide was put together by the awesome team at Salvation Repair and isn’t officially backed by anyone. Learn more about our guides here.
This repair guide is brought to you by Salvation Repair and will help you swap out the 5G mmWave antenna in your Pixel 9 Pro Fold. Let’s get started! Need a hand? You can always schedule a repair.
Step 1

– Alright, let’s get this party started! First things first, unplug all the cables from your phone and turn it completely off. You got this!
Step 2
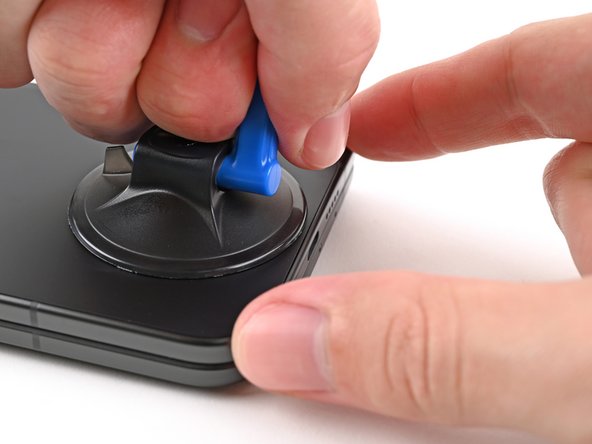


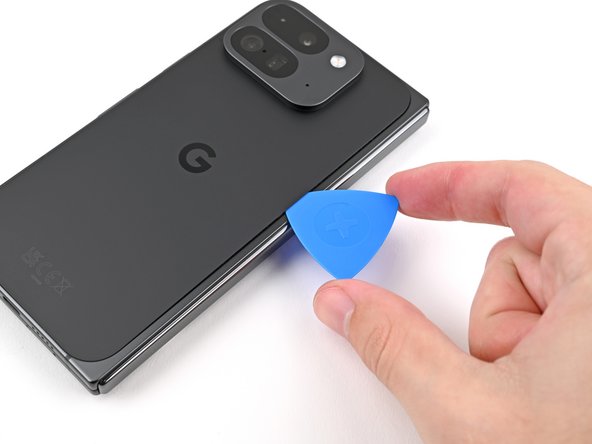
– Alright, let’s get this back cover off! Start by sticking a suction cup right on the center of the bottom edge of the back cover.
– Now, hold your phone steady with one hand and with the other, pull up on that suction cup like you’re lifting a weight. Keep pulling until you see a tiny gap open up between the back cover and the phone’s frame.
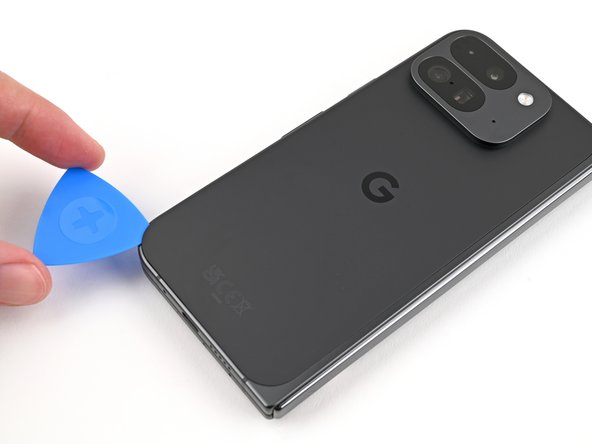
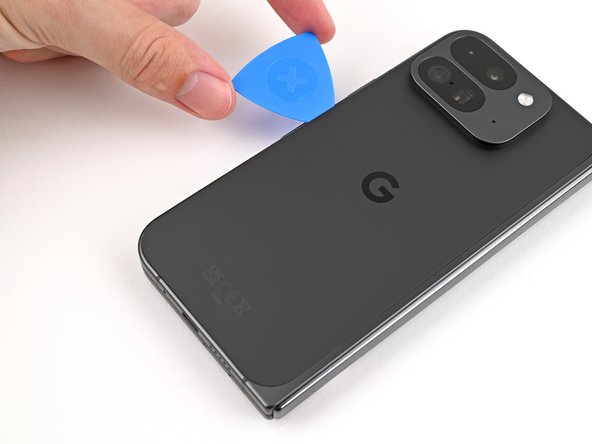
– With that gap open, you’re going to slide in an opening pick. It’s like a little pry tool, but don’t worry, we’ll make it easy.
If your back cover is looking a bit worse for wear with some nasty cracks, you might want to give it a little TLC by slapping on a layer of clear packing tape. This trick can help your suction cup stick like it’s meant to! If you’re feeling adventurous, some strong tape can do the trick in place of that suction cup. And hey, if you’re really in a pinch, a dab of superglue to secure that suction cup to the broken back cover can save the day. You’ve got this!
Step 3

Hey, remember those metal springs around the frame? They’re kind of sensitive. So, during the next couple of steps, keep your opening pick to about 3mm deep. You don’t want to give those springs a bad day, right? If you need help, you can always schedule a repair.
Feel free to take a moment to measure and mark your opening pick at 3 mm. It’s a nifty way to visualize the length and make your repair journey even smoother.
– Time to let go of the suction handle—detach it from the back cover with ease!
– Now, grab that trusty opening pick and slide it around the bottom left corner, then gently glide it up the left edge of the back cover to break free from the sticky adhesive.
Tools Used

Step 4

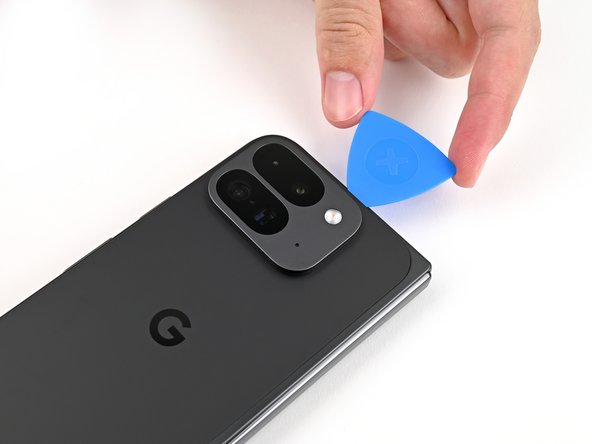
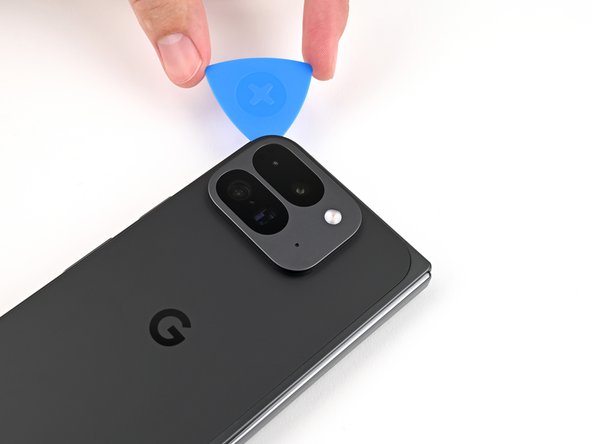
– Keep sliding that pick around the top left corner and along the top edge of the back cover. You got this!
Step 5
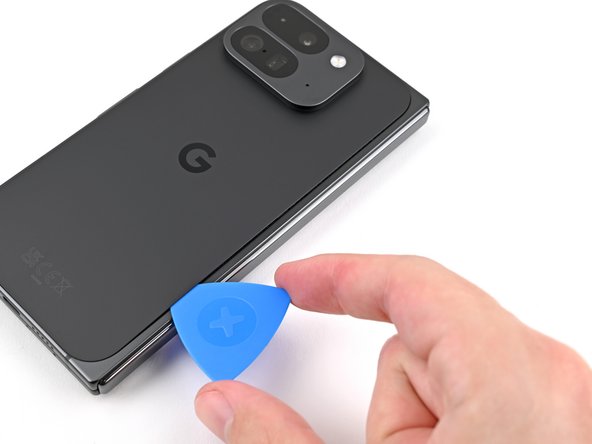

Heads up! The adhesive on the right edge of the back cover is a bit beefier than the rest. Slide your opening pick in at least 4 mm to tackle it. You’ve got this! If it feels tricky, remember you can always schedule a repair for a hand.
– Slide your helpful pick down that right side, and carefully round the bottom corner to unhitch the last bits of sticky stuff!
Step 6
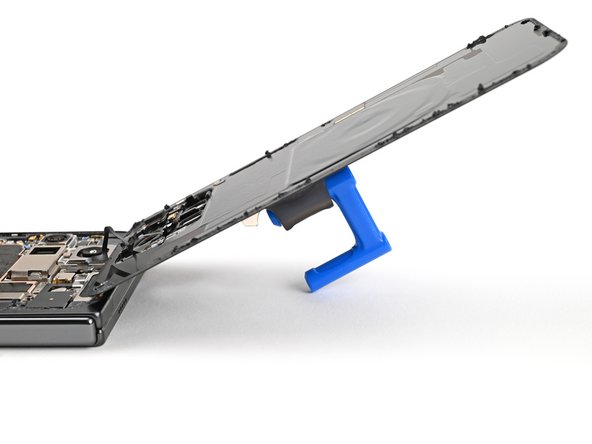

Hold up there, cowboy! The back cover is still hanging on by a thread, so don’t yank it off just yet. There’s a cable holding it in place.
Alright, the back cover should be loose by now! If it’s still hanging on for dear life around the edges, grab your opening pick and gently coax that last bit of adhesive apart. You’ve got this!
– Alright, buddies! Let’s get this party started! Lift that bottom edge of the back cover and swing it over the top edge of your device. Now, let’s prop it up with something cool and sturdy—like a superhero! Just make sure the cable isn’t getting all tangled and strained.
Tools Used
Step 7

It’s like a puzzle, so remember where each screw goes – you don’t want to lose your mind (or your phone!)
These little screws are a bit different, but don’t sweat it. Use a standard Torx screwdriver, the same size or a little bigger. Just apply steady pressure, like you’re making a wish on a dandelion, and you’ll be good to go!
– Feeling brave? You’re ready to embark on your phone or electronic repair adventure with us! Let’s conquer this with some fun and leave the intimidation at the door. It’s only a screw, don’t be heatbeating! Grab your trusty Torx Plus 3IP driver and removed that 3.0 mm‑long screw from the top bracket, because the next step is ours to take! Keep it lit and safe as we proceed to your next challenge together. If you need guidance through this adventure, you can always schedule a repair and let us help you unlock your inner repair guru.
Step 8

– Grab your trusty tweezers or just use your fingers to gently pull the top bracket up towards the phone’s top. This will help free it from its snug little clip.
– Now, go ahead and lift off that top bracket!
Step 9

Keep your spudger in its happy place! Avoid poking it anywhere else, or you might accidentally bump some delicate components off their cozy spots.
– Gently slide your spudger under the edge of the back cover cable connector—no rush, it’s not going anywhere!
– Carefully lift and disconnect the back cover cable. Easy does it!
Tools Used

Step 10

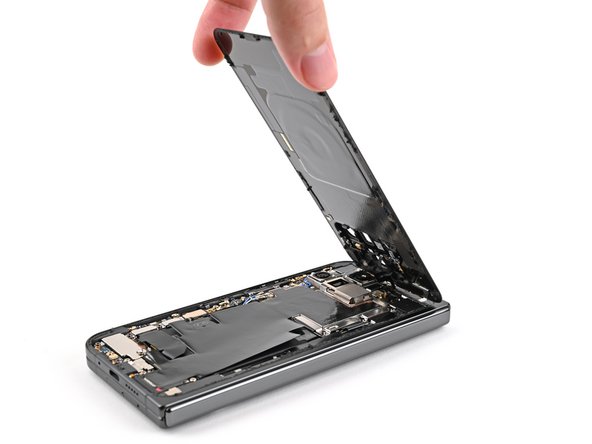
– Time to give that back cover a little lift and freedom! Carefully remove it from the frame and set it aside.
Step 11

– Grab your trusty Torx Plus 3IP driver and gently unscrew those two 3.0 mm-long screws holding down the base battery bracket. You’ve got this!

Step 13


Be careful with your spudger! Using it in the wrong spot could knock loose some tiny components that are just trying to hang out where they belong.
– Gently slide the tip of your spudger under the bottom left corner of the base battery press connector, right by that shiny gold marker.
– Give it a little pry and disconnect the base battery with confidence!
Tools Used
Step 14
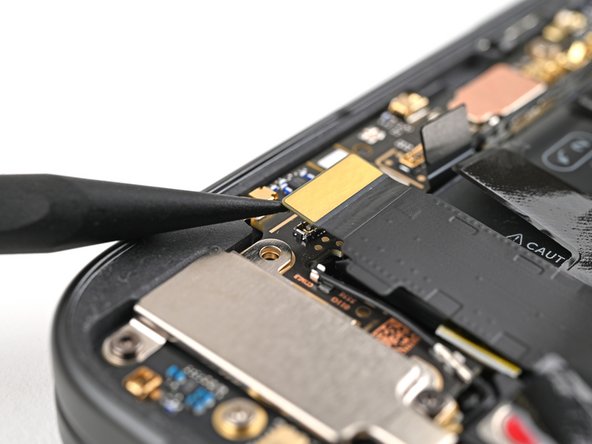

– Grab your trusty spudger and gently wiggle it to lift and disconnect the USB-C port board cable press connector. You’ve got this!
Tools Used
Step 15

– Grab your Torx Plus 3IP driver and unscrew the two 3.0 mm-long screws holding the vibrator bracket in place. Easy peasy!

Step 17

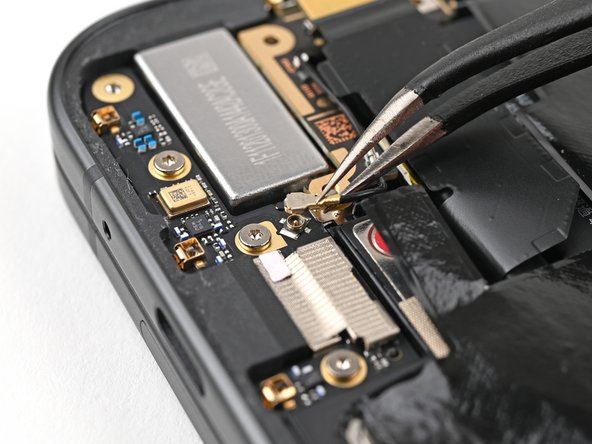
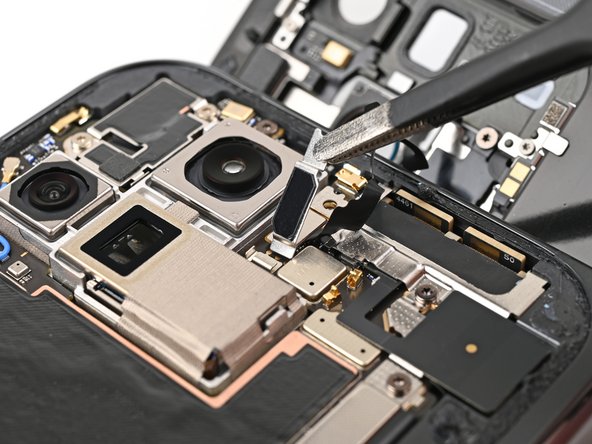
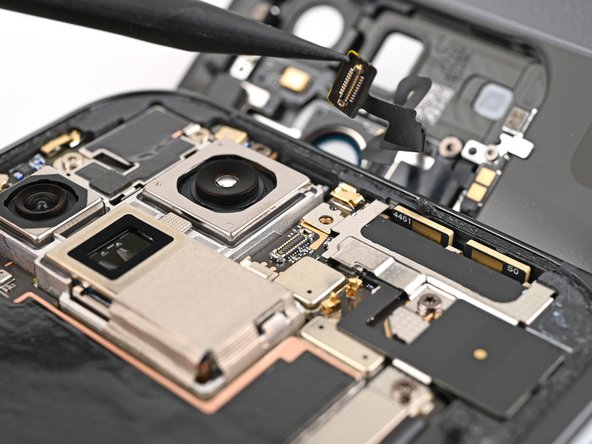
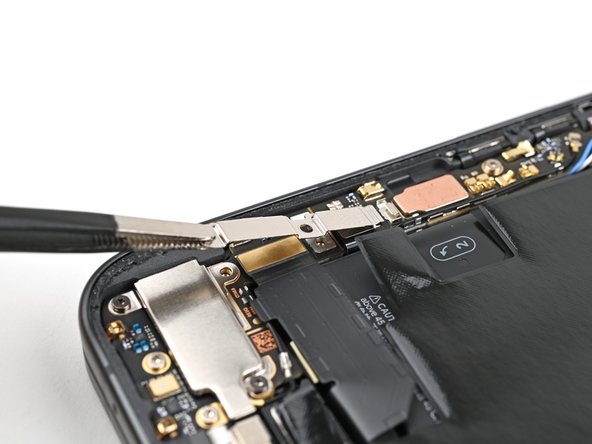
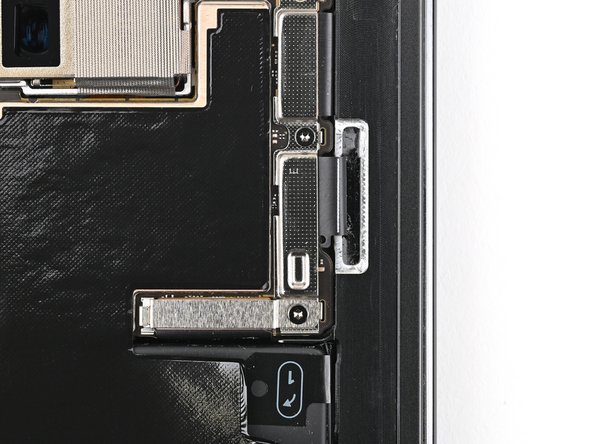
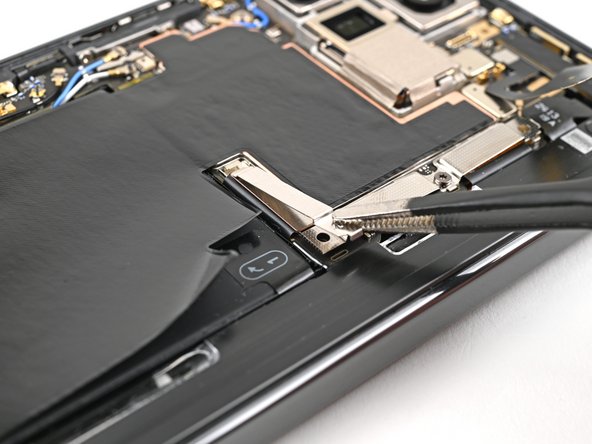
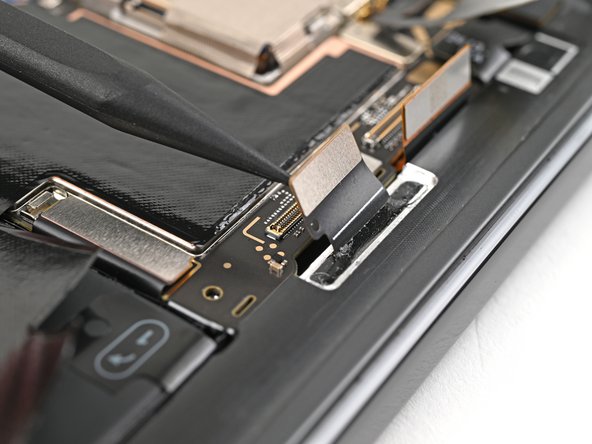
– Gently slide one side of your trusty angled tweezers under the shiny metal neck of the black antenna cable’s connector on the USB‑C board.
– Now, just give it a little lift straight up to gracefully disconnect the cable.
Tools Used

Step 18

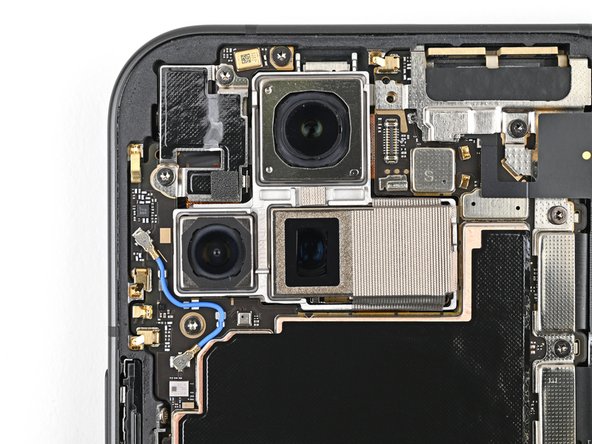
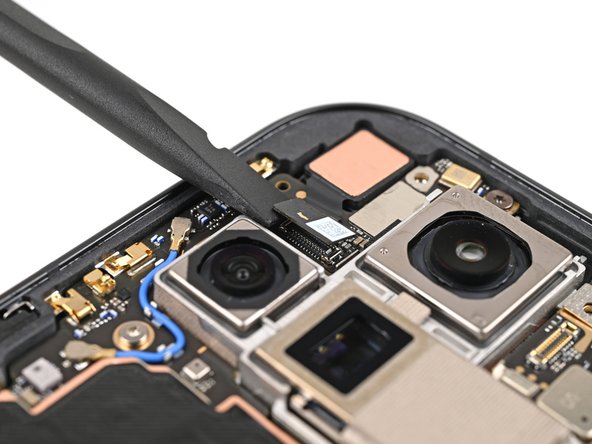
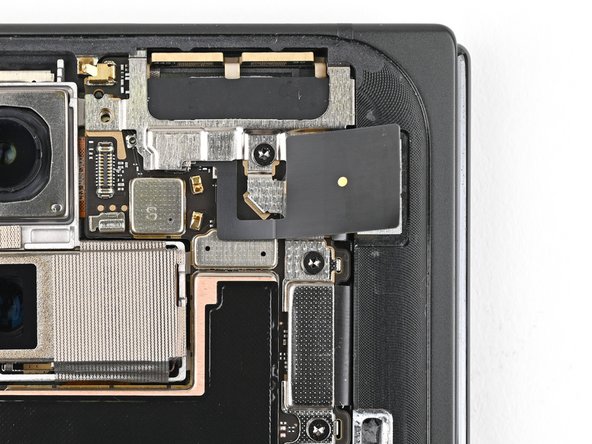
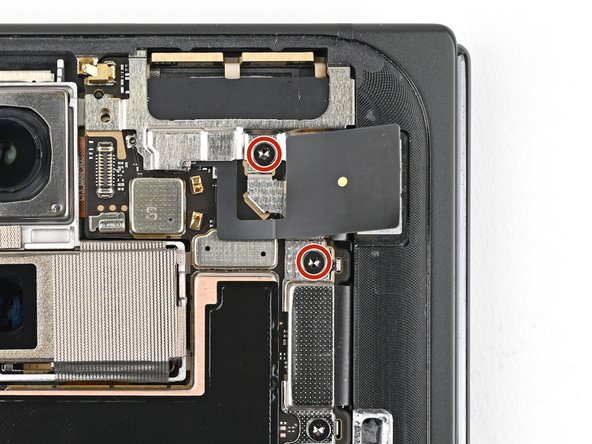
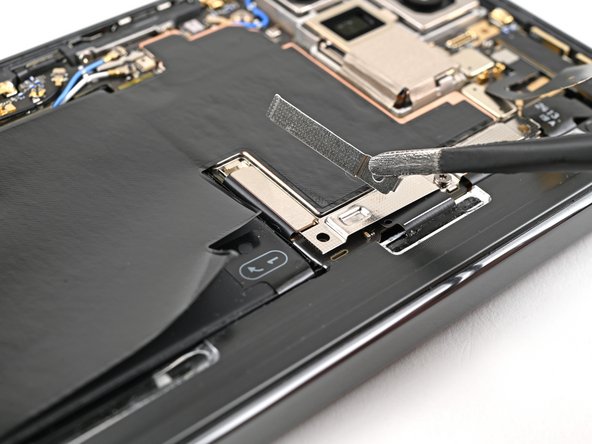
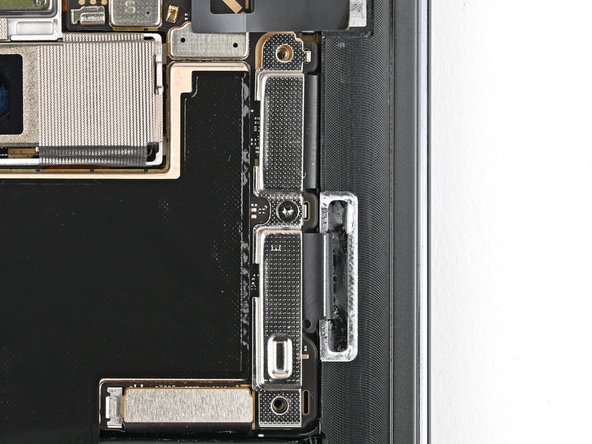
– Alright, grab your trusty Torx Plus 3IP driver and give those two 2.6 mm screws securing the inner front camera bracket a friendly farewell. They’re holding on tight, but we can handle it!
Step 19

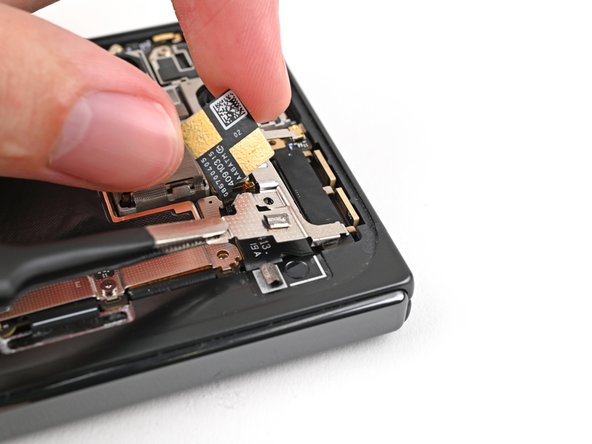
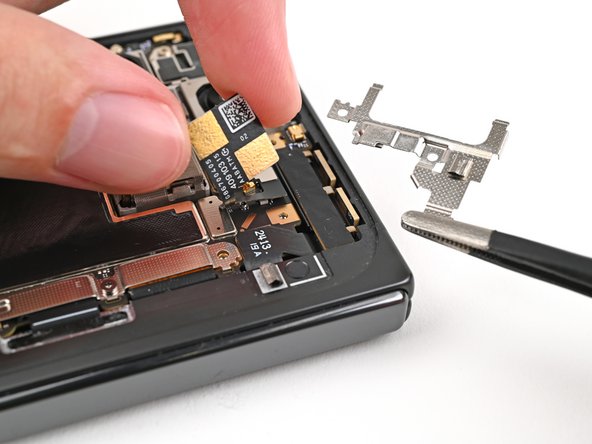
– Grab those tweezers or just use your fingers to gently lift the inner front camera bracket up and slide it towards the left edge of the phone to free its clips. You’re doing great!
– Now, go ahead and remove that inner front camera bracket. You’re one step closer!
Step 20

– Grab your trusty spudger and gently pry up the inner front camera press connector. It’s like giving it a little high-five to say goodbye!
Tools Used
Step 21
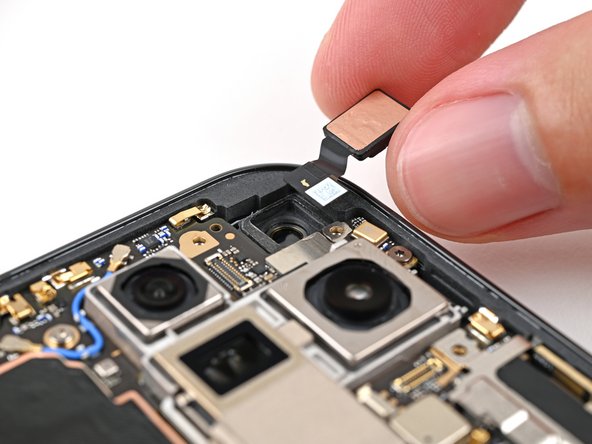


– Grab your trusty spudger and gently coax the inner front camera up, working to break the adhesive’s grip on the frame. You got this!
– Carefully lift out the inner front camera and set it aside.
Tools Used
Step 22

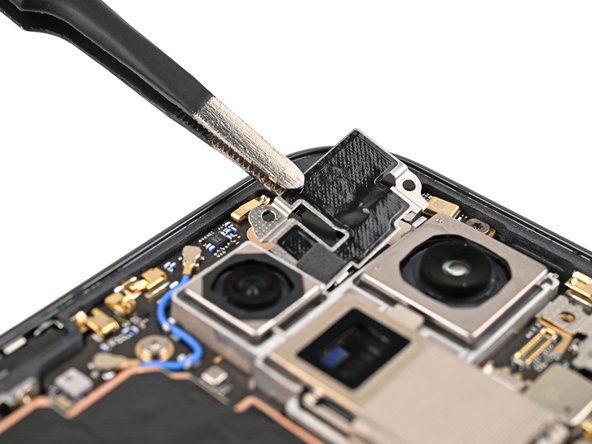
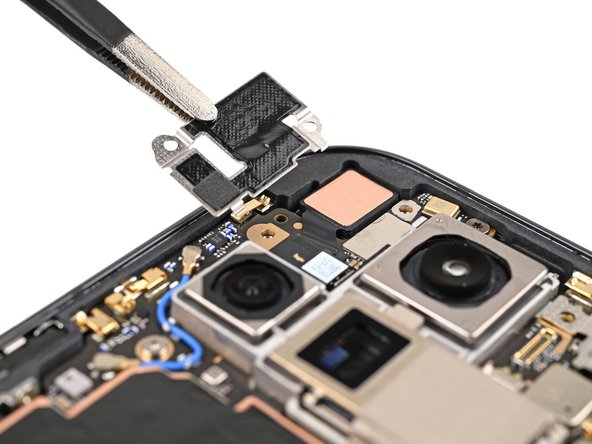
– Whoa, buddy antenna, time to make like a tree and get outta here! Slide that flat end of your trusty spudger underneath you, and give that ultra wideband antenna a gentle lift. Can’t stop, won’t stop, no looking back! Adhesive foam who? Foam can’t hold us now! Now, using your fingers or those fancy tweezers, be our guest and give that antenna a nudge to fully separate from the frame. No adhesive left behind! Good job, you little separation sleuth, you!
Tools Used
Step 23
– Groovy! Grab your funky Torx Plus 3IP driver and unscrew the two 3.0 mm-long screws holding down the ultra wideband bracket. It’s time to let it fly free!
Step 24

– Gently keep the ultra wideband antenna out of the way, then slide the bracket down towards the bottom of the phone to pop those clips loose.
– Now, go ahead and take out the ultra wideband bracket.
Step 25

– Grab your Torx Plus 3IP driver and unscrew the 3.0 mm-long screw holding the interconnect cable bracket in place. Easy peasy!
Step 26

– Grab your tweezers or use those nimble fingers of yours to gently tug the bracket towards the right edge of the phone—clip release incoming!
– Now, go ahead and remove that bottom interconnect cable bracket. You’ve got this!
Step 27

– Grab your trusty Torx Plus 3IP driver and gently unscrew that 3.0 mm-long screw holding down the inner display cable bracket. You’re doing great!

Step 29

Keep your spudger in the right spot! Inserting it elsewhere could pop off those tiny surface-mounted components. Let’s keep everything secure and steady!
– Let’s get this inner display cable outta there! Slide the tip of your spudger under that bottom left corner of the connector, right next to that gold marker on the logic board.
– Now, gently pry up and disconnect that cable. You’re doing great!
Tools Used
Step 30
– Alright, let’s do this again! Unplug the top and bottom connectors. Just gently pry next to those gold markers. You got this!
Step 31


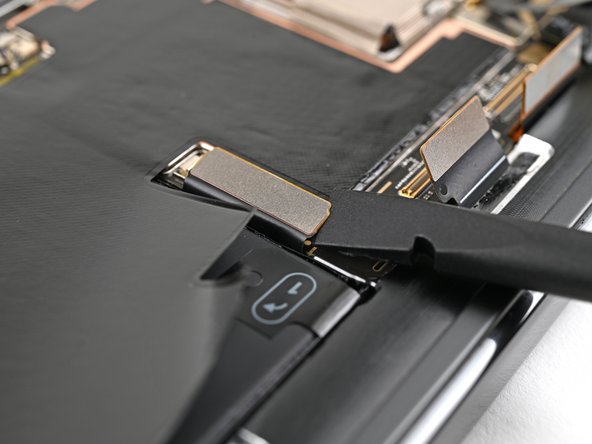
– Gently peel back the graphite sheet from the bottom speaker to break the adhesive holding it in place. You’ve got this!
Step 32
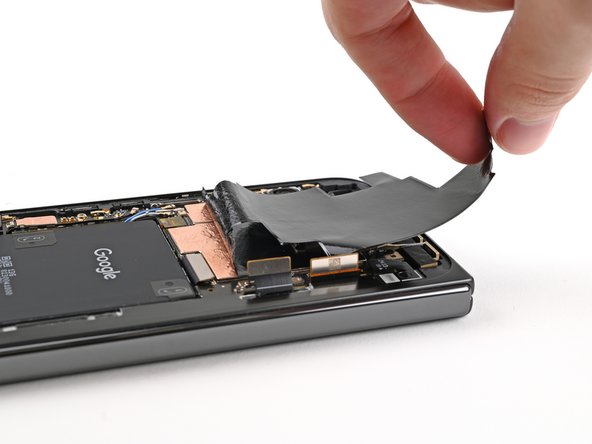

– Keep gently peeling away the graphite sheet from the logic board to free up the last bits of sticky adhesive. You’ve got this!
Step 33

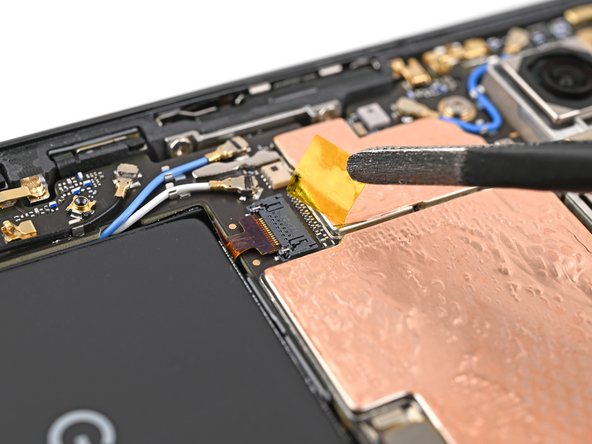
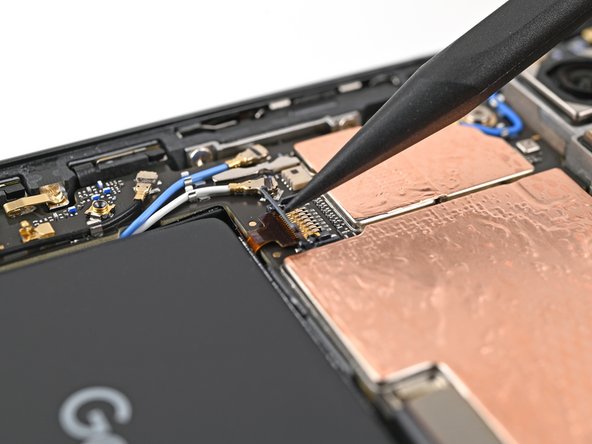
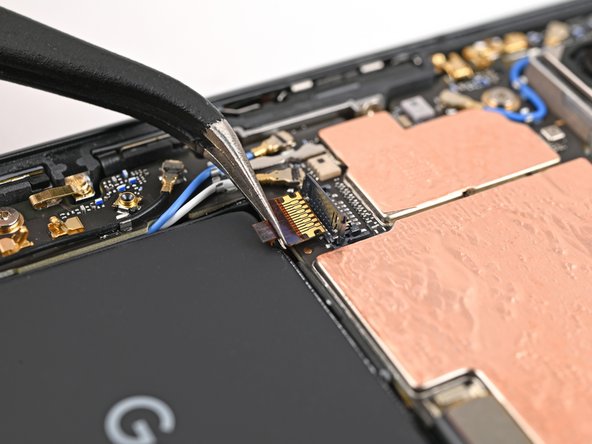
– Alright, let’s peel that yellow tape off the side button cable ZIF connector. Use tweezers or your fingers, be gentle, we don’t want to break anything!
– Just set that tape aside, we’ll need it later when we put everything back together.


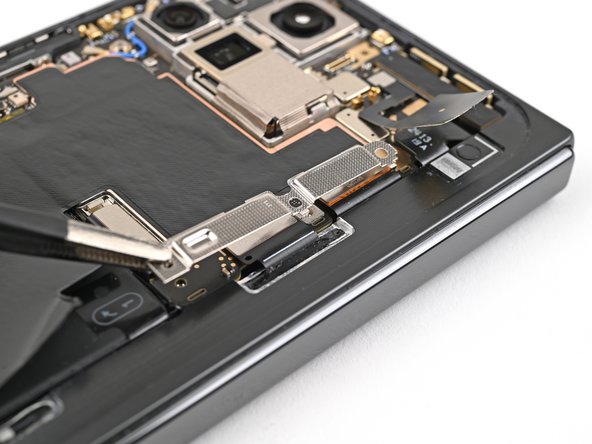
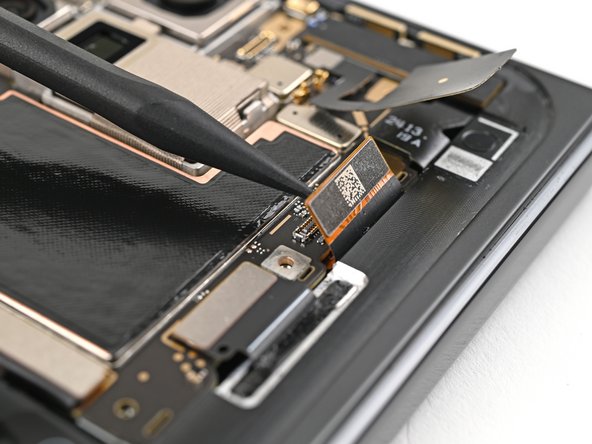
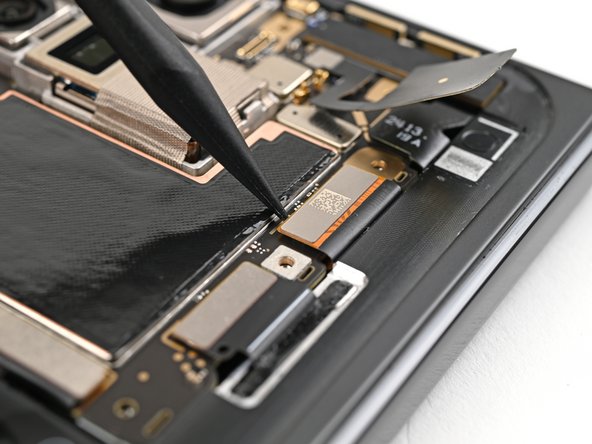
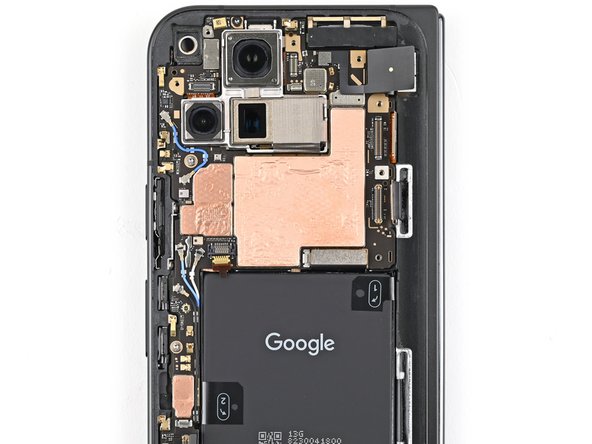
Step 36

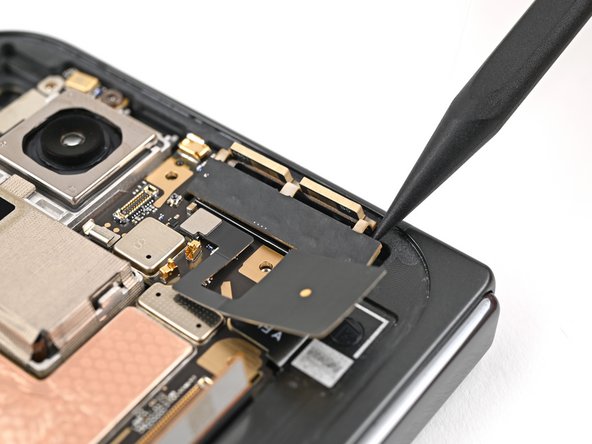
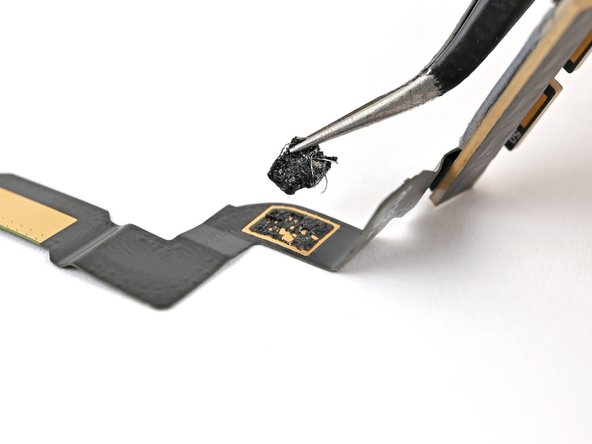
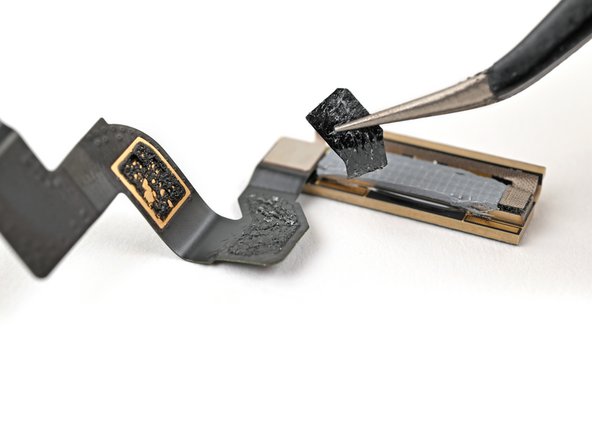
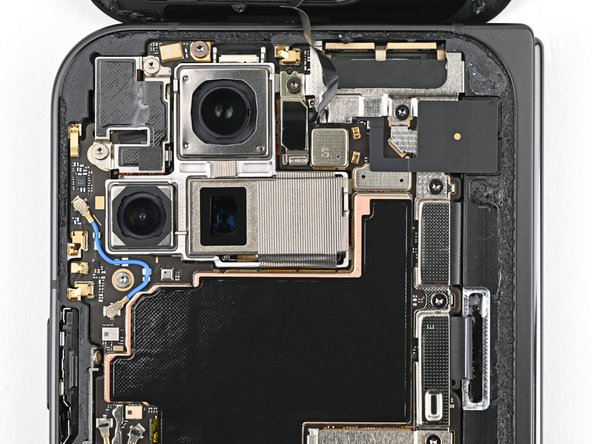
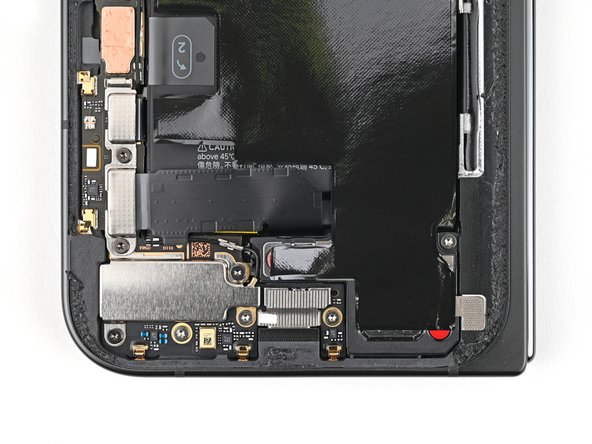
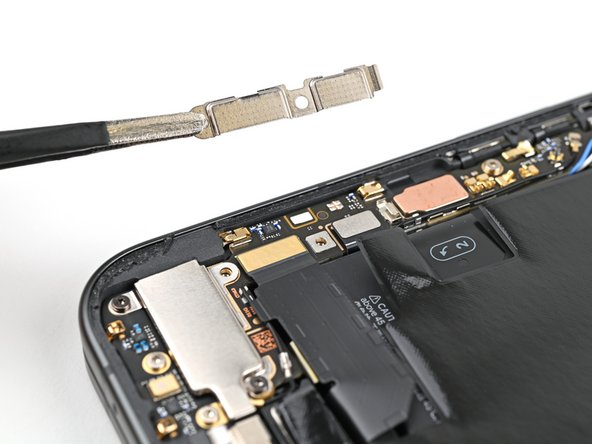
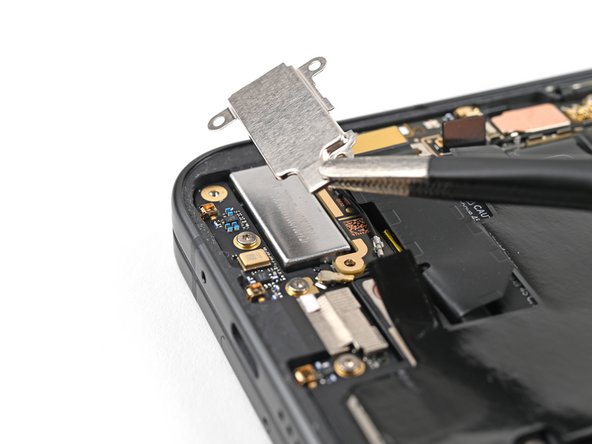
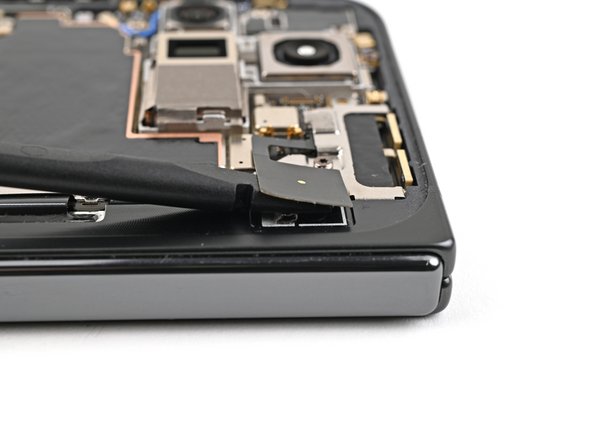
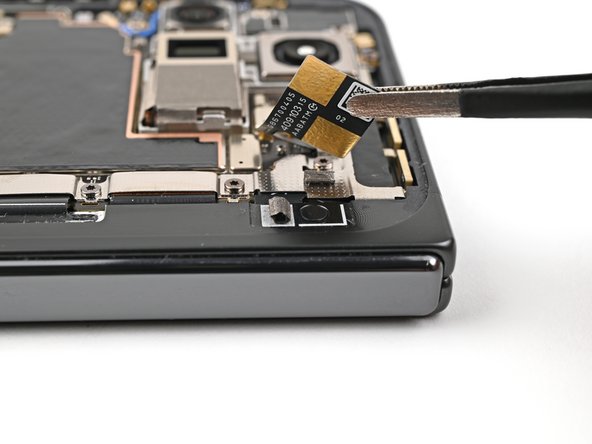
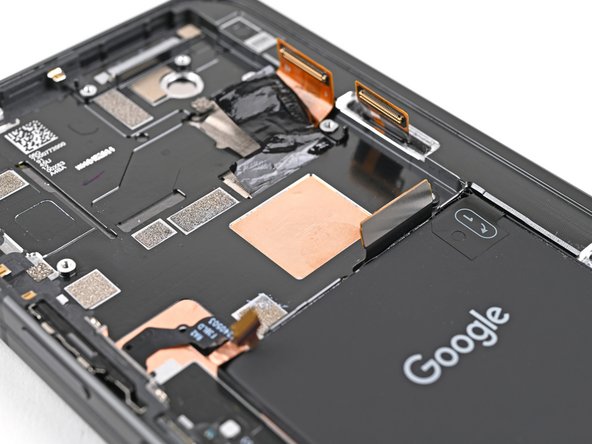
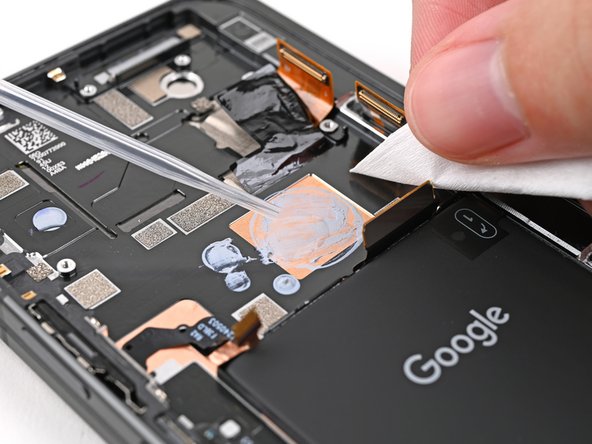
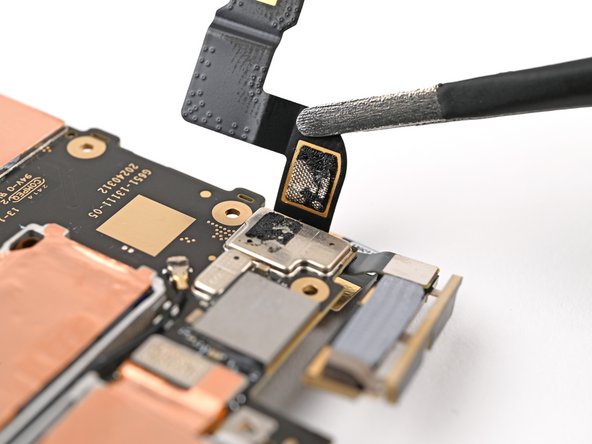
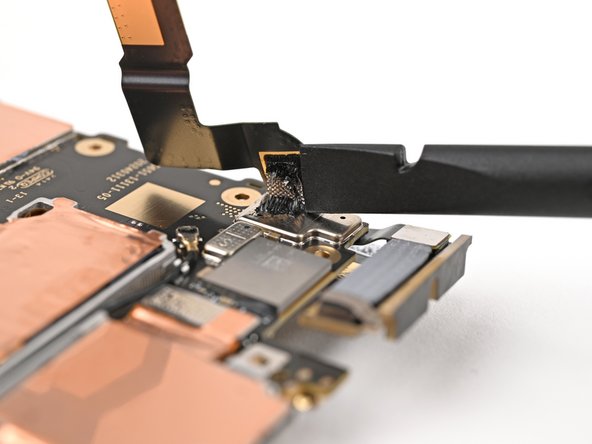
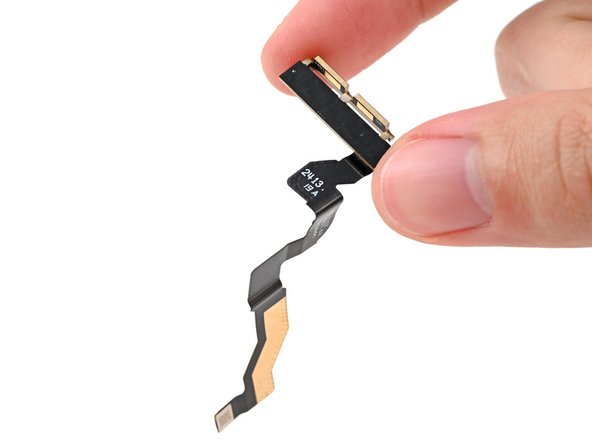
– Gently grab your trusty spudger and use its tip to lift the 5G mmWave antenna away from the frame. Take your time to separate it from the thermal pad, and you’ll be on your way to success!
You gotta see this, a little thermal pad just peppers the 5G mmWave antenna down on the frame like it’s a fun little game of top that antenna’s playin’ with the frame. Total cuteness over here! And hey, if you’re feeling kinda doubtful about this tiny dance, remember that you can always schedule a repair to get some professional love for your device!
Tools Used
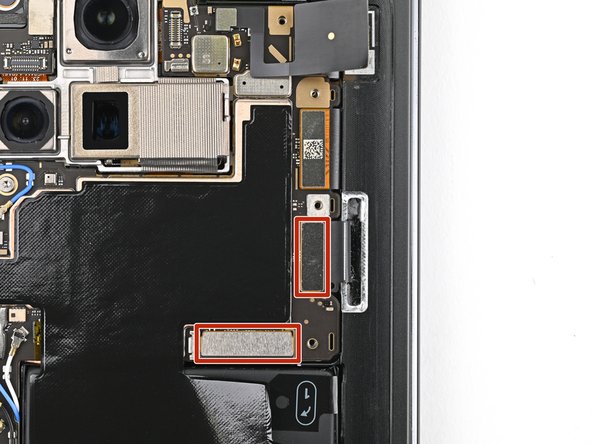
Step 37

– Grab your trusty Torx Plus 3IP driver and let’s get those screws out! You’re going to need to remove three little warriors holding the logic board in place:
– One screw measuring 2.2 mm long
– Two screws that are 2.6 mm long
Step 38
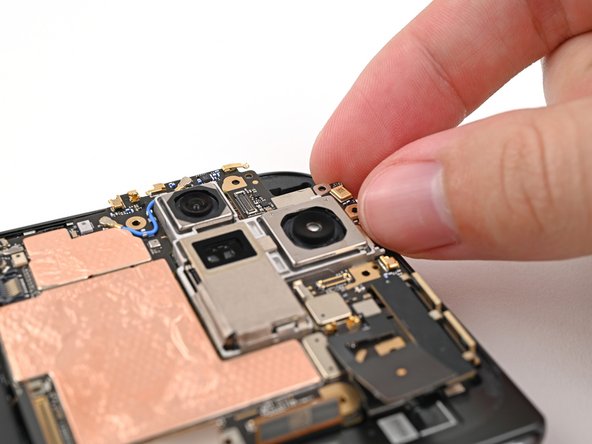

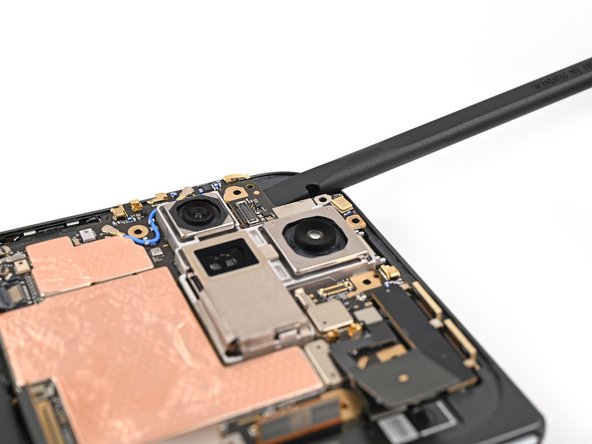
You might encounter a bit of resistance because the logic board is stuck to the frame with thermal paste.
– Let’s rock and roll! Get your spudger ready and slide it under the top left corner of that logic board, right next to the cool front camera cutout. You got this! Now, give a little grunt and pry up the logic board enough to grab it with your fingers. Keep up the awesome work, champ!
Tools Used
Step 39

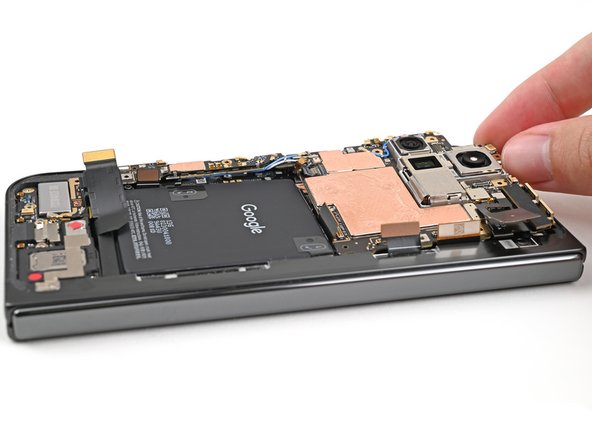
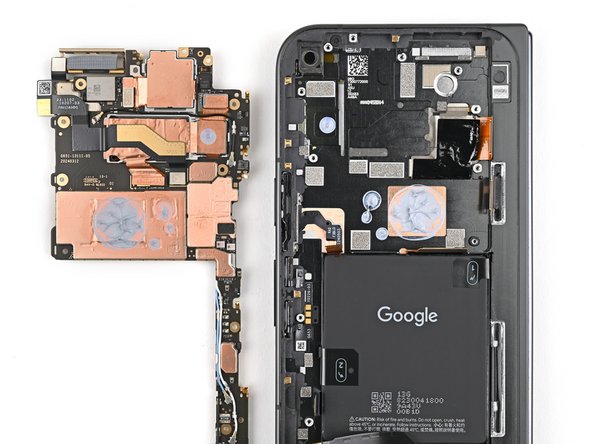
– Gently lift the top of the logic board out of its cozy frame and set it aside.
– Now, flip the logic board over and lay it down on a tidy surface, ready for the next steps.
Step 40

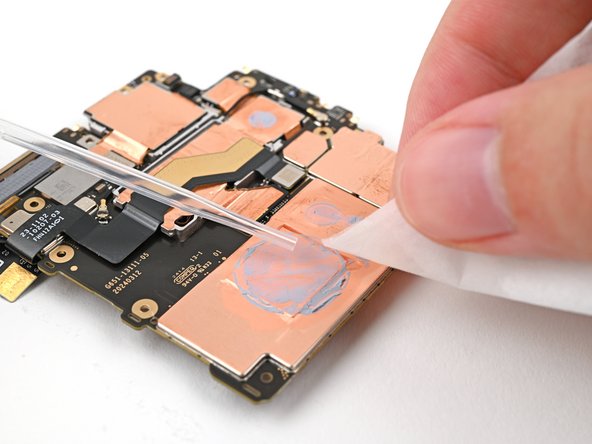
– Grab your spudger and gently scrape off the chunky bits of old thermal paste from the frame—think of it as peeling off a sticker.
– Dab a bit of high-strength isopropyl alcohol (90% or more) on any stubborn paste remnants—it’s like a spa treatment for your device.
– Polish it off with a coffee filter or lint-free cloth, leaving it shiny and ready for action. If you’re feeling stuck, you can always schedule a repair.
Tools Used
Step 41

Be super gentle when you’re cleaning the logic board – you don’t want to bend those little metal springs or get your camera lens all smudged up! Just a little TLC, and your device will be good as new.
– Now, let’s do a little dance with that thermal paste – give the bottom of the logic board a good cleaning, just like you did before. You’ve got this!


Step 43

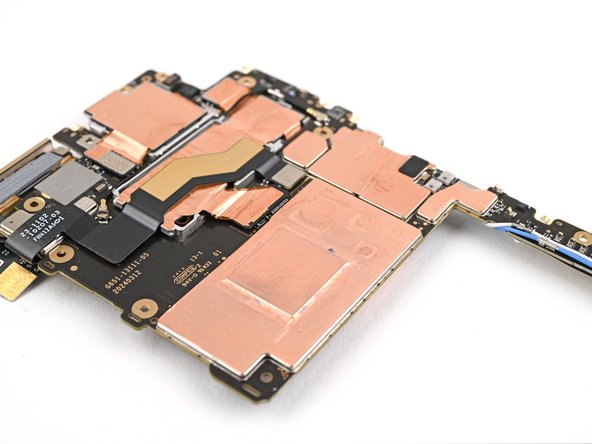
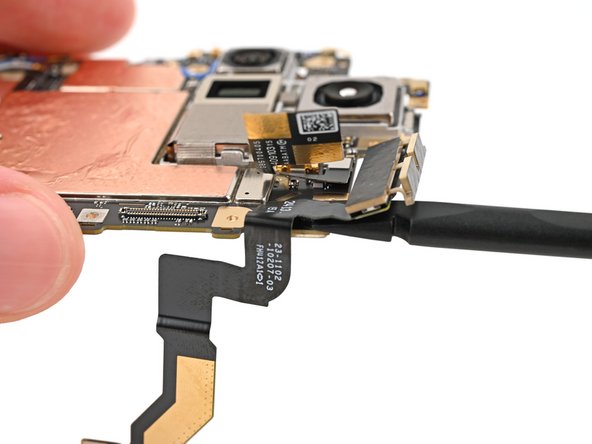
The 5G mmWave antenna cable is held firmly in place on both sides of the logic board by adhesive. Don’t worry, you’ve got this!
– Whoa, let’s slide our trusty spudger under that 5G mmWave antenna cable’s sticky section on the bottom of the logic board – can you feel the excitement??
– Now, gently pry up that cable to separate the strong adhesive bonds,,’cuz we’re on a mission!
– Finally, use those nifty tweezers or your own nimble fingers to pull the cable off the logic board and say goodbye to any remaining adhesive! You’re doing great!
Tools Used
Step 44

– Now, let’s get grooving! Just like a choreographed dance, we need to wiggle that previous step onto the top of the logic board for the stuck cable friends. Then, after that funky move, it’s time to say bye-bye to our 5G mmWave antenna pal! Don’t forget to keep that happy rhythm as you vibe through each step! 🎶 If you need a helping hand, remember that you can always schedule a repair to keep the beat going strong!
Step 45

– Nice work on getting everything apart! Now we’re ready to dive into the fun part – putting your device back together. Follow along, and let’s get your gadget up and running again!