How to Replace Google Pixel 9 Pro XL Front Camera – DIY Guide
Duration: 45 minutes
Steps: 30 Steps
This guide is crafted by the awesome team here at Salvation Repair. It’s packed with insights but hasn’t received any high-fives from tech giants. Want to dive deeper into our repair guides? Check them out here.
Welcome to your guide for swapping out the front-facing selfie camera in your Pixel 9 Pro XL! Are your selfies looking a bit fuzzy or blurry? Or has your camera decided to take a permanent vacation? It might be time for a replacement! Grab yourself a new front camera and some adhesive for the rear cover to get started. Keep in mind, any repair might affect your phone’s water resistance, so how well you stick on that rear cover adhesive will make all the difference. Let’s get you back to snapping those perfect selfies!
Step 1
– First things first, let’s get everything unplugged! Disconnect those cables and give your phone a little break by powering it down completely.
Step 2
When you’re working on detaching the adhesive, remember to keep your tool no deeper than 3 mm beneath the rear cover. It’s like a little dance—stay light on your feet to keep those delicate internal components safe and sound!
Get your marker and measure 3mm from the tip of your opening pick. Mark the pick with the marker. You could also tape a coin to the pick 3mm from the tip, but we’re feeling kinda artsy here. 😉
Step 3
– Pop a suction handle onto the bottom edge of that rear cover, right up close to the edge. You’ve got this!
Tools Used
Step 4
– Time for some finger gymnastics, let’s get that suction handle to make some magic happen and create a teeny-weeny gap under that cover! Next, whip out your trusty opening pick and slide it into the gap, like a ninja! Wohoo!
Tools Used
Step 5
Remember: don’t go too deep with that opening pick! Keep it under 3mm, you’ll be fine!
– Now, take your trusty opening tool and slide it along the bottom edge of your device. This’ll help separate the adhesive holding it together. Just slide it gently, you don’t want to break anything!
Step 6
– Gently slide your opening pick along the left side and then up the top edge to break that pesky adhesive free.
Step 7
– Gently glide your pick down the right edge to break free the last stubborn bits of adhesive.
Step 8
Hold your horses on removing that rear cover just yet! There’s a sneaky ribbon cable hanging on the right edge, keeping it connected to the phone.
Don’t worry, this is just like that time you tried to get the gum out of your hair! Carefully check the edges of the phone for any stubborn adhesive and use your trusty opening pick to gently separate it. You got this!
– Grab that suction handle and give the left edge of the rear cover a little lift, then swing it over to the right like you’re opening a book. Easy peasy!
– Now, use that suction handle to prop up the rear cover just right, giving you a clear view of the ribbon cable hanging out near the top right corner. You’ve got this!
Tools Used
Step 9
– Grab your trusty Torx Plus 3IP screwdriver and let’s get to work! Carefully remove those two 5.2 mm screws that are holding down the cable cover. You’re doing great!
Step 10
– Grab your trusty tweezers or just your fingers and gently lift off that cable cover like a pro!
Step 12
– Let’s get that rear cover off! It’s time to unveil the magic inside.
– As you put everything back together, remember to check out this guide for applying fresh adhesive and securely placing your back cover back on.
Step 13
Feel free to take off the tape entirely if you’d like, but don’t forget to hang onto it for when it’s time to put everything back together.
– Grab your trusty spudger and put those fingers to work! Gently lift the edge of the tape on the left side of your phone, just enough to reveal the hidden bracket and screws waiting for some attention underneath.
Tools Used
Step 14
– Alright, let’s loosen up those screws! Use a Torx Plus 3IP screwdriver to take out the two 5.2 mm long screws holding the wireless charging cable cover in place. You got this!
Step 16
– Gently use the pointed end of an opening pick to lift and disconnect the wireless charging press-connector. You’ve got this!
Step 18
– Grab your trusty Torx Plus 3IP screwdriver and let’s take off those two 2.2 mm-long screws holding the wireless charging assembly in place. You’ve got this!
Step 19
– Alright, let’s give this wireless charging assembly the boot! Time to remove it. You’ve got this!
Step 21
– Grab your trusty Torx Plus 3IP screwdriver and get ready to roll! It’s time to unscrew that 5.2 mm-long screw that’s holding down the mmWave antenna cover. You’ve got this!
Step 22
A snug little metal clip holds down the bottom left corner of the mmWave antenna cover like it’s guarding a treasure!
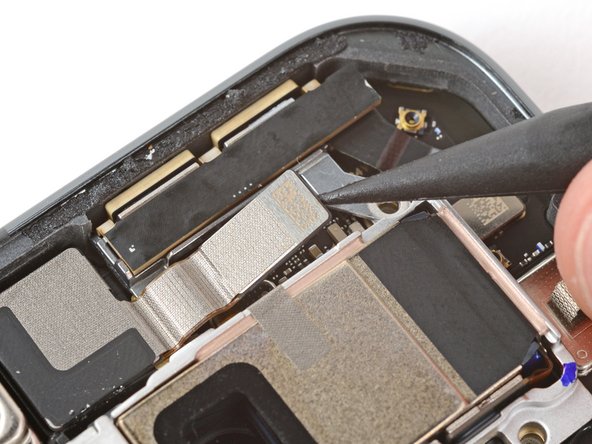
– Slide the pointy end of your spudger under the tab at the bottom left corner of the mmWave antenna cover. You’ve got this!
– Now, with a little finesse, use your spudger to push the cover to the right while gently prying it up to release the clip. Easy peasy!
Tools Used
Step 23
– Carefully tug the right edge of the cover downward, like you’re peeling a banana, and lift it right off the phone!
– When putting everything back together, tuck those two top corner tabs under their cozy little spots in the frame, then press the cover down until it clicks into place. You’re almost there!
Step 24
– Use the point of a spudger to gently lift and disconnect the mmWave antenna press connector from the top right corner of the logic board. It’s like giving the connector a little high five!
Tools Used
Step 26
Okay, those cameras are delicate, so just be super careful around them. If you accidentally bump one, give it a quick wipe with a clean microfiber cloth.
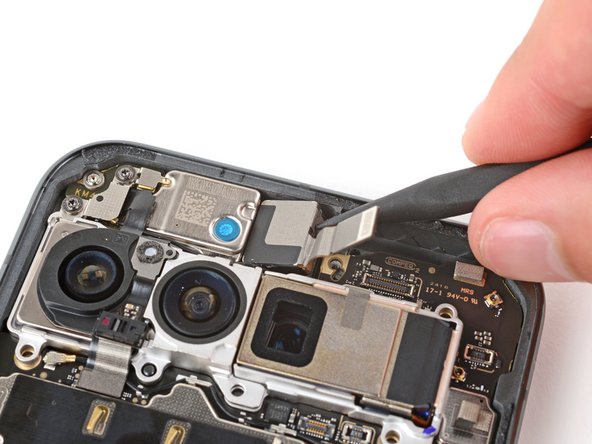
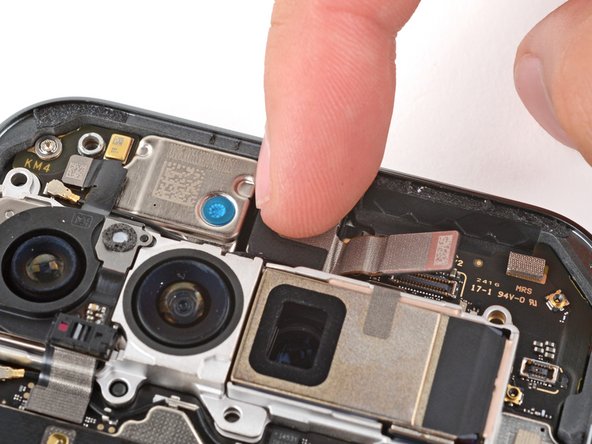
– Gently move the front-facing camera cable to the side so you can easily get to that sneaky little mmWave antenna screw.
– Grab your trusty Torx Plus 3IP screwdriver and unscrew the 4.2 mm-long screw that’s keeping the mmWave antenna in place. You’ve got this!
Step 27
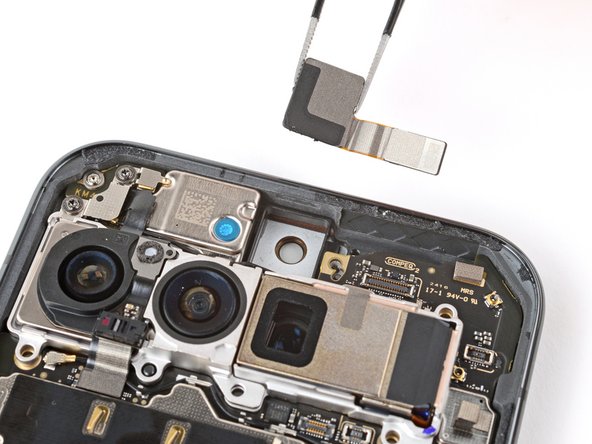
– Grab those tweezers or just use your trusty fingers to gently lift out the mmWave antenna. You’ve got this!
– When putting everything back together, remember to tuck the mmWave antenna snugly under the front-facing camera cable. It’ll be like a cozy little blanket for your tech!
Step 29
– Grab your trusty tweezers and gently peel away the old front-facing camera adhesive from the frame. It’s like unwrapping a gift!
– Next, off with the larger clear liner from the front-facing camera adhesive. We’re making progress!
– With the tweezers still in hand, carefully position the adhesive into the cozy little recess for the front-facing camera. Precision is key!
– Now, take that spudger and give the adhesive a little press to secure it snugly against the frame. You’re doing great!
– Lastly, peel off the remaining blue liner from the adhesive. Almost there!
Tools Used
Step 30
– Alright, let’s get this camera in place! First, remove any protective caps or liners from your new camera. You got this! Next, with the cable on the right edge, gently press the camera into its recess. The adhesive will help hold it in place. You’re doing great!
Success!


