How To Replace Google Pixel Fold Lower Board: Step-by-Step Guide
Duration: 45 minutes
Steps: 32 Steps
Hey there! This repair guide is brought to you by Salvation Repair. We’re here to help you fix your stuff. If you need help, you can always schedule a repair. Happy fixing!
Welcome to this handy repair guide! Here, we’ll walk you through the steps to swap out the lower board in your Google Pixel Fold. Just so you know, the SIM card reader is attached right to that lower board. If you hit any bumps along the way, remember, you can always schedule a repair for some expert help. Let’s get started!
Step 2


– Grab your trusty SIM eject tool, a bit, or even a straightened paper clip. It’s time to get that SIM card tray out! Just pop it into the little hole on the tray.
– Give it a firm push and watch as the SIM card tray gracefully ejects. You’re doing great!


Step 4


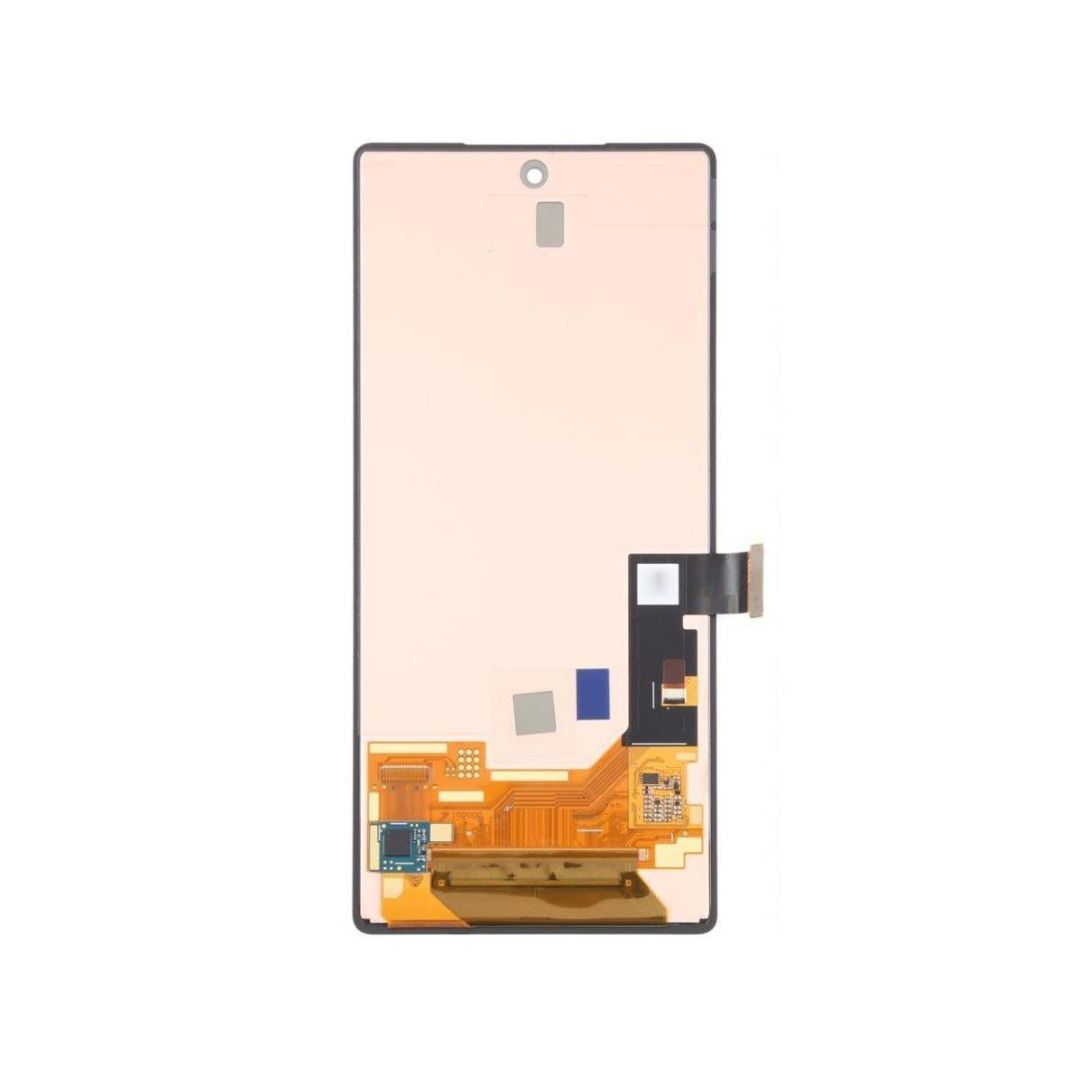
Be careful not to push your pick in too far—it’s a risky move that could harm your screen and the inner workings of your device!
When you’re tackling the screen removal, just slide that opening pick in as far as the edge allows. You’ve got this!
Step 5


Got a screen that’s looking like a spider web? Try covering it with clear packing tape to give the suction cup something to stick to. Super sticky tape can do the trick, too. And hey, if all else fails, superglue that suction cup to the screen—desperate times, right?
If your phone is on the older side, this might be a tough nut to crack. If you’re stuck, add more heat to the edge and give it another go.
– Gently place a suction cup on the screen, aiming for the sweet spot near the center of the bottom edge.
– Give that suction cup a solid pull with consistent strength to open up a little space between the screen and the frame.
– Slide in an opening pick to take advantage of that gap you just made.
Step 6


– Glide that opening pick along the bottom edge to loosen the adhesive.
– Hold that opening pick in the bottom right corner before proceeding.

Step 8


– Gently maneuver the opening pick around the bottom right corner to break free of that sticky adhesive. You’ve got this!
Step 9


– Get your new opening pick ready and gently insert it in the bottom right corner.
– Now, give that pick a happy little slide toward the top right corner—this will help you break free from the adhesive’s sticky grip.
– Keep that trusty opening pick in the top right corner as you move on to the next step. You’re doing great!

Step 11


– Let’s get this party started! Carefully twist the opening pick around the top right corner to loosen up the adhesive. You got this!
Step 12


– Pop a fresh opening pick into the top right corner like a pro!
– Now, gently glide that pick towards the top left corner to break free the sticky stuff holding it together.

Step 14


Careful now, that corner’s a delicate one! Crank up the heat and treat it gently.
– Tilt your pick to keep it as close to the screen as possible for the best angle.
– Gently sweep the opening pick around the top left corner to break the adhesive seal.
Step 15


– Pop in a fresh opening pick at the top left corner.
– Slide that pick down towards the bottom left to loosen the adhesive.
Step 16


Hey there! That sharp corner is a bit of a delicate flower. Be sure to use plenty of heat and treat it gently as you work around it. You’re doing great!
– Tilt your pick to keep it nice and flat against the screen. We want to be smooth, right?
– Now, gently rotate that opening pick around the bottom left corner. Time to break free from that adhesive!

Step 18

– Okay, now let’s give this corner a little heat wave party! Gently apply your trusty iOpener and let the party commence for two minutes straight. That’s right, make the corner the life of the party and we’ll move on to the next adventure together! Feel free to pop, lock, and drop it as long as you keep those two minutes in check, party animal.
Tools Used
Step 19


– Slide an opening pick gently under the right edge of the screen, right at that top right corner—the sweet spot!
– Now, push that pick under the screen as far as you can go, just make sure you keep a firm grip. You’ve got this!
Step 20


Hey, just a heads-up, be super careful during this step, you don’t want to crack the screen! Take your time and add some extra heat if you need to.
If the adhesive isn’t budging, don’t worry! Just turn up the heat a bit more or try sliding the pick in at a different angle.
– Wiggle that opening pick back and forth to loosen up that glue! You got this!
Step 21


Hold up! Don’t go yanking that screen off just yet. There’s a little cable still holding it to the phone. We’ll get to that soon.
Alright, it’s time to give that screen a little wiggle! It should be pulling away from the frame now. If it’s still playing hard to get around the edges, grab an opening pick and gently pry away any stubborn adhesive. You’re doing great!
Step 22

As you dive into this repair adventure, make sure to keep a close eye on every screw. They all have their special spot, so let’s make sure they find their way back home!
The Pixel Fold loves its Torx Plus screws, but don’t worry, standard Torx bits are also invited to the party! Just grab a T3 or T4 bit (or one size larger) and remember to apply steady, downward pressure to keep things smooth and avoid any stripping mishaps.
– Grab your trusty Torx Plus 3IP screwdriver and let’s tackle those five 2.5 mm screws holding the bottom bracket in place. You’ve got this!
Step 23


– Alright, bonanza buddies! May we present the winning moves to get that bottom bracket from the current game, to the replacement big leagues. Firstly, employ your finest tweezers, or, if those’re too fancy, your dandy fingers to relieve that bottom bracket of its seat. In the reassembly round, make sure the bottom bracket powersits in its two friend zones, or alignment pegs, before the grand finale of refastening it back into place. If you need a hand, you can always schedule a repair!
Tools Used

Step 24


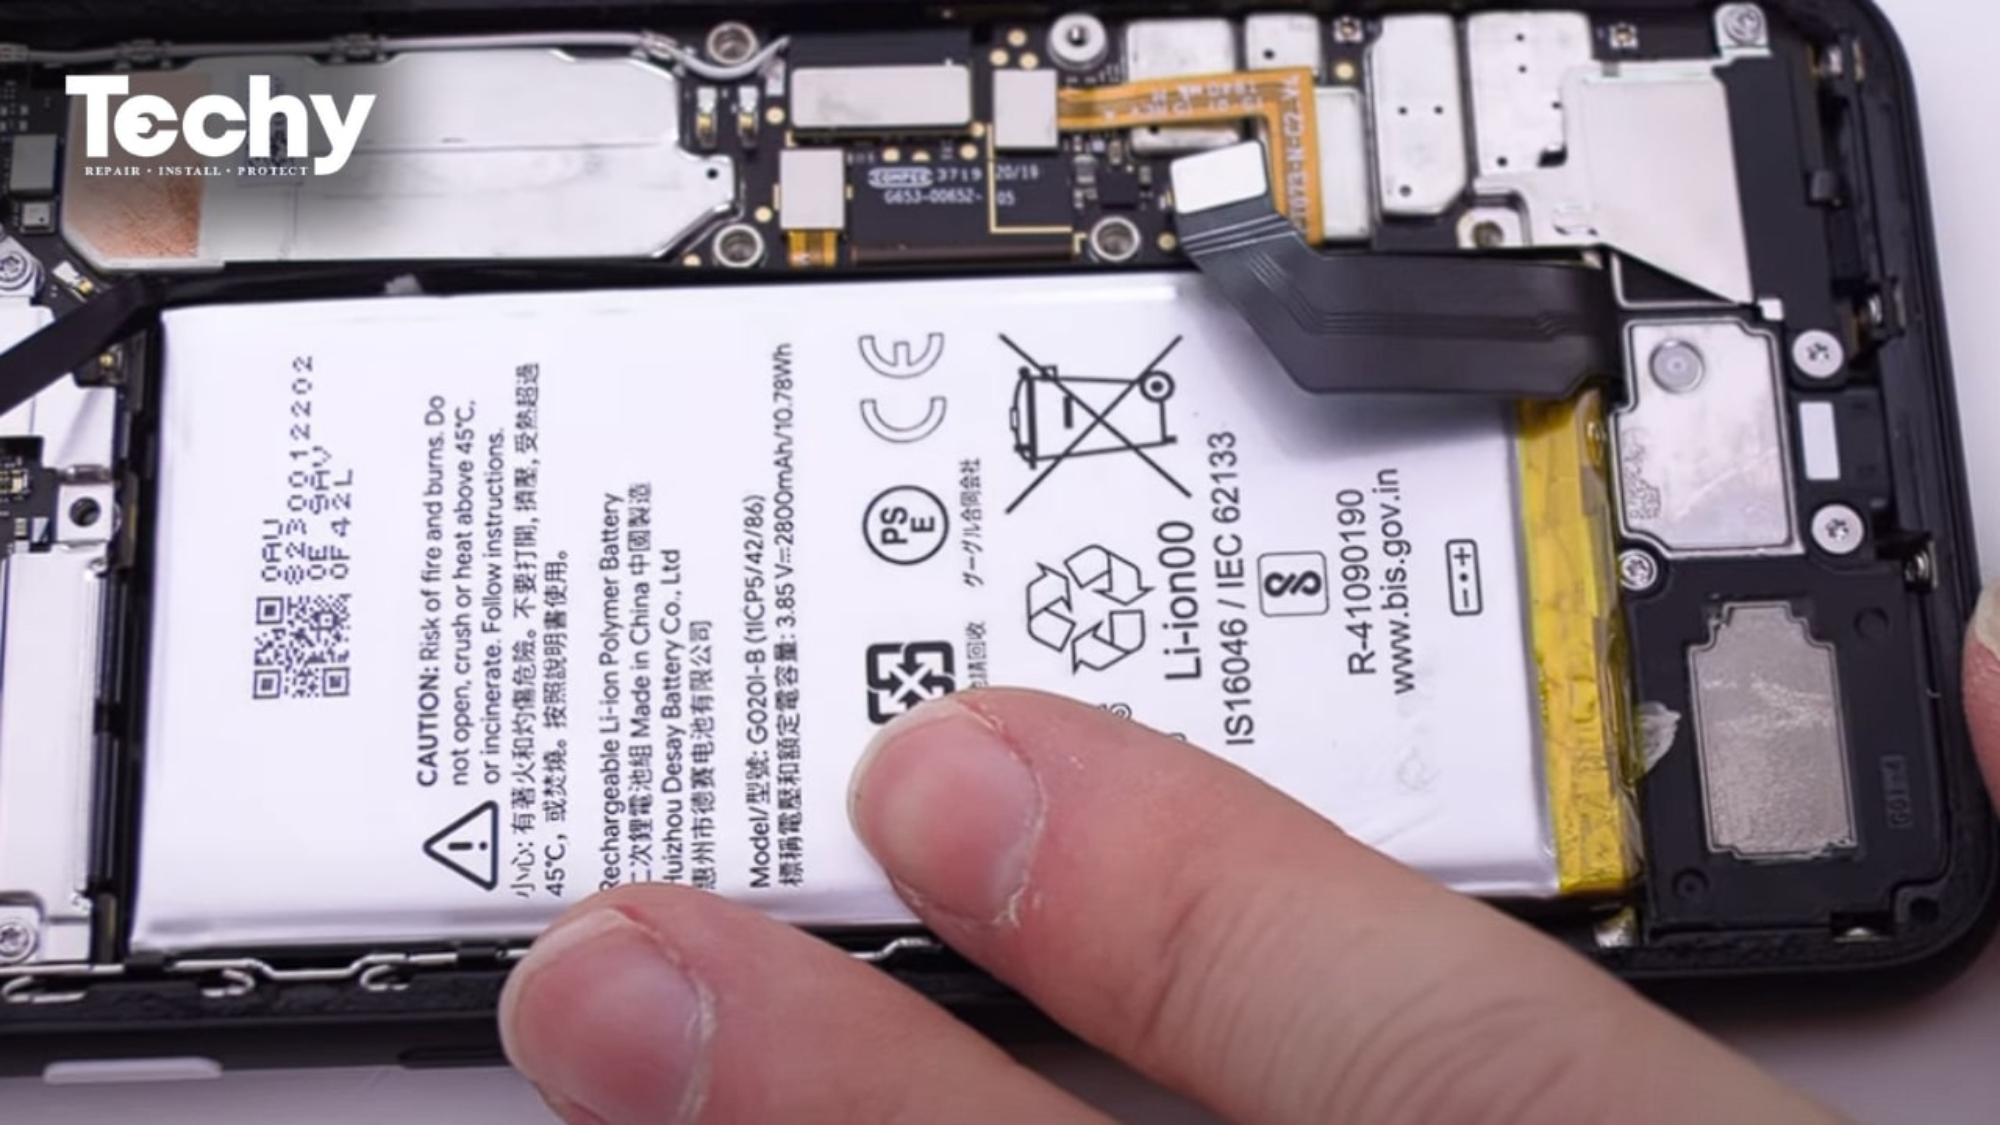
– Use the flat end of a spudger to carefully pry up and disconnect the flip battery press connector.
– To reconnect this kind of press connector, gently align it and press down on one side until it clicks into place. Then, repeat on the other side. Don’t press down in the middle! If you misalign the connector, you could bend the pins and that could cause some serious damage. If you need help, you can always schedule a repair.
Tools Used

Step 25


Keep your spudger where it belongs! Straying off course could lead to some serious surface-mounted component drama on the logic board. Let’s keep it safe, shall we?
– Slide the tip of your trusty spudger under the short edge of the screen press connector that’s peeking out at the bottom of your phone.
– Gently pry it up to give that screen press connector a little break from its duties.
Tools Used