How to Replace iPhone 16 Plus Back Glass – Step-by-Step Guide
Duration: 45 minutes
Steps: 25 Steps
Wrap up your repair adventure with Apple’s Repair Assistant!
Ready to tackle that cracked or broken back glass on your iPhone 16 Plus? You’ve got this! This assembly not only holds the back cover but also includes the flashlight and wireless charging coil, all bundled together like a happy little family that’s matched with your logic board. Just a heads up, when you swap it out, make sure to use Apple’s Repair Assistant to keep everything running smoothly with charging and your camera’s flash. Don’t forget to grab some replacement back glass adhesive to seal the deal!
Step 1
Let your phone’s battery take a little vacation below 25%! A fully charged lithium-ion battery can be a bit of a drama queen when it comes to safety.
– First things first, let’s disconnect any cables from your phone. Time to free it up!
– Now, give a little love to your power and volume buttons by holding them down together, and then slide to power off your trusty device.
Step 2
Ensure there’s a nice, smooth spot near the bottom edge that’s spacious enough for a suction cup to make its home.
– If your screen or back glass is in rough shape, don’t worry! Just grab some packing tape and lay down overlapping strips over the glass. This will keep you safe and make it easier to take things apart. You’ve got this!
Tools Used
Step 3
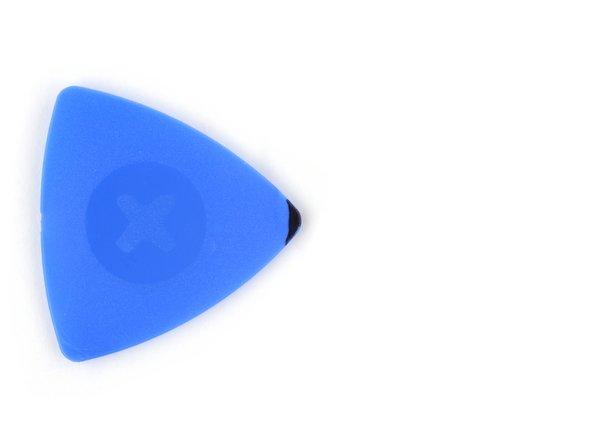
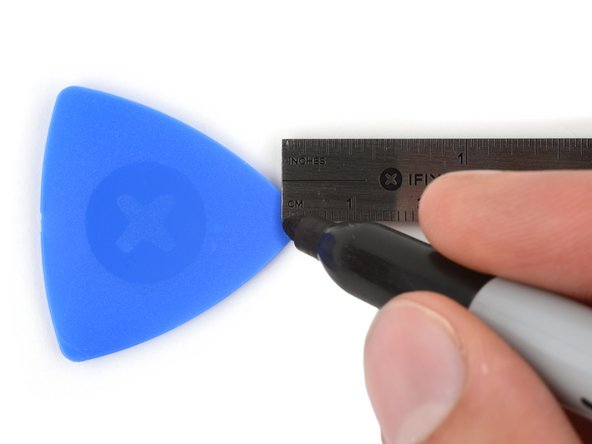
To avoid a bad day, make sure you don’t insert the opening pick too far. Mark your pick to keep your device safe.
Try marking the other corners of the pick with different measurements.
Or, tape a coin 3mm from the tip of your pick for a handy guide.
– Take a moment to measure 3 mm from the tip and give your opening pick a stylish mark with a permanent marker. You’re on your way to a successful repair!
Step 4
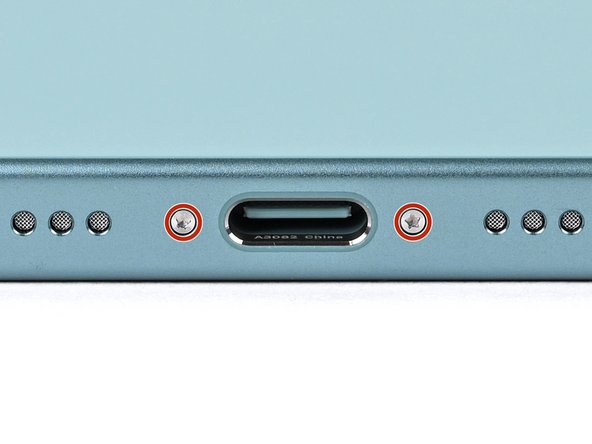
– Grab your trusty P2 pentalobe driver and unscrew the two 7.7 mm-long screws flanking the USB-C port. You’ve got this!
Step 5
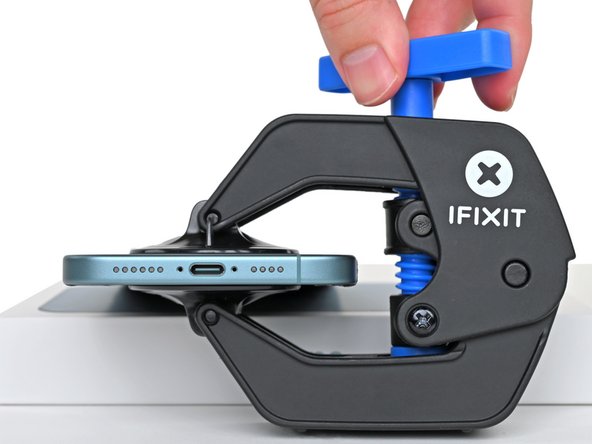
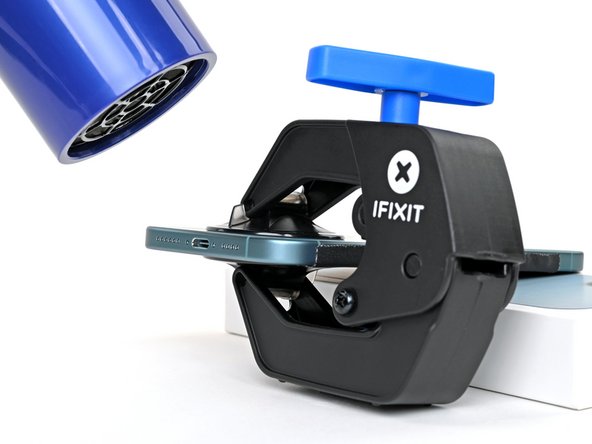
Get ready for a smooth ride! The next five steps will introduce you to the Anti-Clamp, a nifty little tool we’ve concocted to make opening your device a breeze. If you don’t have the Anti-Clamp handy, no worries—just jump down four steps for a different approach.
The Anti-Clamp works its magic by applying suction to both the screen and the back glass. If you’re just wanting to open the back glass, be sure to tape down the screen securely.
For the complete scoop on how to use the Anti-Clamp, we’ve got a handy guide just for you.
Remember, the tape should only be holding the screen in place, not the back glass. Keep it neat!
– Grab two strips of tape, stick them along the long edges of your phone, and fold them over the screen to keep everything snug and secure.
Step 6
Got a phone that’s slipperier than a bar of soap? No worries! Just slap on some tape to give it a grippy new personality. And if you need help, you can always schedule a repair.
– Give that blue handle of the Anti-Clamp a little tug backward to free those arms!
– With the back glass facing up, carefully slide the arms over the right edge of your phone, placing one suction cup on the back glass and the other on the screen. Aim to position the suction cups near the lower edge for a snug fit.
– Support your phone so it stays nice and level between the Anti-Clamp’s arms—a small box can work wonders here!
– Squeeze the cups together to work their magic and create some solid suction.
Step 7
If tape is playing hard to get, just give those suction cups a little warmth – they’ll stick like they mean it!
– Give that blue handle a little tug forward to secure those arms in place.
– Now, twist that handle a full circle (360 degrees) or until those cups start stretching out like they’re ready for a party.
– As the cups stretch, keep an eye on their alignment—make sure they stay stacked nicely. If they start to slide around, no worries! Just take off the Anti-Clamp and use some tape to help those cups stick.
Step 8
Don’t go overboard with the heat—your phone’s battery doesn’t handle the heat too well. If you need help, you can always schedule a repair
Grab a hair dryer or heat gun and warm up the bottom edge of the back glass until it feels hot to the touch.
If you don’t see a gap after a minute, crank up the heat and give the handle a quarter turn. Let the Anti-Clamp do its thing, and repeat as needed.
– Give your iOpener a little love with some heat, then gently place it on the bottom edge of the back glass for about two minutes.
– Take a breather for up to a minute as the adhesive decides to part ways, creating a nice little gap between the back glass and the frame.
Tools Used
Step 9
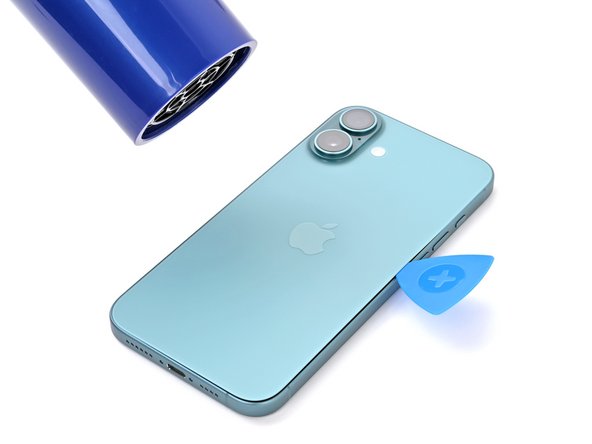
– Gently slide the tip of your trusty opening pick into the gap.
– Ease off the Anti-Clamp by using the handy pull tabs on the suction cups.
– You can skip ahead and bypass the next two steps!
Step 10
Keep it cool—don’t overheat the phone, or you’ll risk cooking the battery! If you need help, you can always schedule a repair
If you’re feeling a bit adventurous, grab a hair dryer or heat gun and warm up the bottom edge of that back glass until it’s nice and toasty. Just be careful not to overdo it!
– Warm up the bottom edge of the back glass with a heated iOpener for a cozy two minutes.
Tools Used
Step 11
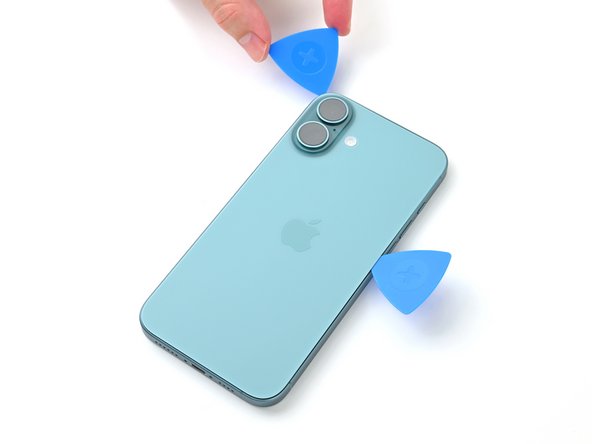
– Grab a suction handle and place it right above the USB-C port on the bottom edge of that back glass.
– Give that handle a solid pull, steady and strong – we want to create a nice little gap between the back glass and the frame.
– Now, slide the tip of your opening pick into that gap you’ve just made.
Tools Used
Step 12
As you carefully cut through the adhesive holding the back glass in place, keep an eye out for the following areas:
– There’s a super fragile cable chilling right next to the volume up button on the back glass. Avoid sticking your pick in there, or you might slice it.
– There are a bunch of spring contacts around the edge of the phone. Stick to the depth suggested in each step to avoid bending these guys.
Step 13
Be sure not to go deeper than 5 mm with your pick on the bottom edge. We don’t want to mess up those spring contacts! If you need help, you can always schedule a repair.
– Gently glide your pick along the bottom edge, wiggling it back and forth to break the adhesive seal. It’s like giving your device a little dance!
– Keep your pick snugly in the bottom right corner to stop that adhesive from playing tricks and resealing.
Step 14
Fire up that hair dryer or heat gun and give the back glass a warm hug until it’s toasty enough for your fingers to feel the heat!
– Warm up that iOpener and give it a cozy hug on the right edge of the back glass for a good two minutes!
Tools Used
Step 15
Remember, keep your pick shallow—no deeper than 5 mm along the right edge! We want to protect those spring contacts and ribbon cables like they’re made of gold.
Steer clear of the volume buttons while slicing; we don’t want to accidentally mess with the wireless charging or flash cable. Let’s keep things smooth!
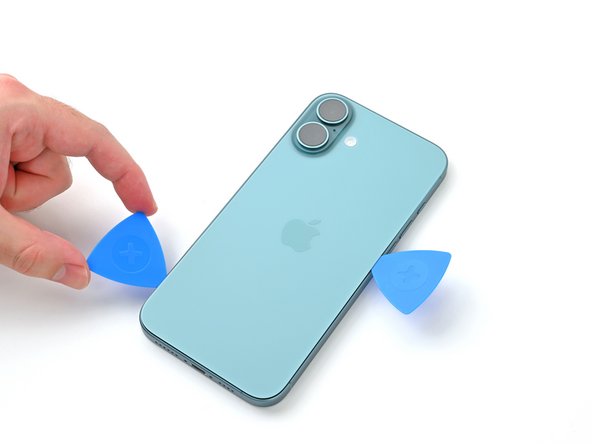
– Gently glide your pick around the bottom right corner and slide it halfway up the right edge until you hit a solid stop at the clip holding the back glass in place.
– Keep that pick in there to stop the adhesive from rejoining the party.
Step 16
When you’re ready to warm things up, grab that hair dryer or heat gun and get it nice and toasty to the touch.
– Warm up the left edge of the back glass with a heated iOpener for a solid two minutes.
Tools Used
Step 17
Keep your pick no deeper than 5mm along the left edge to avoid hitting the spring contact. If you need help, you can always schedule a repair.
As you glide through, you’ll hear and feel those metal clips pop free. It’s like a little celebration of progress!
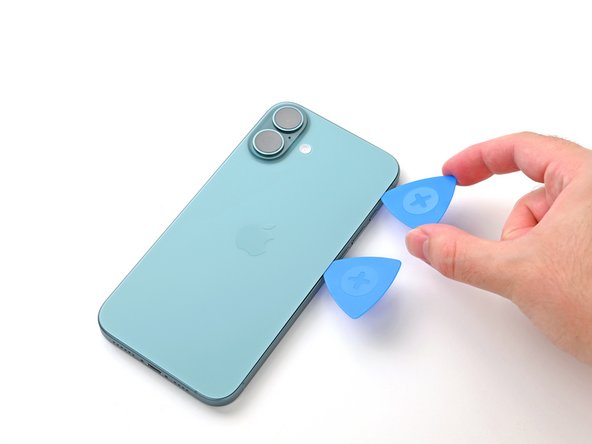
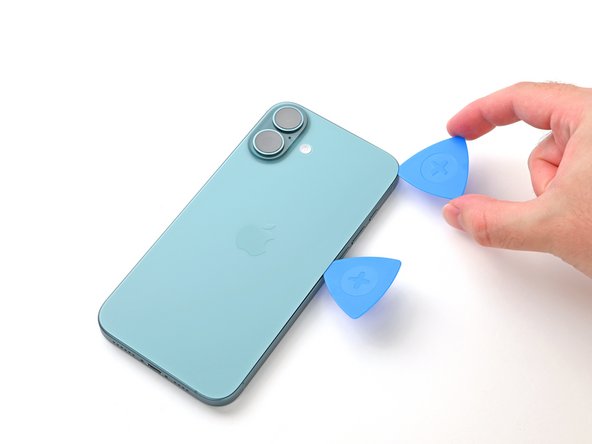
– Pop in a second opening pick at the bottom edge, just like sliding into a cozy chair.
– Gently glide that pick around the bottom left corner and then along the left edge of the screen to break free the adhesive and let those metal clips breathe.
– Keep that pick snugly inserted at the top left corner to make sure the adhesive doesn’t decide to play hide and seek.
Step 18
When using a hair dryer or heat gun, warm it up until it’s nice and toasty to the touch.
– Warm up the top edge of the back glass, making sure to angle it around the volume buttons, using a heated iOpener for two minutes. Need help? You can always schedule a repair.
Tools Used
Step 19
Keep your pick no deeper than 3 mm along the top edge—it’s like a cozy blanket for the spring contacts, and we don’t want to accidentally wake them up!
You should feel and hear a satisfying click as the top two clips pop free.
– Glide your opening pick along the top edge and around the top right corner to the volume up button to break the adhesive seal.
Step 20
Hold up on yanking that back glass completely off—it’s still hanging on with a delicate ribbon cable. Stick with the next few steps to get it off safely.
If the back glass isn’t popping open like it should, no worries! Just take a stroll around the edges with your pick to see if there’s any sneaky adhesive or stubborn clips holding it back.
You might need to give the back glass a gentle nudge upward before swinging it open to completely free those clips. You’re doing great!
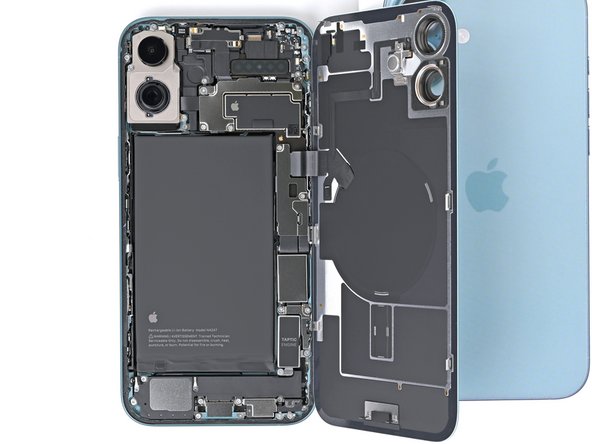
– Carefully swing the back glass open towards the volume buttons like you’re unveiling a surprise!
– Use a clean, sturdy object—maybe a small box—to hold the back glass in place. We want to keep that cable happy and stress-free!
– Now, go ahead and remove those opening picks. You’ve got this!
Step 21
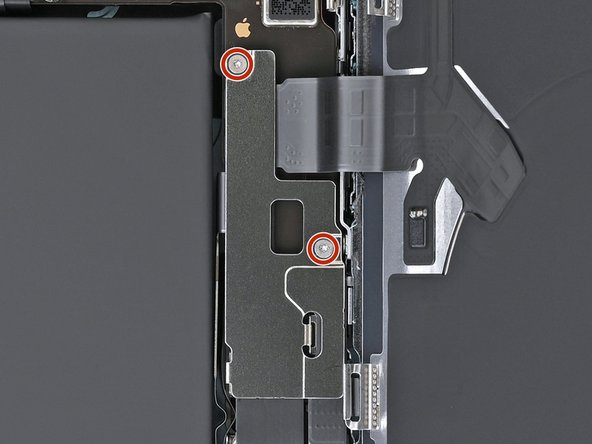
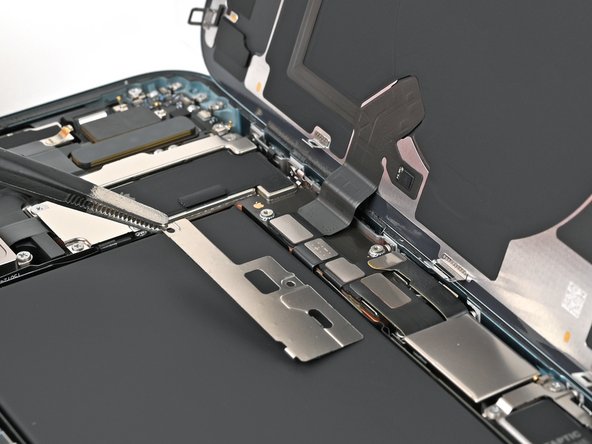
– Grab your trusty tri-point Y000 driver and get ready to tackle those two 1.3 mm screws holding down the middle connector cover. You’re on your way to a smooth repair journey!
Step 22
Keep that battery safe and sound; no dents or punctures, please!
– Grab some blunt-nose tweezers or use your fingers to slide the cover towards the left edge of the phone and unhook it from the slot on the logic board.
– Pop off the cover.
– When putting it all back together, align the hooks with their slots on the logic board. Then, press the cover down and slide it towards the right edge to re-engage the hooks. If you need help, you can always schedule a repair.
Step 23
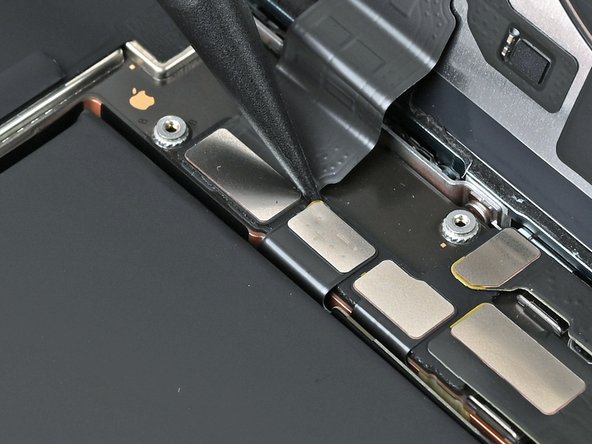
– Grab the spudger and gently pry up and disconnect the battery press connector.
– When putting things back together, carefully line up the connector with its socket and press it down using your fingertip or the flat end of a spudger—start on one side, then move to the other—until it clicks into place. Don’t force it. If it’s being stubborn, reposition and try again.
Tools Used
Step 24
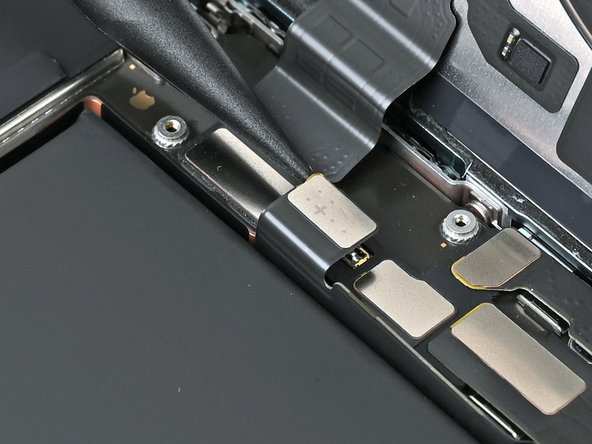
– Grab your trusty spudger and gently nudge up that wireless charging coil press connector to disconnect it. You’ve got this!
Tools Used
Step 25
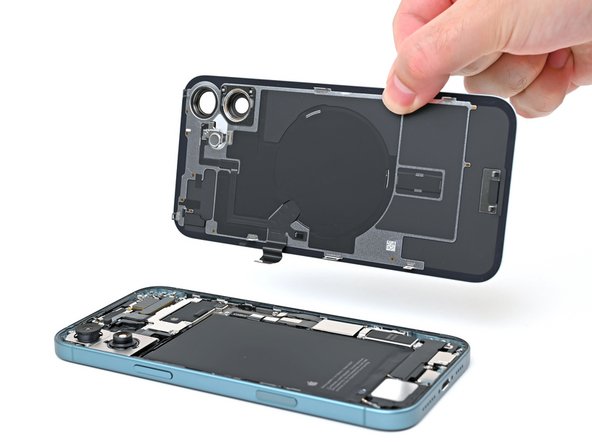
– Carefully lift the back glass off the frame and set it aside.
– Now, before we wrap things up:
– This is a perfect moment to test your handiwork before sealing everything back up. Go ahead and temporarily reconnect the battery and back glass (but don’t stick it down just yet), power on your device, and check that it’s running smoothly. Once you’ve confirmed everything’s in order, power it down, disconnect the battery, and let’s keep going with the reassembly!
– Use this guide to reapply adhesive and put that back glass back in place.


