How to Replace iPhone 16 Plus Battery Guide
Duration: 45 minutes
Steps: 32 Steps
a USB-C Power Delivery (PD) power source is your best buddy for this task!
Get ready to swap out that battery in your iPhone 16 Plus! To tackle this repair, you’ll need some replacement back glass and battery adhesive. If your new battery doesn’t come with its own adhesive, no worries—grab some stretch release battery adhesive instead. Remember, iPhone batteries are designed to keep about 80% of their power for around 500 charge cycles, which translates to about 18–24 months. If your iPhone is begging for a charge more often or seems to be running on fumes, it’s probably time for a new battery. This model uses a special adhesive that needs a little electrical love to loosen up. Apple suggests hooking up a 9V battery for 90 seconds, but feel free to use a power supply or power bank with a 5–20V output if that’s what you have on hand—the time it takes to loosen the adhesive may vary. The guide below shows off our handy VoltClip with a USB-C Power Delivery (PD) power source, which could be the FixHub Portable Power Station, a USB-C PD power brick, or even some laptops/smartphones. Just a heads up, not all USB-C PD sources can handle 12V (but don’t worry, the FixHub Portable Power Station can!). If your power source can’t handle 12V, the VoltClip will default to the next available voltage, usually 9V, which is still plenty to break that adhesive bond. If you’re rolling with a different method, just follow the guide as usual and adjust your power source’s steps as needed. Once you’re done with this repair, you might see some warnings about your new part and lose access to battery health data temporarily, but rest assured, your new battery will be up and running just fine. As of iOS 18.1, battery health works like a charm with both original and aftermarket replacement batteries. After you finish, don’t forget to run Repair Assistant to reset the battery metrics. And just a little note, some images in this guide might show the non-Plus iPhone 16, but they won’t mess with the procedure at all.
Step 1


Let your phone’s battery dip below 25%—a fully charged lithium-ion battery can be a bit of a drama queen when it comes to safety!
– Disconnect any cords from your phone.
– Press and hold the power and volume buttons, then swipe to shut down your phone.
Step 2


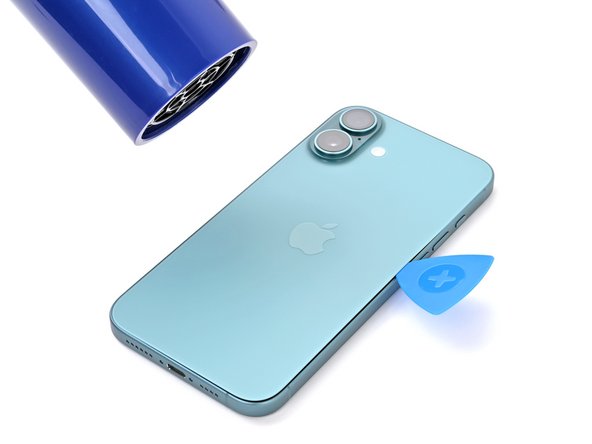
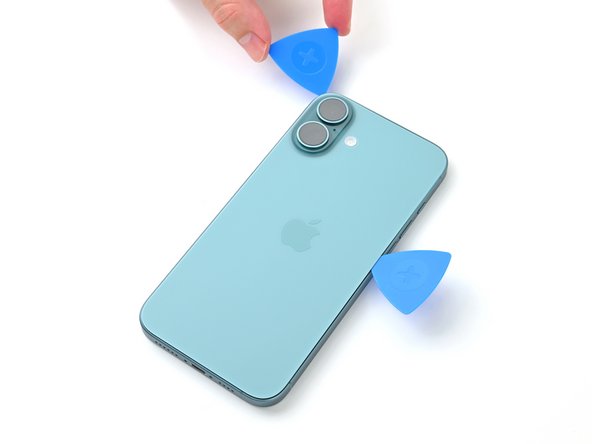
Find a nice, smooth spot near the bottom edge that’s spacious enough for a suction cup to grab onto.
– If your screen or back glass is looking a bit worse for wear with some serious cracks, no worries! Just grab some packing tape and lay down overlapping strips over the glass. This will keep you safe and make the disassembly process a breeze.
Tools Used

Step 3
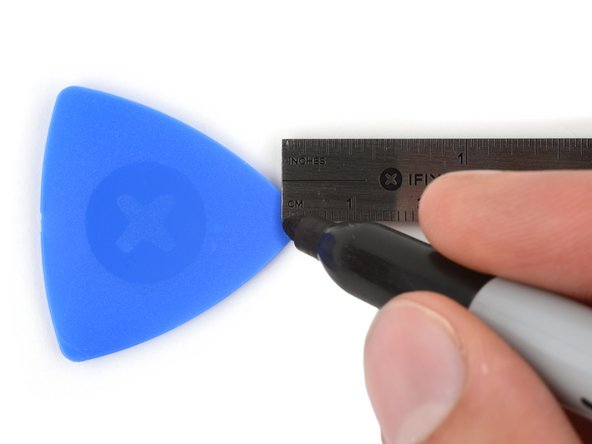

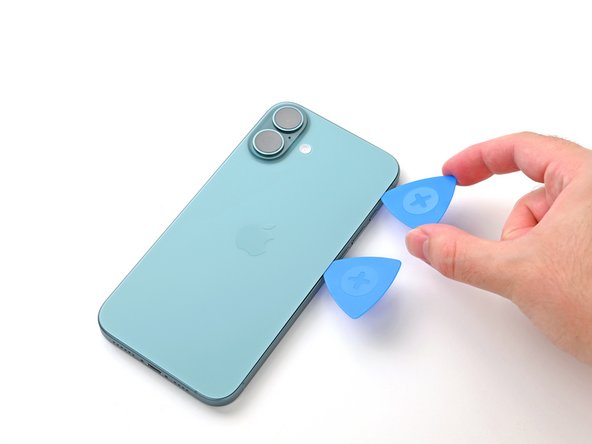
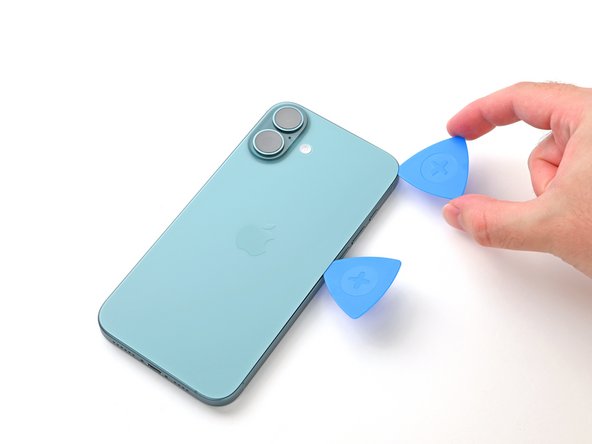
Avoid damage by not inserting an opening pick too far. Mark your pick to prevent mishaps.
Mark the other corners of the pick with different measurements too.
Alternatively, tape a coin to a pick 3 mm from the tip.
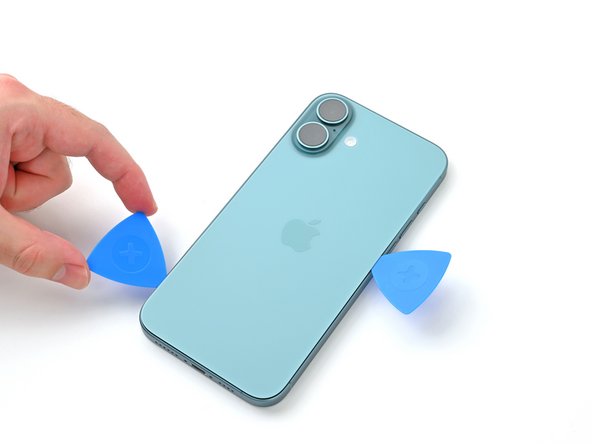
– Measure out 3 mm from the tip and make a mark with a permanent marker on the opening pick.
Step 4
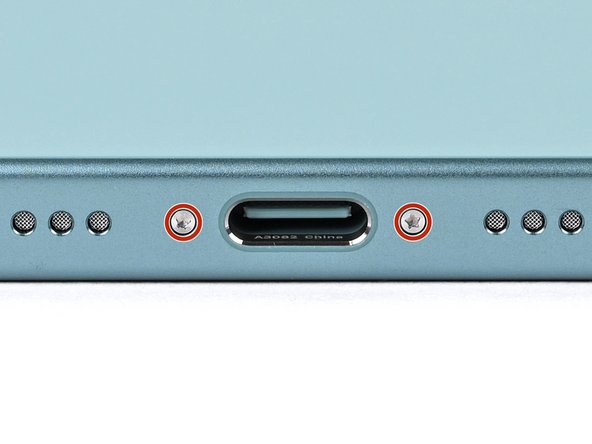

– Grab your P2 pentalobe driver and pop out those two 7.7 mm-long screws flanking the USB-C port.
Step 5


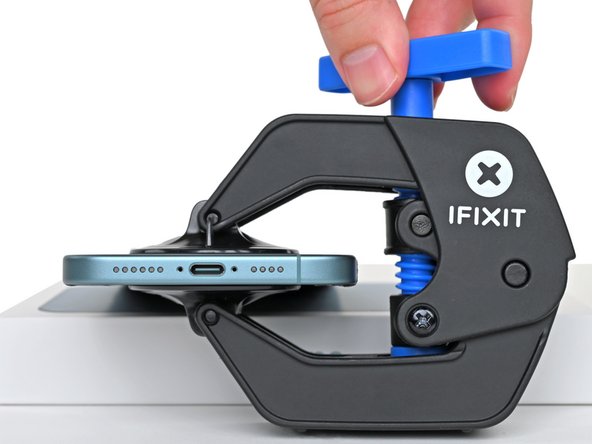
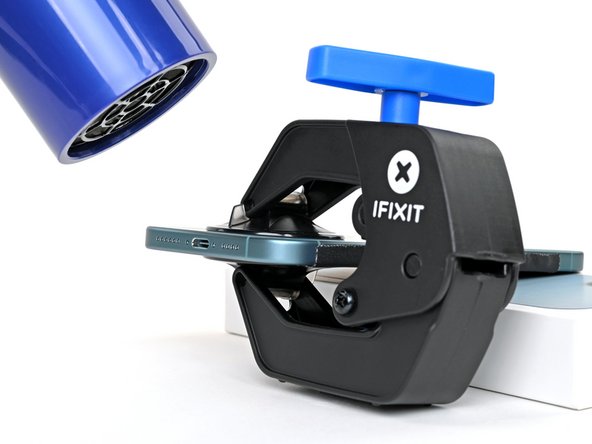
In the next five steps, I’ll show you how to use the Anti-Clamp, our cool tool for making the opening process a breeze. Not using the Anti-Clamp? No problem! Jump ahead four steps for an alternate method.
The Anti-Clamp uses suction to grip both the screen and the back glass. If you’re only opening the back glass, make sure to secure the screen with tape.
For full details on using the Anti-Clamp, check out this guide.
Ensure that the tape is securing just the screen and not the back glass.
– Grab two strips of tape, run them along the length of your phone’s edges, and fold them over the screen to keep it snug and secure.
Step 6


If your phone’s surface is a bit too slick for the Anti-Clamp to grip, try using some tape to give it a little extra traction.
– Give the Anti-Clamp’s blue handle a gentle tug backward to free the arms.
– With the back glass facing up, gracefully glide the arms over the right edge of your phone, positioning one suction cup snugly on the back glass and the other on the screen. Aim to center those suction cups close to the bottom edge.
– Ensure your phone is sitting pretty and level while nestled between the Anti-Clamp’s arms—a small box is just the ticket for this.
– Now squeeze those cups together to work some suction magic!
Step 7


If tape is in short supply, a little warmth on those suction cups can help them grip better.
– Give that blue handle a solid pull to lock those arms in place.
– Spin the handle a full 360 degrees or until you see those cups start to stretch.
– As the cups stretch, keep them aligned vertically. If they keep slipping, take off the Anti-Clamp and tape the cups for better grip.
Step 8

Avoid overheating your phone to prevent battery damage. If you need help, you can always schedule a repair
Alternatively, grab a hair dryer or heat gun and warm up the bottom edge of the back glass until it feels nice and toasty. Just be careful not to turn it into a mini sauna!
If you don’t see a gap after a minute, don’t fret! Just apply a bit more heat and give that handle a quarter turn. Let the Anti-Clamp do its magic, and repeat as needed to get the job done.
– Warm up your iOpener and stick it to the bottom edge of the back glass for a cozy two minutes.
– Take a breather for up to a minute while the adhesive gets a chance to loosen up and create a little gap between the back glass and the frame.
Tools Used


Step 9


– Slide the tip of your opening pick into the gap.
– Remove the Anti-Clamp using the pull tabs on the suction cups.
– Skip the next two steps.
Step 10


Watch the heat! Don’t cook your phone hotter than this—the battery won’t like it one bit. If you need help, you can always schedule a repair.
Alternatively, grab your hair dryer or heat gun and warm up the bottom edge of the back glass until it’s nice and toasty.
– Warm up your iOpener and place it on the bottom edge of the back glass for two minutes.
Tools Used
Step 11


– Grab a suction handle and stick it right on the bottom edge of that back glass, just above the USB-C port.
– With a steady hand, give that handle a good pull to open up a little gap between the back glass and the frame.
– Now, slide the tip of an opening pick into that gap you’ve created.
Tools Used

Step 12

As you carefully cut through the adhesive holding the back glass in the upcoming steps, keep your eyes peeled for these areas:
– Watch out for that delicate cable connecting the back glass to your phone, right near the volume up button! Keep your pick away from there to avoid slicing through it like a hot knife through butter.
– There are spring contacts all around the phone’s edges, so tread carefully! Make sure not to poke your pick deeper than recommended in each step to keep those contacts from bending out of shape.
Step 13


Keep that pick shallow—no deeper than 5 mm on the bottom edge—or you’ll risk messing with the spring contacts. If you need help, you can always schedule a repair
– Gently glide your pick along the bottom edge, wiggling it a bit to break that sticky adhesive loose.
– Keep your pick snugly wedged in the bottom right corner to stop that adhesive from making a comeback.
Step 14


Grab your hair dryer or heat gun and warm up the back glass until it feels toasty. If you need help, you can always schedule a repair
– Warm up the right edge of the back glass with a heated iOpener for two minutes. It’s like giving your device a cozy little spa treatment!
Tools Used
Step 15


Hey there! Just a friendly reminder: keep your pick no deeper than 5 mm along the right edge to steer clear of any mishaps with the spring contacts and ribbon cable.
Also, steer clear of slicing near the volume buttons to keep the wireless charging and flash cable happy!
– Swing your pick around the bottom right corner and glide it halfway up the right edge. Feel that clip holding the back glass? That’s your stopping point.
– Leave this pick right there to stop the adhesive from resealing.
Step 16

Warm it up with a hair dryer or heat gun until it’s cozy to touch.
– Grab your heated iOpener and place it on the left edge of the back glass for two minutes. If you need help, you can always schedule a repair.
Tools Used
Step 17

Keep that pick no more than 5 mm deep along the left edge to keep the spring contact safe. If you need help, you can always schedule a repair.
As you glide through, you’ll hear and feel the metal clips letting go—it’s like music to your ears!
– Pop in a second opening pick at the bottom edge. You’ve got this!
– Gently slide that second pick around the bottom left corner and along the left edge of the screen. This will help separate the adhesive and set those metal clips free!
– Keep that pick snugly in place at the top left corner to stop the adhesive from playing tricks and resealing.
Step 18


Give that hair dryer or heat gun a little love and heat it up until it’s nice and toasty!
– Heat up your trusty iOpener and place it on the top edge of the back glass, including the volume buttons, for two minutes.
Tools Used
Step 19

Keep your pick to a maximum of 3 mm along the top edge—this way, you’ll steer clear of any spring contact damage. You’ve got this!
Listen closely and feel for those satisfying clicks as the top two clips pop open!
– Gently glide your opening pick along the top edge and around the top right corner, making your way to the volume up button to break that adhesive seal. Keep it smooth and steady!
Step 20


Whoa there, hold your horses! Don’t yank off the back glass just yet—it’s still clinging on with a dainty ribbon cable. Let’s cruise through the next steps to detach it safely.
If the back glass isn’t swinging open easily, don’t force it—grab your pick and check around the edge for any stubborn adhesive or clips that didn’t get the memo.
Sometimes, you gotta give the back glass a little lift before swinging it open to pop those clips loose. If you need help, you can always schedule a repair
– Carefully flip the back glass open towards the volume buttons.
– Prop the back glass up with a clean, sturdy object like a small box to prevent stressing the cable.
– Take out the opening picks.
Step 21
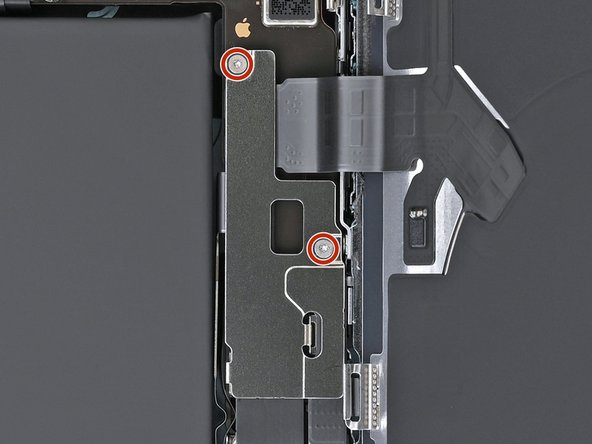

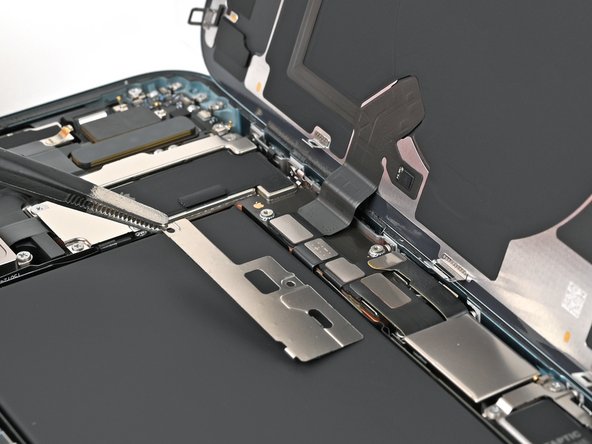
– Grab your tri-point Y000 driver and unscrew those two 1.3mm-long screws holding the middle connector cover. Need a hand? You can always schedule a repair.
Step 22

Handle with care to avoid any battery dings or punctures during this step.
– Grab some blunt-nose tweezers or just use your fingers to gently slide the cover to the left side of the phone. Give it a little nudge until the hook pops free from its cozy spot on the logic board.
– Now, go ahead and remove that cover like a pro!
– When it’s time to put everything back together, make sure those hooks are lined up just right over their slots on the logic board. Once you’ve got them in place, press the cover down and slide it to the right to lock those hooks back in. Easy peasy!
Step 23


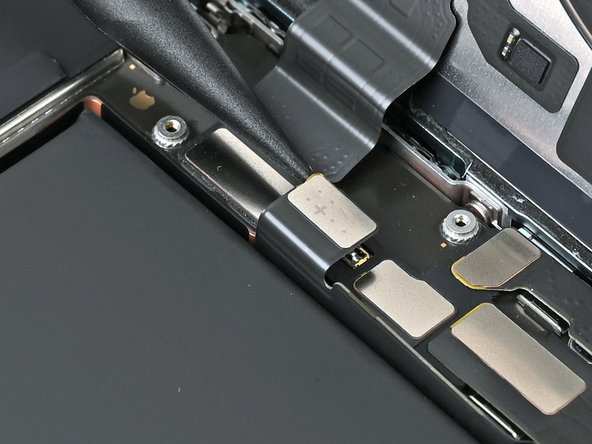
– Use the point of a spudger to gently lift and disconnect the battery press connector.
– When you’re reassembling, line up the connector with the socket and press down using your fingertip or the flat end of a spudger—one side at a time—until it clicks into place. Don’t force it! If it’s giving you trouble, just reposition and try again. If you need help, you can always schedule a repair.
Tools Used

Step 24


– Grab the spudger and gently nudge the wireless charging coil press connector up to disconnect it. You’re doing great!
Tools Used
Step 25

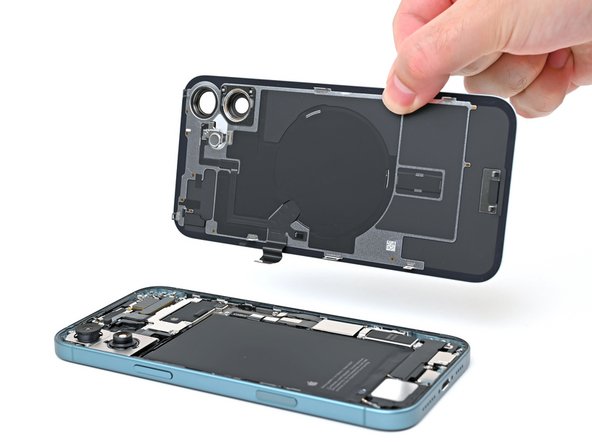
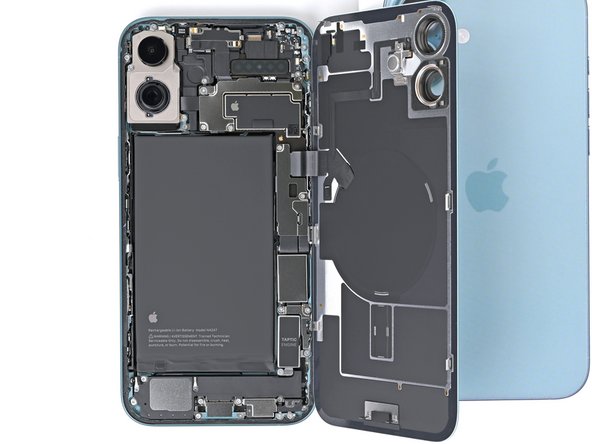
– Gently lift the back glass off the frame and set it aside.
– Now, before you seal everything back up:
– Here’s a great moment to test your handiwork before putting everything back together. Temporarily reconnect the battery and back glass (but hold off on the adhesive for now), power up your device, and see if it’s running smoothly. Once you’re happy with it, power it down, disconnect the battery, and let’s get back to reassembly.
– Follow this guide to reapply adhesive and put that back glass back in place.
Step 26


Hold up on connecting that VoltClip to a power source just yet. Those loose alligator clips might make an electrifying mistake and cause a short circuit.
– Connect the VoltClip’s barrel connector to the USB-C elbow and let the magic happen!
Tools Used

Step 27

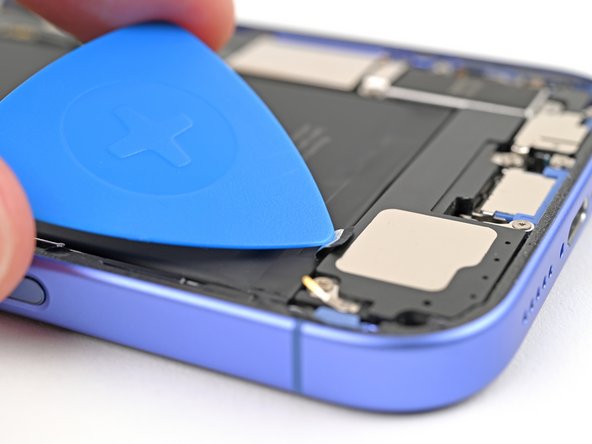
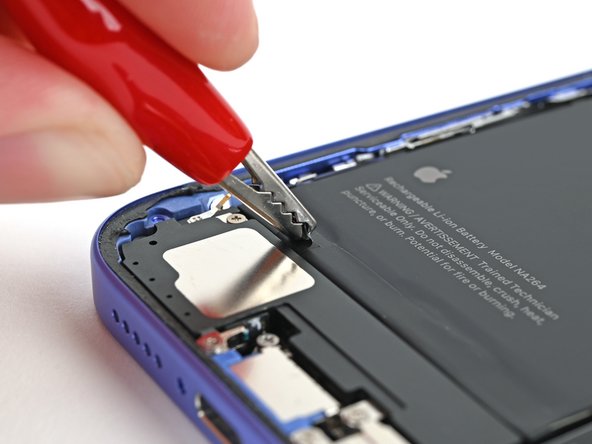
– Use a clean fingernail or an opening pick to lift the silver tab at the battery’s bottom edge.
Step 28

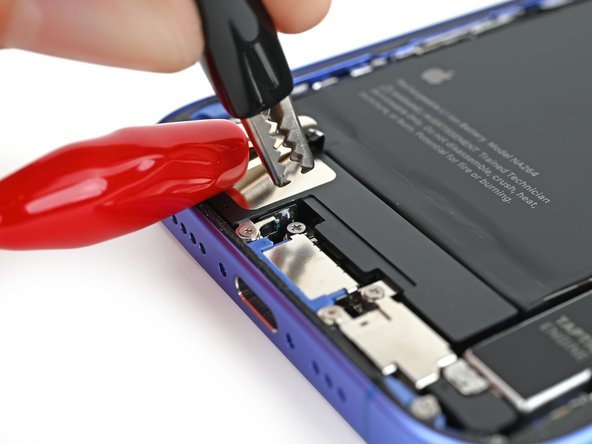
– Snap the red alligator clip onto the shiny silver tab on the battery. If you need help, you can always schedule a repair.
Step 29

– Clip on that black alligator clip to the grounding screw, and let’s keep things safe and sound!
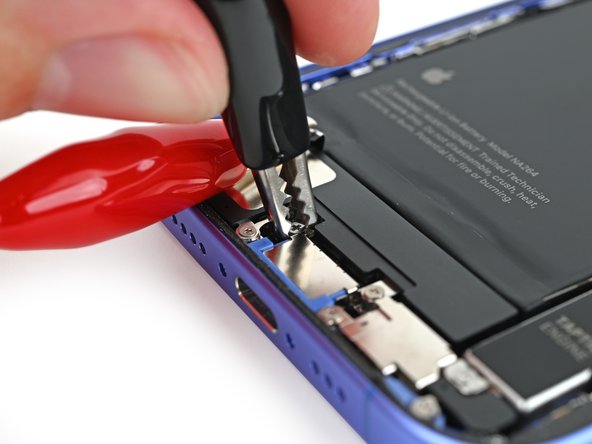
Step 30


– Just double-check that the red alligator clip isn’t cozying up to any random metal bits.
– Plug in a powered USB-C cable to the USB-C elbow and chill for about 90 seconds while the adhesive loosens up.
Step 31


– Unplug the USB-C cable from the elbow, and then detach those alligator clips.
Step 32


By now, your adhesive should be nicely loosened. If your battery still seems to be playing hard to get, just reconnect the VoltClip for another minute and give it another go!
If you’re feeling adventurous, grab a suction handle to gently coax the battery out. But remember, if it’s not budging, don’t force it—just reconnect the VoltClip for one more minute.
– Grab that silver tab and gently lift the battery out of the frame. If you need help, you can always schedule a repair.
Tools Used
