How to Replace iPhone 5c Speaker Guide
Duration: 30 min.
Steps: 13 Steps
Ready to bring some sound back to your iPhone 5c? In this guide, we’ll walk you through replacing that pesky, faulty speaker. If your phone is playing music like a whisper or your ringtone is more of a silent movie, it’s time for a change! Let’s dive in and get your tunes back on track!
Step 1

– Grab your trusty pentalobe screwdriver to get that iPhone 5c open. It’s showtime!
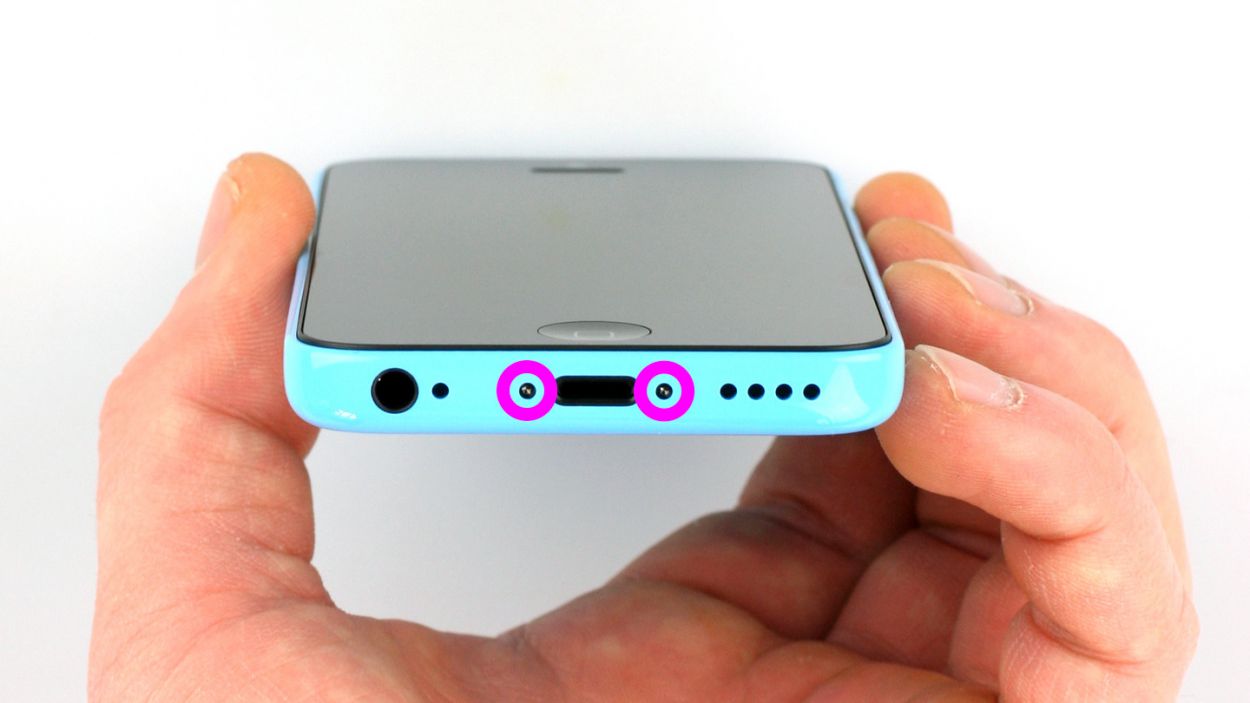
– Now, let’s tackle those two pentalobe screws hanging out at the bottom of the enclosure. They’re right next to the Lightning connector, just waiting for you! Make sure to toss them into the same compartment of your organizer tray to keep things tidy. You’ll be dealing with 2 x 3.8 mm pentalobe screws.
Step 2

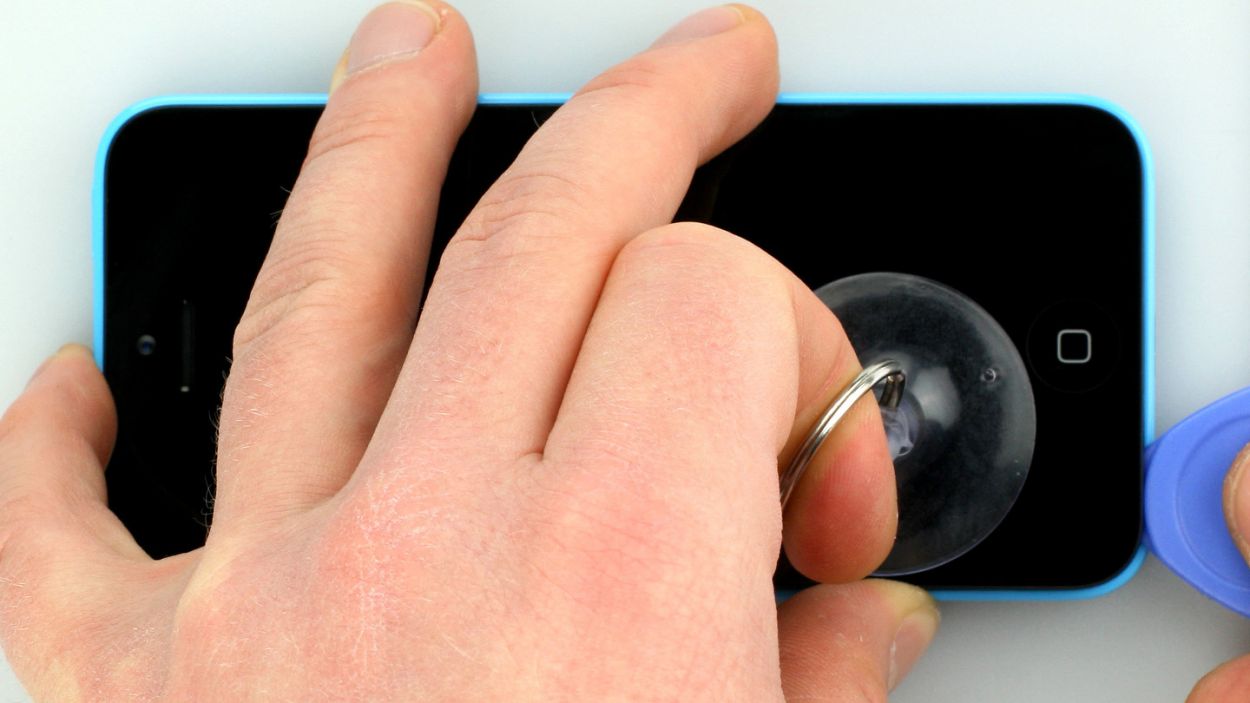


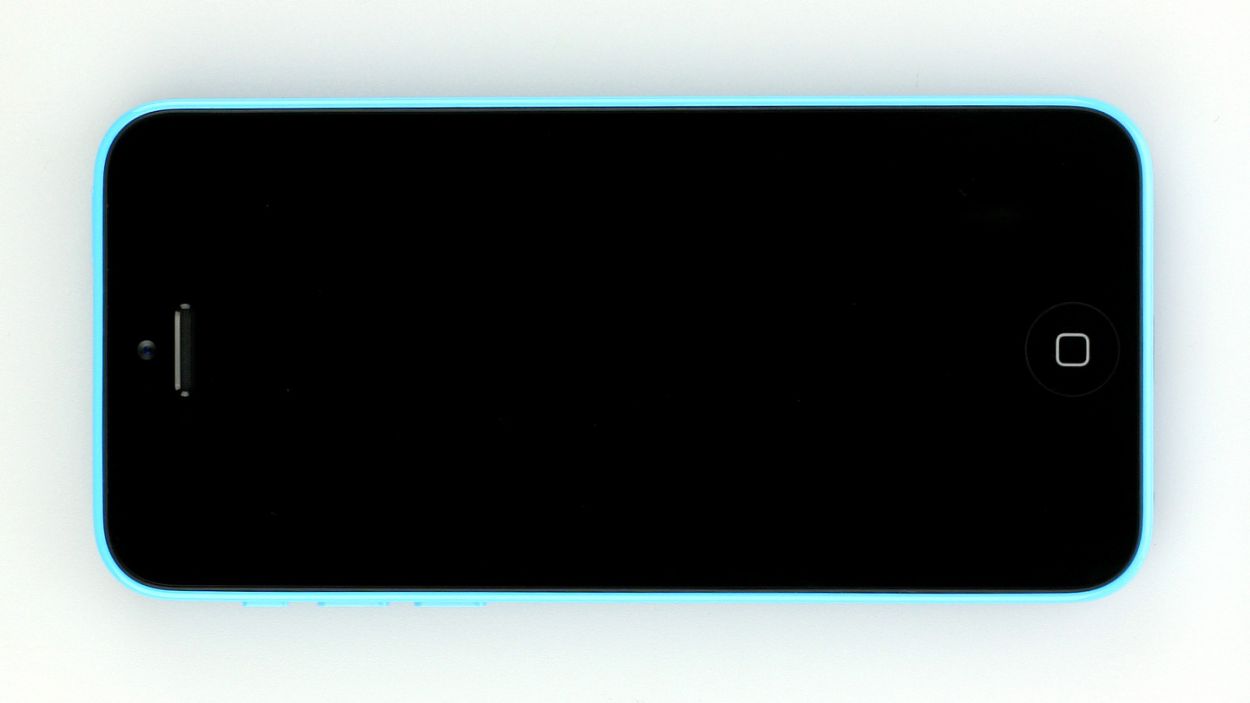
– Gently place your iPhone 5c on a soft, clean surface to keep that back safe from scratches.
– To lift the front panel, grab a suction cup and a hard plastic pick. If your screen looks like a jigsaw puzzle, cover it with packing tape first for extra support.
– Position the suction cup over the Home button (if you can) or right beside it (check out figure 1). While you’re lifting the screen with the suction cup, slide the hard plastic pick between the plastic frame and the display frame, pressing down on the plastic frame. Use the pick to raise the screen as well (see figure 2). It might take a few tries, but you’ve got this!
– Once you’ve managed to lift the screen a few millimeters (see figure 3), carefully work your way around the edges until it’s loose on both sides (see figure 4).
Step 3
– First, grab your Phillips screwdriver and tackle those four screws holding the silver cover in place (check out figure 1 for a visual). Keep things organized by tossing those screws into the same compartment of your trusty organizer tray. Once they’re out, lift that cover right off!
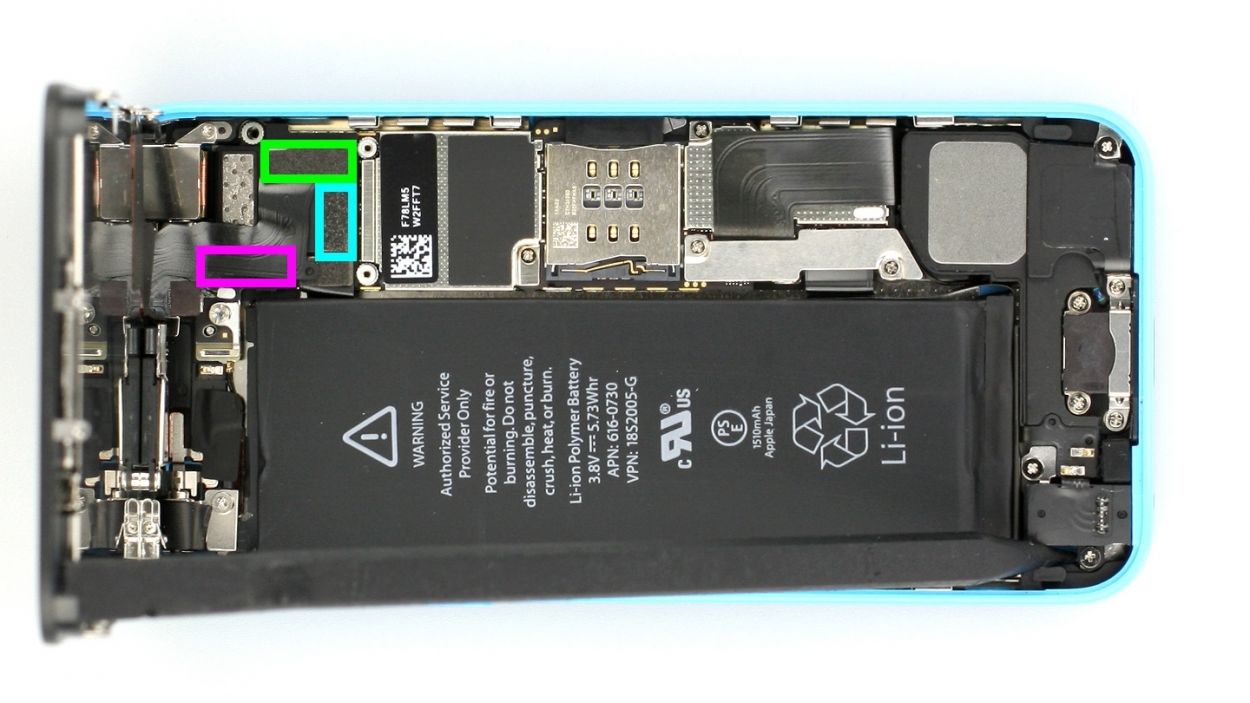
– Next up, it’s time to disconnect three connectors (see figure 2). Be gentle, like you’re handling a fragile piece of art! Use the pointed tip of your spudger and slide it ever so slightly below the contact, then gently lift it up. You’re disconnecting the Touchscreen, LCD, and the front camera/sensor/earpiece/ambient microphone.
– Now, let’s see how that new display is doing! Temporarily connect the new display assembly and fire up your iPhone. Check if the LCD and touchscreen are working like a charm. Just make sure those connectors are snugly plugged in; otherwise, you might see a black display or some funky stripes. If you notice a slight yellow tint, don’t forget to check the last step in this guide.
– Just a reminder, connect that new display assembly temporarily.
– Once you’ve got it connected, start up your iPhone and give the LCD and touchscreen a quick test. Again, ensure those connectors are firmly in place. If they’re not, you might end up with a black screen or stripes galore.
– And if your display is looking a bit yellow, swing by the last step in this manual for some tips.
Step 4


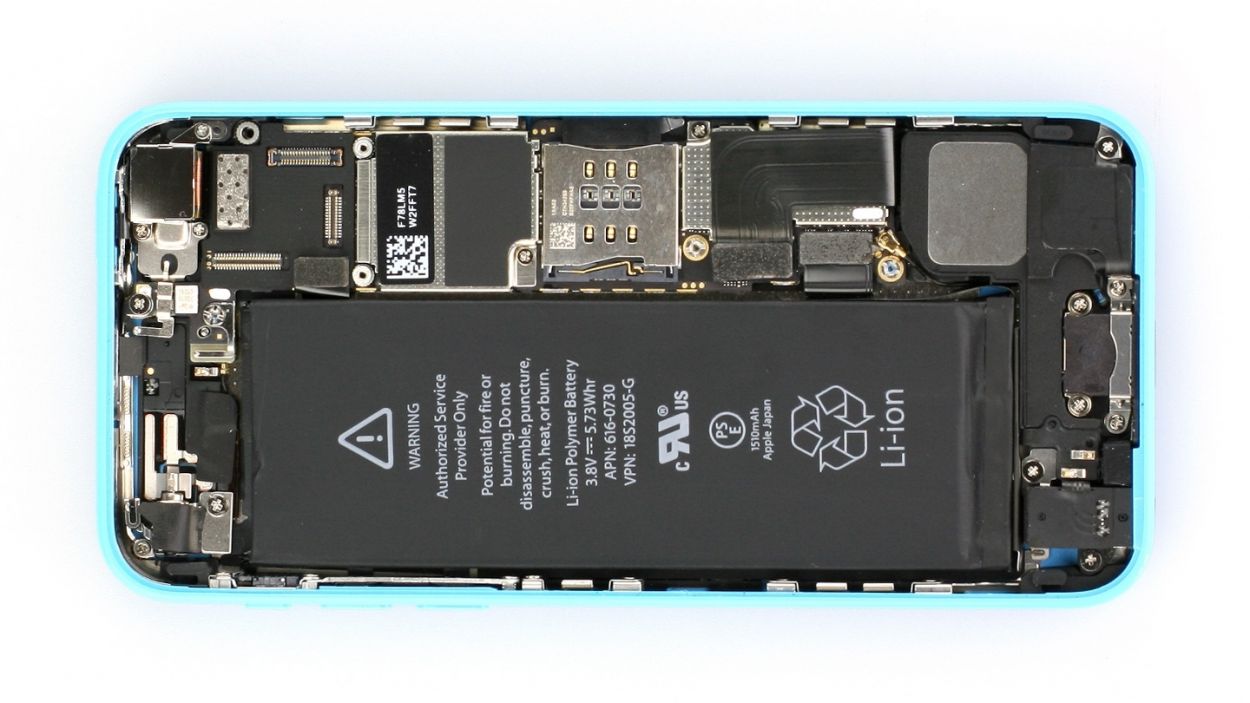
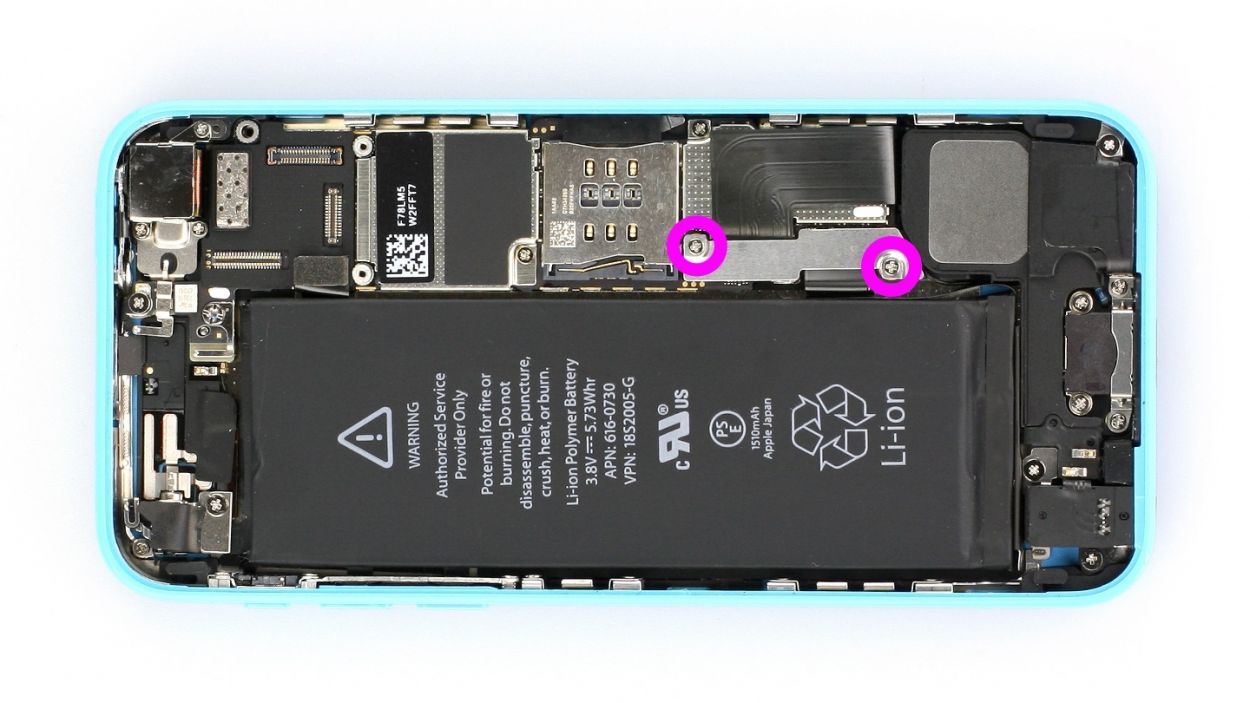
– Grab your Phillips screwdriver and get ready to tackle those Phillips screws on the battery connector (check out figure 1 for a visual). Once you’ve got them out, gently lift the cover using your trusty spudger (see figure 2). Remember to toss all those little parts into the same compartment of your organizer tray to keep things neat and tidy. You’ll be dealing with 2 x 1.6 mm Phillips screws.
– Now, let’s carefully lift that battery connector! Just slide the pointed tip of your ESD spudger right below the connector (see figure 3). If you don’t have a spudger handy, no worries—your fingernail can do the trick too!
Step 5

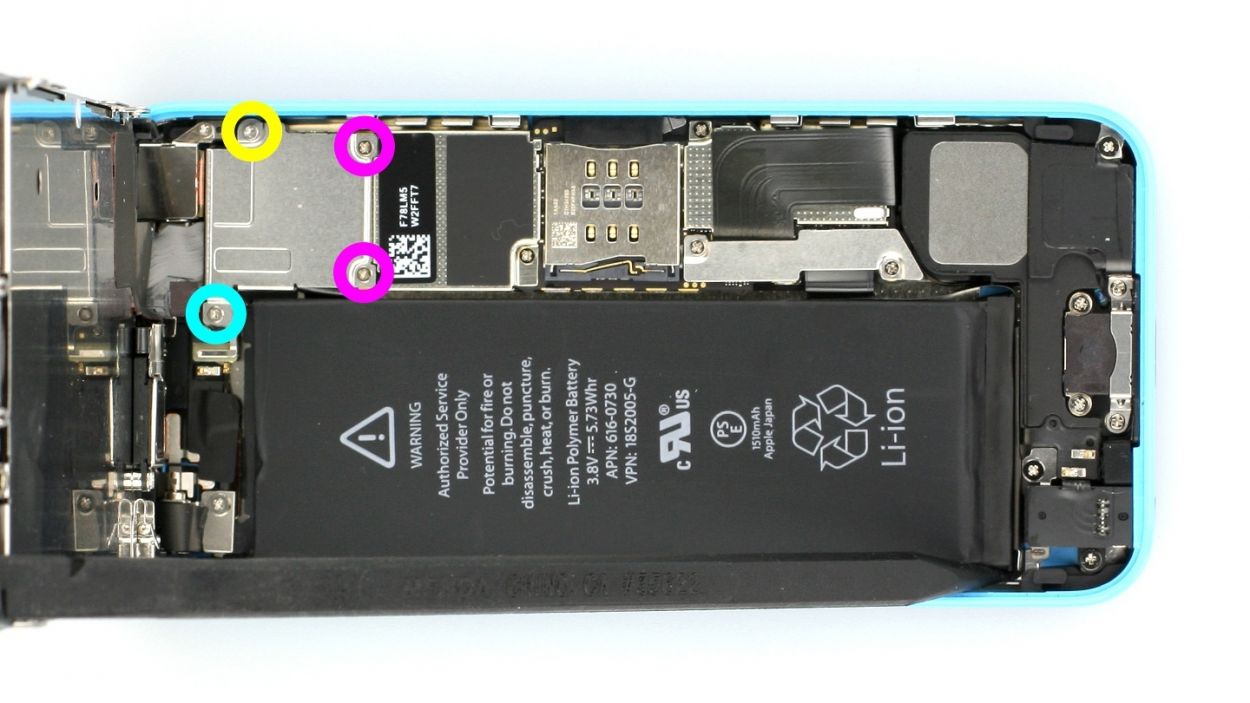
– First, use the laboratory spatula to detach the Home button contact cable, which is lightly glued in place (see figure 1).
– Now remove the following three Phillips screws (see figure 2). Put the screws in a compartment of your organizer tray so you can easily identify them later.2 x 2.7 mm Phillips screws1 x 2.1 mm Phillips screw
Step 6
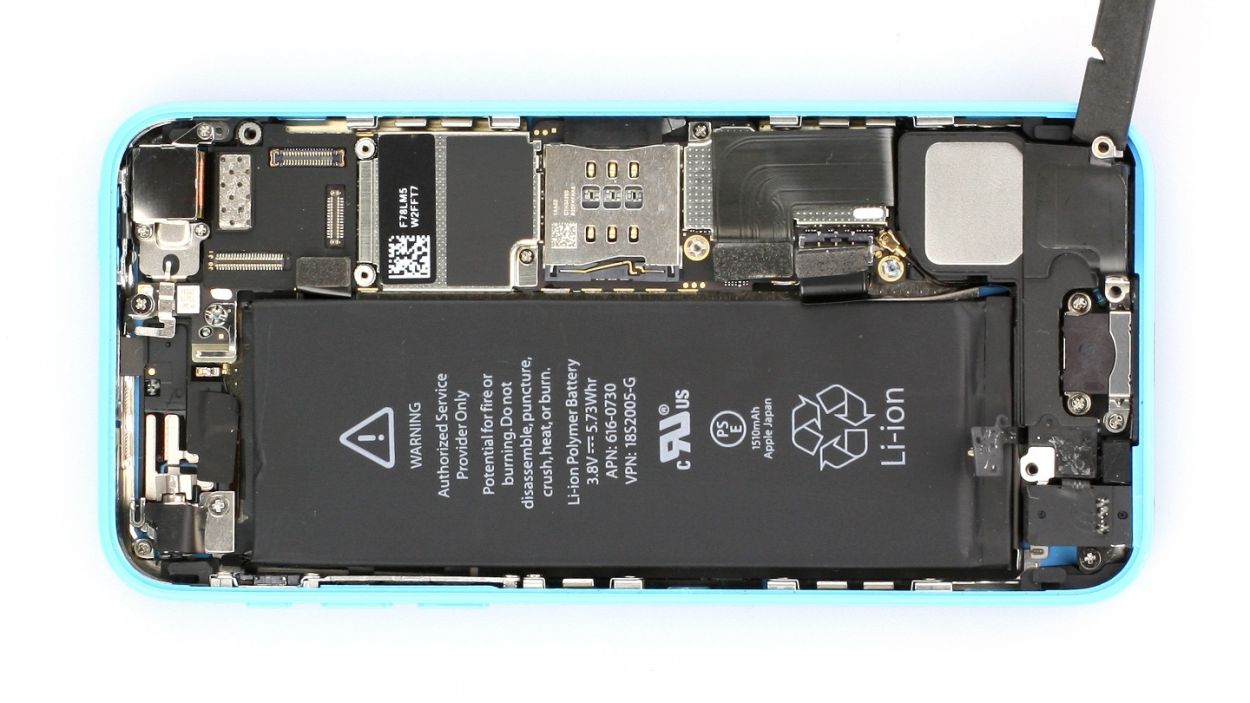

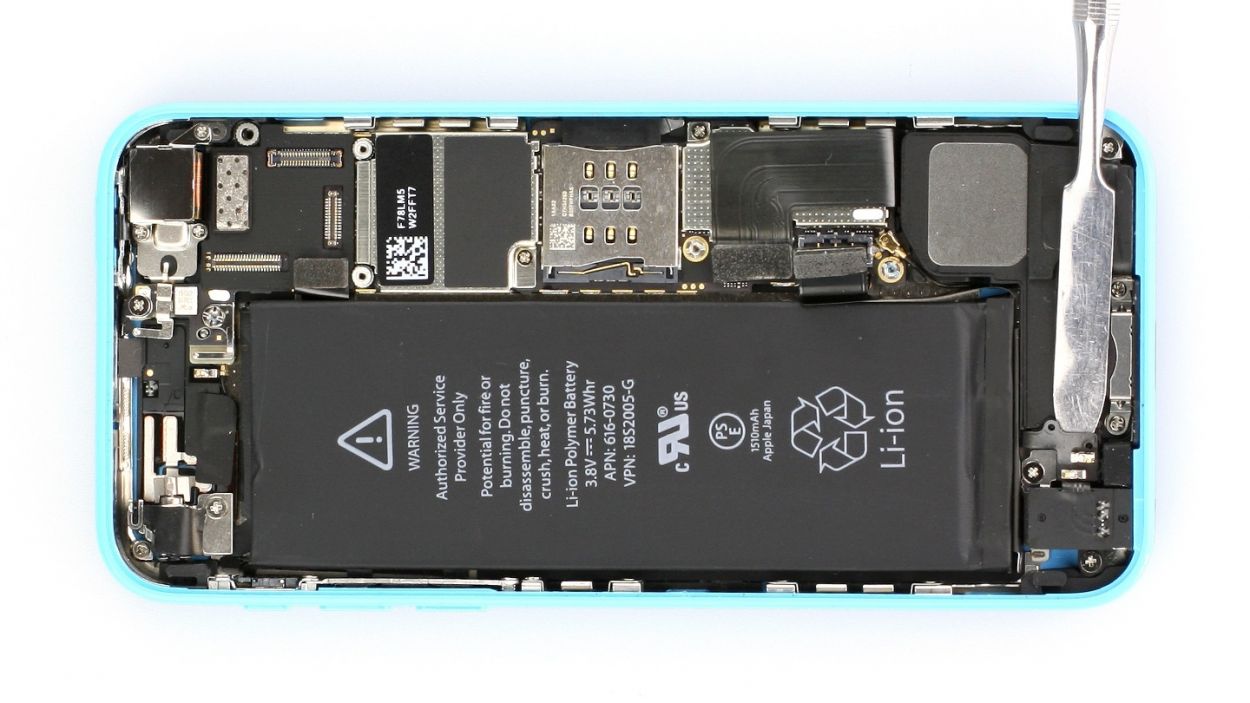
– Time to get that speaker out! Grab your trusty spudger and gently lift the speaker up (check out figure 1). Once it’s popped up, you can easily remove it with your hands (see figure 2). Just a heads up—be careful with that antenna cable!
Step 7
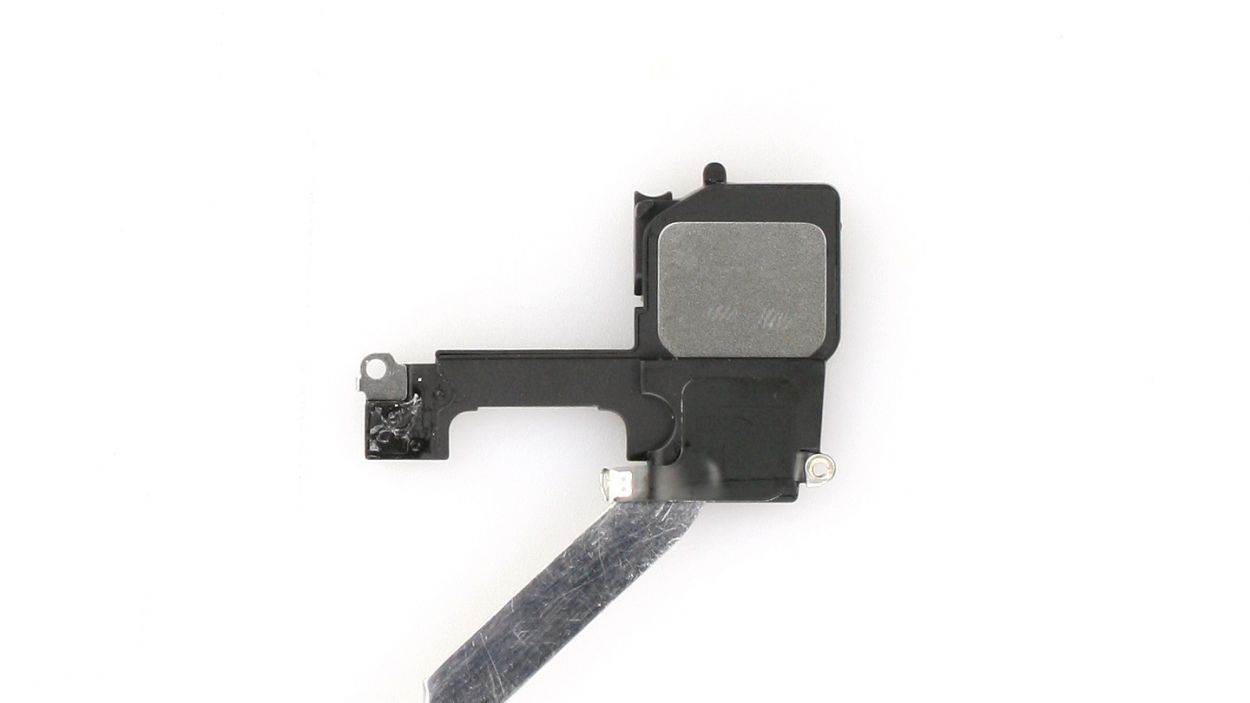
– Time to give that antenna a new home! Gently move the antenna from the old speaker to the new one.
– Since the antenna is glued on, grab your trusty laboratory spatula and carefully detach it (check out figure 1 for some visual guidance).
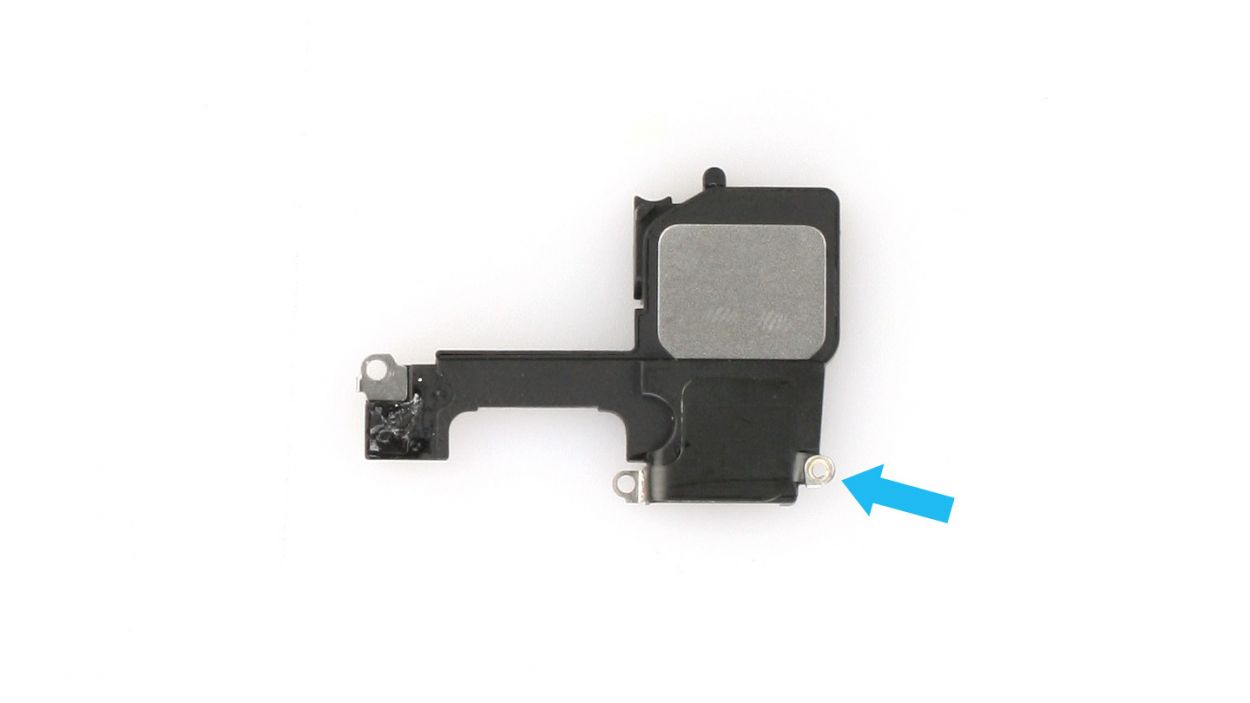
– Once it’s free, stick it onto the new speaker (see figure 2). And don’t forget about that little metal bracket—it’s a team player!
Step 8

– Gently tilt the new speaker to the side as you place it back in its cozy little spot. Ensure it’s snugly positioned just below the antenna cable (check out figure 1 for a visual!).
– Next up, grab those Phillips screws and fasten them back in place (see figure 2).
– Finally, reattach the Home button contact cable with a gentle touch.
Step 9
– Alright, let’s get that battery back into your iPhone! It’s like tucking it in for a cozy nap.
– Next, gently reconnect the battery connector (check out figure 1 for a little visual aid).
– Finally, pop on the cover and secure it with some screws (see figure 2). You’ll need 2 x 1.6 mm Phillips screws for this part!
Step 10


If those connectors are feeling a bit shy and aren’t snugly connected, you might see some funky stripes on your display or parts of the touchscreen could be playing hard to get. Let’s make sure everything’s plugged in tight for a smooth ride!
– Reconnect those connectors (check out figure 1). Sometimes, the touchscreen connector likes to play hide and seek when you plug in the LCD connector. Just a heads up: we’re talking about the Touchscreen, LCD, Front camera/sensor/earpiece/ambient microphone here!
– Once everything is snugly in place, fire up your iPhone! Give the LCD, touchscreen, proximity sensor, front camera, and earpiece a quick check. If something’s off, you might see stripes on your display or parts of the touchscreen may not respond. Let’s make sure everything’s working like a charm!
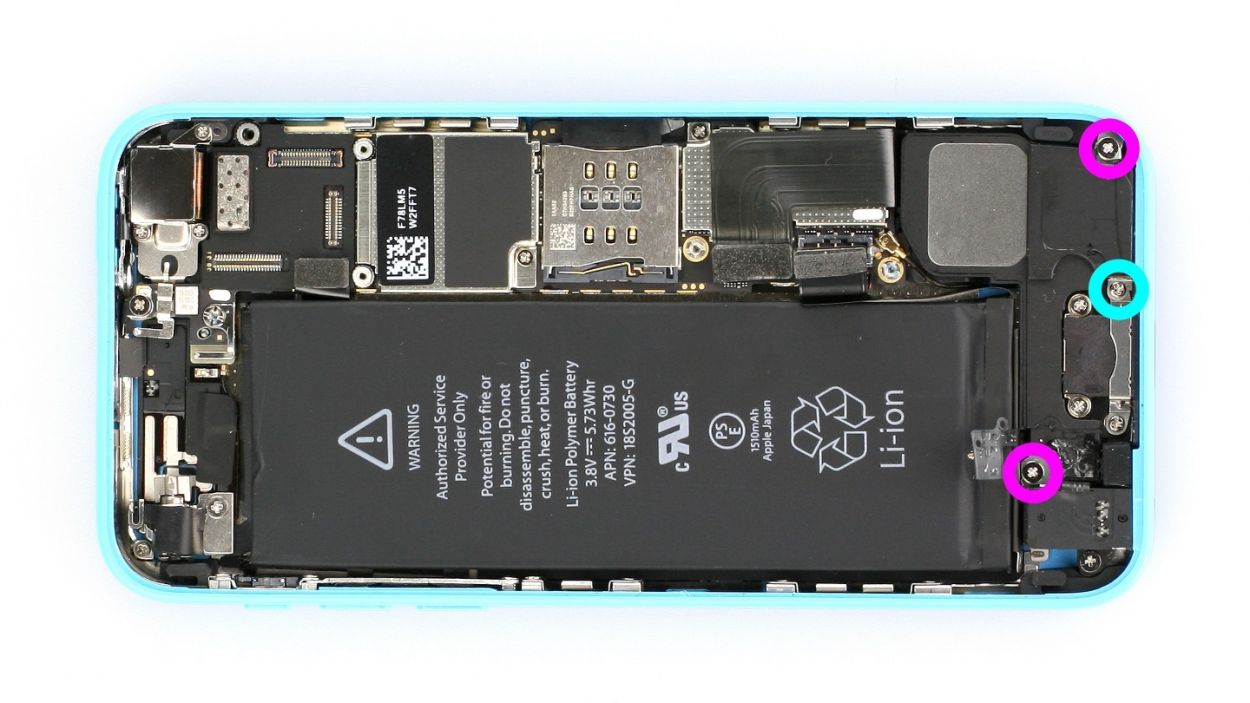
– Now, it’s time to put the cover back on and secure it with some screws (see figure 2). You’ll need 1 x 3.2 mm Phillips screw (not magnetic), 2 x 1.2 mm Phillips screws, and 1 x 1.7 mm Phillips screw for this step.
Step 12
– Alright, it’s time to secure those two pentalobe screws at the bottom of the enclosure. They’re 2 x 3.8 mm pentalobe screws, just waiting for their moment to shine!
Step 13

Heads up! When you take the battery out, your iPhone might decide to take a trip back to 1:00 a.m. on 1/1/1970. If that happens, you might face some hiccups connecting to the cellular network. So, let’s get that time set right!
– Sync up your iPhone with iTunes or hop onto a WLAN network and hang tight until the time gets sorted out!
– Pop out the SIM tray with the SIM card and then slide it back in like a pro.
– Turn on airplane mode for a moment, then flip it back off to give your device a little refresh.