How to Replace iPhone 5s Earpiece: DIY Guide
Duration: 30 min.
Steps: 10 Steps
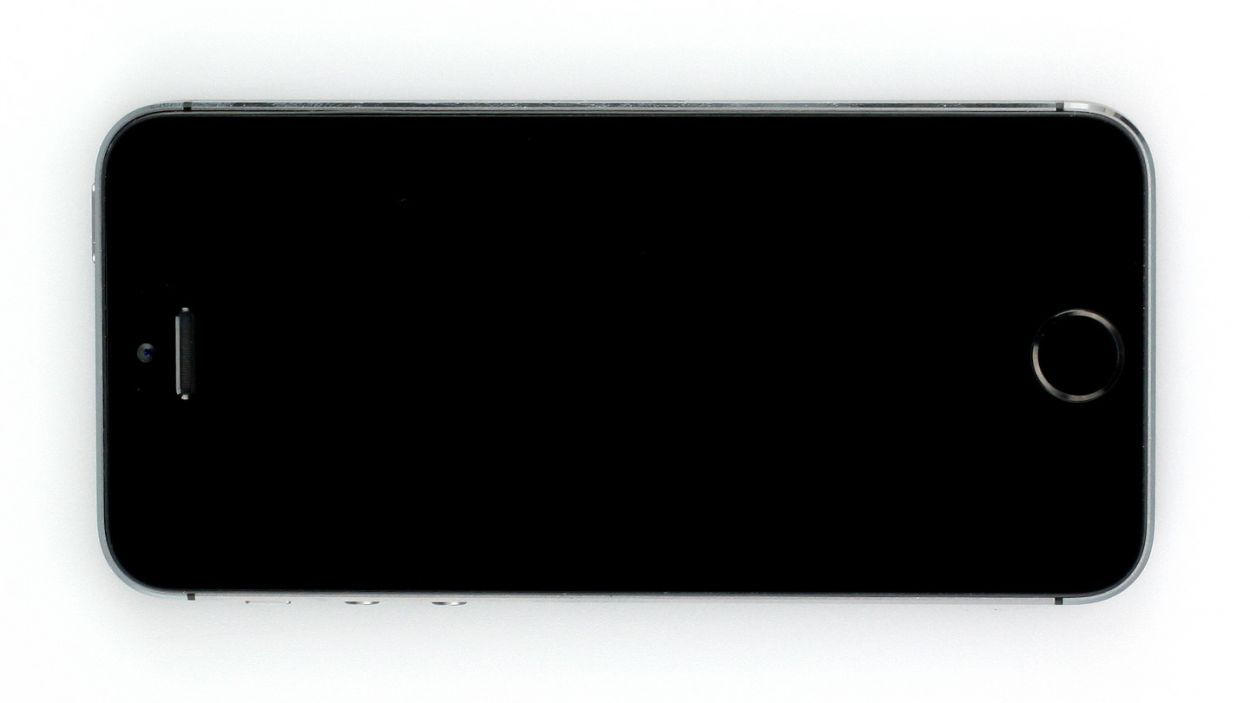
In this guide, we’re here to help you swap out that pesky, broken earpiece on your iPhone 5s. If you’re struggling to hear your conversation partner or if the call sounds like it’s coming from the bottom of a well, it’s time for a change! Let’s get your earpiece replaced so you can chat away without a hitch.
Step 1
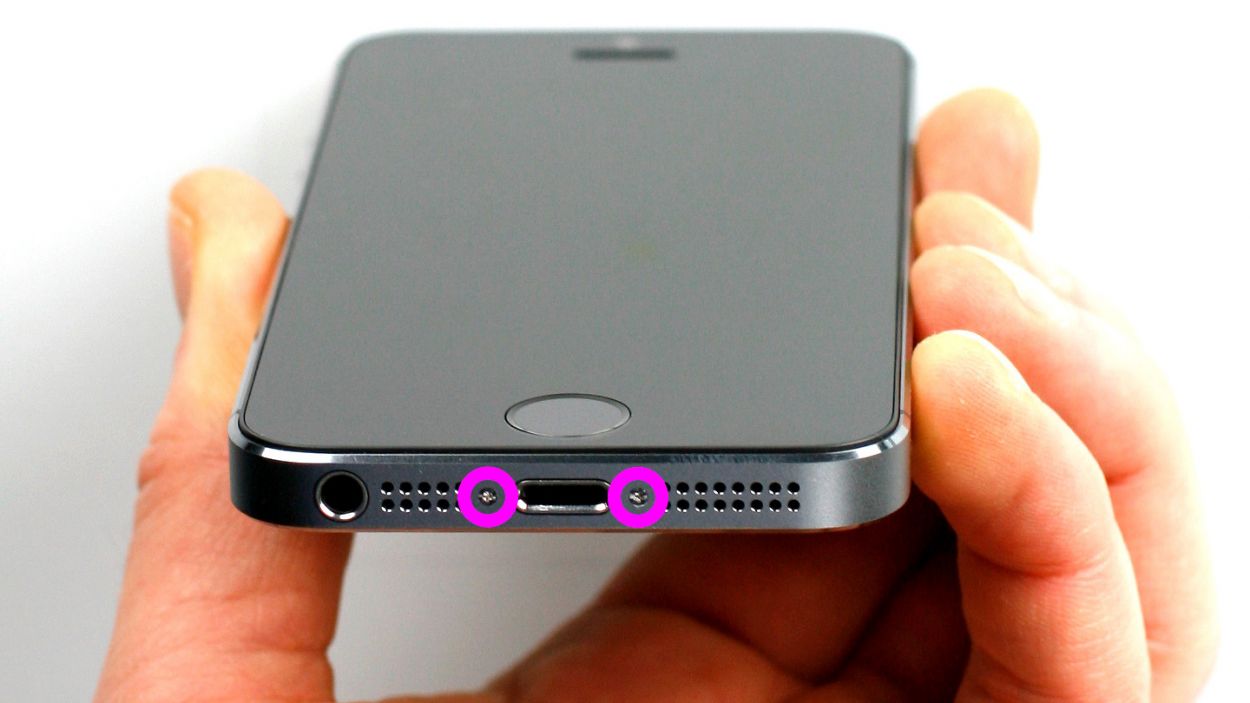
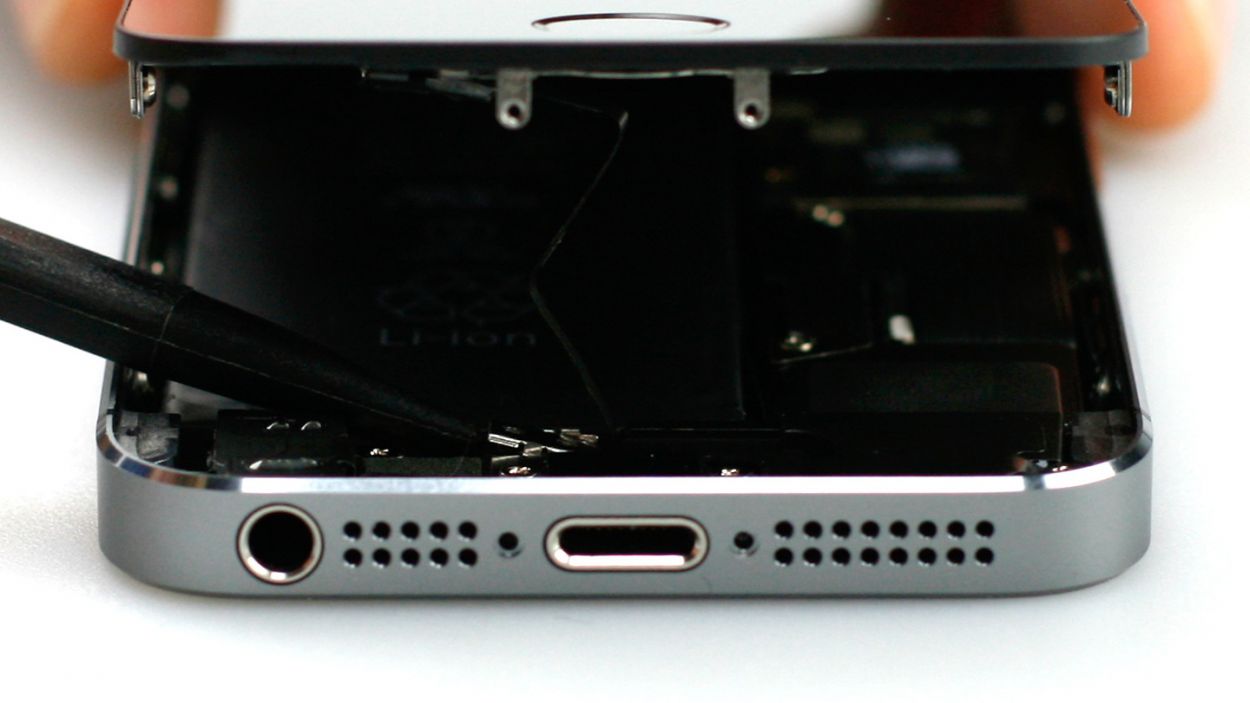
– Grab your trusty pentalobe screwdriver to get that iPhone 5s open!
– Next, let’s tackle those two pentalobe screws at the bottom of the enclosure. You’ll find them cozy on either side of the Lightning connector. Make sure to stash those screws in the same compartment of your organizer tray. You’re looking for 2 x 4.0 mm pentalobe screws.
Step 2


Keep that display under two centimeters of lift, or you might just give the Home button cable a little tear party down below!
– Place your iPhone 5s on a soft, clean surface to keep that back looking fresh and scratch-free!
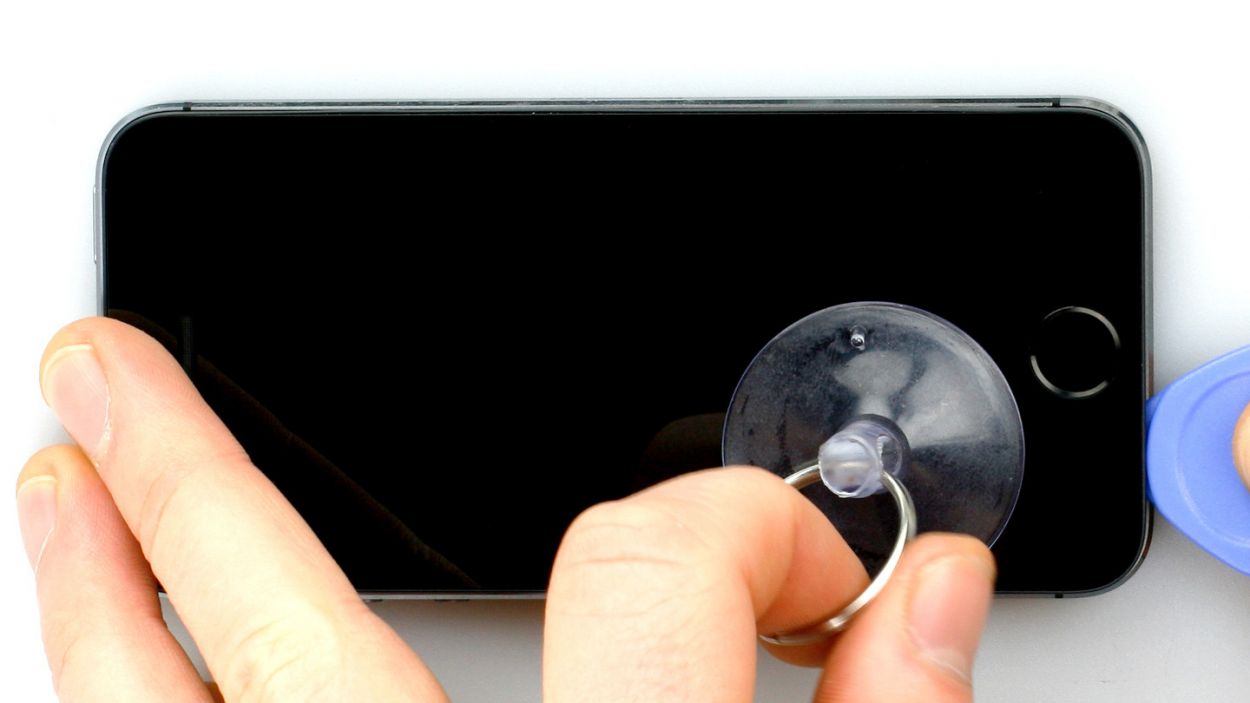
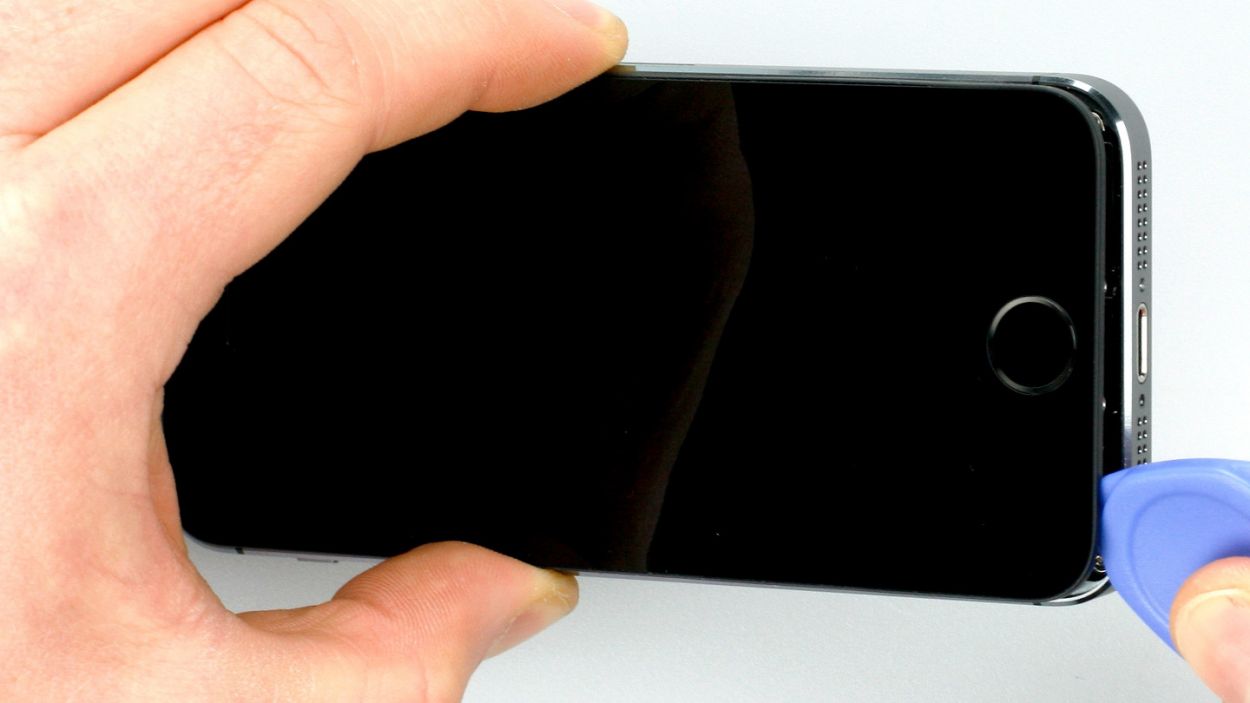
– To pop that front panel off, grab a suction cup and a hard plastic pick. If your screen is looking a bit like a spider web, cover it with packing tape to keep things tidy.
– Stick the suction cup over the Home button (or right beside it if it’s a tight fit). While you gently pull up with the suction cup, slide the hard plastic pick between the aluminum frame and the display frame, pressing down on the aluminum frame. Use the pick to lift the screen too (check out figure 2 for guidance). Just a heads-up: this might take a few tries!
– Once you can lift the screen a smidge (like a few millimeters – see figure 3), carefully work your way around the edges to loosen it up on both sides (see figure 4).
Step 3
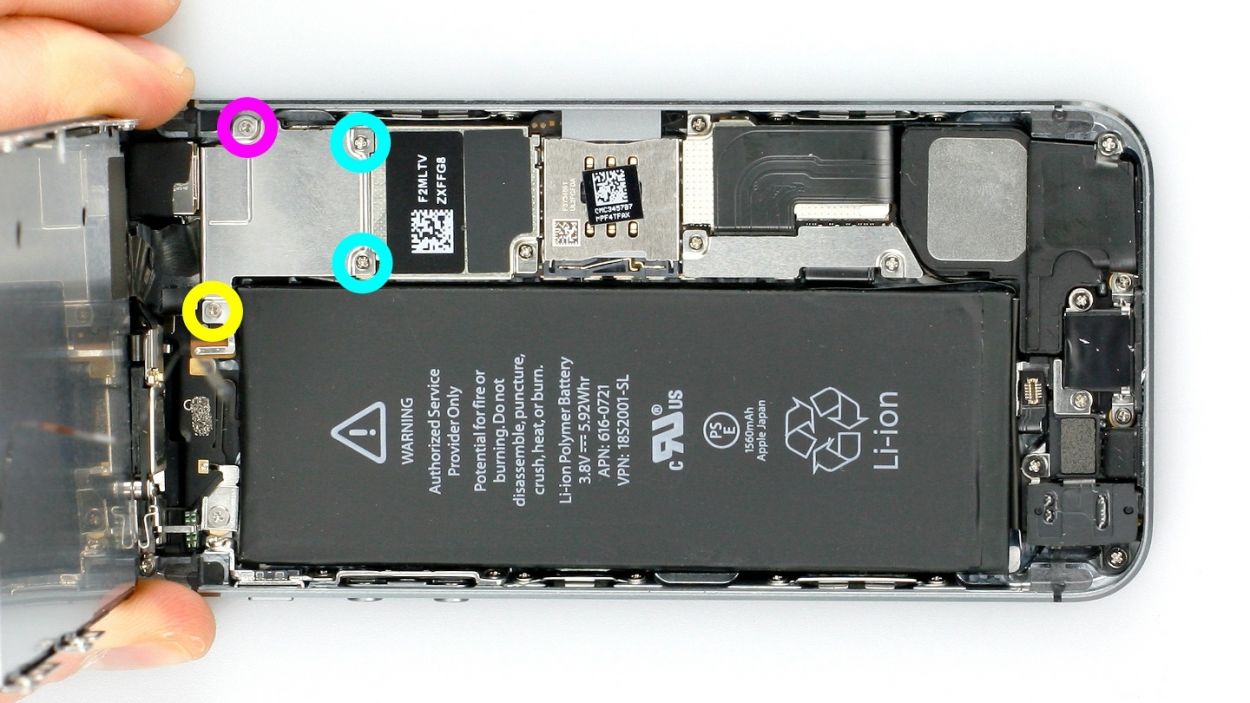
– First, let’s tackle those four Phillips screws holding down the silver cover (check out figure 1 for a visual!). Make sure to stash those screws in the same compartment of your organizer tray, so they don’t wander off. Once that’s done, gently lift off the cover to free it! You’re dealing with 1 x 1.7 mm Phillips screws (not magnetic), 2 x 1.2 mm Phillips screws, and another 1 x 1.7 mm Phillips screw.
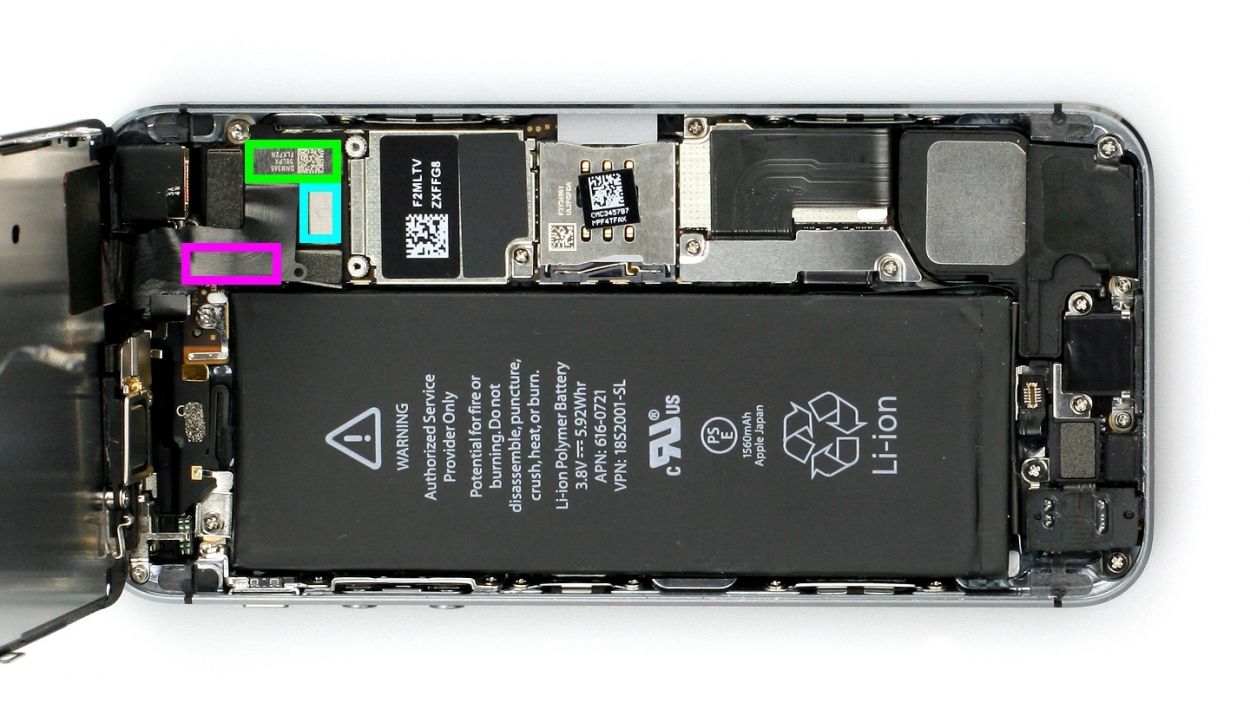
– Now, it’s time to disconnect three connectors (figure 2 is your guide here). Be super careful! Use the pointed tip of your spudger, placing it just below the contact and giving it a gentle lift. You’ve got the Touchscreen, LCD, Front camera/sensor, earpiece, and ambient microphone to disconnect. Easy peasy!
Step 4

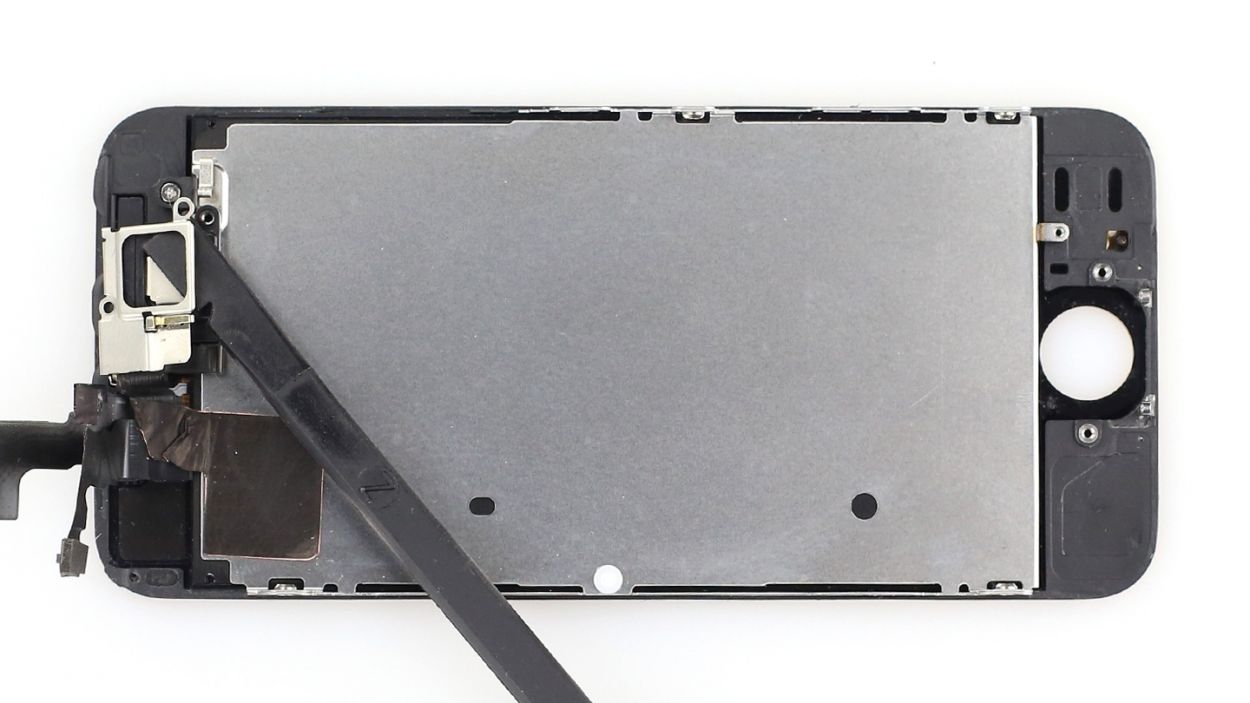

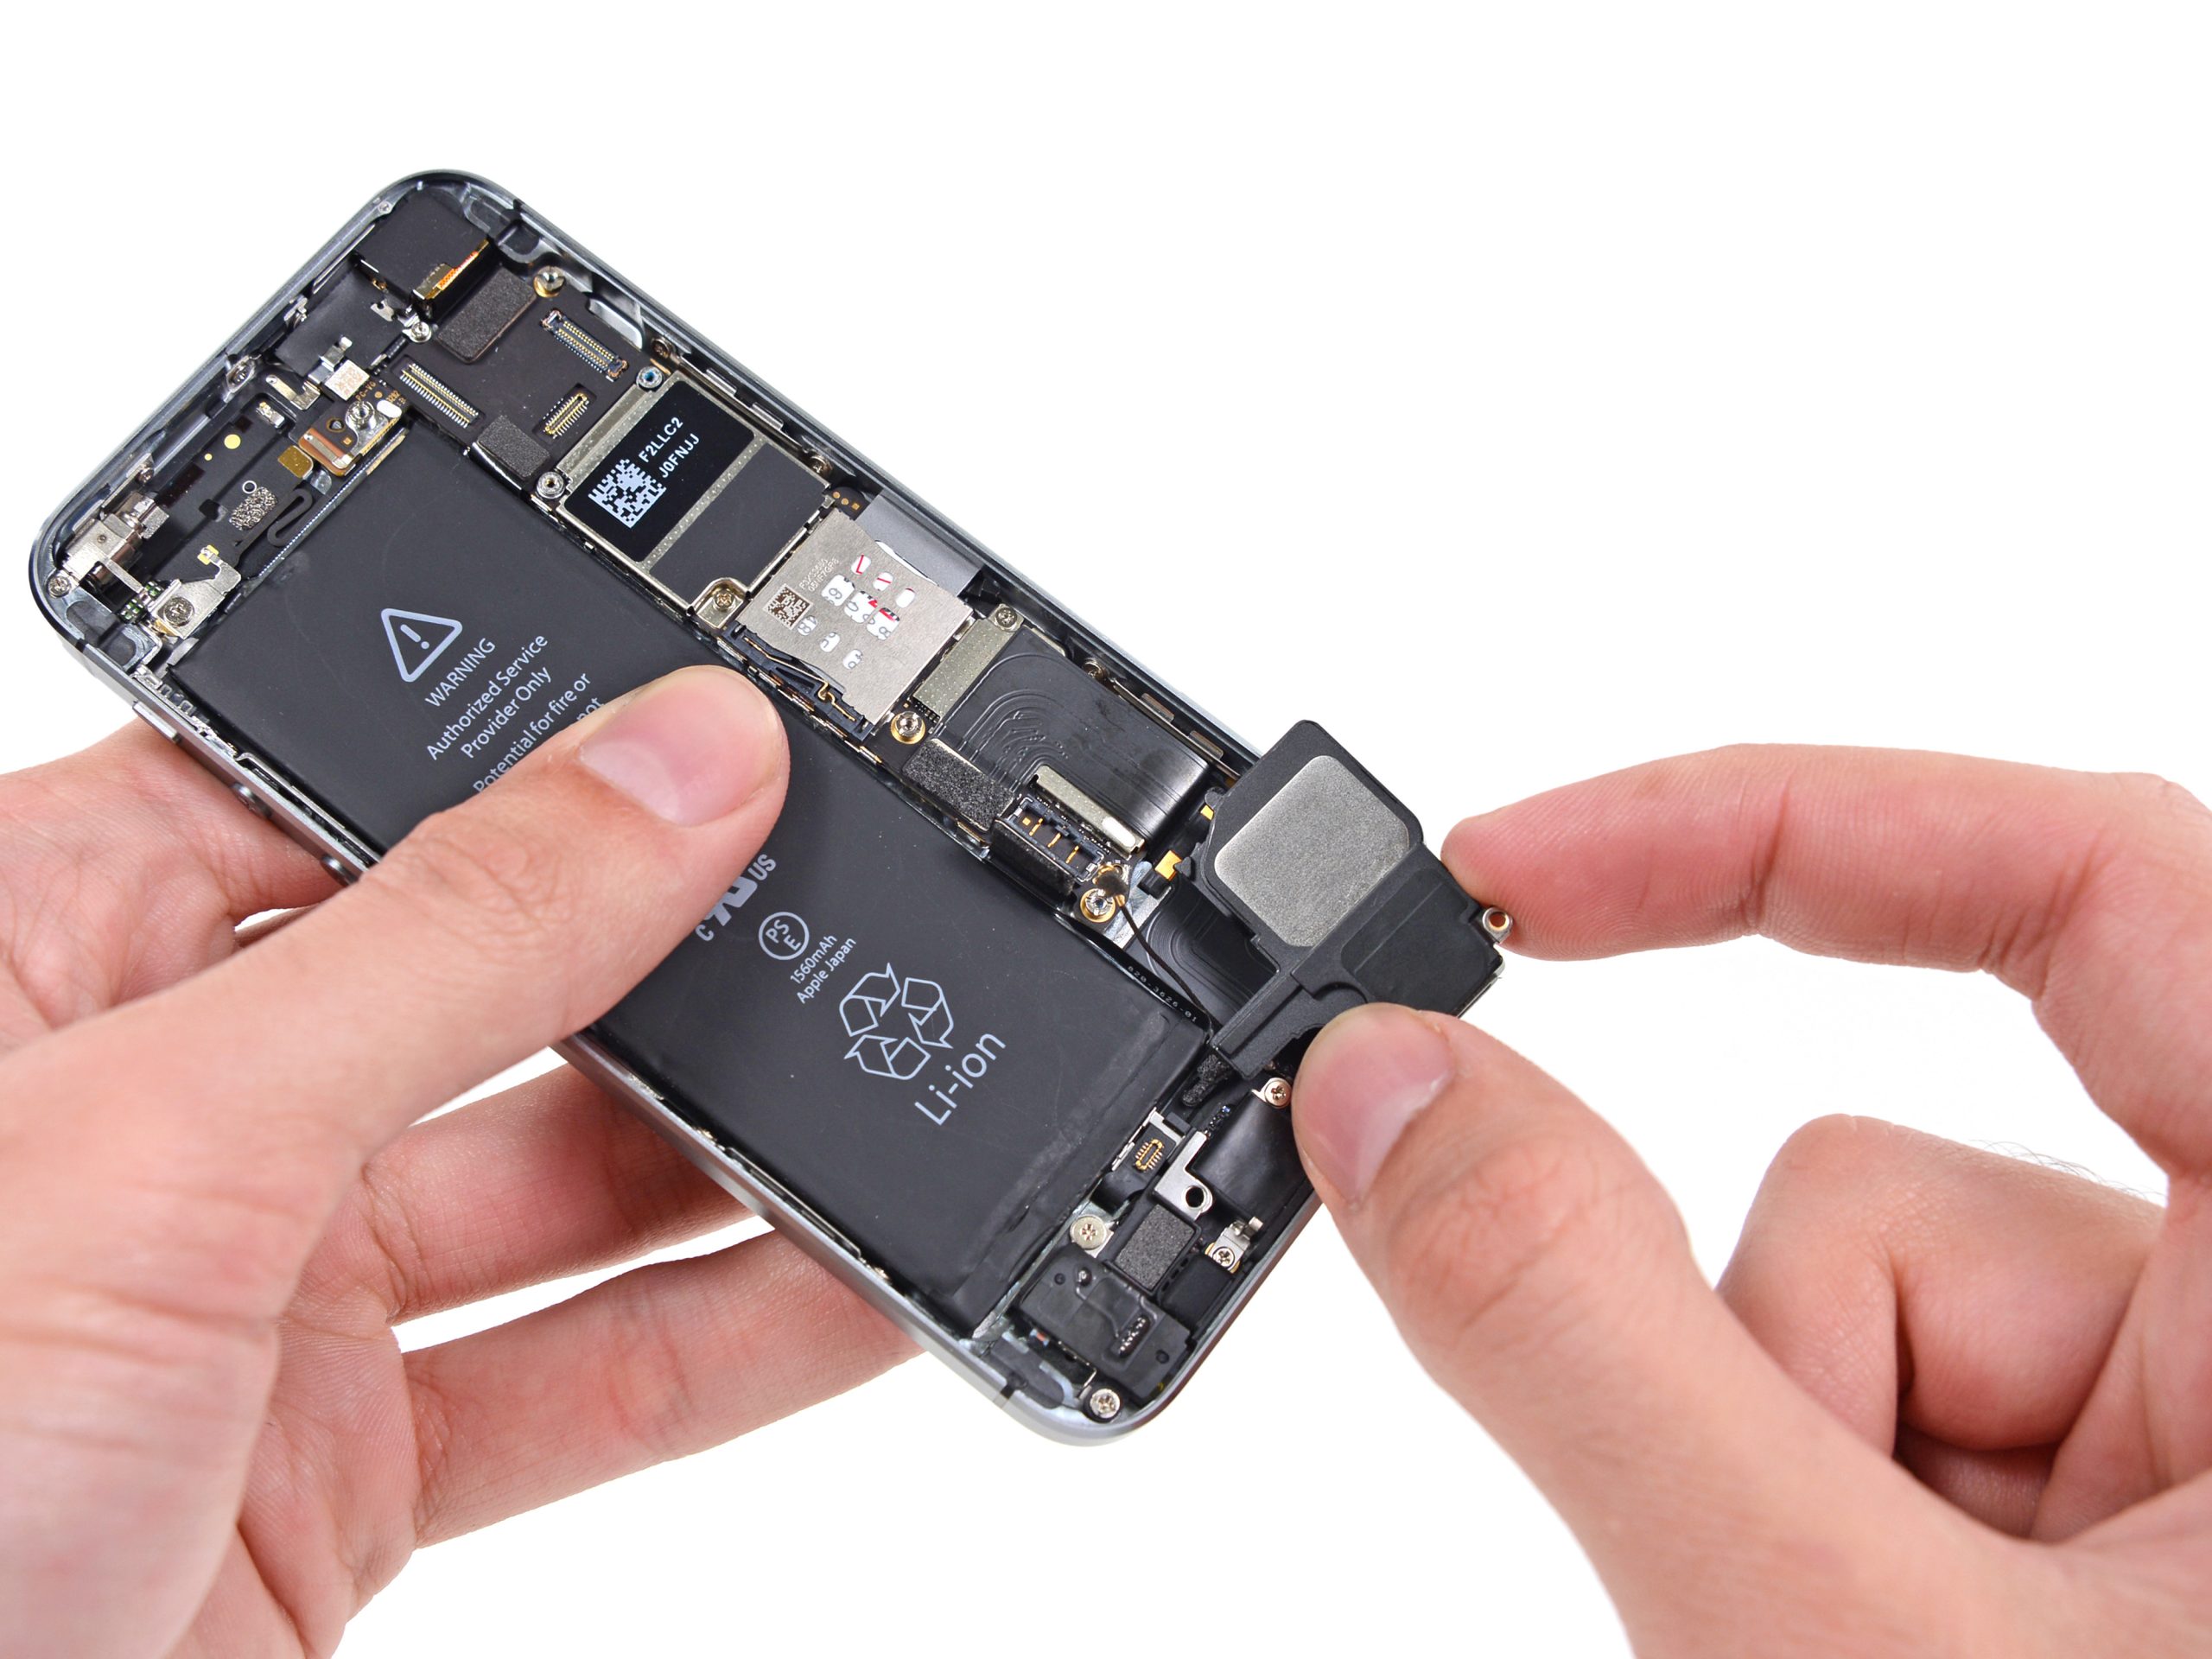
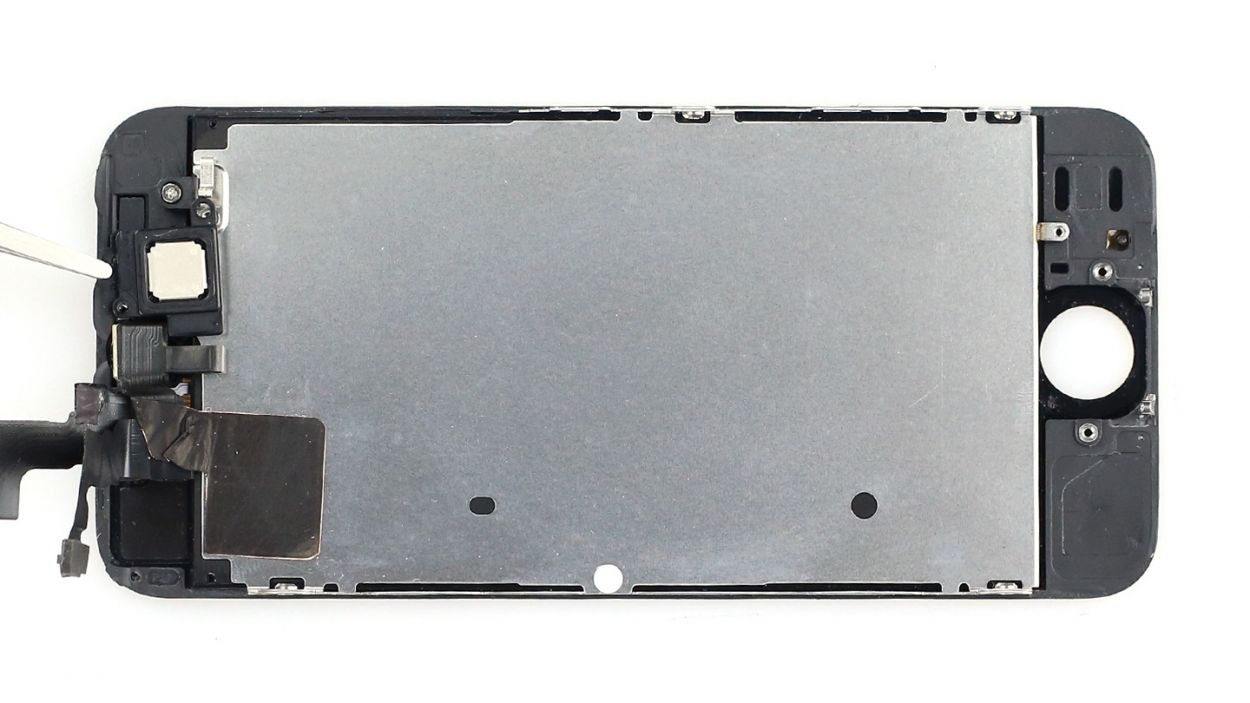
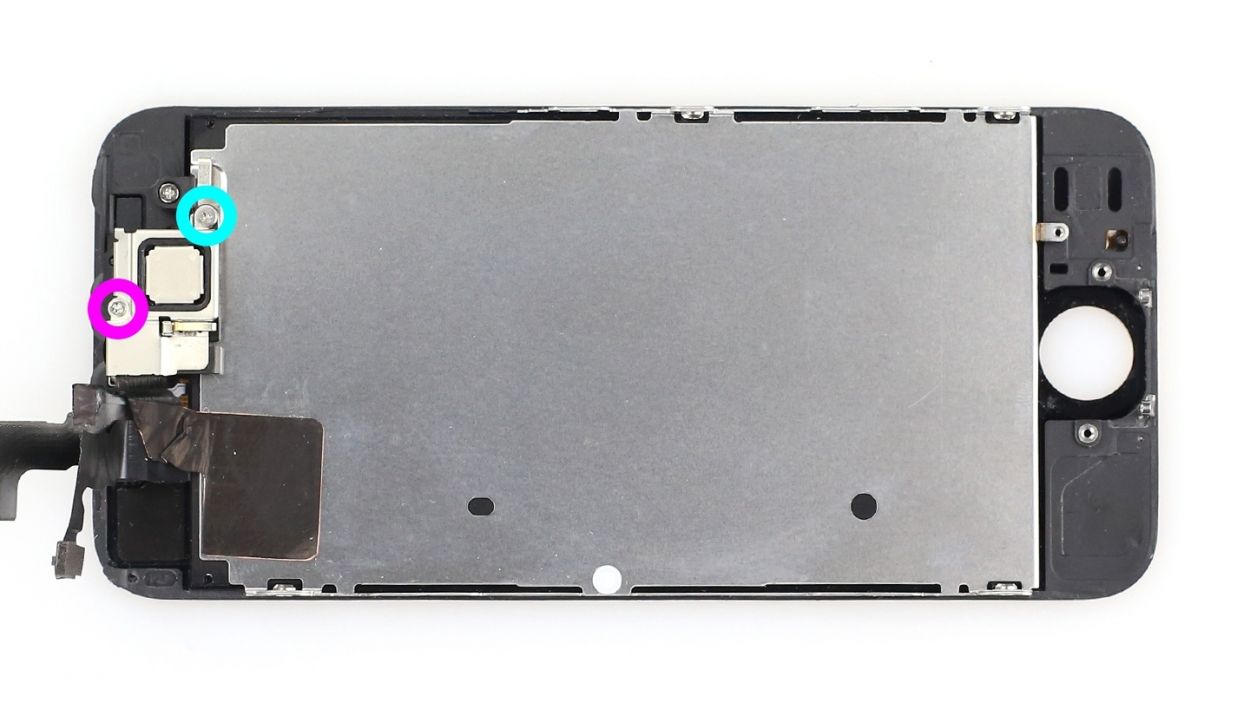
– First up, you’ll find the earpiece chilling on the back of the display unit. Grab your Phillips screwdriver and remove those two screws from the cover (check out figure 1 for a visual guide). Don’t forget to tuck them away in the same compartment of your organizer tray. You’re looking at 1 x 4.0 mm Phillips screw and 1 x 2.2 mm Phillips screw.
– Next, let’s get that cover off! It’s hooked on in a couple of spots, so gently detach the hooks on one side and lift it out. Pop it into the container with the screws you just removed (see figure 2).
– Now it’s time to reveal the earpiece (see figure 3) so you can take it out. You’re almost there!
Step 5

Heads up! The screws are like a quirky puzzle—each one has its own length. If you mix them up, you might end up with a screw that decides to cozy up against the display glass from the inside, and we definitely don’t want that!
– Pop that earpiece back into its cozy spot (check out figure 1 for a visual!). After that, it’s time to put the cover back on (figure 2 will guide you).
– Now, let’s fasten those Phillips screws (figure 3 is your friend here). Just a quick tip: ensure the front camera is perfectly centered on the display. Give it a little nudge if it’s feeling off-center. You’re working with 1 x 4.0 mm Phillips screw and 1 x 2.2 mm Phillips screw.
Step 6


Hey there! If those connectors aren’t snug as a bug, you might see some funky stripes on your display or find parts of the touchscreen playing hide and seek. Let’s get those connections right for a smooth experience!
– Reconnect those connectors (check out figure 1 for a visual!). Just a heads-up, the touchscreen connector can sometimes go rogue when you’re attaching the LCD connector. So, keep an eye on it! You’re dealing with the Touchscreen, LCD, Front camera/sensor, earpiece, and ambient microphone.
– Once those connectors are snug as a bug, fire up your iPhone! Give the LCD, touchscreen, proximity sensor, front camera, and earpiece a quick test. If they’re not connected just right, you might see some funky stripes on your display or find parts of the touchscreen playing hide and seek.
– Now, let’s pop on the cover and secure it in place (see figure 2). You’ll need 1 x 1.7 mm Phillips screw (not magnetic), 2 x 1.2 mm Phillips screws, and 1 x 1.7 mm Phillips screw (magnetic).
Step 7

– Alright, let’s get those two pentalobe screws at the bottom of the enclosure in place! You’re looking for 2 x 4.0 mm pentalobe screws. Make sure to tighten them up nice and snug!
Step 8

– First, let’s gently lift off the shiny silver cover that’s hanging out over the Home button connector. Grab your trusty spudger and slide the pointed tip just beneath the cover, then give it a little lift (check out figure 1 for help!).
– Next up, it’s time to disconnect the contact from the connector. Be super gentle and use your laboratory spatula or spudger to carefully pull it away.
– Once you’ve successfully disconnected the cable, you can lift the display right at the Home button. Just a heads-up: the LCD/touchscreen cables are still attached to the logic board, so keep that in mind for the next step!
Step 9


– Alright, this part might take a little finesse! Grab your tweezers or spudger to get that cable set’s connector just right. Once it’s in position, use the spudger to gently press it onto the connection (check out figure 1 for a visual!).
– If everything clicks into place nicely, it’s time to cover that connector with the silver cover. Tweezers make it super easy to position the cover just right (see figure 2). Then, using your spudger, give it a gentle press until you hear that satisfying click (figure 3).