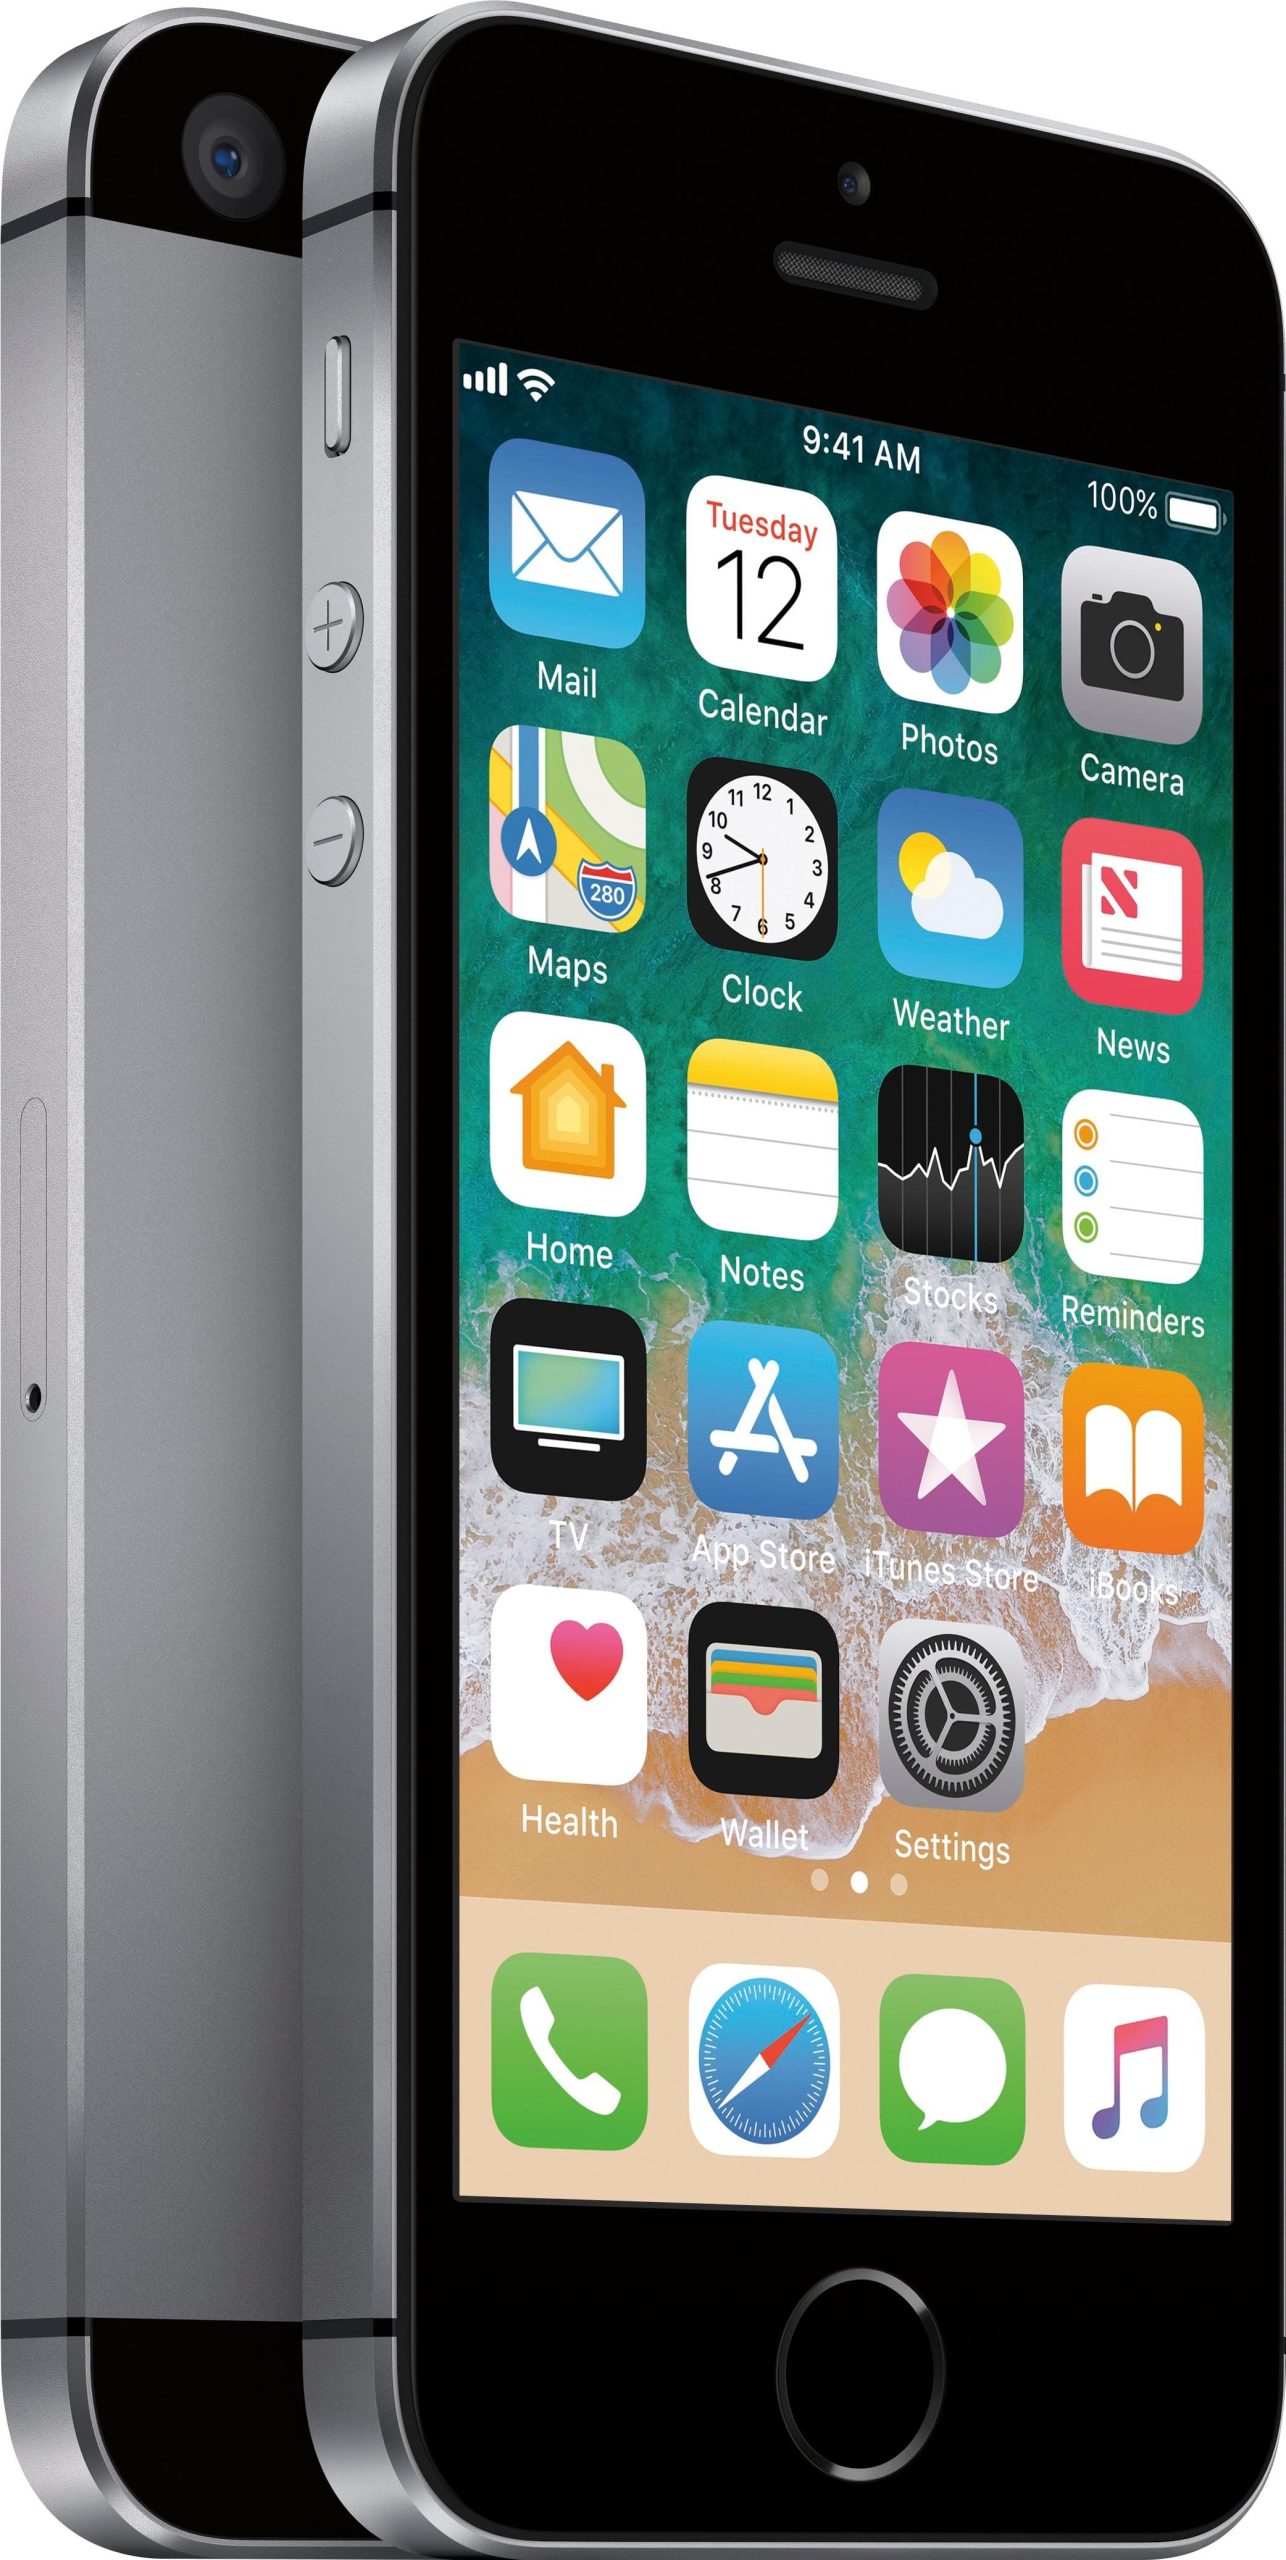
How to Replace iPhone SE 2020 LCD and Digitizer: Step-by-Step Guide
Duration: 45 minutes
Steps: 44 Steps
Don’t forget, it’s crucial to transfer that cool home/Touch ID sensor to the new display – that’s how it’ll totally Function up!
Ready to tackle that screen replacement? Grab our handy fix kit and check out this streamlined guide to swap out your iPhone’s entire screen with ease! If you’re feeling a bit more adventurous, this guide will walk you through replacing just the iPhone SE 2020 LCD and digitizer assembly (yep, the bare ‘front panel’). Just a heads up, you’ll need to transfer a few components from your old screen to the new one—like the front-facing camera, earpiece speaker, LCD shield plate, and home button assembly. And remember, for all screen repairs, it’s super important to carefully move the original home/Touch ID sensor to the new display so it works like a charm. Keep in mind, the solid-state home button is paired with its original logic board by Apple, so swapping it out will make it a no-go. If you need help, you can always schedule a repair.
Step 1
Hey there! Before diving in, make sure to drain that iPhone battery to below 25%. A fully charged lithium-ion battery can be a bit of a drama queen and might catch fire or even explode if it gets a little poke.
And don’t forget to power off your iPhone before you start taking it apart. Safety first, right?
Opening up your iPhone’s display? Just a heads up, it might mess with those nifty waterproof seals. Make sure you’ve got some replacement seals on hand before diving in, or be extra careful to keep it away from any liquids if you decide to put it back together without swapping those seals out. You’ve got this!
– Unscrew the two 3.5 mm pentalobe screws located at the bottom edge of your iPhone. You’ve got this!
Step 2
Don’t go too deep with the opening pick or you might end up giving your device a not-so-fun surprise! Let’s make sure to mark that pick right to keep things smooth sailing and damage-free.
– Measure 3 mm from the tip and give that opening pick a mark with your permanent marker.
Step 3
Rock those safety glasses to keep your eyes safe from any little glass pieces that might decide to dance out during the repair.
– If your display glass is cracked, let’s keep it from shattering further and avoid any accidental ouchies during your repair by sticking some tape over the glass.
– Grab some clear packing tape and lay down overlapping strips over the iPhone’s display until the entire face is nicely covered.
– If the broken glass is making it tricky to get a suction cup to stick in the next steps, try folding a sturdy piece of tape (like duct tape) into a handle and use that to lift the display instead.
Step 4
In the next three steps, we’ll show off the Anti-Clamp, our handy tool to make opening your device a breeze. If you’re not using the Anti-Clamp, no worries—just jump ahead three steps for another method. If you need help, you can always schedule a repair.
– Give that blue handle a gentle tug backwards to free the Anti-Clamp’s arms.
– Slide those arms over the left or right edge of your iPhone—pick your favorite side!
– Place the suction cups just above the home button on the bottom edge of your iPhone—one on the front and one on the back.
– Now, squeeze those cups together to create a solid grip in the area you want to work on.
Step 5
– Give that blue handle a gentle tug forward to secure those arms like a boss.
– Twist the handle around a full 360 degrees or until those suction cups start stretching out like they’re ready for a yoga class.
– Keep an eye on those suction cups to make sure they’re staying in sync. If they start to drift apart, just loosen them up a bit and get those arms back in line.
Step 6
– Get that iOpener nice and warm, then slide it gently through the Anti-Clamp’s arms.
– Give the iOpener a little fold so it rests snugly along the bottom edge of your iPhone.
– Hang tight for a minute to let the adhesive loosen up and create a nice opening gap.
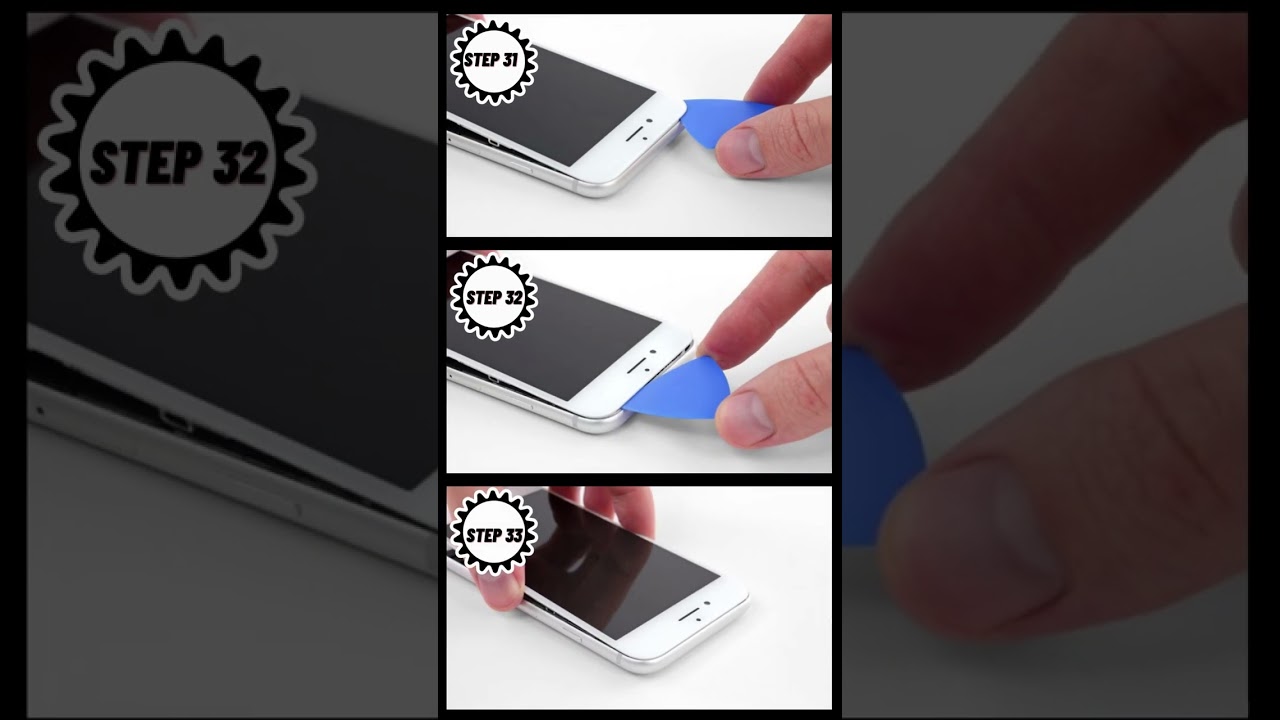
– Pop an opening pick right into that gap.
– For now, let’s skip ahead past the next trio of steps.
Tools Used
Step 7
Get ready for some screen-separating magic with the help of a trusty suction cup in the following three steps!
– Warming up the lower edge of your iPhone is a great way to loosen up that stubborn adhesive holding the display in place, making it a breeze to pop it open.
– Grab a hairdryer or whip up an iOpener, and give that lower edge a nice warm hug for about 90 seconds to help melt the adhesive underneath.
Tools Used
Step 8
– Grab a suction cup and place it on the lower half of the front panel, just above the home button. Let’s get that panel off with a little help from our friend, the suction cup!
Step 9
Getting the screen loose can be a bit of a challenge – the adhesive is super strong. Don’t worry if it’s tough to open at first. Just apply some extra heat and gently wiggle the screen back and forth to loosen the adhesive. Once you’ve got a small gap, you’re golden. If you need help, you can always schedule a repair
– Gently lift up on the suction cup with steady, even pressure to make a little gap between the screen and the frame.
– Slide in an opening pick into the gap.
Step 10
Don’t go trying to pop the top edge of the display off the rear case; those plastic clips are fragile and might snap on you!
– Gently slide that trusty opening pick up the left edge of your phone, starting from the bottom and making your way towards those volume control buttons and the silent switch. This will help break the adhesive that’s keeping the display snug and cozy.
– Pause the adventure just shy of the top left corner of the display.
Step 11
Watch out for the delicate cables snuggled along the right edge of your iPhone! Inserting your pick here could lead to a little cable chaos. Keep that in mind as you proceed with your repair adventure!
Step 12
– To begin the separation process, gently insert your tool at the lower right corner of your device. Slowly slide it along the edge and continue up the right side to loosen the adhesive.
Step 13
– Carefully lift up on the suction cup to raise the bottom edge of the screen.
– Pull the tiny nub on the suction cup to detach it from the front panel.
Step 14
– Gently slide an opening pick under the display at the top left corner and glide it along the top edge of your phone to free up the last bits of adhesive. You’ve got this!
Step 15
– Gently slide the display assembly down a bit, away from the top edge of the phone, to pop those clips free from the rear case. You’ve got this!
Step 17
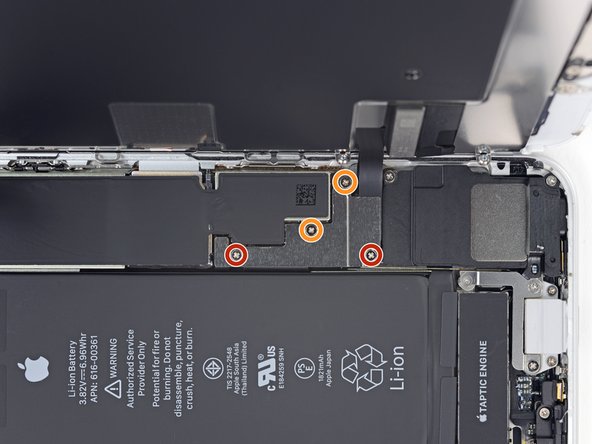
– Get ready to say goodbye to those four Phillips screws holding down the lower display cable bracket to the logic board. They come in a variety of sizes – like a mismatched family trying to fit in! Make sure to remember where each one belongs for reassembly, or you might end up with a real puzzle on your hands. Time to bid farewell to the bracket!
Step 18
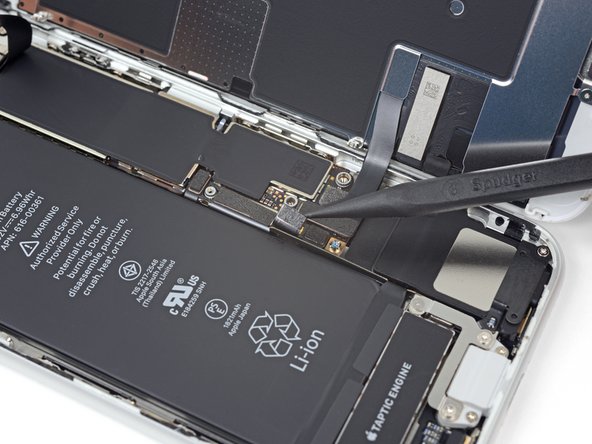
– Time to get that battery connector out – use the point of a spudger to gently pry it out of its socket on the logic board. Be careful, you’re making progress!
– Now, bend the battery connector cable slightly away from the logic board. This will prevent it from accidentally making contact with the socket and giving your phone any unexpected power surges during the repair. If you need help, you can always schedule a repair
Tools Used
Step 19
– Gently use the tip of a spudger to ease the lower display connector out of its cozy little socket.
– When it’s time to reattach, press down on one side of the connector until you hear that satisfying click, then move to the other side. Just remember, avoid pressing down in the middle! If it’s even a tad misaligned, it could bend and create some serious damage. You’ve got this!
Tools Used
Step 21
– Gently bid farewell to the three tiny 1.3 mm Phillips screws that are currently holding the bracket in place over the front panel sensor assembly connector.
– Give the bracket a little vacation as you remove it.
Step 24
– Let’s start by taking out those four Y000 screws that are holding the bracket over your home/Touch ID sensor in place:
– Next, gently lift off the bracket.
– When you put everything back together, remember to avoid cranking down those screws too tight, or your home button might decide to take a vacation!
Step 25
– Gently slide an opening tool underneath the left side of the home button cable connector and delicately detach it from its socket.
Step 26
Warming up the area around the home/Touch ID sensor is a smart move! It helps to loosen the adhesive that’s keeping that delicate cable snug, making it a breeze to remove safely.
– Turn the display assembly upside down. Grab a hairdryer or get your hands on an iOpener, and gently warm up the lower edge of the display for about 90 seconds to help loosen that stubborn adhesive underneath.
Tools Used
Step 27
– Gently slide an opening pick between the display panel and the adhesive clinging to the home/Touch ID sensor cable to carefully peel them apart.
Step 28
– Let’s get started by carefully lifting the home/Touch ID sensor assembly out from the front side of the display.
– When you’re ready to put everything back together, begin by feeding the cable through the hole in the front of the display – it’s easier than you think, and our guide will walk you through it.
– A heads up: your replacement part might come with some extra Y000 screws already installed near the Home Button. Go ahead and remove those extra screws so you can reinstall the home button bracket without any issues. If you need help, you can always schedule a repair with Salvation Repair.
Step 29
– Unscrew the three Phillips screws holding down the top earpiece bracket to the front panel. Let’s get that bracket off so we can keep moving forward!
Step 31
– Gently lift the front facing camera up from its socket and swing it out of the way with a smile.
Step 32
– Let’s get those two Phillips screws out that are holding the earpiece speaker snugly to the front panel. You’ve got this!
Step 34
– Get the iOpener nice and toasty, then gently apply it to the top edge of the display to loosen up the adhesive that’s keeping the front camera and sensor assembly snug in place.
Tools Used
Step 35
– Give the proximity sensor a gentle nudge using the point of a spudger to coax it out of its cozy spot in the front panel.
Tools Used
Step 36
– Gently slide the spudger’s tip under the ambient light sensor flex cable, and carefully lift the sensor out of its cozy little home.
Tools Used
Step 37
– Gently slide an opening pick under the front camera cable assembly to break free the adhesive that’s keeping the camera and sensor cable snug. You’re doing great!
Step 39
– Time to get your screwdriver ready! Carefully take out the six 1.2 mm Y000 screws from each side of the display. You’ve got this!
Step 40
– Warm up an iOpener and place it over the edge of the shield nearest to the home button to loosen the adhesive that’s keeping it snug.
Tools Used
Step 41
– Now, let’s get groovy and use an opening pick to bust up the adhesive near the home button that’s keeping the flat display cable snug with the LCD shield plate.
Step 42
– Stick that opening pick into the bottom right corner and keep working to pop that display cable off the LCD shield plate!
Step 43
– Carefully lift the LCD shield plate off the display assembly. If you need help, you can always schedule a repair


