How to Replace LG Smartwatch Display
Duration: 45 minutes
Steps: 9 Steps
Step 1

Spring bars hook up the two halves of the wristband to the watch body. Each end of the spring bar has a little shoulder.
Get ready to use a bit of finger muscle for the next move.
– First up, give that wristband a little slide down the spring bar to unveil the shoulder of the spring bar. You’re doing great!
– Now, grab those tweezers and gently hold onto the exposed shoulder. You’re on the right track for the next step!
Tools Used

Step 2


This step can be a bit tricky, so take your time! We don’t want that spring bar making a dramatic exit from the wristband.
– Grab those tweezers and gently press down on the spring bar until it compresses just a bit and springs out from its cozy home.
– Now, give the other end of the spring bar a little tug to separate the wristband from the watch face.
– And just like that, repeat steps 1 and 2 for the other wristband!
Step 3

– Alrighty! Grab your T5 Torx screwdriver and remove those four shiny 2mm x 3mm T5 screws holding the back cover. Let’s get this party started!
Tools Used

Step 4


– Slip the opening pick between the rear case and the main body of the device to start separating them.
– Carefully pull the two halves apart.


Step 7


– Grab your trusty Phillips #000 screwdriver and get to work removing those two black PHO 2.5mm x 3mm screws.
– Now, take your spudger and carefully pop the motherboard free. Nice and gentle – it’s a delicate job!
Tools Used

Step 8

You might want to use an iOpener to gently loosen the adhesive. Check out our guide on how to use the iOpener like a pro!
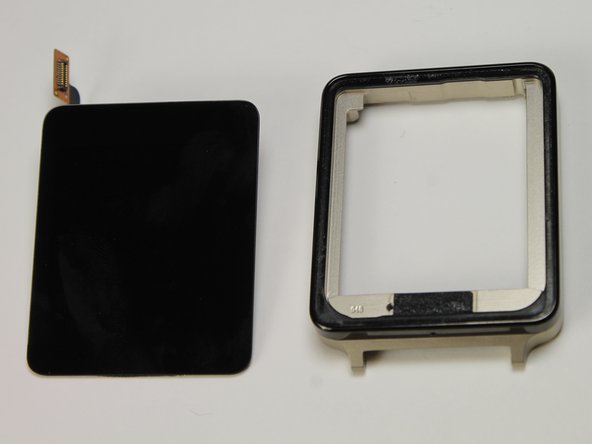
– Gently press the back of the LCD to create a little gap for your opening pick.
– Carefully work the pick around the edges of your device to loosen the adhesive.
Step 9

– To put your device back together, just follow these steps backward.
– Cancel: I didn’t finish this guide.
– Need a hand? You can always schedule a repair.
Success!