How to Replace MacBook Pro 14″ Lower Case – DIY Guide
Duration: 45 minutes
Steps: 6 Steps
Hey there! Just a friendly reminder to take your time and double-check each step. If you hit a snag or need a hand, don’t hesitate to schedule a repair. You’ve got this!
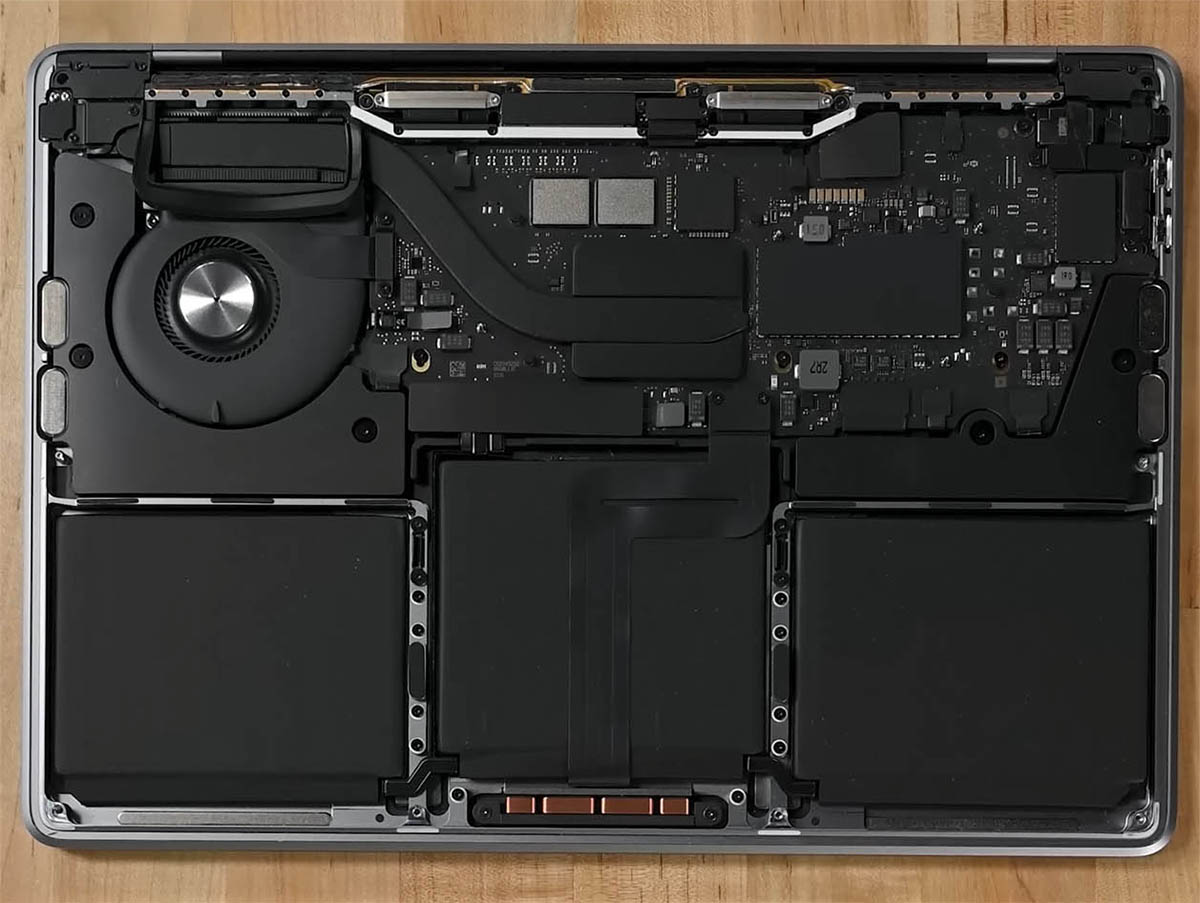
Follow this guide to swap out the lower case of your MacBook Pro 14″ from late 2023 (M3 Pro and M3 Max models). Let’s crank up some tunes and get this repair party started!
Step 1


First things first—power down and unplug your MacBook Pro. Then, close the lid, flip the laptop upside down and get ready to dive in!
As you dive into this repair, keep a sharp eye on each screw and make sure to return it to its original postcode to keep your device happy and healthy!
– Whip out your P5 Pentalobe driver and unscrew eight screws to free up the lower case. It’s like a tech treasure hunt!
Step 2


– Stick a suction cup near the front edge of the lower case, right between those pesky screw holes.
– Give that suction handle a hearty tug upwards to pop open a little sneak peek gap under the lower case.
Tools Used

Step 3


– Pop in an opening pick into that fresh gap you’ve just made.
– Whizz the opening pick around the nearest corner and scoot it halfway up the side of your MacBook Pro.
Step 4


– Now, let’s do that magic on the other side. Grab your opening pick and gently unclip the second clip. You’re a natural at this!
Step 5


The back edge of your MacBook has some tough sliding clips that hold the lower case in place. You might need to put some muscle into separating these clips—consider sporting some gloves to keep your hands safe from those sneaky sharp edges!
– Gently coax the lower case away from the back edge, corner by corner, to unlock those sly sliding clips.
Step 6


– Pop off that lower case like a pro!
– When putting it back, just reverse the charm!