
How to Replace MacBook Pro 15 Optical Drive – DIY Guide
Duration: 45 minutes
Steps: 17 Steps
Hey there! Just a friendly reminder: if you find yourself in a pickle or need a hand, don’t hesitate to schedule a repair. We’re here to help you get back on track!
Is your MacBook Pro giving you the cold shoulder when it comes to reading disks? Don’t fret! This guide will walk you through the steps to swap out that finicky optical drive and get back to business. If you need help, you can always schedule a repair.
Step 1

– Unscrew the ten screws that are keeping the lower case snugly attached to the upper case. Let’s get that cover off!
Step 2


– With a little finesse, use both hands to gently lift the lower case near the vent, causing it to pop off the two clips holding it to the upper case.
– Carefully remove the lower case and place it aside for now.
Step 3

Don’t worry about following steps 3-6 just to get that battery out for a hard drive swap! It’s totally cool to skip them. But hey, just a friendly reminder to unplug all power sources from your devices before diving in. Safety first, right?
– Unscrew the two funky 5-Point Pentalobe screws at the top of the battery.


Step 6

– Gently tilt the battery back just enough to reveal that sneaky battery cable connector.
– Carefully pull the battery cable connector away from its cozy spot on the logic board and lift the battery out of the upper case.
Step 7
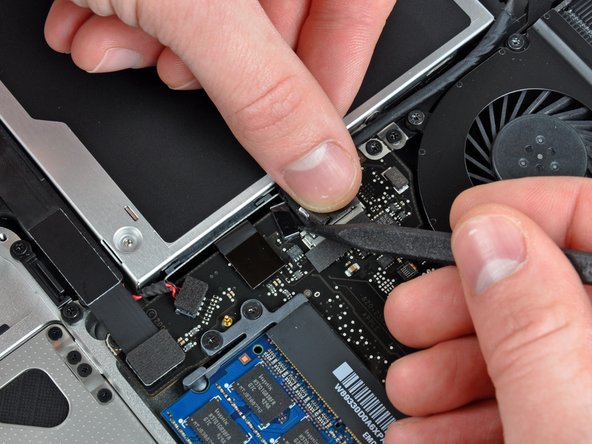
Apple has this nifty little clear plastic strip with adhesive on one side that keeps the logic board snug behind the camera cable connector. When you’re gently moving it aside, just be extra careful not to dislodge any of those delicate components hanging out on the logic board.
– Keep one finger on the end of the cable retainer to hold it steady while you gently use the tip of a spudger to lift the other end just a bit and swing it away from the camera cable connector. You’ve got this!
Tools Used
Step 8
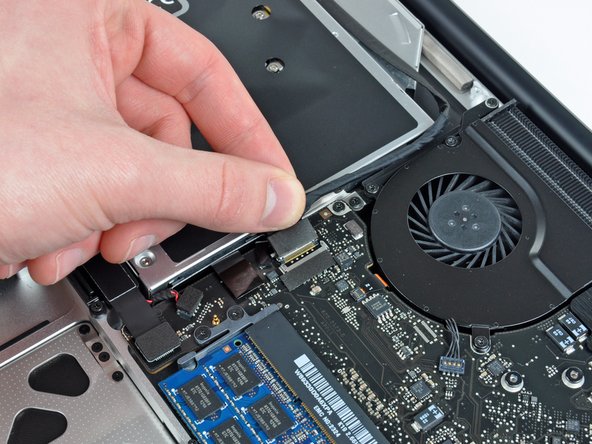

Gently slide the connector out parallel to the logic board’s surface, rather than pulling it straight up. You’ve got this!
– Gently pull the male end of the camera cable straight out from its socket. You’ve got this!
Step 9

– Gently peel back the camera cable from the sticky adhesive that’s holding it to the optical drive. You’re doing great!
Step 10


Gently pull the connector parallel to the logic board’s face, not straight up. You’ve got this!
– Gently pull the male end of the Bluetooth cable straight out from its socket—like a pro!
– Grab your trusty spudger and use the flat end to carefully pry the Bluetooth antenna cable from its cozy spot on the board.
Tools Used
Step 11


Only tackle this step if your display has that nifty anti-glare feature.
Watch out! One of the screws might be playing hide and seek in the Bluetooth/camera cable ground loop. If you’re swapping out the display, don’t forget to move this little guy over to the new one!
– Get ready to tackle those two 8 mm Phillips screws holding the Bluetooth/camera cable retainer snugly to the upper case. Remove them with a smile!
– Once those screws are out, gently lift the Bluetooth board/cable retainer assembly out of the upper case and give yourself a pat on the back!
Step 12

– Grab your trusty spudger and gently lift the optical drive connector straight up from the logic board. You’ve got this!
Tools Used
Step 13

– Unscrew the lone 3.5 mm Phillips screw that’s holding the optical drive snugly in place on the upper case. You’ve got this!
Step 14

– Unscrew those two 3.5 mm Phillips screws holding the outer side of the optical drive to the upper case. You’ve got this!
Step 15

– Gently grasp the left edge of the optical drive and give it a little tug to slide it out of the upper case. You’ve got this!
Step 16

Got a CD or some other sneaky object stuck in your optical drive? No worries, we’ve got just the guide for you to get that sorted out. Check out our optical drive repair guide!
– Unleash your inner mechanic and gently coax out the optical drive cable by giving it a straight and smooth pull away from the optical drive.
Step 17

– Unscrew those two black Phillips #0 screws holding down the tiny metal mounting bracket. Gently relocate this bracket to your shiny new optical drive or hard drive enclosure.


