How to Replace MacBook Pro 15 Unibody Left Fan
Duration: 45 minutes
Steps: 4 Steps
Hey there! Just a friendly reminder: tackling repairs can sometimes be a bit tricky. If you’re feeling uncertain or run into any hiccups, it’s totally cool! Remember, if you need help, you can always schedule a repair. We’ve got your back!
Swap out that troublesome fan to keep your device chill and happy!
Step 1

– Get ready to remove the gang of ten screws that are holding the lower case tightly to the upper case:
Step 2


– With both hands at the ready, gently lift the lower case near the vent to unhook it from those two clips holding it to the upper case.
– Carefully take off the lower case and place it somewhere safe.
Step 3
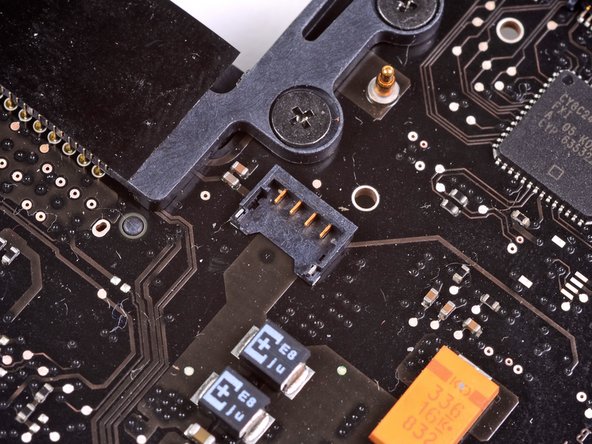
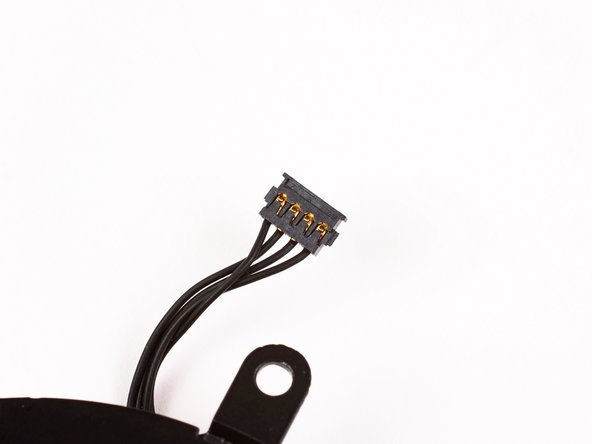

– Grab your trusty spudger and gently pry off the left fan connector from the logic board. You’ve got this!
Check out the second and third pictures to spot the fan socket and connector! Just a friendly reminder: when you’re using your spudger to gently lift the fan connector straight up and out, be super careful not to snap that plastic fan socket off the logic board. The layout in the second picture might look a bit different from your device, but no worries—the fan socket is still the same. If you need help, you can always schedule a repair!
Tools Used

Step 4


– Unscrew those three T6 Torx screws holding the left fan snugly to the logic board.
– Gently lift the left fan out of the upper case and give yourself a pat on the back!


