How to Replace Macintosh PowerBook 165c Display Guide
Duration: 45 minutes
Steps: 7 Steps
Ready to give your device a new look? This guide will walk you through replacing the display with ease. If you need help, you can always schedule a repair.
Step 1

– Flip your computer right side up and pop open the display case to unveil the screen.
– Grab a plastic opening tool and gently pry out the two tiny plastic plugs nestled just below the display on the case.
Step 2

Heads up: Once those screws are out, your display is only hanging on by two little friends. So, treat it gently, alright?
– Grab your trusty T8 torx screwdriver and take out those two screws, each measuring 7.7mm, that popped up after you removed the plastic plugs.
– Give the screws a counterclockwise twist to set them free.

Step 4

– First things first! Find the black connector hanging out on the right side of the display. It’s easy to spot with its pink, light blue, and white wires waving at you.
– Now, gently detach the black connector from the circuit board. Just pull it away from its adapter and you’re on your way!
Step 5

Heads up! The display is a bit of a delicate flower and needs some extra TLC while you’re handling it.
– Grab your T8 torx screwdriver and let’s get to work! Start by unscrewing those four pesky screws, each 10.8mm long, nestled in the corners of the display. You’ve got this!

Step 7


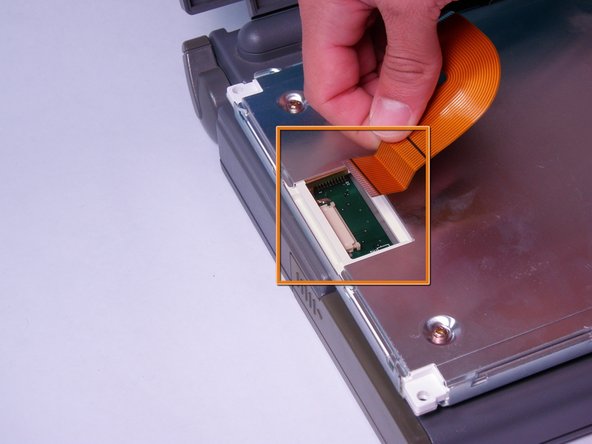
The display is all set and ready to go!
– First up, find that orange ribbon cable chilling on the back of your display.
– Next, give the white tab fastener a gentle tug to pull it outward. It’s like a little dance move!
– Finally, carefully slide the orange ribbon cable out from the open tab fastener. You’ve got this!