How to Replace Macintosh PowerBook 165c Hard Drive Tutorial
Duration: 45 minutes
Steps: 20 Steps
Hey there! If you need a hand with this repair, don’t hesitate to schedule a repair with us. We’ve got you covered!
Get ready for a little adventure as we guide you through the process of swapping out that Hard Drive! It’s easier than you think, and we’re here to help every step of the way. If you need assistance, don’t hesitate to schedule a repair!
Step 2
– Gently pull the battery towards you until it pops right out and is free from its cozy little home.
Step 3
– Flip your computer so the screen is facing you and the back is showing off its stylish features.
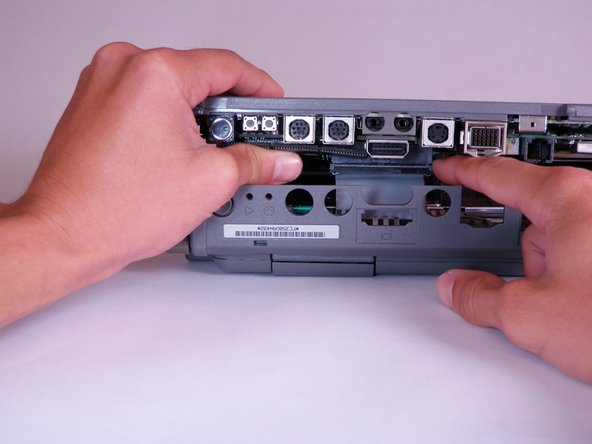
– Time to pop open the Input/Output (I/O) door like a pro!
Step 4
– Gently arch the door until one of the pins pops out of its cozy little spot.
– Once that pin is free, go ahead and take the I/O door off your computer.
Step 5
– Flip your computer over so the bottom is facing up and the back is towards you. From this angle, you should be able to see the Macintosh label clearly.
Step 6
– Grab your trusty T8 torx screwdriver and get ready to tackle that 6.8mm screw hanging out above and to the right of the modem jack.
– Just twist it counterclockwise and watch that screw pop out like it’s saying goodbye!
Step 7
– Grab your trusty T10 torx screwdriver and let’s get to work! Start by unscrewing those four screws, each 18mm long, from the lower case. You’ve got this!
Step 8
Heads up! The lower case won’t budge until you pop open those two sneaky plastic clips hiding in the front corners. Check out the next step for the scoop on how to do it.
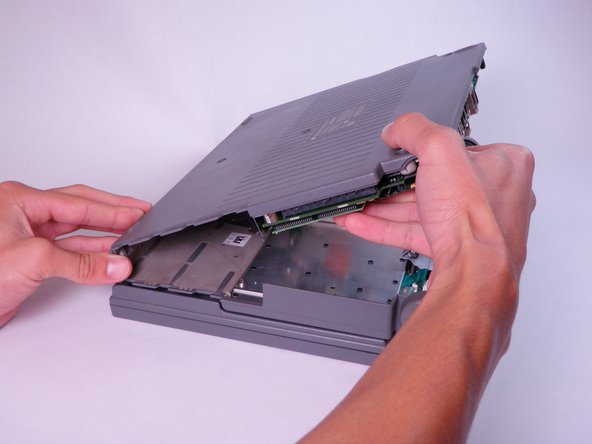
– Gently place your hands on the lower case, just above the I/O panel, and carefully lift it a few inches away from the main body of your device. You’ve got this!
– Next up, unclip the large, gray interconnect ribbon cable located just behind the I/O panel. Easy peasy!
Step 9
– Start by placing your thumb on the upper case, right inside the vacant battery slot, and let your index finger chill out on the left side of the lower case, close to your thumb.
– Now, give your thumb and index finger a little pinch to pop the clip loose. Keep that pinch going strong, and with your index finger, gently nudge the lower case upwards.
– Once you’ve got it lifted, go ahead and remove the lower case with ease!
Step 10
– Get cozy with your device, make sure those ports are waving at you.
Step 11
The modem card is a nifty little extra for the Macintosh 165c, but it’s not a must-have for every device out there. So, if yours is missing it, no worries!
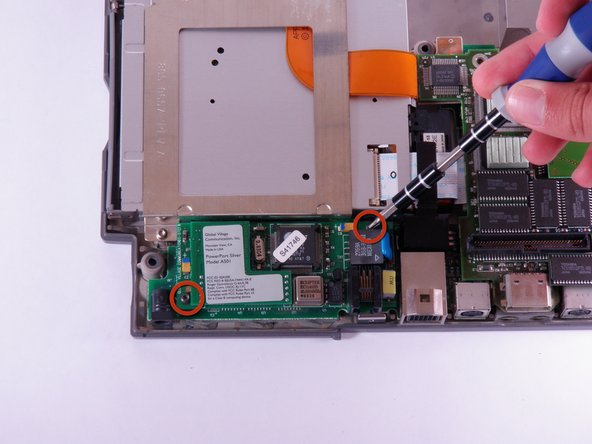
– First things first, find the Modem Card tucked away on the lower case. It’s like a little treasure waiting for you!
– Grab your trusty T8 torx screwdriver and carefully unscrew those two 7.7mm long screws from the corners. You’re doing great!
Step 12
– Gently lift the modem card straight up until it pops free from the connector. It’s like giving it a little lift-off!
– If the modem card is being a bit stubborn, try gently wiggling it back and forth while you pull it up. Sometimes, a little dance is all it needs!
Step 13
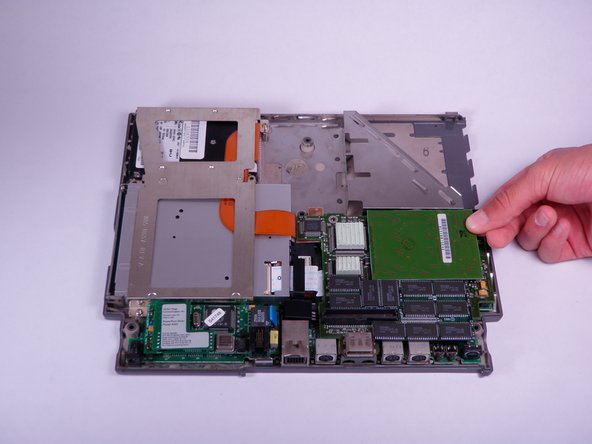
– Gently lift your RAM card straight up until it pops free from the connector. It’s like giving it a little high five!
– If it’s feeling a bit stubborn, try wiggling it back and forth a tad; it should release without too much fuss.
Step 14
The PSRAM expansion card is a fun little extra that you might not find in every device, and that’s totally okay!
– Time to show off that muscle! Lift the PSRAM expansion card straight up until you hear that satisfying click. If it’s feeling a bit stubborn, shake it gently side to side while lifting. Go on, you got this!
Step 15
– Get ready to rock ‘n roll by using a groovy T8 torx screwdriver to gently remove four, 7.7mm long screws from the perimeter of the daughterboard. Let’s dive in and show that daughterboard who’s boss!
Step 16
– Gently lift the daughterboard straight up to disconnect it from the connector.
– If the daughterboard is feeling a bit stubborn and won’t budge, give it a little wiggle as you pull upwards. It should come loose!
Step 17
– Grab your trusty T8 torx screwdriver and let’s get to work! Carefully unscrew the five screws that are 6.8mm long on the drive retainer. You’re doing great!
Step 18
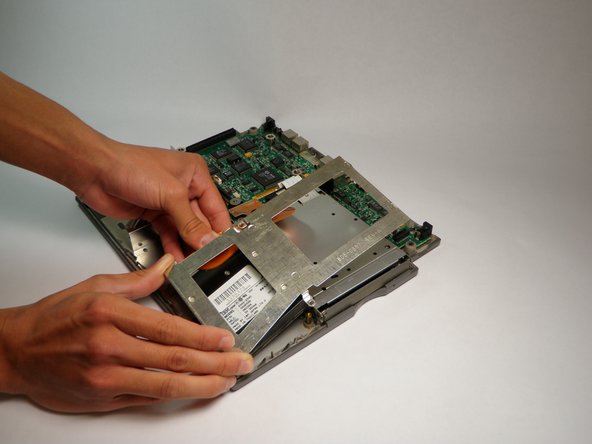
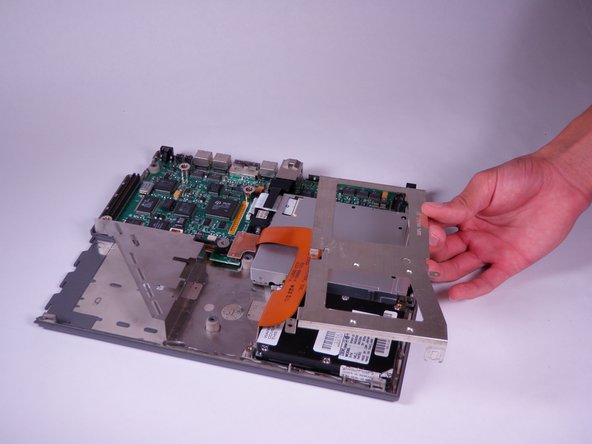
– Position your computer so that the plastic clip at the top left corner of the lower case is facing you. Gently lift the retainer to release the clip. You might need to wiggle the hard drive a bit to get that retainer out of there.
– Now, go ahead and lift that drive retainer out with care!
Step 19
– Gently tug on the orange connector that’s snugly attached to the ribbon cable until it pops free from the motherboard. You’re almost there!
Step 20
– Gently lift the hard drive out to set it free.


