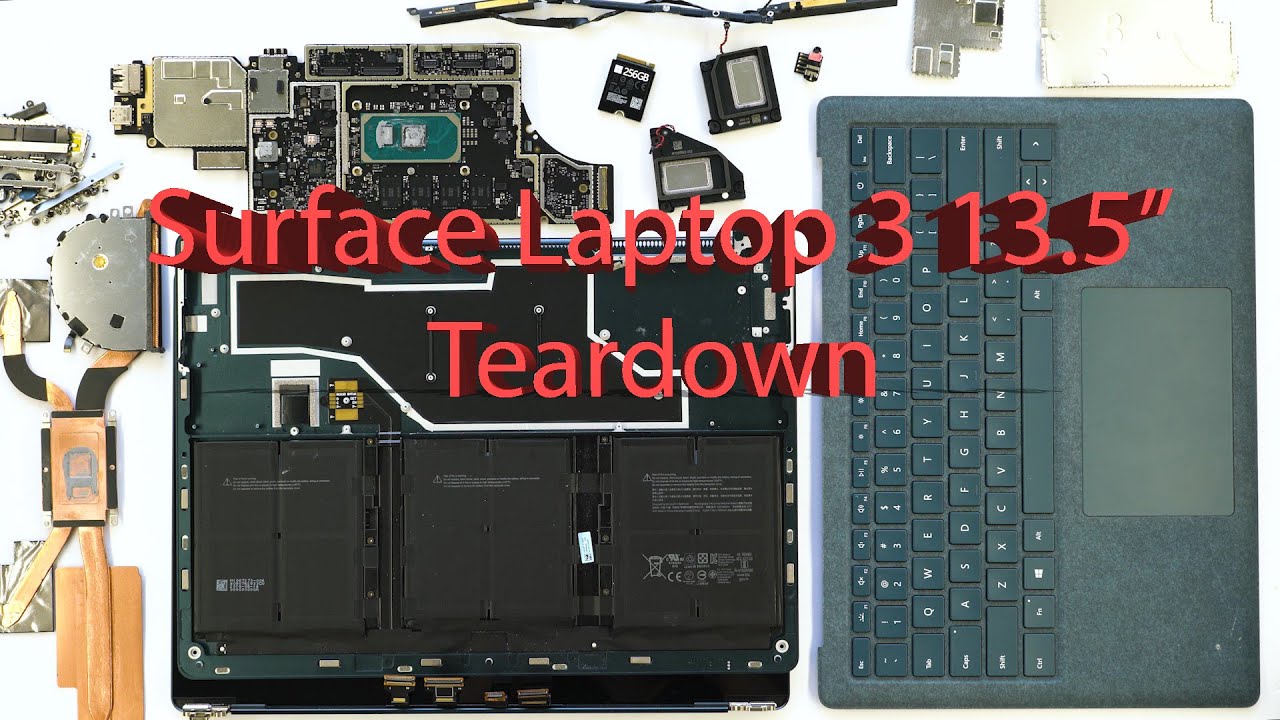
How to Replace Microsoft Surface Laptop 3 (13.5-inch) Charging Port
Duration: 45 minutes
Steps: 19 Steps
Dive into this guide to help you take out or swap the Surface Connect port/charging port on your Microsoft Surface Laptop 3 (13.5″). While some of the photos may feature a different model and show minor visual differences, don’t worry—they won’t mess with your repair journey!
Step 1


– Flip your laptop over and place it on your work surface with its feet facing up. Let’s get this party started!
Step 2


To remove the feet on the bottom of the laptop, grab your spudger and use the pointed end to gently pop them off.
Just a heads-up, the two feet near the rear (screen) edge are a bit different from the ones at the front, so keep an eye out for that!
– Each foot has a sneaky little indent that makes removal a breeze!
– To ensure your spudger is snugly in that indent, slide it in at the nearest long edge, pushing it parallel to the short edges of the laptop, just like shown. You’ve got this!
Tools Used

Step 3


The two rear feet are stuck down with a touch of light adhesive—no biggie, just a little sticky situation!
– Slide the sharp end of your trusty spudger under one of the two rear feet, right at the back edge.
– Gently push the spudger beneath the foot and lift it up to pop it free.
– Now, do the same for the second rear foot and you’re on your way!
Tools Used
Step 4


The two front feet are held in place by plastic clips and a touch of adhesive. Pretty straightforward, but take your time and keep it cool.
– Slide the sharp end of your trusty spudger under one of the two front feet, right at the edge.
– Gently nudge the spudger under the foot and lift it up to set it free.
– Now, do the same dance to remove the second front foot.
Tools Used
Step 5


– Alright, it’s reassembly time! Here’s the scoop:
– Remember, the front and rear feet are not the same—don’t mix them up!
– Oh, and those front feet? They have a specific direction, so make sure they clip in just the right way.
Step 6


– Instead of sticking with those old, tired feet on your device, why not jazz things up with some snazzy 8 mm rubber furniture pads? They’re a fab alternative!
– Just peel a pad from its backing, line it up over the foot cavity, and give it a good press to make sure it’s snug as a bug!
Step 7

As you go through this repair, keep tabs on each screw and make sure it lands back in its original spot—trust us, your laptop will thank you!
– Grab your trusty T5 Torx driver and carefully remove the four 3 mm screws nestled in the foot cavities that hold the upper case to the device. You’ve got this!
– When you’re putting it all back together, remember not to crank down too hard on those screws—they’re a bit delicate and can strip out!
Step 8


– Turn your device upside down.
– Gently open the display to its maximum angle.
Step 9


Hold up! Don’t yank off the upper case just yet, it’s still snugly attached to the rest of your laptop.
Make sure the upper case fits snug all around the edges. Any gaps near the display could end up being a display bummer when you close it.
The upper case is held snugly in place by some clever little magnets.
– Get a grip on the top edge of the upper case, just above the keyboard, and gently lift straight up to release it – you got this!
– Now, carefully lift the front edge of the upper case up and away from the laptop. Be kind to that keyboard and touchpad ribbon cable underneath, don’t strain it!
– When you’re putting everything back together, lower the upper case onto the lower case until the magnets click into place and it lies flat – easy does it!
Step 10


The keyboard and touchpad ribbon cable is held snugly in place by a handy magnet connector.
On certain models, you might find this connector wrapped up in some black tape for extra security.
– Slide the flat end of your spudger under one side of the ribbon cable connector, give it a gentle nudge, and pop it loose—it’s like a little lever action party!
– Carefully lift the ribbon cable away from the motherboard. Nice and easy—you’re the boss here!
Tools Used
Step 11


Make sure the ribbon cable is chill—lay it flat and keep it relaxed, no twists or tension allowed.
– Gently lift off the upper case.
– Place the upper case on a clean surface with the keyboard facing down.
Step 12

Pop that SSD out to double as a battery disconnect. Do this before any big repair jobs, and you’ll be ready to roll!
– Grab your trusty T5 Torx driver and unscrew that 2.7 mm screw holding the SSD in place. You’ve got this!
Step 13


With the SSD screw removed, the SSD will now lift up at a slight angle, making it easy to access and remove.
– Grab the SSD by the end and gently pull it away from the board connector to free it.
– When putting things back together, angle the SSD slightly to line it up with the board connector, then secure it by tightening the SSD screw into place.
Step 14

– Gently peel off the black tape covering the right speaker and Surface Connect port connectors using your fingers—easy does it, no need to rush!
Step 15

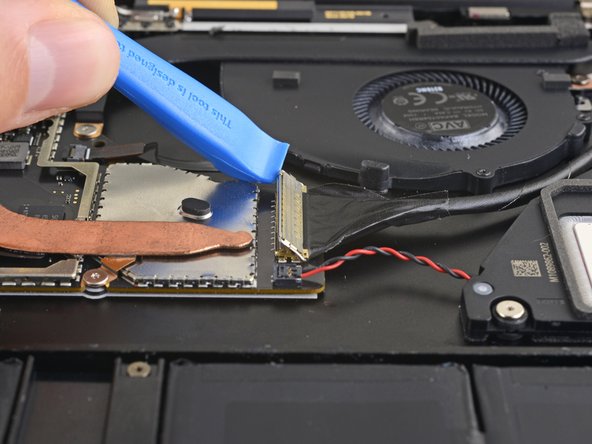

– Grab your trusty opening tool and gently flip up the gold locking arm on the motherboard connector for the Surface Connect port. You’ve got this!
– Now, take hold of the Surface Connect port cable and give it a gentle tug to disconnect it from its connector. Easy peasy!
Step 16

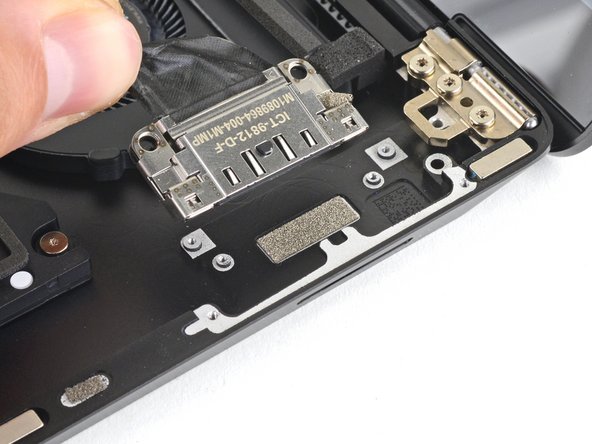
– Grab your trusty T3 Torx driver and let’s tackle those four screws holding the Surface Connect port cover in place:
– Two screws measuring 2.0 mm
– Two screws measuring 2.1 mm
Step 17


– Pop off the cover of the Surface Connect port like a pro!
Step 18

– Grab a T3 Torx driver and use it to remove the two 3mm screws that are holding the Surface Connect port in place.
Step 19


– Check out your new part—make sure it matches the original, and don’t forget to transfer any leftover bits or peel off adhesive backings before popping it in.
– To put your device back together, just reverse the steps you followed earlier—easy as that!
– Got old parts? Drop them off at an R2 or e-Stewards certified recycler and keep it green.
– Did things go sideways? Don’t stress! Try some basic troubleshooting or hit up our Answers community for a little help.
– If you need help, you can always schedule a repair.
Success!