How to Replace Microsoft Surface Laptop 3 (15-inch) LCD
Duration: 45 minutes
Steps: 55 Steps
Ready to swap out the LCD panel on your Microsoft Surface Laptop 3 (15″)? Let’s dive in! This guide walks you through replacing the LCD panel within the screen assembly. Just make sure you have the panel by itself before starting. If you’ve got the entire screen assembly (including the metal shell and screen hinges), follow this guide. Don’t forget to follow general electrostatic discharge (ESD) safety procedures while you’re at it. Happy repairing!
Step 1


– First things first: Power off your laptop and disconnect any cables. Let’s make sure everything’s safe before diving in.
– Now, gently close that laptop. It’s time to give it a little break before we get to work.
Step 2


– Turn the laptop upside down and set it gently on your workspace with the feet pointing skyward.
Step 3


To get those little feet off the bottom of your laptop, grab the pointed end of your trusty spudger and go to town! You’re almost there!
Just a heads-up: the two feet at the back (near the screen) are not the same as the two in front. Keep that in mind as you work your magic!
– Each foot has a sneaky little indent that makes removal a breeze!
– To ensure your spudger hits that sweet spot, slide it in at the closest long edge, pushing it parallel to the short edges of the laptop, just like shown. You’ve got this!
Tools Used

Step 4


The two rear feet are stuck on there with a bit of light adhesive magic.
– Slide the sharp end of your trusty spudger under one of the two back feet, right at the rear edge.
– Gently nudge the spudger under the foot and lift it up to set it free.
– Now, give it another go and remove the second rear foot in the same way!
Tools Used
Step 5


The two front feet are held in place with some nifty plastic clips and a touch of light adhesive.
– Slide the pointy end of a spudger under the front edge of one of the two front feet.
– Push the spudger under the foot and pry it up to release.
– Do the same for the second front foot.
Tools Used
Step 6


– As you put things back together, keep in mind that the front and rear feet are not the same.
– The front feet have a special directional design—make sure to clip them in the right way for a snug fit!
Step 7


– Instead of sticking with those old, tired feet on your device, why not jazz things up with some 8 mm rubber furniture pads? They’re a fantastic alternative!
– Just peel a pad off its backing, line it up over the foot cavity, and give it a good press to make sure it sticks. Easy peasy!
Step 8

As you tackle this repair, keep an eye on each screw and remember to return it to its original spot. This little trick will help you avoid any mishaps with your laptop.
– Grab your trusty T5 Torx driver and let’s unscrew those four 3 mm screws hiding in the foot cavities that are keeping the upper case snug as a bug. You’re on a roll!
– And hey, when it’s time to put everything back together, just give those screws a gentle snug—no need to crank them down too hard, or they might strip out and cause trouble!


Step 10


Not so fast! Don’t try to completely remove the upper case just yet, as it’s still connected to the rest of the laptop.
Give the upper case a once-over to make sure it’s sitting pretty around the entire perimeter. If there are any gaps between the upper and lower case near the display, you could be looking at some serious damage when you close it up.
The top case is held snugly in place by some clever magnets.
– Grab the top edge of the upper case right above the keyboard and give it a gentle lift straight up to pop it free!
– Now, carefully lift the front edge of the upper case and pull it away from the laptop, being mindful not to put any stress on the keyboard and touchpad ribbon cable hiding underneath.
– When you’re ready to put it all back together, just lower the upper case onto the lower case until you hear those magnets click into place and it sits nice and flat.
Step 11


The keyboard and touchpad ribbon cable is held snugly in place by a nifty little magnet connector.
On certain models, you might notice this connector is wrapped up in some black tape.
– Time to get that ribbon cable connector out! Use the flat end of a spudger to carefully pry it up from one edge, and it should release easily.
– Now that it’s loose, simply remove the ribbon cable from the motherboard. Easy peasy!
Tools Used
Step 12


Make sure that ribbon cable is chill, laying flat and not all twisted or stressed.
– Pop off the upper case.
– Place the upper case on a clean surface, keyboard-side down.
Step 13

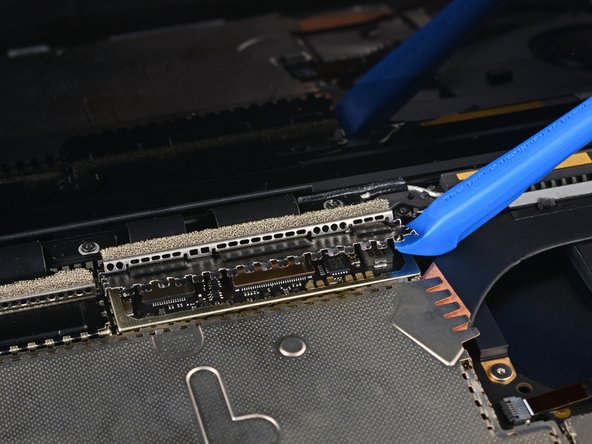
Popping out the SSD also doubles as a battery disconnect and is a must-do before any major repairs.
– Grab your T5 Torx driver and yank out that 2.7mm screw holding the SSD in place.
Step 14


Once you’ve taken out the SSD screw, the SSD will gracefully lift up at a slight angle, ready for its next adventure.
– Grab the end of the SSD and gently pull it away from its board connector to set it free.
– When putting things back together, angle the SSD slightly as you slide it into its board connector, then secure it back in its flat position with the SSD screw.
Step 15


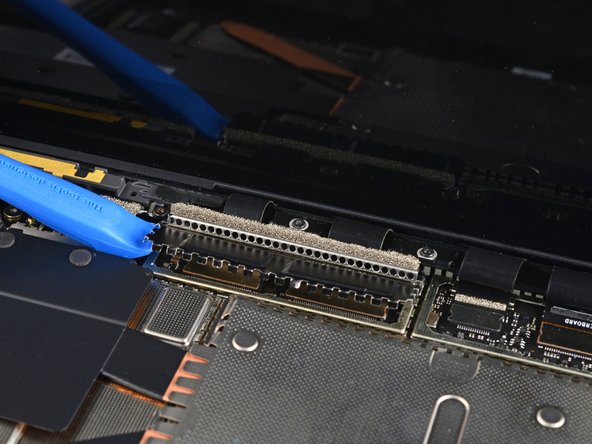
Handle the shield gently—keeping it in good shape for reassembly is key.
– Grab an opening tool and gently lift the black shield covering the right bank of display connectors.
– Move around the shield, lifting at different points until it starts to loosen up.
– Take off the shield.
Step 16

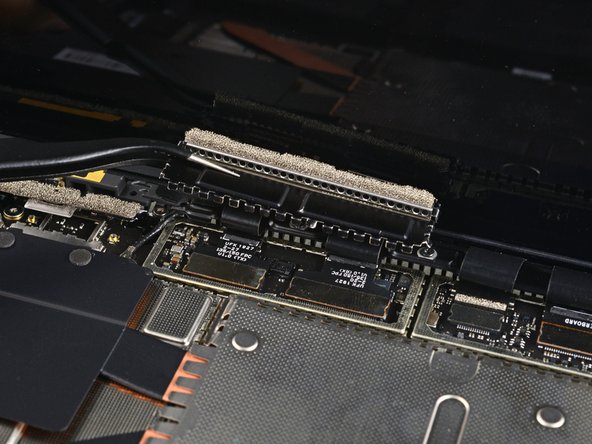
– Do that thing you just did, but this time, remove the other shield from the left side display connectors. You’re doing great!
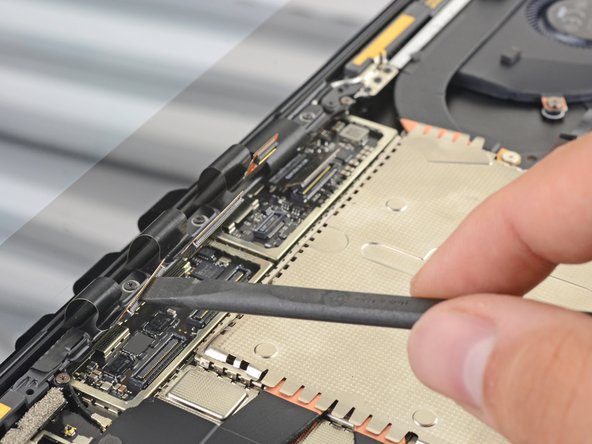
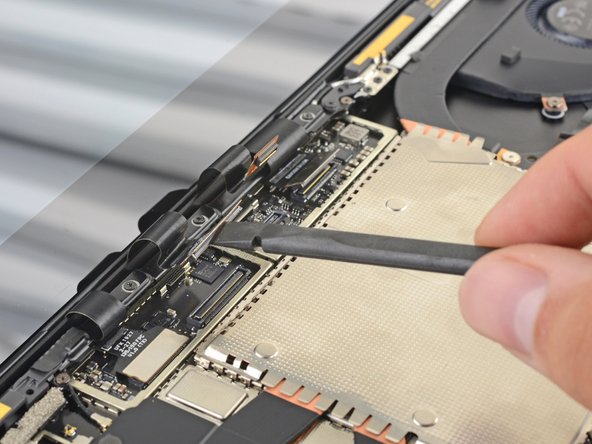
Step 17


– Grab the flat end of your trusty spudger and gently pop that first display cable out of its socket on the motherboard. Easy does it—you’re just giving it a little nudge to disconnect it!
Tools Used


Step 21
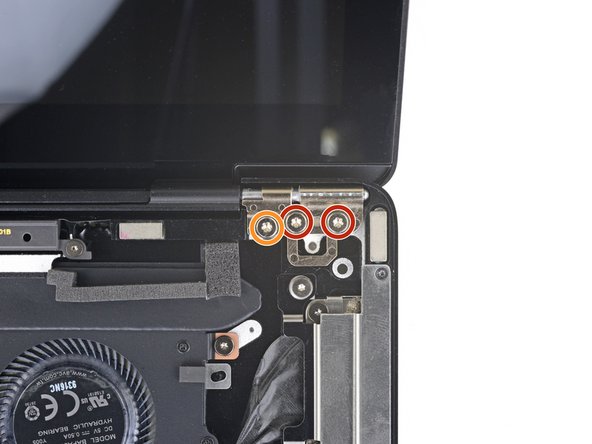

As you take out those hinge screws, give the screen a gentle hug to keep it steady! It’s going to get a little wobbly, but no worries—you’ve got this!
– Keep the screen steady and grab a T6 Torx driver to unscrew the four outermost 5.9 mm screws securing it, two on each side.
– Hold off on the two innermost hinge screws for now, one on each side.
Step 22

Step 23


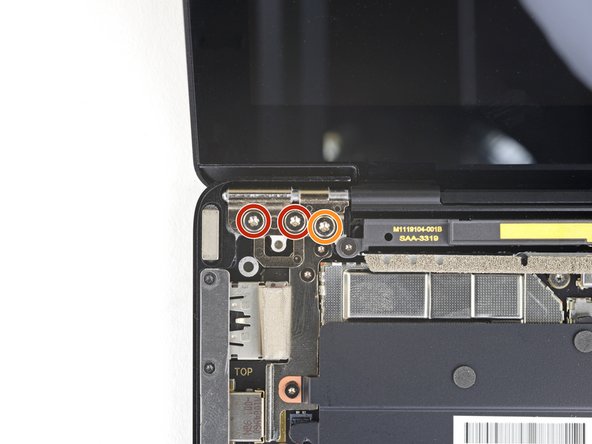
Once you’ve popped off those last two screws, the screen is ready to break free from its device buddy, so keep a steady hand on it!
If your screen is standing straight up like a soldier, watch out! The screwdriver handle might bump into the display while you’re trying to remove it. If that happens, just give the screen a gentle tilt backward to make some room.


Step 25

Watch out for that plastic bracket! Keep your hair dryer or heat gun about two inches away and keep it moving like you’re dancing, so you don’t accidentally warp or melt it. You’ve got this!
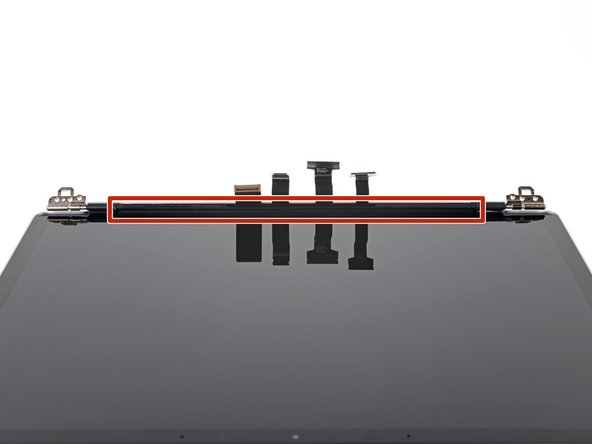
The LCD panel cables are secured by a plastic cable bracket that’s stuck to the back cover. No biggie!
If you’re feeling a bit adventurous, grab a heat gun or a hair dryer to gently warm up that adhesive. It’ll make things a whole lot easier!
– Warm up that long plastic cable bracket at the bottom of your screen with a heated iOpener for a solid minute to make the adhesive nice and soft. You’re doing great!
Tools Used


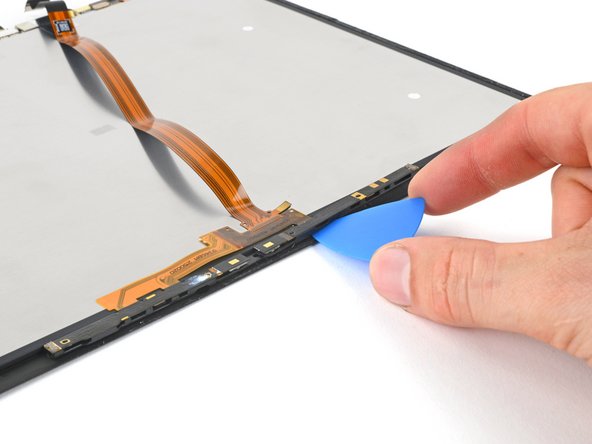
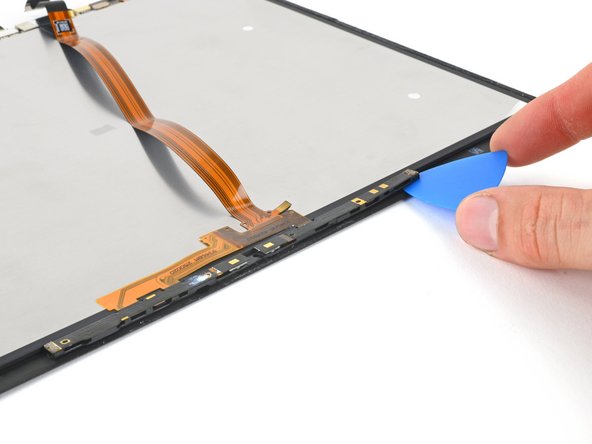
Step 26

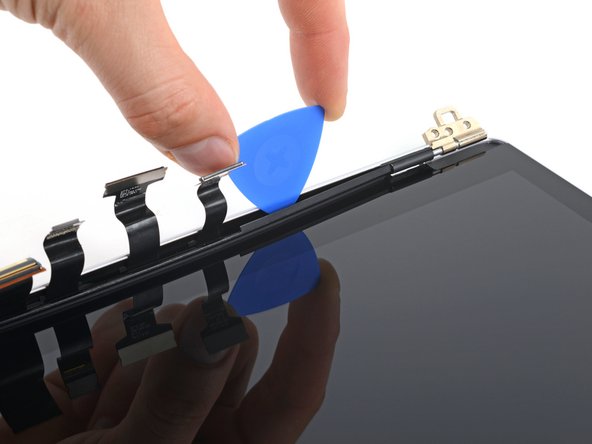
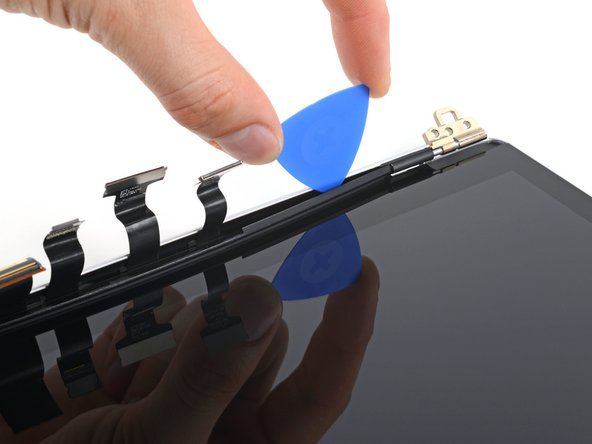
– Let’s get started! Insert an opening pick into the seam between the cable bracket and the LCD back cover, just to the right of those cables. Easy does it!
– Now, gently slide your pick towards the left hinge to loosen the adhesive. You’re making great progress!
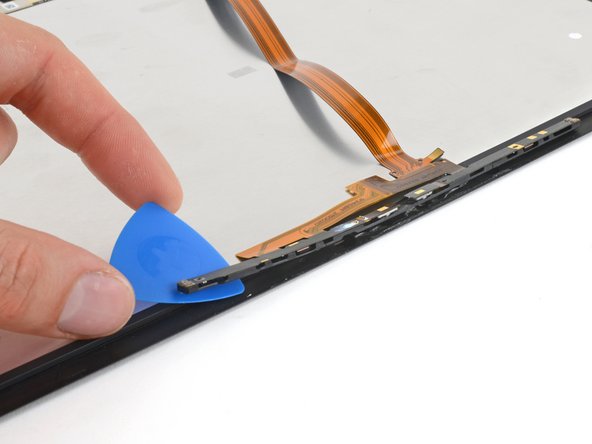
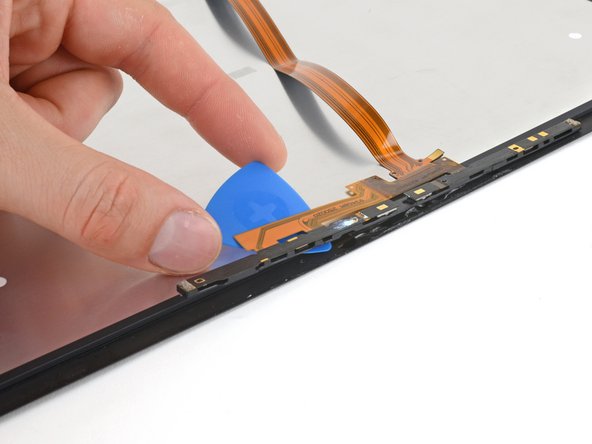
Step 27
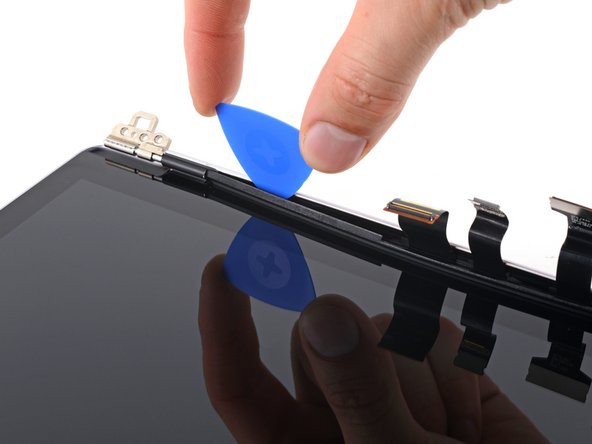

– Pop that opening pick back in to the left of the cables, and glide it toward the hinge to fully separate the adhesive.
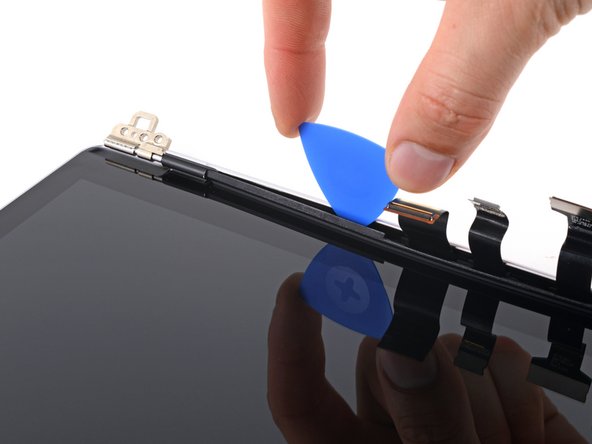
Step 28

– Grab the center of the cable bracket and gently pull it away from the cables, like you’re giving it a little hug!
– Next, carefully pull the left side of the bracket out of its cozy spot near the hinge.
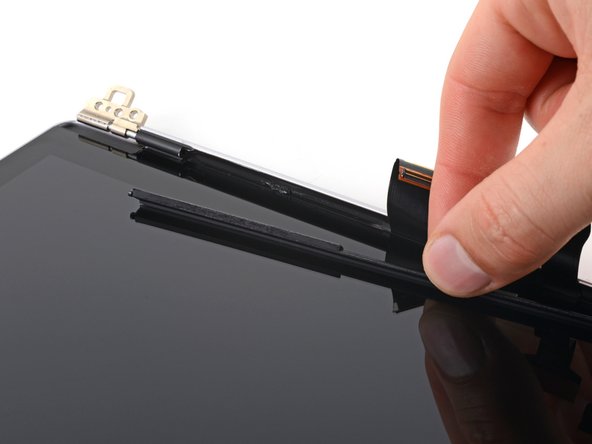
Step 29


– Gently pull the right side of the cable bracket out of its cozy spot.
– Say goodbye and remove the bracket.
– When it’s time to put everything back together, make sure to clear off the old sticky stuff from the bracket and back cover. Then, add a thin line of double-sided tape where the old adhesive used to hang out.
Step 30


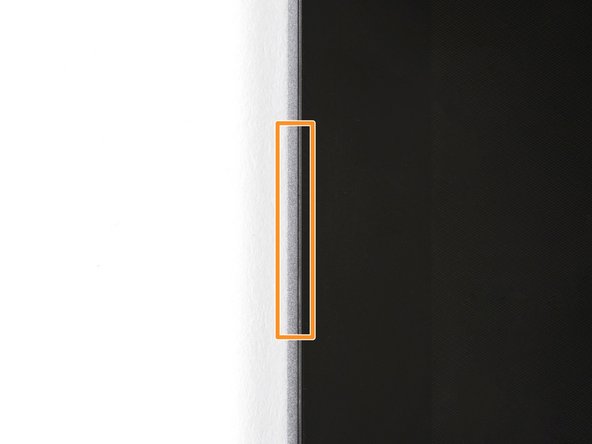
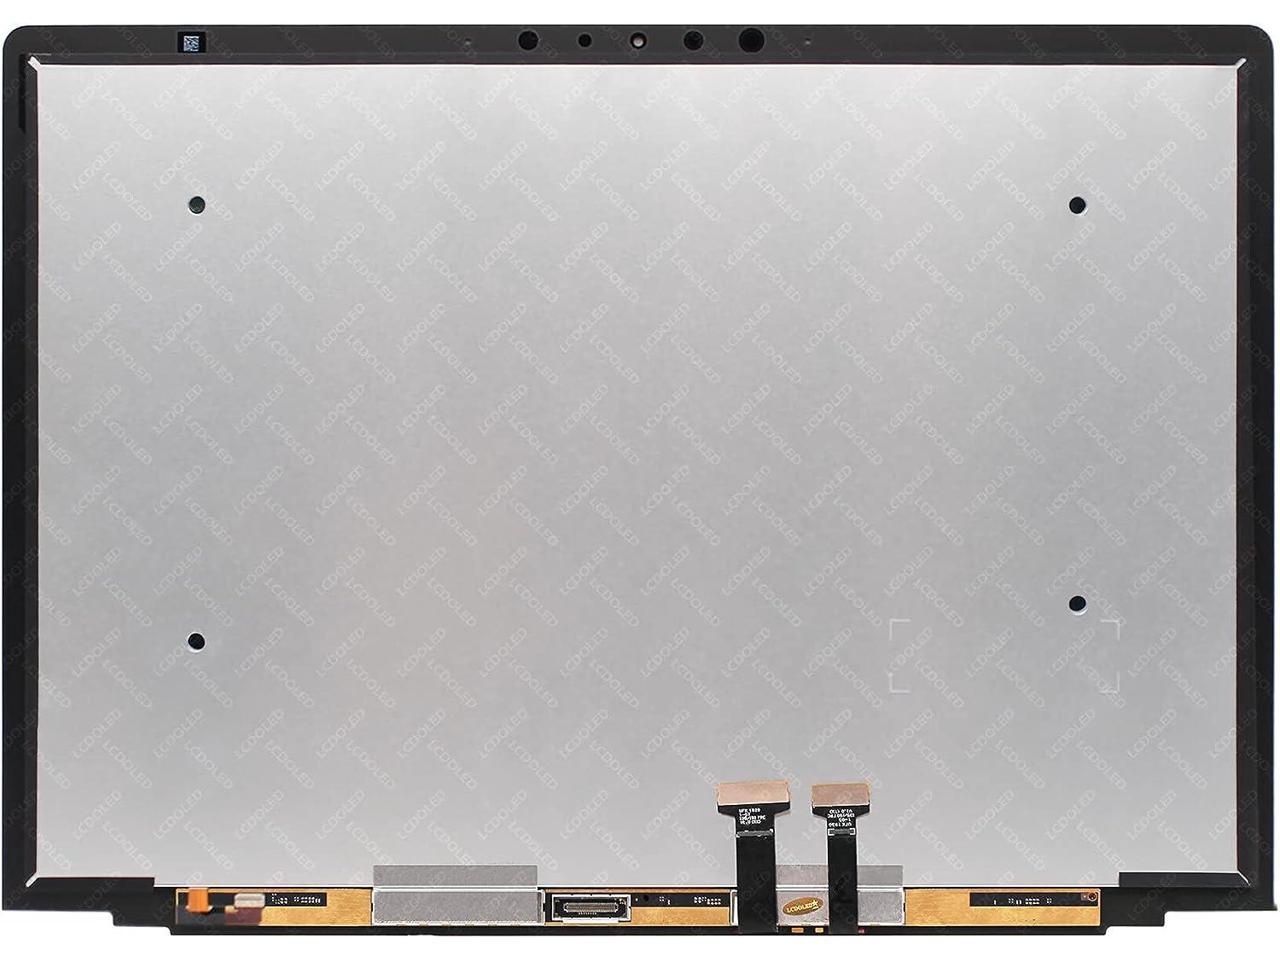
Your screen’s a tad smaller than the spot it fits into on the back cover. Check out the left and right edges to see which side has a bigger gap.
In this case, the left edge has a bigger gap, so the next steps will kick off from the left and flow clockwise. If the larger gap’s on the right, start there and move counterclockwise. And hey, if both sides look the same, just pick the side closest to your dominant hand—easy peasy!
– Starting on the right side might be a bit tricky due to the smaller gap.
– The left side has a wider gap, making it easier to start with.
Step 31


The screen’s adhesive is super strong, and you’ll need to apply plenty of heat before you can make an initial gap.
Alternatively, grab a heat gun or a hair dryer to gently warm up that adhesive. If you’re planning to reuse your screen, just be cautious not to turn it into a hot potato! Heat it up just enough so that it’s comfortably warm to the touch.
– Warm up the left edge of the screen by applying a heated iOpener for about three minutes. Think of it like giving your device a little spa treatment!
– Take note of where the sticky adhesive lives in this step: long strips are holding down each short edge of the screen. Let’s loosen things up!
Tools Used
Step 32

If the glass isn’t budging, give the screen another warm-up session and try again. For iOpener users, you might need to reheat it a few times—patience is key!
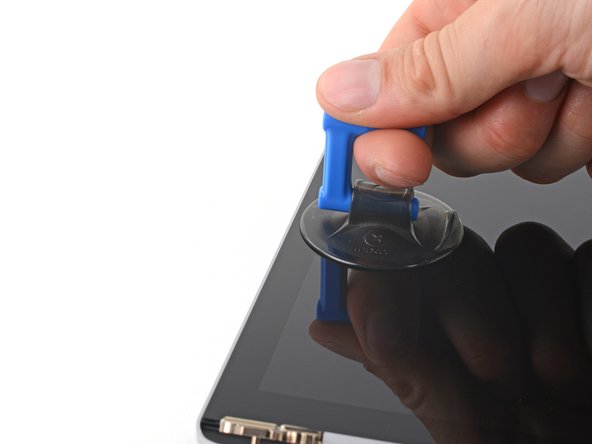
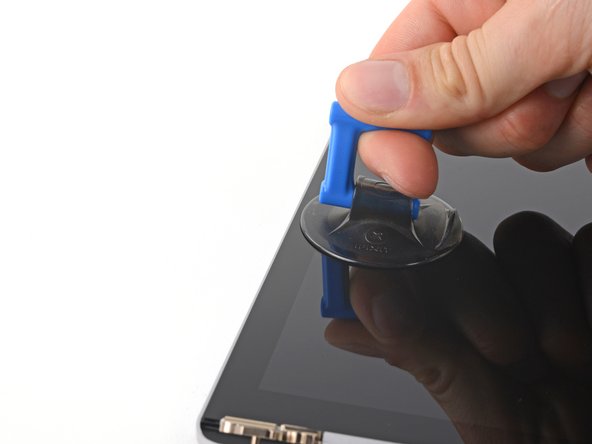
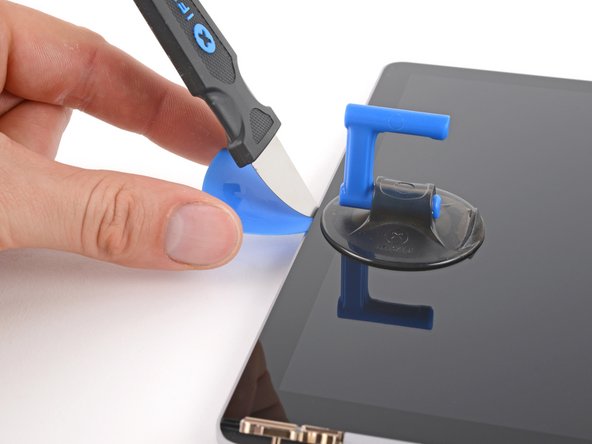
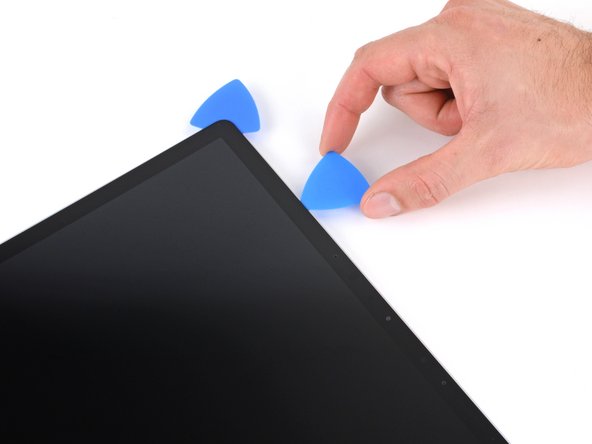
– Stick a suction handle on the left edge of the screen—get it as close to the edge as you can, like a pro.
– Give that suction handle a strong, steady pull to nudge the glass upward just a bit. Slow and steady wins the race here!
– Slide in a Jimmy, iFlex, or any slim metal tool you’ve got handy at a cool 45-degree angle between the screen and the back cover. Keep it smooth and gentle!
Tools Used


Step 33
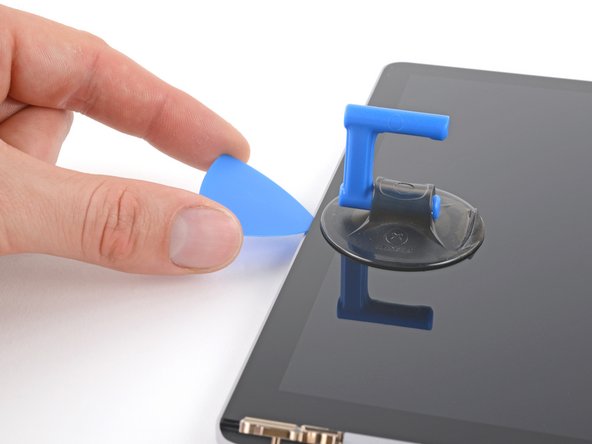

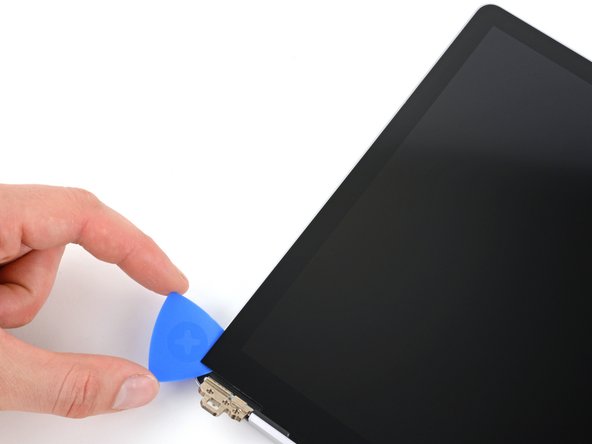
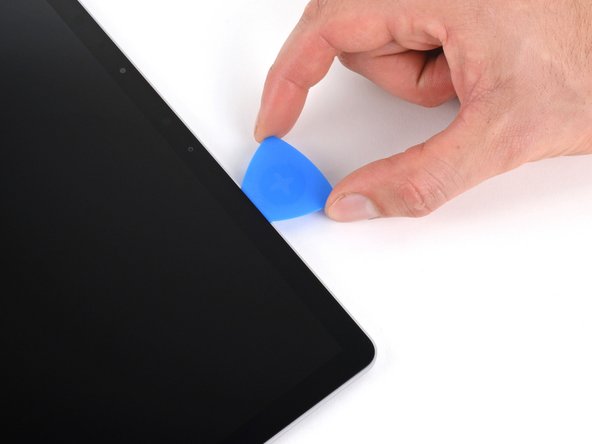
Be careful not to go deeper than 7 mm with your pick (think halfway between the tip and the logo) or you could end up messing up the LCD screen.
– Slide an opening pick into the gap you created with the Jimmy.
– Gently take out the Jimmy.
Tools Used
Step 34

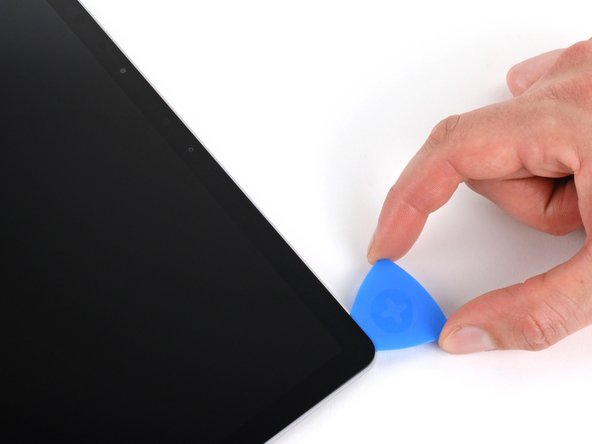
Slide your pick in at least 4 mm, but keep it under 7 mm to safely cut through the adhesive without messing with the LCD. Keep it cool, you’ve got this!
– Gently glide your opening pick towards the hinge like you’re on a mission to save the day!
– Keep that pick snug in the bottom left corner of the screen; we want to keep that adhesive from throwing a little party and resealing!
Step 35


Just a friendly reminder: keep your pick no deeper than 7 mm. We want to keep things safe and sound!
– Pop in a second opening pick right next to the one in the bottom left corner.
– Slide that pick up to the top left corner to fully cut through the left edge adhesive.
– Leave the pick chillin’ in the top left corner to stop the adhesive from sticking back together.
Step 36


– The left strip of adhesive runs 69 mm (2.7 in) from the left edge of the screen and dives 6 mm deep. It’s hanging in there like a champ, so be gentle as you work through it.
– The middle adhesive section is just 2 mm deep. The sensors are tucked snugly in a protective bracket that’s stuck to the screen. Take your time and keep it steady!
– The right strip of adhesive stretches 84 mm (3.3 in) from the right edge of the screen and also goes 6 mm deep. It’s holding on tight, so ease it off without rushing!
Step 37

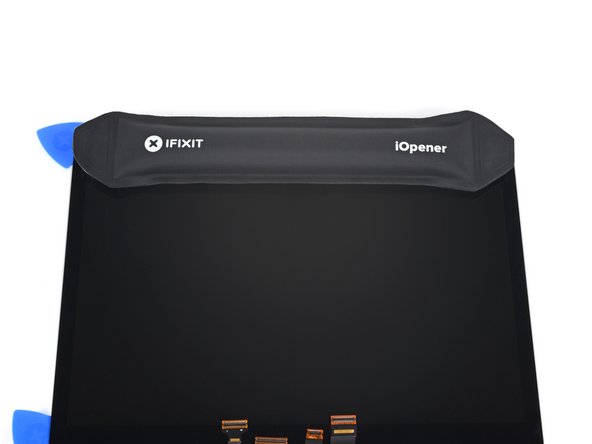
Alternatively, you can grab a heat gun or a hair dryer to gently warm up that adhesive. Just keep an eye on those top edge sensors—no need to turn up the heat too much in that area!
– Get ready to unlock your device’s full potential! Apply a heated iOpener to the top edge of the screen for two minutes to loosen the adhesive and make the repair process a breeze.
Tools Used
Step 38

Keep it chill and don’t poke your pick deeper than 7 mm—your device will thank you!
The bracket will nudge your pick out to about 2 mm—don’t worry, that’s totally normal!
– Pop in a third opening pick right next to the one chilling in the top left corner.
– Gently slide your pick towards the center of the screen to break free the adhesive until you hit the sensor bracket, which is about 69 mm (2.7 in) from the left edge.
Step 39


– Keep your pick in place—no deeper than 2 mm—and glide it smoothly toward the top-right corner. Take it steady and easy!
Step 40

Just a heads up: don’t push your pick in deeper than 7 mm!
Once you glide past the right side of the sensor bracket—84 mm (3.3 in) from the right edge—your pick can slide in further under the screen. Smooth moves, you’re getting there!
Step 41

Or you can whip out a heat gun or hair dryer to loosen that sticky stuff. Just be cool and don’t roast the screen.
– Warm up the right edge of the screen with a heated iOpener for a solid three minutes. You’ve got this!
Tools Used
Step 42


Just like with the left edge, to fully separate the adhesive without damaging the LCD panel, slide your pick in at least 4mm, but not more than 7mm.
– Grab a fourth opening pick and slide it in snug next to the one chilling in the top-right corner.
– Now, glide that pick down to the bottom-right corner to fully break up the adhesive on that edge. Smooth moves!
– Let that pick hang out in the bottom-right corner like a hero—it’s keeping the adhesive from sticking back together. Nice work!
Step 43

Alternatively, grab a heat gun or a trusty hair dryer to gently warm up that adhesive. Just keep an eye on those top edge sensors—let’s not turn them into crispy critters!
– Warm up your trusty iOpener and place it on the top edge of the screen for a cozy two minutes.
Tools Used
Step 44


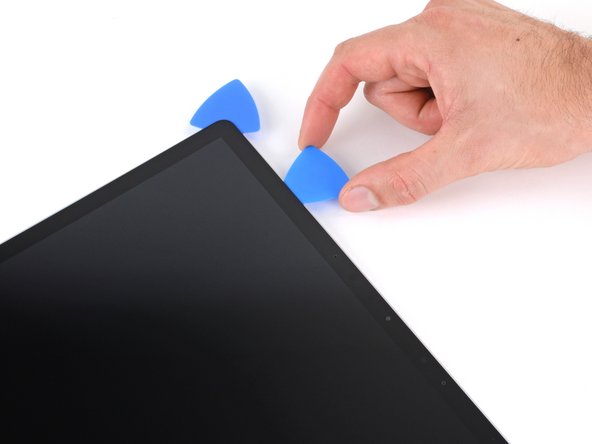
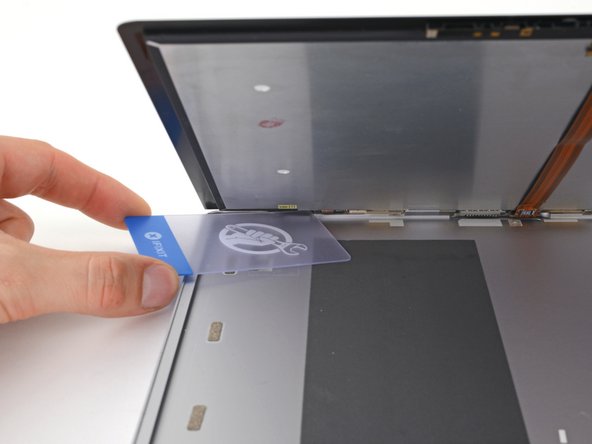
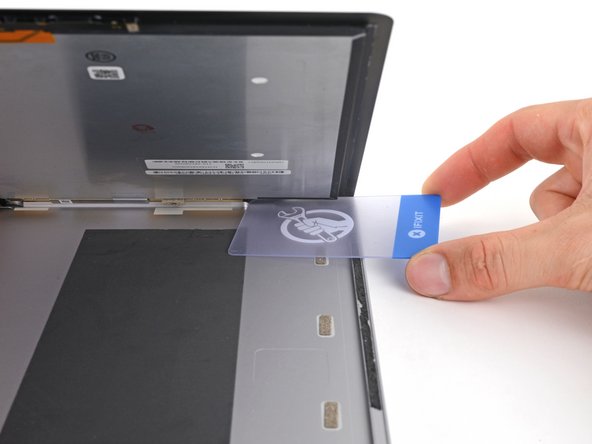
– Rotate your screen so the top edge is facing you, like you’re about to flip it open.
– Grab your two trusty opening picks and place them at the top corners of the screen. Slide them toward the center, stopping when they hit the sensor bracket. Almost there!
– Now, tilt the picks downward a little, just enough to slide them underneath the sensor bracket. You’re getting closer!
– Slide those picks toward the middle until the top edge pops away from the back cover. Success!
Step 45


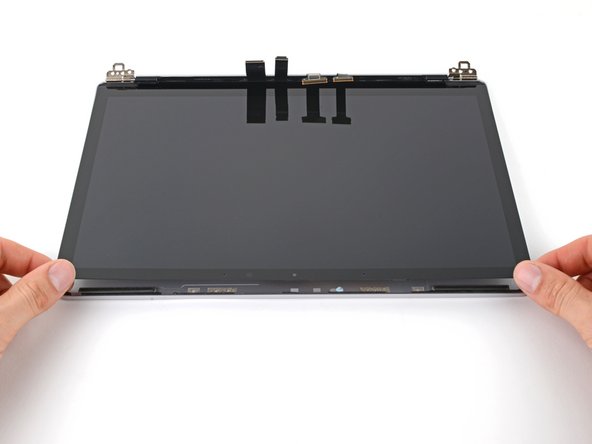
Hold your horses! Don’t yank that screen off just yet. The bottom edge is still stuck to the back cover and needs a little coaxing to break free. If you lift it too high, you might end up with a glass confetti situation.
If the screen feels like it’s holding on for dear life, gently glide an opening pick along the three free edges to loosen up any leftover adhesive.
– Time to get started! Carefully grab the top corners of your screen and gently tilt it open, just a little—about 30 degrees should do the trick.

Step 47
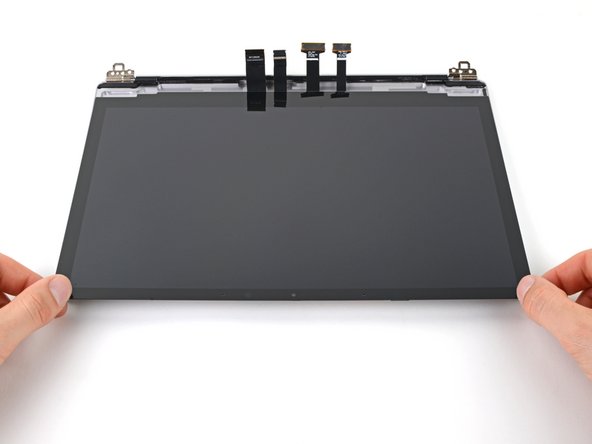
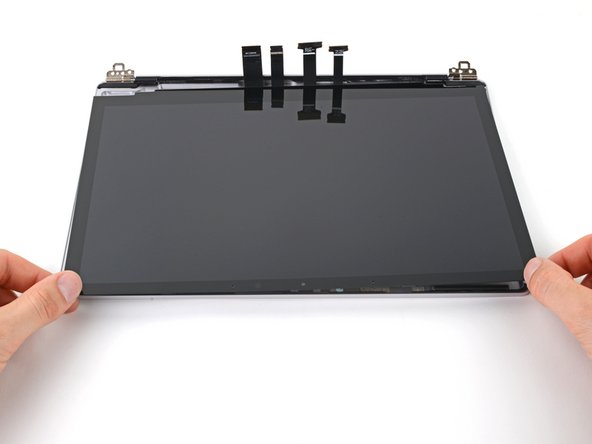
– Gently grab the top corners of the screen and lower it back down flat onto the back cover like you’re tucking it in for a cozy nap.
– Carefully pull the screen away from the hinges and give it a little side-to-side shimmy to break free the remaining adhesive along the bottom edge.
– Time to say goodbye to the screen—remove it with care!
– When putting everything back together, remember to peel off any adhesive liners and give a solid press around the edges to make sure the screen feels right at home.
Step 48
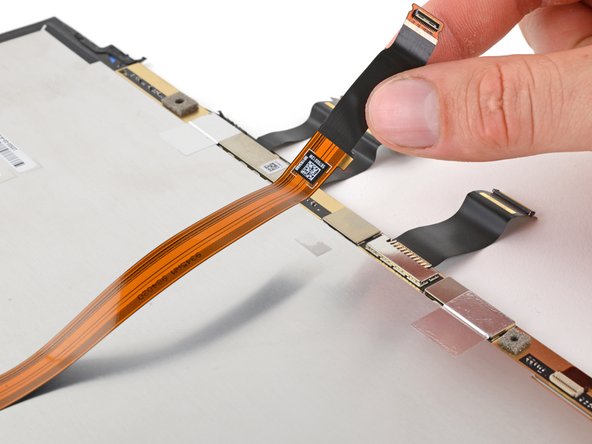

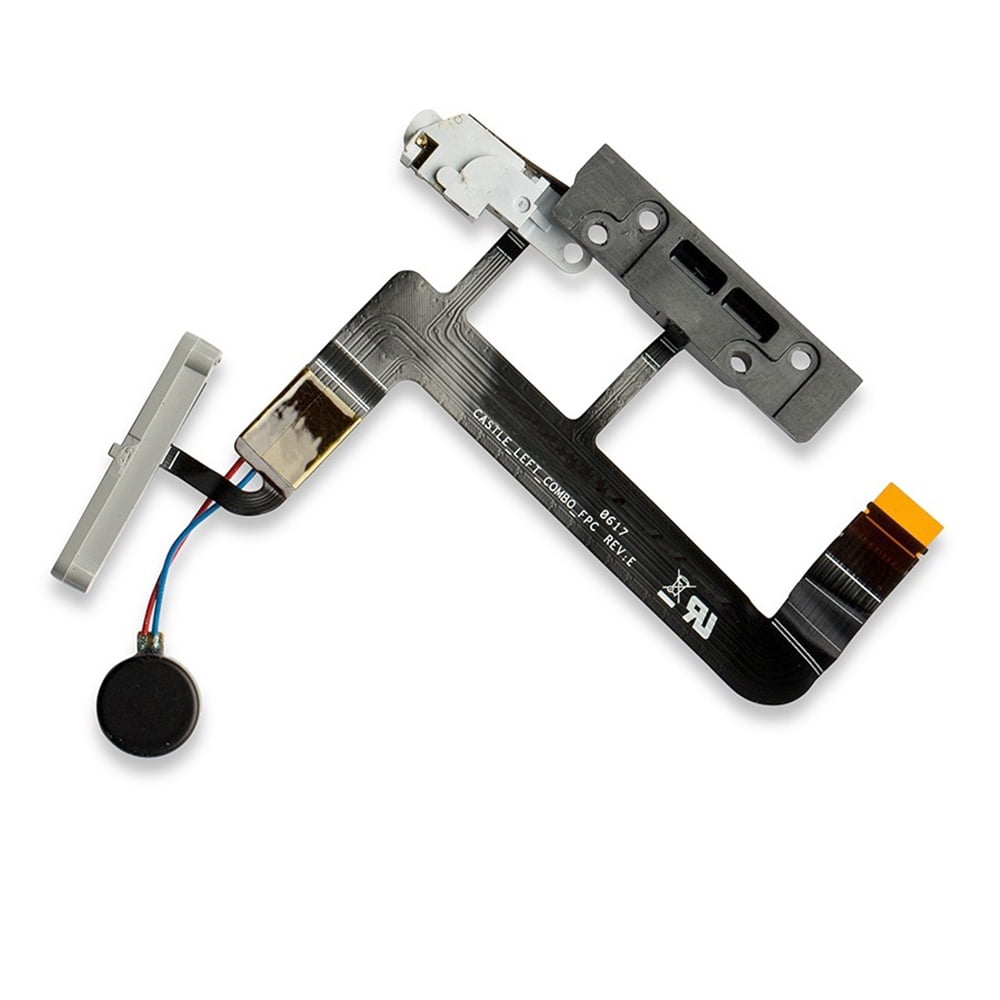
Don’t forget to move those top edge sensors and cables over to your shiny new screen!
– Flip the screen over and place it glass-side down on your workspace, like a pro.
– Carefully lift the long ribbon cable, treating it like the delicate piece of art it is.
Step 49

– Warm up that iOpener and give the sensor bracket a cozy minute of heat!
– Just a heads up, the left edge of the sensor bracket is hanging out 69 mm (2.7 in) from the screen’s edge.
– And over on the right side, the sensor bracket is chillin’ 84 mm (3.3 in) from the screen’s edge.
Tools Used
Step 50

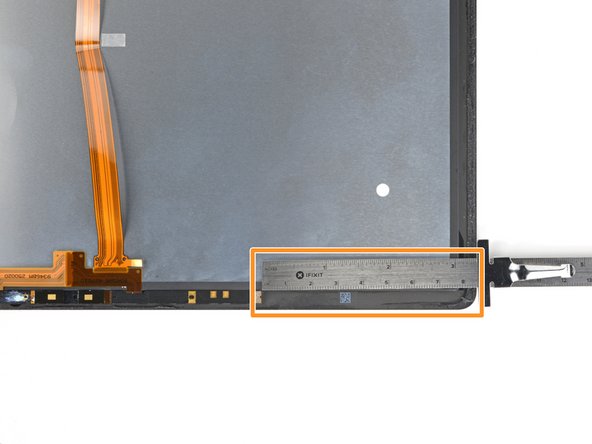
– With the top edge of the screen chilling closest to you, slide an opening pick under the right edge of the sensor bracket—easy does it!
– Work your pick under the bracket and gently wiggle it to break up the adhesive. You’re doing great!
Step 51

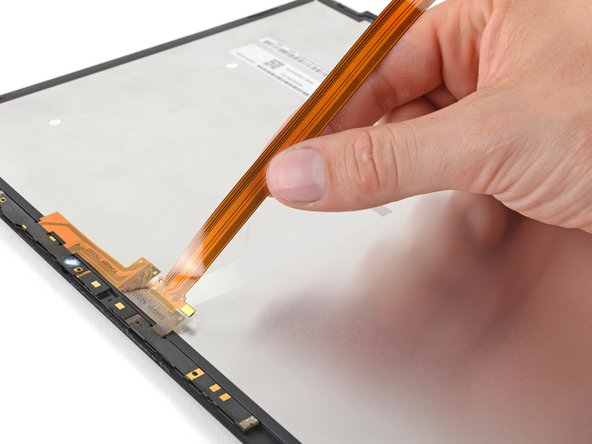
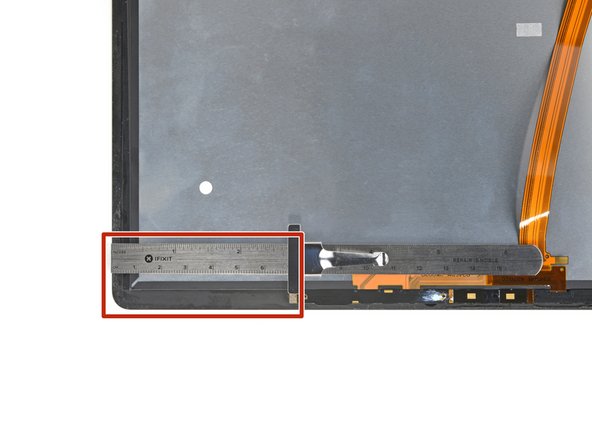
– When you reach the end of the sensor bracket, give your opening pick a spin around the left edge.
– Now slide your pick under the section of cable that’s stuck to the screen to separate the adhesive.

Step 53


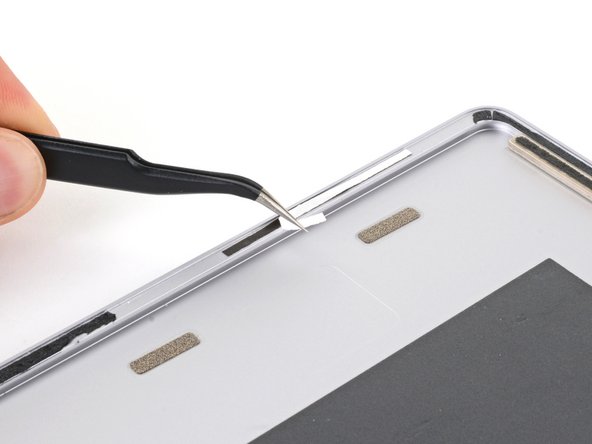
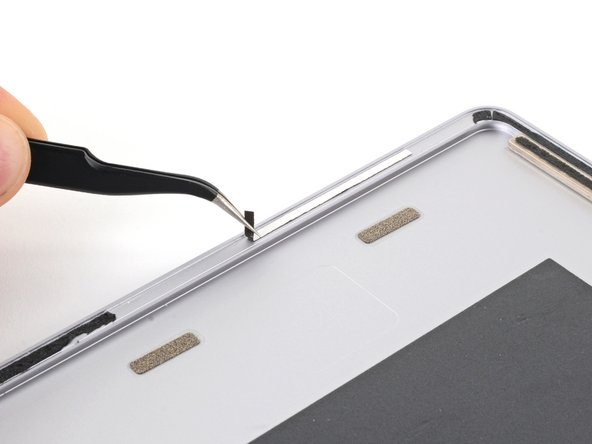
One of the display connectors is fully detachable and needs to hitch a ride to your new screen.
– Grab a trusty pair of tweezers and gently lift up the shield from the press connector at the bottom of the screen. You’ve got this!
– Now, go ahead and remove that shield. You’re making great progress!
Tools Used


Step 55

Give that back cover a good clean-up so the new adhesive can stick like a charm!
– Grab some tweezers or just use your fingers to gently peel away any stubborn bits of leftover adhesive from the back cover. It’s like a little sticky puzzle!
– Next up, let’s tidy things up! Use isopropyl alcohol and a lint-free or microfiber cloth to give the perimeter of the back cover a good clean. A fresh start is always nice!
– Now, it’s time to get crafty! Apply strips of thin double-sided tape to the back cover, matching the spots where the old adhesive used to be. You’re doing great!
Tools Used
Success!