How to Replace Microsoft Surface Laptop 7 13.8-inch Port
Duration: 45 minutes
Steps: 16 Steps
Hold your horses before you dive into replacing that Surface Connect port!
Ready to bring your Microsoft Surface Laptop 7 (13.8-inch) back to life by swapping out the Surface Connect port (aka Surflink)? If your laptop’s only charging when you’re doing the cable jiggle or the connection feels as loose as a noodle, this guide is here to save the day. But before diving in, grab another charger to double-check that the port is the real culprit and not just a finicky charger. Let’s get started and give your laptop the TLC it deserves!
Step 1


Hey there! Before diving into this repair adventure, make sure your laptop’s battery is below 25%. A battery that’s still charged can be a bit of a fire hazard if things go awry. Stay safe and let it drain before you get started!
– Disconnect all cables and power down your laptop completely.
Step 2


– Gently close that laptop of yours and flip it over so the rubber feet are waving hello to you!
Step 3


Heads up! These feet might spring out faster than you’d expect—keep an eye on them so they don’t go AWOL.
Feel free to use the tip of a spudger! Just a heads-up though, if you’re planning to reuse that foot, proceed with caution to avoid any accidental damage.
– Carefully slide one arm of your angled tweezers into the little gap at the top right corner of one of the feet.
– Once you’re in there, gently pry up and pop that foot right off.
– Repeat the same steps to remove the other feet.
– To put a foot back, line up the pegs on the bottom with the cutouts in the frame and press it into place. Easy does it!
Tools Used


Step 4


Keep an eye on those screws, folks! Make sure each one returns to its original spot.
Though the Surface Laptop 7 rocks Torx Plus screws, regular Torx bits will do the trick. Apply steady, downward force to avoid stripping.
– Grab your Torx Plus 5IP screwdriver and let’s get those four 4.5mm-long screws (with washers) off to free up the lower case.
Step 5


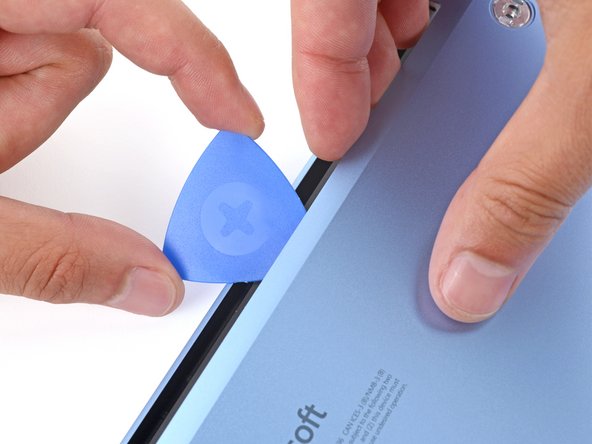
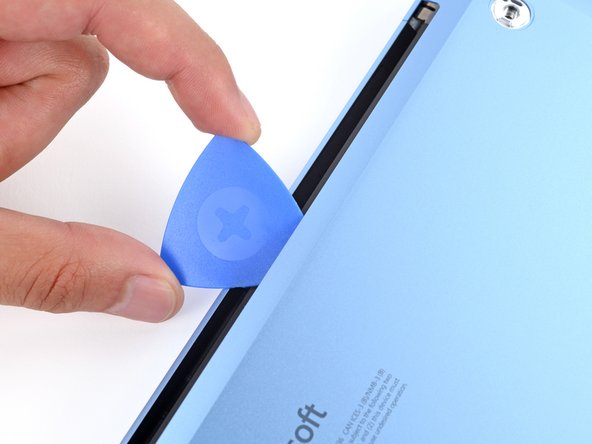
Keep that pick away from the outer edges, or you might tickle the antenna bar the wrong way!
– Slide the tip of your trusty opening pick under the top edge of the lower case, positioning it about an inch (2.5 cm) to the left or right of that iconic Microsoft logo. You’ve got this!
Step 6

– Give the pick a little twist to nudge the lower case open just enough so you can grab it with your hand.
Step 7


– Time to get started! Carefully lift the lower case and gently remove it.
Step 8

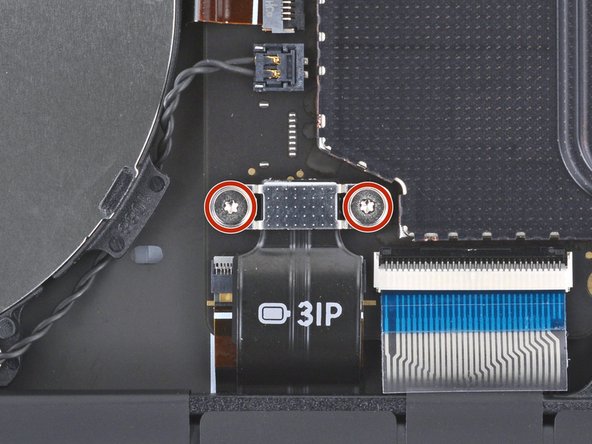

– Grab your trusty Torx Plus 3IP screwdriver and carefully unscrew the two 2.3 mm-long screws holding down the battery connector cover. You’ve got this!
Step 9


– Grab some tweezers or just use your fingers and gently pop off the battery connector cover—easy-peasy!
Step 10


To reconnect a press connector, just line it up over the socket and give one side a gentle press until you hear that satisfying click! Once that’s done, do the same for the other side. It might take a couple of tries to get everything lined up just right—so don’t stress, just take your time and don’t force it.
– Slide the flat end of your trusty spudger under the top edge of the battery press connector and give it a gentle nudge upwards to disconnect it. You’ve got this!
Tools Used
Step 11
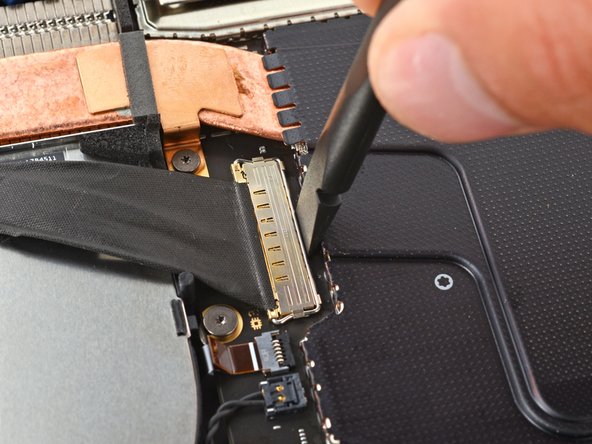

– Grab your trusty spudger and give that metal buckle on the Surface Connect port connector a gentle flip up.
Tools Used
Step 12
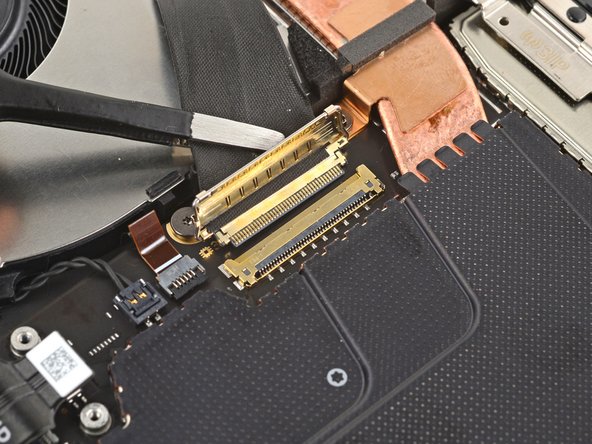
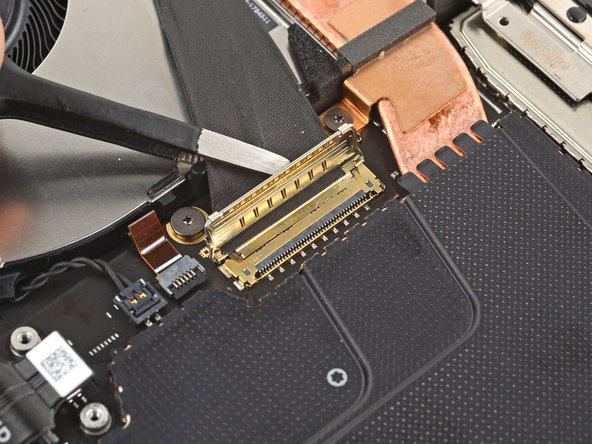
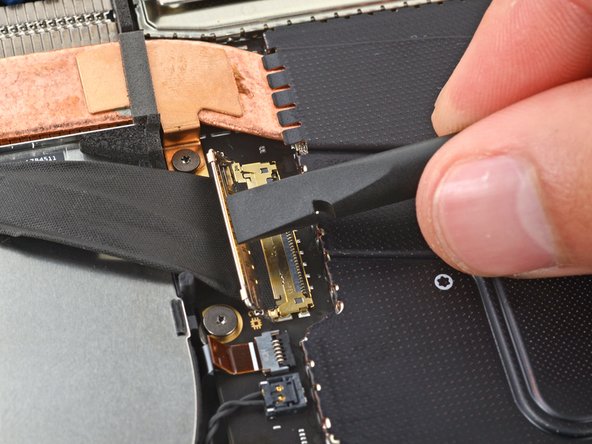
– Grab the Surface Connect port cable with tweezers or your fingers and gently pull it straight out of its cozy socket.
– Now, let’s get back to business:
– Reconnect that Surface Connect port cable like a pro.
– Peel off any adhesive liners and press the cable down firmly to stick it in place with that trusty adhesive.
Step 13

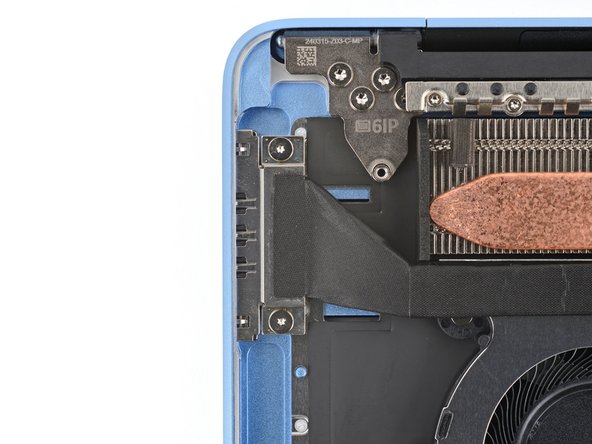
– Grab your Torx Plus 3IP screwdriver and unscrew those two 3 mm-long screws holding the Surface Connect port snugly in the top left corner of the frame.
Step 14

A sturdy adhesive strip holds the Surface Connect port cable securely on top of the fan. Warm up the cable to soften the adhesive for easier removal.
Or, you can use a hair dryer or heat gun. Just a heads-up, extreme heat can mess up the battery.
– Warm up an iOpener and place it over the Surface Connect port cable for a couple of minutes to loosen up that pesky adhesive.
Tools Used


Step 15
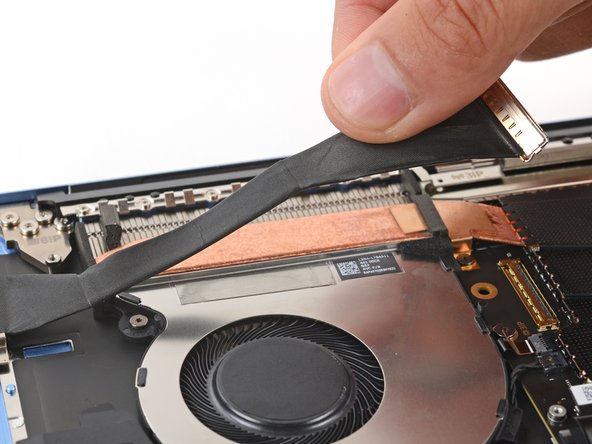

Hold off on sticking down that trackpad cable just yet! Wait until you’ve plugged it back in. If you get ahead of yourself, you might find that cable doesn’t quite reach where it’s supposed to go. Let’s keep things in the right order for a smooth repair!
– Hold the Surface Connect cable near the motherboard connector and gently peel it away from the fan.
– As you put things back together:
– If the tape still has some stickiness, no need to replace it.
– If the adhesive has lost its stickiness, or if you’re putting in a new fan and it doesn’t come with adhesive, slap on a new strip of thin, double-sided tape to the top edge of the fan.
Step 16


– Ready to bring your device back to life? Just reverse those steps and you’ll be golden!
– Got some old tech lying around? Don’t let it go to waste! Take it to an R2 or e-Stewards certified recycler.
– Things not going as smoothly as you’d hoped? No worries! Check out some basic troubleshooting tips, or reach out to our awesome Answers community for a hand.
– Changed your mind? That’s totally cool! Just hit cancel and go at your own pace.
–
Success!