How to Replace Microsoft Surface Laptop 7 Trackpad
Duration: 45 minutes
Steps: 22 Steps
Dive into this guide to swap out a trackpad that’s giving you grief on your Microsoft Surface Laptop 7 (13.8-inch). Whether it’s refusing to respond, acting all jittery, or just plain ignoring your touch, you might need a replacement. But hey, before breaking out the tools, give your trackpad firmware an update—it could be a quick fix for those quirks.
Step 1


Before diving into this repair adventure, make sure your laptop’s battery is below 25%. A battery that’s charged and gets damaged? That’s a recipe for disaster! Let’s keep it safe and sound.
– Disconnect all cables and power down your laptop completely.
Step 2


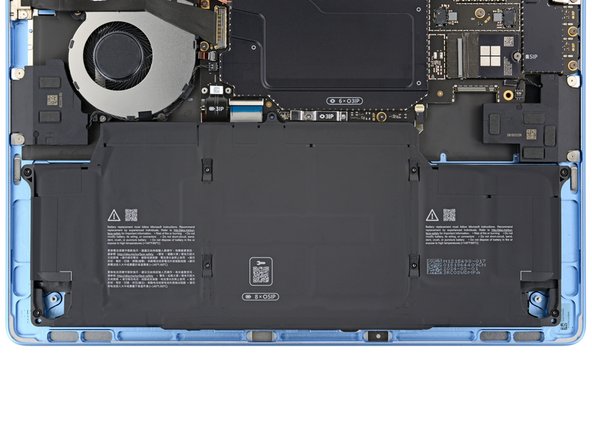
– Time to get started! Close your laptop and flip it over so the rubber feet are pointing up. Let’s get this repair underway!
Step 3


The feet might pop off quicker than you expect—stay sharp so they don’t vanish into the void!
You could use the pointy end of a spudger for this step, but just a heads-up—you might risk messing up the foot if you’re planning to reuse it. Handle with care!
– Carefully slip one arm of your angled tweezers into the little nook at the upper right corner of one of the feet.
– Give it a gentle nudge with your tweezers to pop off that foot and send it packing.
– Do the same for the rest of the feet until they’re all gone!
– When it’s time to put a foot back on, just line up those pegs with their cozy cutouts in the frame and press down until it clicks into place.
Tools Used


Step 4


As you dive into this repair adventure, make sure to keep a close eye on every little screw – they each have their own special spot waiting for them to return!
The Surface Laptop 7 may be rocking Torx Plus screws, but don’t sweat it; standard Torx bits will do the trick just fine. Just remember to apply steady, downward pressure to keep those screws from stripping!
– Grab your trusty Torx Plus 5IP screwdriver and get ready to unscrew! Carefully remove the four 4.5 mm-long screws (with washers) holding down the lower case. You’ve got this!
Step 5


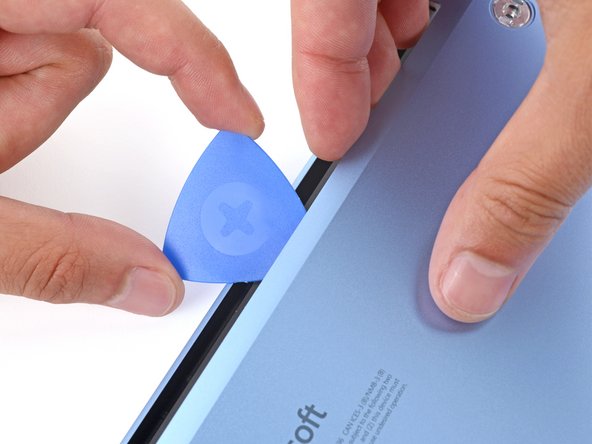
Steer clear of the outer edges with that pick, or you might mess up the antenna bar. Take it easy and keep it centered!
– Slide the tip of your trusty opening pick under the top edge of the lower case, about an inch (2.5 cm) to the left or right of that shiny Microsoft logo. You’re doing great!
Step 6
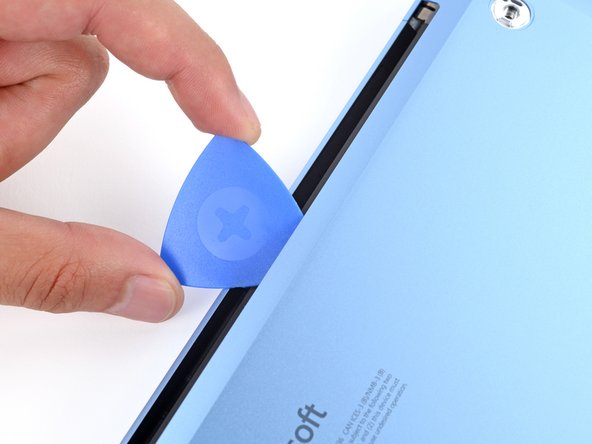

– Gently twist the pick to lift the lower case just enough so you can grab it with your hand.
Step 7


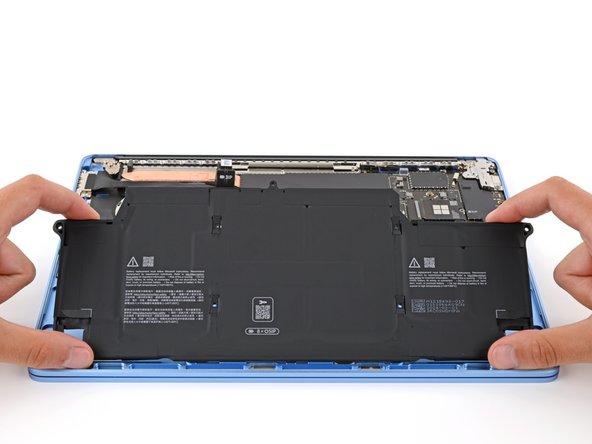
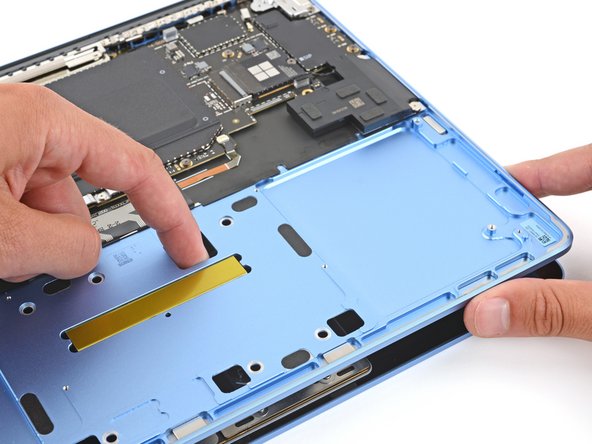
– Pop off the lower case and set it aside.
Step 8

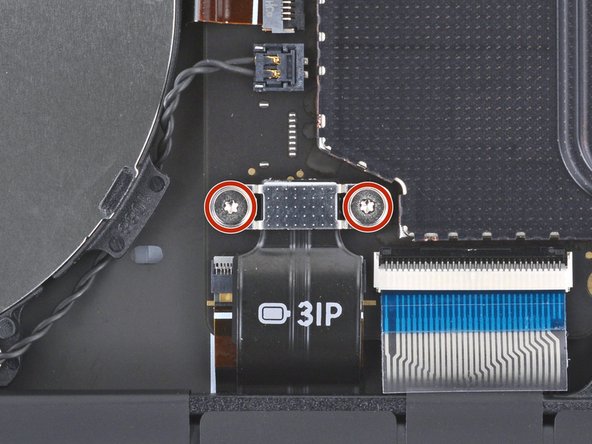

– Grab a Torx Plus 3IP screwdriver and unscrew the two 2.3 mm-long screws holding down the battery connector cover. You’ve got this!
Step 9


– Grab your trusty tweezers or just use your fingers to gently lift off that battery connector cover. You’ve got this!
Step 10


To reconnect a press connector, simply line it up with the socket and give one side a gentle push down until you hear that satisfying click! Then, do the same for the other side. It might take a couple of attempts to get it just right, so take your time and don’t force it—patience is key!
– Slip the flat end of a spudger under the top edge of the battery press connector and gently pry it up to disconnect. Bam, you’re a pro!
Tools Used
Step 11

Handle that battery with care! We don’t want your screwdriver to go on an unexpected adventure and puncture it.
– Grab your trusty Torx Plus 5IP screwdriver and get ready for some action! It’s time to unscrew those eight 5.4 mm-long screws that are holding the battery in place. Let’s do this!
Step 12


Don’t even think about reusing a battered, deformed battery—it’s a fire waiting to happen. Swap it out with a brand-new one to stay safe.
If your battery is puffing up like a balloon, it’s time to handle it with care!
– Gently nudge your battery loose and then take it out with a smile!
Step 13
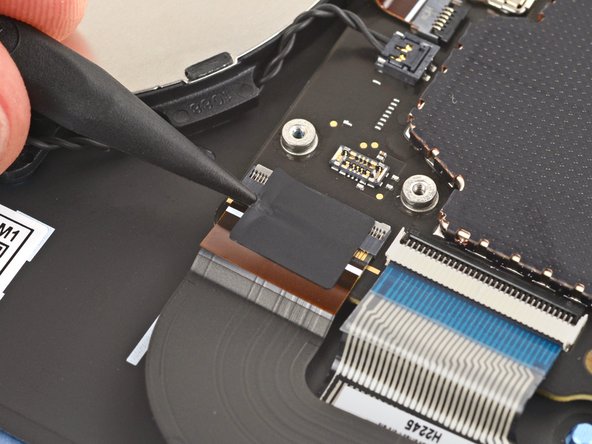
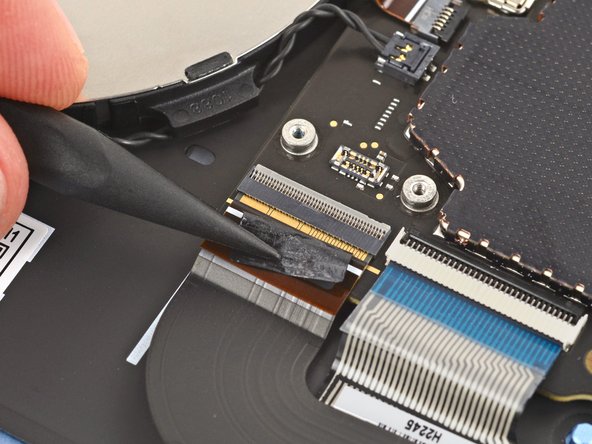
You don’t need to fully remove the tape, it just needs to be off the connector.
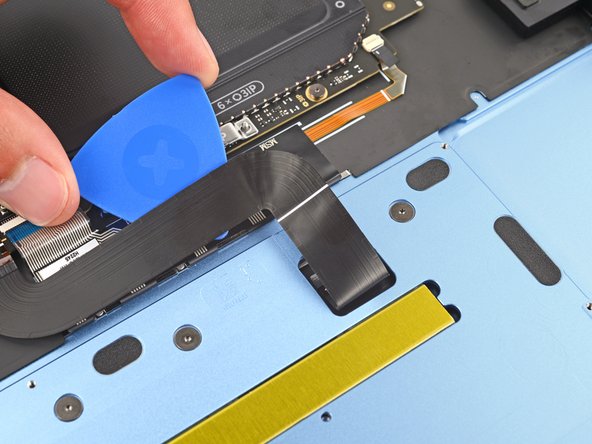
– Slide the point of a spudger under the piece of tape on the trackpad cable ZIF connector near the bottom left corner of the motherboard. Use a bit of finesse, but nothing too forceful.
– Use the spudger to lift the tape from the connector. A steady hand does wonders here!
Tools Used
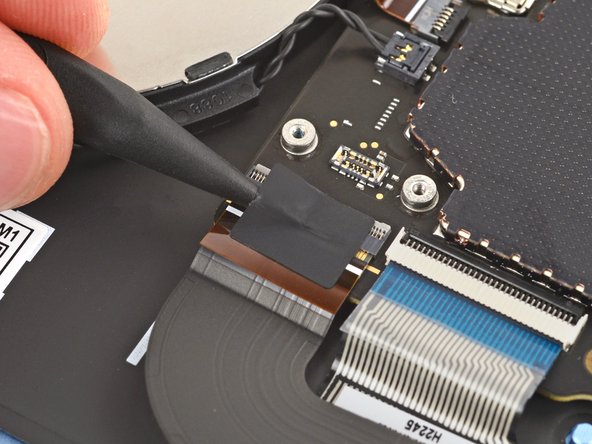
Step 14
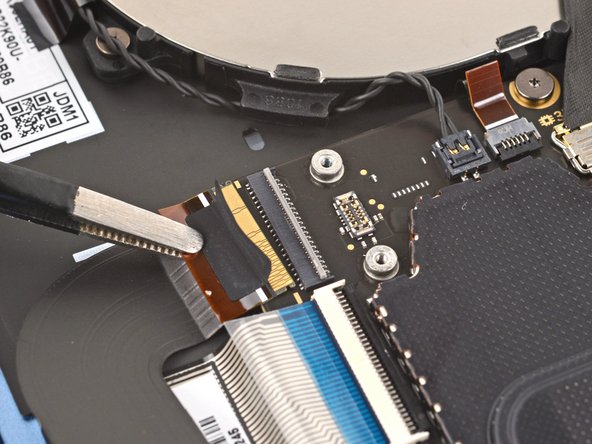

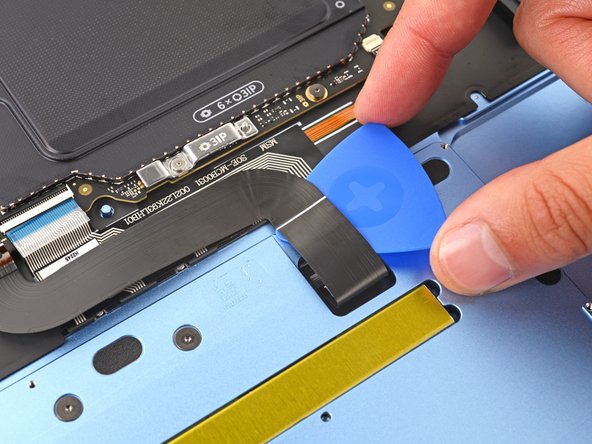
– Grab your trusty spudger and gently lift the hinged locking flap on the trackpad cable ZIF connector like a pro!
– Now, take those tweezers and give the trackpad cable’s plastic pull tab a little tug, sliding that cable out of its cozy socket.
– When you’re putting everything back together, make sure to reconnect the trackpad cable to its ZIF connector on the motherboard. Give the right side of the cable a firm press to ensure it’s snug and secure with the adhesive.
Tools Used
Step 15


The right side of the trackpad cable is stuck down with some serious sticky stuff. A little heat goes a long way in softening that adhesive, making it way easier to peel it off.
You can also grab a hair dryer or a heat gun to warm things up a bit.
– Warm up your iOpener and place it on the trackpad cable for a minute to loosen that pesky adhesive.
Tools Used


Step 16

Handle that trackpad cable like it’s made of spun sugar! A little care goes a long way, so keep it safe and sound during the next few steps.
If you’re running into issues, try reheating the cable and giving it another shot.
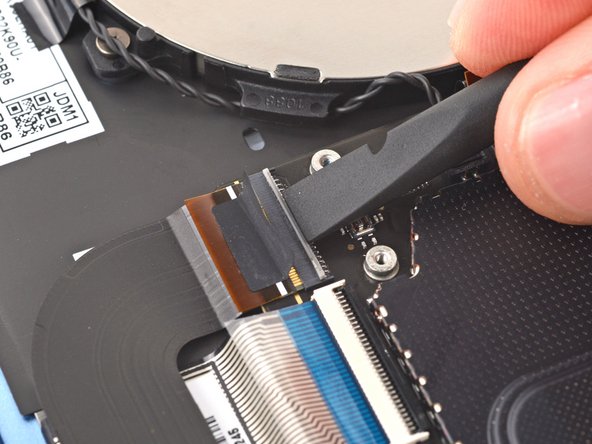
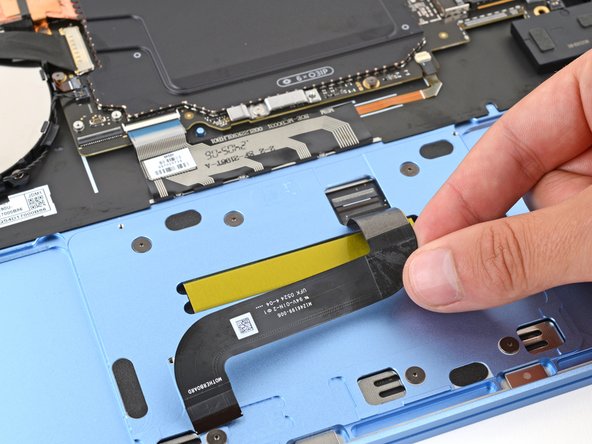
– Gently wiggle an opening pick under the right side of the trackpad cable to loosen the adhesive holding it to the frame—take it slow and steady, like you’re freeing a sticker without tearing it.
Step 17


Hold your horses on securing that trackpad cable with adhesive! Let’s first reconnect the other end. If you rush it, that cable might just decide to play hide and seek with its socket.
– Gently use your fingers to nudge the trackpad cable down toward the bottom of your laptop—it’s like giving it a little stretch—so you can reach that ZIF connector on the trackpad.
– When you’re putting everything back together:
– If you’re sticking with the original trackpad cable, the adhesive should still be sticky enough to hold up—easy peasy!
– Got a replacement trackpad cable with adhesive pre-installed? Peel off the liner and you’re good to go.
– If your replacement cable is missing adhesive or the stickiness is MIA, just apply a thin strip of double-sided tape to the bend on the right side of the cable to secure it in place.
Step 18
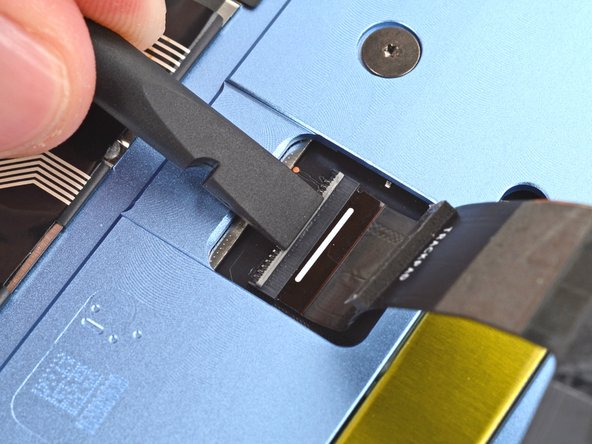

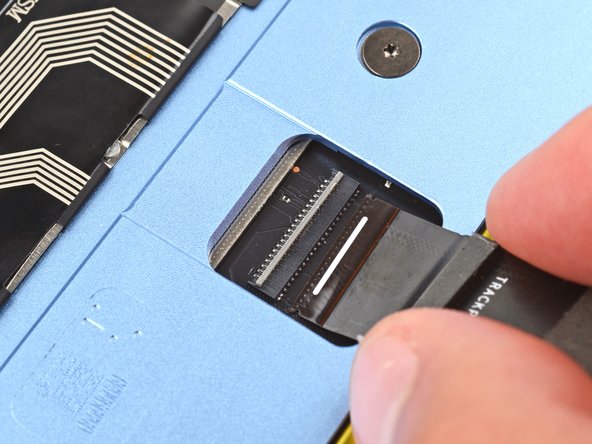
– Grab your trusty spudger and gently lift the hinged locking flap on the trackpad cable ZIF connector that’s hanging out on the trackpad. It’s like giving it a little high five!
– Now, using your fingers, delicately grip the trackpad cable and slide it out of its cozy socket. Easy peasy!
– When you’re putting everything back together, make sure to reconnect the cable end that’s labeled “TRACKPAD” to its ZIF connector on the trackpad. Just remember, the side with the white strip should be facing up like it’s waving hello!
Tools Used
Step 19

– Disconnect the trackpad cable with care.
Step 20

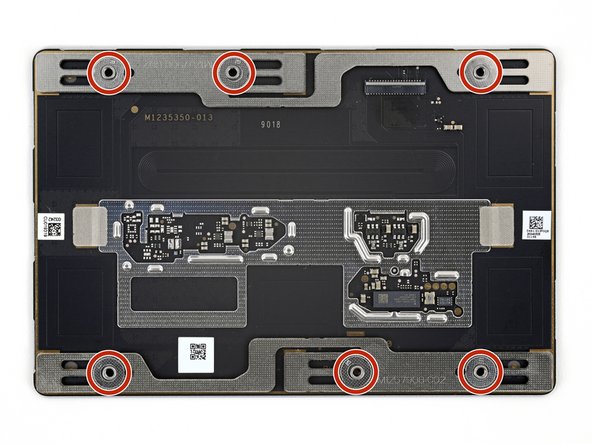
These screws can be a bit tricky, so keep that steady pressure down to avoid any stripping mishaps!
– Grab your trusty Torx Plus 5IP screwdriver and let’s tackle those six 2.1 mm-long screws holding the trackpad in place. You’ve got this!
– Now, as we gear up for reassembly:
– Loosely fasten those six trackpad screws for now.
– Open up your laptop and take a peek at the edges of the trackpad. Are there any pesky gaps? If so, give it a little nudge to reposition it just right.
– Keep tightening those screws and checking that trackpad alignment until everything is snug and secure. You’re almost there!
Step 21

Heads up! For the next couple of steps, keep a sharp eye on those six washers chilling on the trackpad screw posts. Lose ’em, and your trackpad won’t sit right. No one wants a wobbly trackpad, right?
If your new trackpad comes with a cable already attached, carefully thread it through the designated cutout in the frame. It’s like guiding a little wire buddy into its new home!
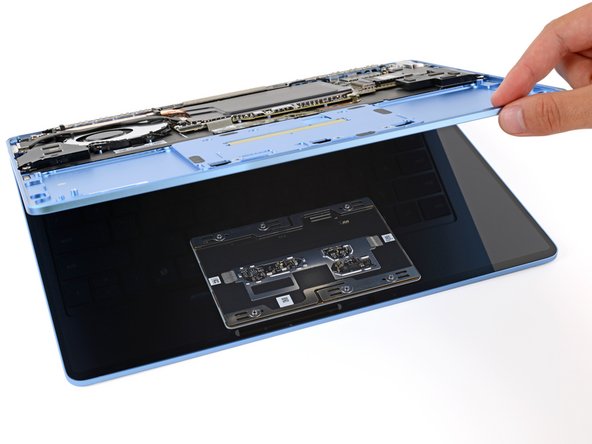
– Gently lift the main part of your laptop until it stands tall and proud all by itself—the trackpad will still be chillin’ on the screen.
– When it’s time to close things up, use one hand to carefully bring your laptop down while the other hand helps guide the trackpad into its cozy spot. A little nudge with a finger through one of the frame cutouts can work wonders!
Step 22


Handle the screen with care—no one wants a scratched display!
– To put your device back together, follow these instructions in reverse order.
– Dispose of your e-waste responsibly at an R2 or e-Stewards certified recycler.
– Having trouble with the repair? Try some basic troubleshooting or check out our Answers community for help.
– Cancel: I did not complete this guide.
–
Success!