How to Replace Nintendo Home Console Motherboard – Step-by-Step Guide
Duration: 45 minutes
Steps: 7 Steps
Got a busted motherboard? No worries! Follow this guide to carefully disassemble your game console and remove the motherboard with confidence.
Step 1


The screws are tucked away about 40 mm deep, so get ready to dig in!
– Unscrew the six 13.25mm Phillips screws on the console’s bottom using a #2.5 flathead screwdriver.
– Flip the console right side up, and carefully lift the top off with your hands by pulling it up and away from the rest of the device.
Step 2


– Let’s get those seven 13.25mm Phillips screws out of the way! Grab your trusty Phillips head #2 screwdriver and start unscrewing them from the metal cover.
– Once you’ve freed the screws, gently lift the metal cover up and away from the console. Use your hands to pull it off like you’re unveiling a surprise!
Step 3
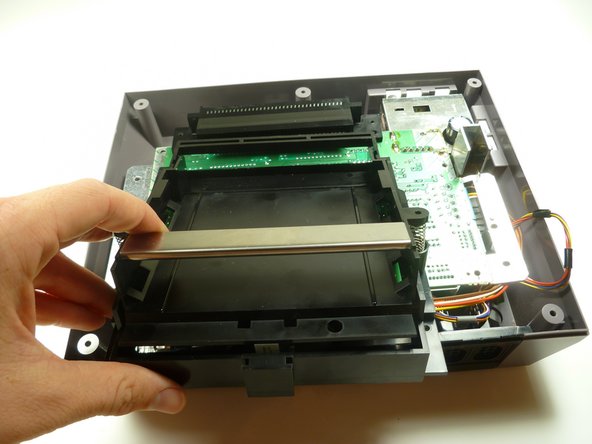


– First, let’s get started by removing the two silver 17.45mm Phillips screws from the cartridge tray – grab your trusty Phillips head #2 screwdriver and get to work!
– Next, take out the two bronze 13.25mm Phillips screws from the cartridge tray using that same reliable Phillips head #2 screwdriver.
– Now, gently slide the cartridge tray towards you, away from the 72-PIN connector, and carefully lift it off the motherboard assembly. You’re making great progress! If you need help, you can always schedule a repair
Step 4


While putting everything back together, make sure this tab slides snugly under the motherboard and the tray sits perfectly on top. Missing this step could warp the cartridge tray and put unnecessary stress on the part, jamming the cartridge spring mechanism. Keep it smooth, and you’re golden!
– Hey there! Just a quick heads-up: right under the cartridge tray, you’ll spot a black trapezoid-shaped tab/lip (check out the marker!). When everything’s put together just right, this little tab/lip should snugly fit beneath the motherboard and shielding, just like you see here. Keep up the great work!
Step 5

Flip the motherboard assembly over so that the metal cover is looking right at you.
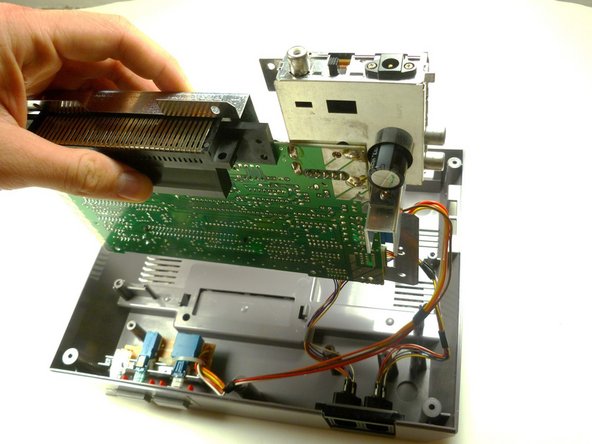
– Let’s get started! Remove the three 13.25mm Phillips screws that hold the motherboard in place using a trusty Phillips head #2 screwdriver.
– Now it’s time to gently pull the motherboard assembly straight up and out of the plastic case with your hands. Easy does it!
Step 6

To keep things straight during reassembly, slap a piece of tape on those wires for a quick and easy label.
– Alright, let’s unplug the wire harnesses from the motherboard assembly. Here’s the lineup:
– 1. Controller 1 on the left — give it a gentle wiggle if it’s stubborn.
– 2. Controller 2 on the right — same deal, just a little TLC.
– 3. And lastly, the Power harness — easy does it!
Step 7


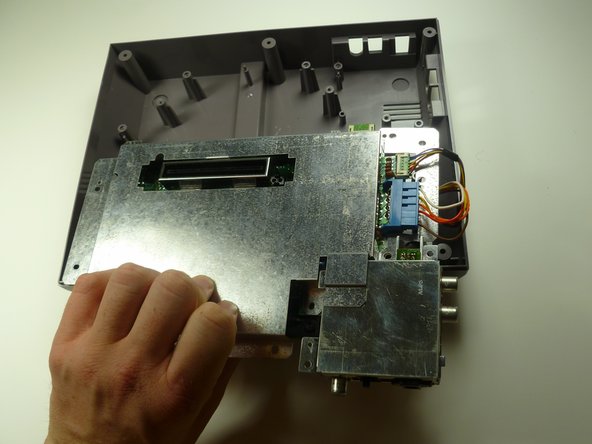
Flip the motherboard assembly so that the 72-PIN connector is chilling right on top of the motherboard assembly. Easy peasy!
– Gently pop off the EMI shield (that little metal cover) from the motherboard assembly—easy does it!
Success!
