How to Replace Nintendo Switch Lite Motherboard: Step-by-Step Guide
Duration: 45 minutes
Steps: 33 Steps
Ready to swap out a wonky motherboard in your Nintendo Switch Lite? Let’s dive in! The Switch Lite uses JIS screws, but hey, a Phillips screwdriver can pinch-hit just fine—just take it slow and steady to avoid stripping those screws. Salvation Repair’s Phillips bits are designed to play nice with JIS-style screws, so they’re a solid choice. Heads-up: you’ll need to remove the shield plate and heat sink during this process. Remember to clean off the old thermal paste from both components and the CPU, then apply fresh paste before putting everything back together. You’ve got this!
Step 1
Before diving into this repair adventure, ensure your device is completely powered down. Let’s keep it safe and sound!
As you dive into this fix, keep track of every screw like it’s a VIP guest at a party—make sure each one ends up right back in its original spot.
– Grab your trusty Y00 screwdriver and carefully undo the four 6.3 mm screws holding the back panel in place. It’s as easy as unscrewing a jar of pickles (well, almost)!
Step 2
To keep those pesky screws from getting stripped, press down firmly, take your time, and if they’re being stubborn, don’t hesitate to switch up your screwdriver!
– Grab a JIS 000 driver or a trusty PH 000 driver to take care of these screws holding the back panel in place:
– Two 3.6 mm screws chilling on the top edge of the device.
– Two more 3.6 mm screws hanging out on the bottom edge. Let’s get those out of the way!
Step 3
Make sure not to push the opening tool too far in, or you might give the speaker module an unwanted haircut!
– Slip an opening tool into the left speaker grille on the bottom of the device.
– Give the tool a twist to pop those clips and free the back panel.
Step 4
– Gently glide the opening tool around the bottom-left corner to pop those clips loose on the left side of your device. You’ve got this!
Step 5
Be careful not to push the opening tool in too deep; we want to keep that speaker module safe and sound!
– Slide an opening tool into the right speaker grille at the bottom of your device.
– Give the tool a little twist to pop those clips loose—easy does it!
Step 6
– Let’s get this device fixed! Start by sliding and prying the opening tool around the bottom-right corner to release the clips on the right side of the device. Take your time and work your way around – you got this!
Step 7
– Gently shimmy that opening tool along the top edge of the device, popping those clips loose like a pro.
Step 8
– Gently lift the bottom edge of the back panel, just like flipping open a book.
– Carefully take off the back panel.
Step 9
– Grab a JIS 000 driver or a trusty PH 000 driver and get ready to tackle these screws like a pro:
– Three 3.1 mm screws
– One 4.5 mm screw
Step 10
You might encounter some resistance—totally normal! The shield plate is just a bit snug due to the thermal paste connecting it to the heat sink.
– Grab your trusty spudger or your nimble fingers and gently lift the shield plate up and out of the device—easy does it!
– Take out that shield plate like a pro. Boom, you’re halfway there!
– Wipe away the old thermal paste from the shield plate and heat sink using some isopropyl alcohol and a soft microfiber cloth. Once it’s squeaky clean, spread a fresh layer of thermal paste on the heat sink to keep things cool during reassembly. Nice work, you’re crushing it!
Tools Used
Step 11
– Grab your trusty opening tool or even your fingernail and gently lift up that little locking flap on the motherboard interconnect cable’s ZIF connector. It’s like giving it a little high five to get things moving!
Step 12
Avoid using metal tweezers! Some folks say that metallic tweezers can cause a short circuit in the ribbon cable or connector. It’s probably a good idea to stick with nylon-tipped or ceramic-tipped tweezers for a safer experience.
– Grab those trusty tweezers and gently wiggle the interconnect cable out of its snug little connector on the motherboard. Take it slow—you’re doing great!
Step 13
– Gently use the tip of a spudger to lift the battery connector straight up and out of its cozy little home on the motherboard.
Tools Used
Step 14
Just peel the foam back enough to give the fan some breathing room—no need to overdo it!
– Grab the flat end of a spudger or use your fingers to gently lift the foam that’s barely sticking to the fan.
Tools Used
Step 15
– Grab yourself a trusty JIS 000 driver or a PH 000 driver, and carefully unscrew the three 3 mm screws holding the heat sink to the motherboard. Steady hands, my friend!
Step 16
You might feel a bit of pushback. Totally cool, it’s just the heat sink being slightly attached to the CPU with that thermal paste.
– Grab your trusty spudger or just your fingers, and gently lift the heatsink off the motherboard like you’re peeling a sticker—nice and easy!
– Time to tidy up! Use isopropyl alcohol and a microfiber cloth to clean off the old thermal paste from the heatsink and CPU. Once it’s sparkling clean, apply a fresh layer of thermal paste to the CPU. You’re all set for reassembly!
Tools Used
Step 17
– Grab your trusty JIS 000 driver or the official PH 000 driver from iFixit, and let’s get to work! Carefully unscrew those two 4.5 mm screws that are holding the right trigger button assembly snugly against the motherboard. You’ve got this!
Step 18
– Time to get started! Remove the right trigger button assembly.
Step 19
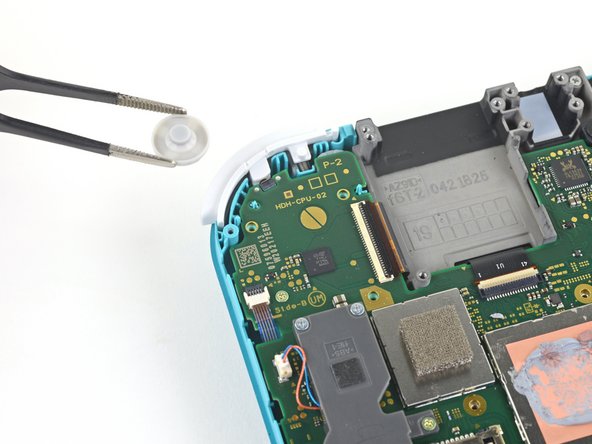
– Grab your tweezers or use your fingers and carefully pluck out the rubber pad from the right trigger button assembly—just in case it didn’t stick to the button assembly itself. Easy does it!
Step 20
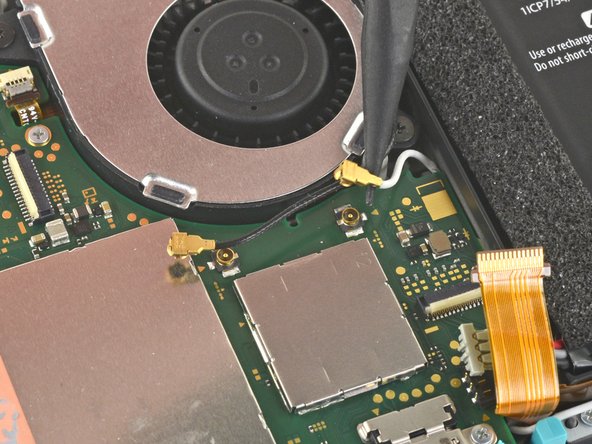
– Grab your trusty spudger and gently pop the black antenna cable straight up from its snug little socket on the motherboard. Easy does it!
– Now, show the white antenna cable some love by repeating the same smooth move. You’re on a roll!
Tools Used
Step 21
– Grab your trusty opening tool—or just your fingernail—and gently pop up the tiny hinged locking flap on the ZIF connector for the fan cable. Easy does it!
Step 22
– Grab a trusty pair of tweezers and gently wiggle the fan cable out of its cozy connector on the motherboard. You’ve got this!
Step 23
– Grab your trusty opening tool or just your fingernail, and gently lift that little hinged locking flap on the ZIF connector for the screen cable. You’ve got this!
Step 24
– Grab your trusty tweezers and gently wiggle the screen cable out of its connector on the motherboard—slow and steady wins the race!
Step 25
– Grab your trusty opening tool or just recruit your fingernail, and gently pop up the tiny hinged flap on that digitizer cable’s ZIF connector. You’re basically unlocking the door to progress—go for it!
Step 26
– Grab your tweezers and gently wiggle that digitizer cable out of its cozy spot in the motherboard connector. Easy does it!
Step 27
– Grab your trusty opening tool or just your fingernail, and gently lift that little hinged locking flap on the right joystick cable’s ZIF connector. You’ve got this!
Step 28
– Grab those tweezers and gently slide the right joystick cable out of its cozy connector on the motherboard. Smooth moves!
Step 29
– Grab your trusty JIS 000 driver or a PH 000 driver and get ready to unscrew some tiny fasteners holding the motherboard tight:
– Three snazzy 3.1 mm screws
– Three slightly longer 4.5 mm screws
Step 30
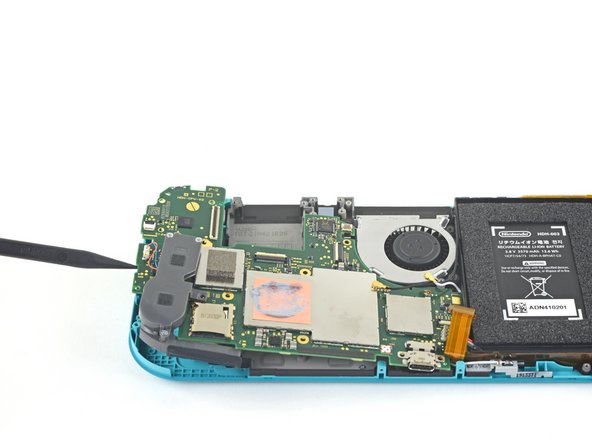
– Gently slide a spudger into the little gap between the frame and the motherboard, then carefully lift the motherboard out of its cozy spot.
– Now, go ahead and remove the motherboard assembly.
Tools Used
Step 31
– Grab a trusty pair of tweezers or just your fingers, and gently lift the right speaker cable straight up and out of its cozy socket on the motherboard. You’ve got this!
Step 32
– Carefully detach the right speaker module from the motherboard—take it slow and steady, like peeling a sticker you don’t want to tear.
Step 33
– Time to put everything back together! Just follow these steps in reverse, and you’ll be good as new.
– Don’t forget to responsibly recycle your e-waste with an R2 or e-Stewards certified recycler.
– Hit a snag? Try some basic troubleshooting or ask our community at Salvation Repair for some helpful tips. If you need help, you can always schedule a repair
– You’re all done! Nice job completing this step-by-step repair guide from Salvation Repair.
Success!


