How to Replace PlayStation 4 Slim Hard Drive Guide
Duration: 45 minutes
Steps: 6 Steps
Hey there, repair champ! Just a little heads up: if things get tricky or you find yourself in a pickle, don’t sweat it! You can always schedule a repair and let the pros handle it. You’ve got this!
Hey there! If your PlayStation 4 Slim is playing hard to get and refusing to boot, it might be time to take a look at the hard drive. Or maybe you’re just itching for an upgrade, whether to snag some extra storage or switch to a solid state drive for those lightning-fast load times. Before diving into the replacement process, let’s do a quick little checkup to see if your hard drive really needs a retirement party (if you’re just upgrading, feel free to skip this part): First off, dust can sneak in and cause some serious overheating issues, making your system shut down or get stuck in boot mode. It might even be lurking where the hard drive connects. Also, keep an eye out for data corruption—sometimes a simple system software reinstall or a safe mode boot can fix that right up! To enter safe mode, just press and hold the power button for 7 seconds and check out the restore options. And don’t forget to listen for any tell-tale signs of trouble, like loud clicking noises, sluggish performance, or unexpected shutdowns. Before you start, make sure to power down your system completely (no rest mode, please!) and unplug all cables, especially that power cable. If you need help, you can always schedule a repair.
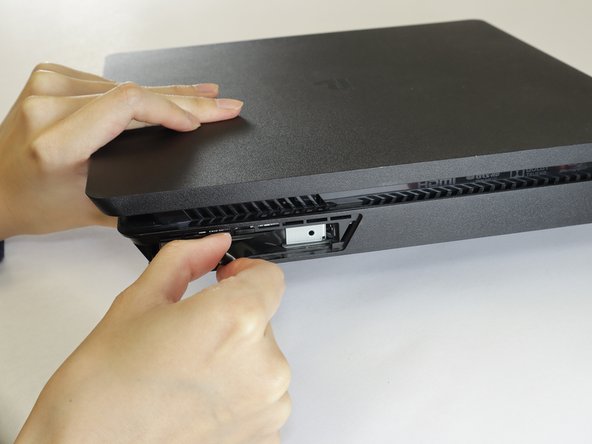
Step 1


– Give the plastic cover a little nudge to the right with your thumb, and off it goes!
Step 2


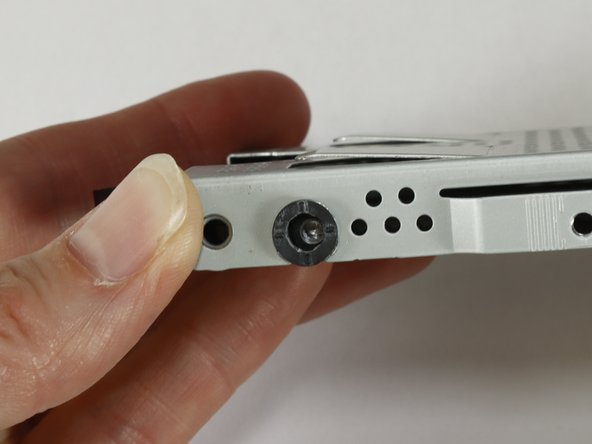
This little screw plays a big role in keeping the drive snugly connected, making sure it doesn’t wiggle free while you’re using your device.
– Grab your trusty screwdriver and unscrew the silver 6 mm #0 Phillips screw holding the hard drive caddy in place. If you need help, you can always schedule a repair
Step 3


– Give that black glossy tape handle a good tug with your fingers.
– Gently slide the caddy out from its cozy spot.
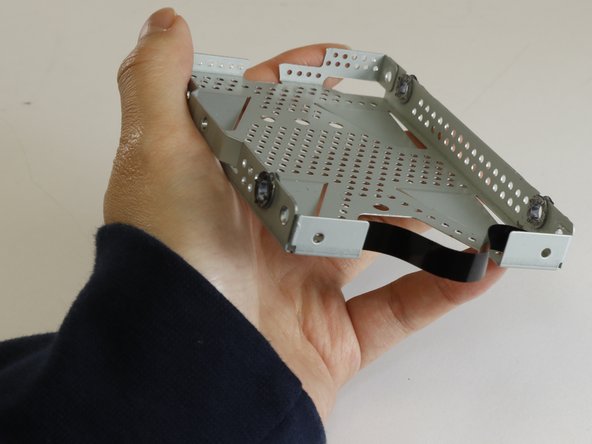
Step 4
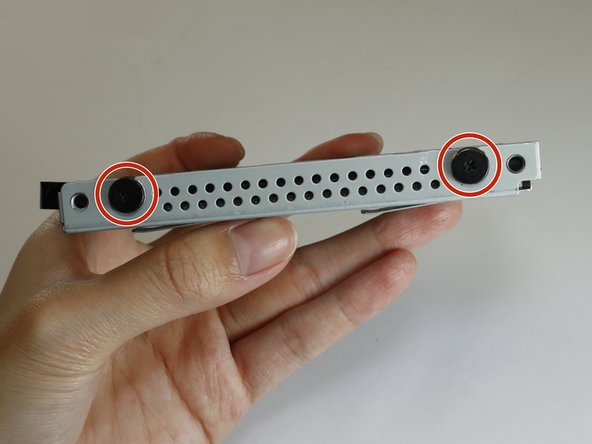
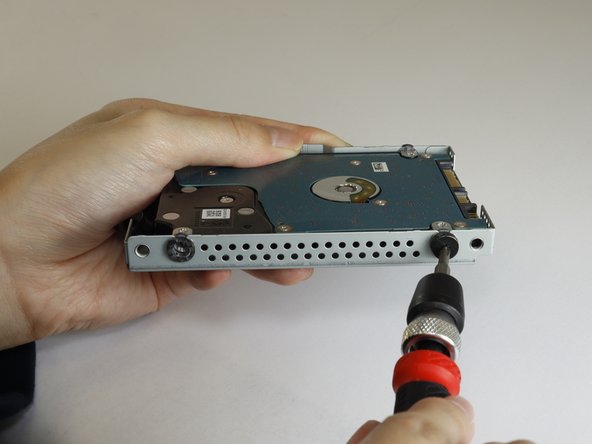

– Take out those four 8 mm Phillips #0 screws from the hard drive caddy—two on each side. You’ve got this!
Step 5
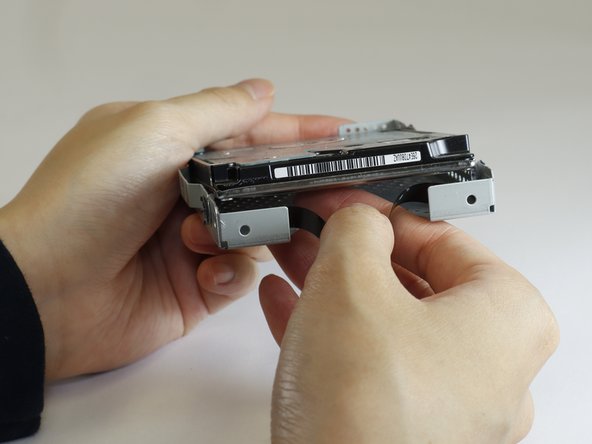
– Slide your hand under the sled opening near the black tape handle, and press one of your fingers against the slate drive to nudge it up.
– Gently slide the hard drive out from the caddy.
Step 6

No worries here with those 2.5″ hard disk drives! Their thickness is just right for a spot-on fit when you’re putting things back together.
– Slide your shiny new hard drive or solid-state drive into the caddy like a pro.
– Just a friendly reminder: make sure the drive is facing up with the golden pins on the connector pointing skyward. It’s like giving it a little high five!
– Also, keep that connector aimed away from the black tape handle. Trust me, this little tip will make sure your connection to the Playstation 4 is spot on.
– If you’re going for a solid-state drive, double-check that the screw holes on both the sled and the drive are lined up perfectly before you screw it back in. Let’s keep it all in sync!